Couldn’t sleep… So I’ve been out here catching up on office-type work since 4 AM – just about the only chance I get to blog!
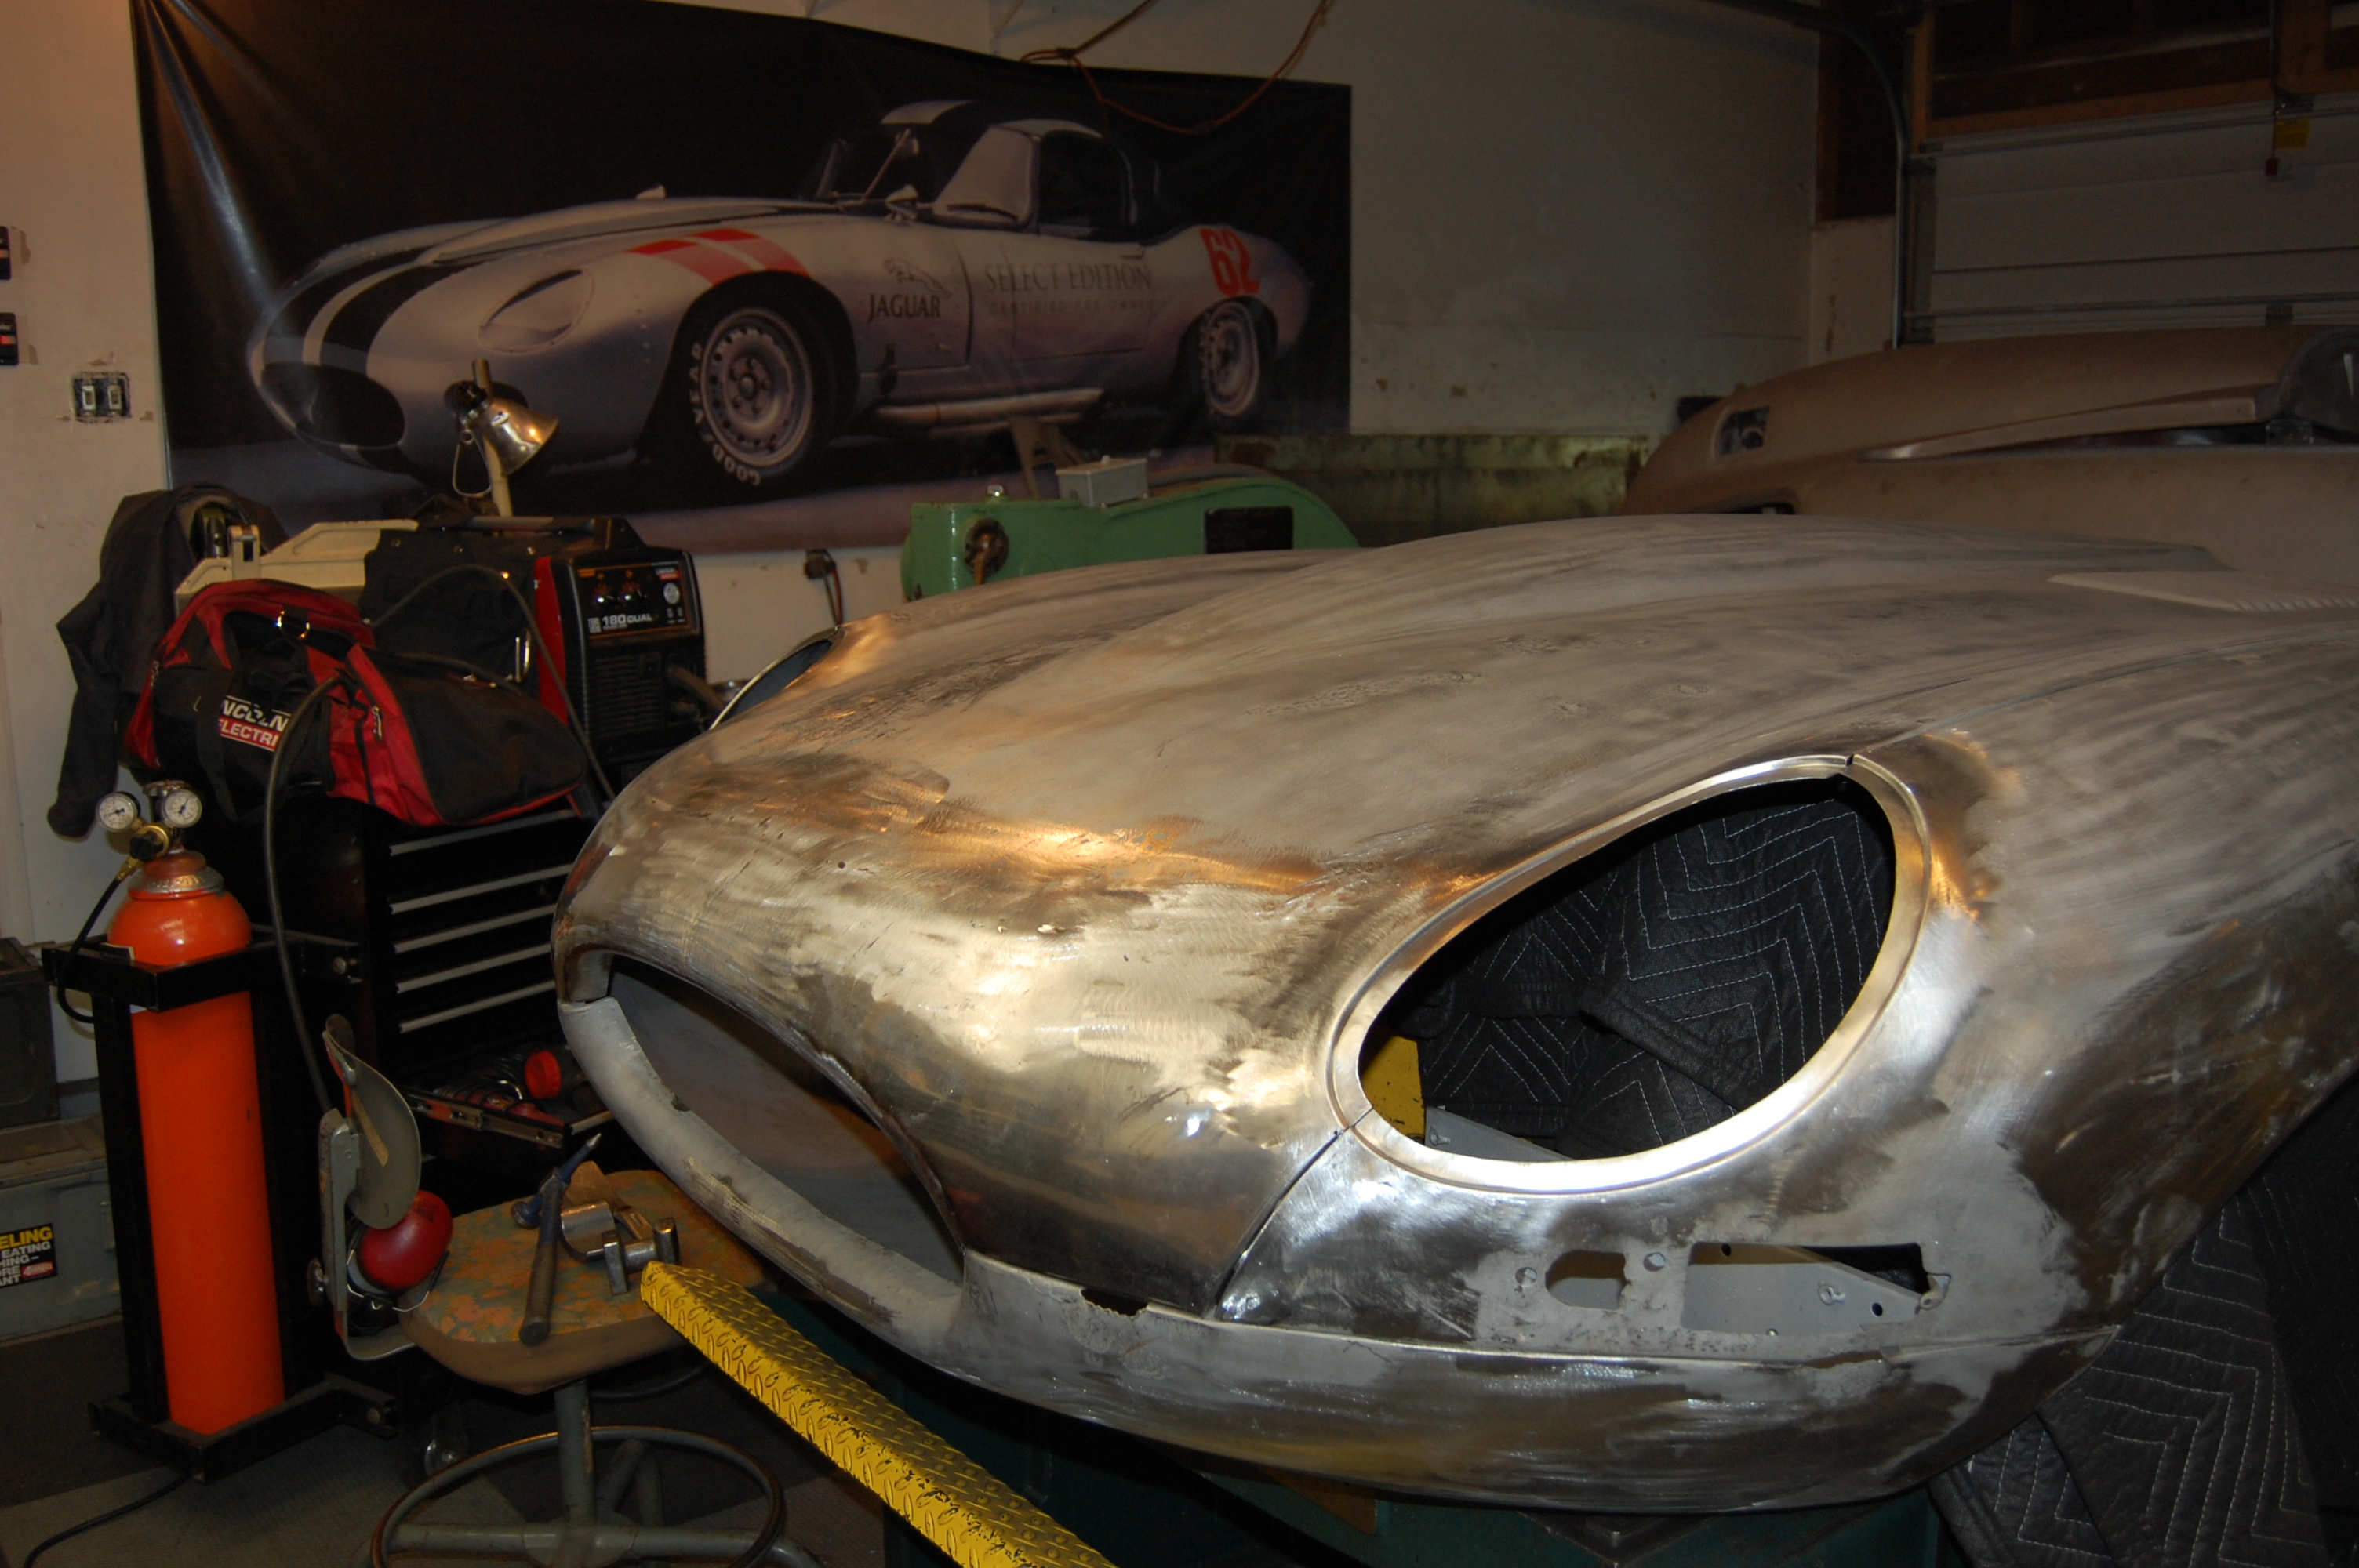
I spent the day last Friday converting this 1968 bonnet to Series 1 covered headlamps by welding in a set of our conversion flanges. Here, we trim the outer edge of the flanges down to 1/4″ wide, and then open up the factory hole for the 1968 bonnet by 1/4″, and butt-weld the flanges in using a TIG welder. In the process, we precisely align them to the bonnet using patterns taken from known good original bonnets – they are EXACT!
But to be honest, you don’t have to be quite that perfect. For example, I do make them identical to original factory Series 1 bonnets, but that doesn’t make the headlamp glass fit perfectly. I COULD make the bonnets better than factory, but the holes are close enough as it is and I guess that’s what they figured in Coventry – the rubber and wide chrome is very forgiving…
The point of this discussion is that if you purchase our flanges and do this job at home – you should be as careful as possible, of course, but you don’t have to be quite this meticulous. If you align your flanges with the factory 1968 cutout, you will be close enough – just make sure you use the glass and rubber to double check things as you go, and BEFORE you weld anything in!
Also – you do not need to butt-weld the flanges and then TIG them as we do here. You can (and most of my customers do it this way) simply overlap the flanges UNDER the existing skin of the bonnet, and then tack them around the edges once every thing is lined up nicely. This also will allow you to hold the flanges in place as you are adjusting with screws, rivets, or clecos, and then just weld up those screw holes.
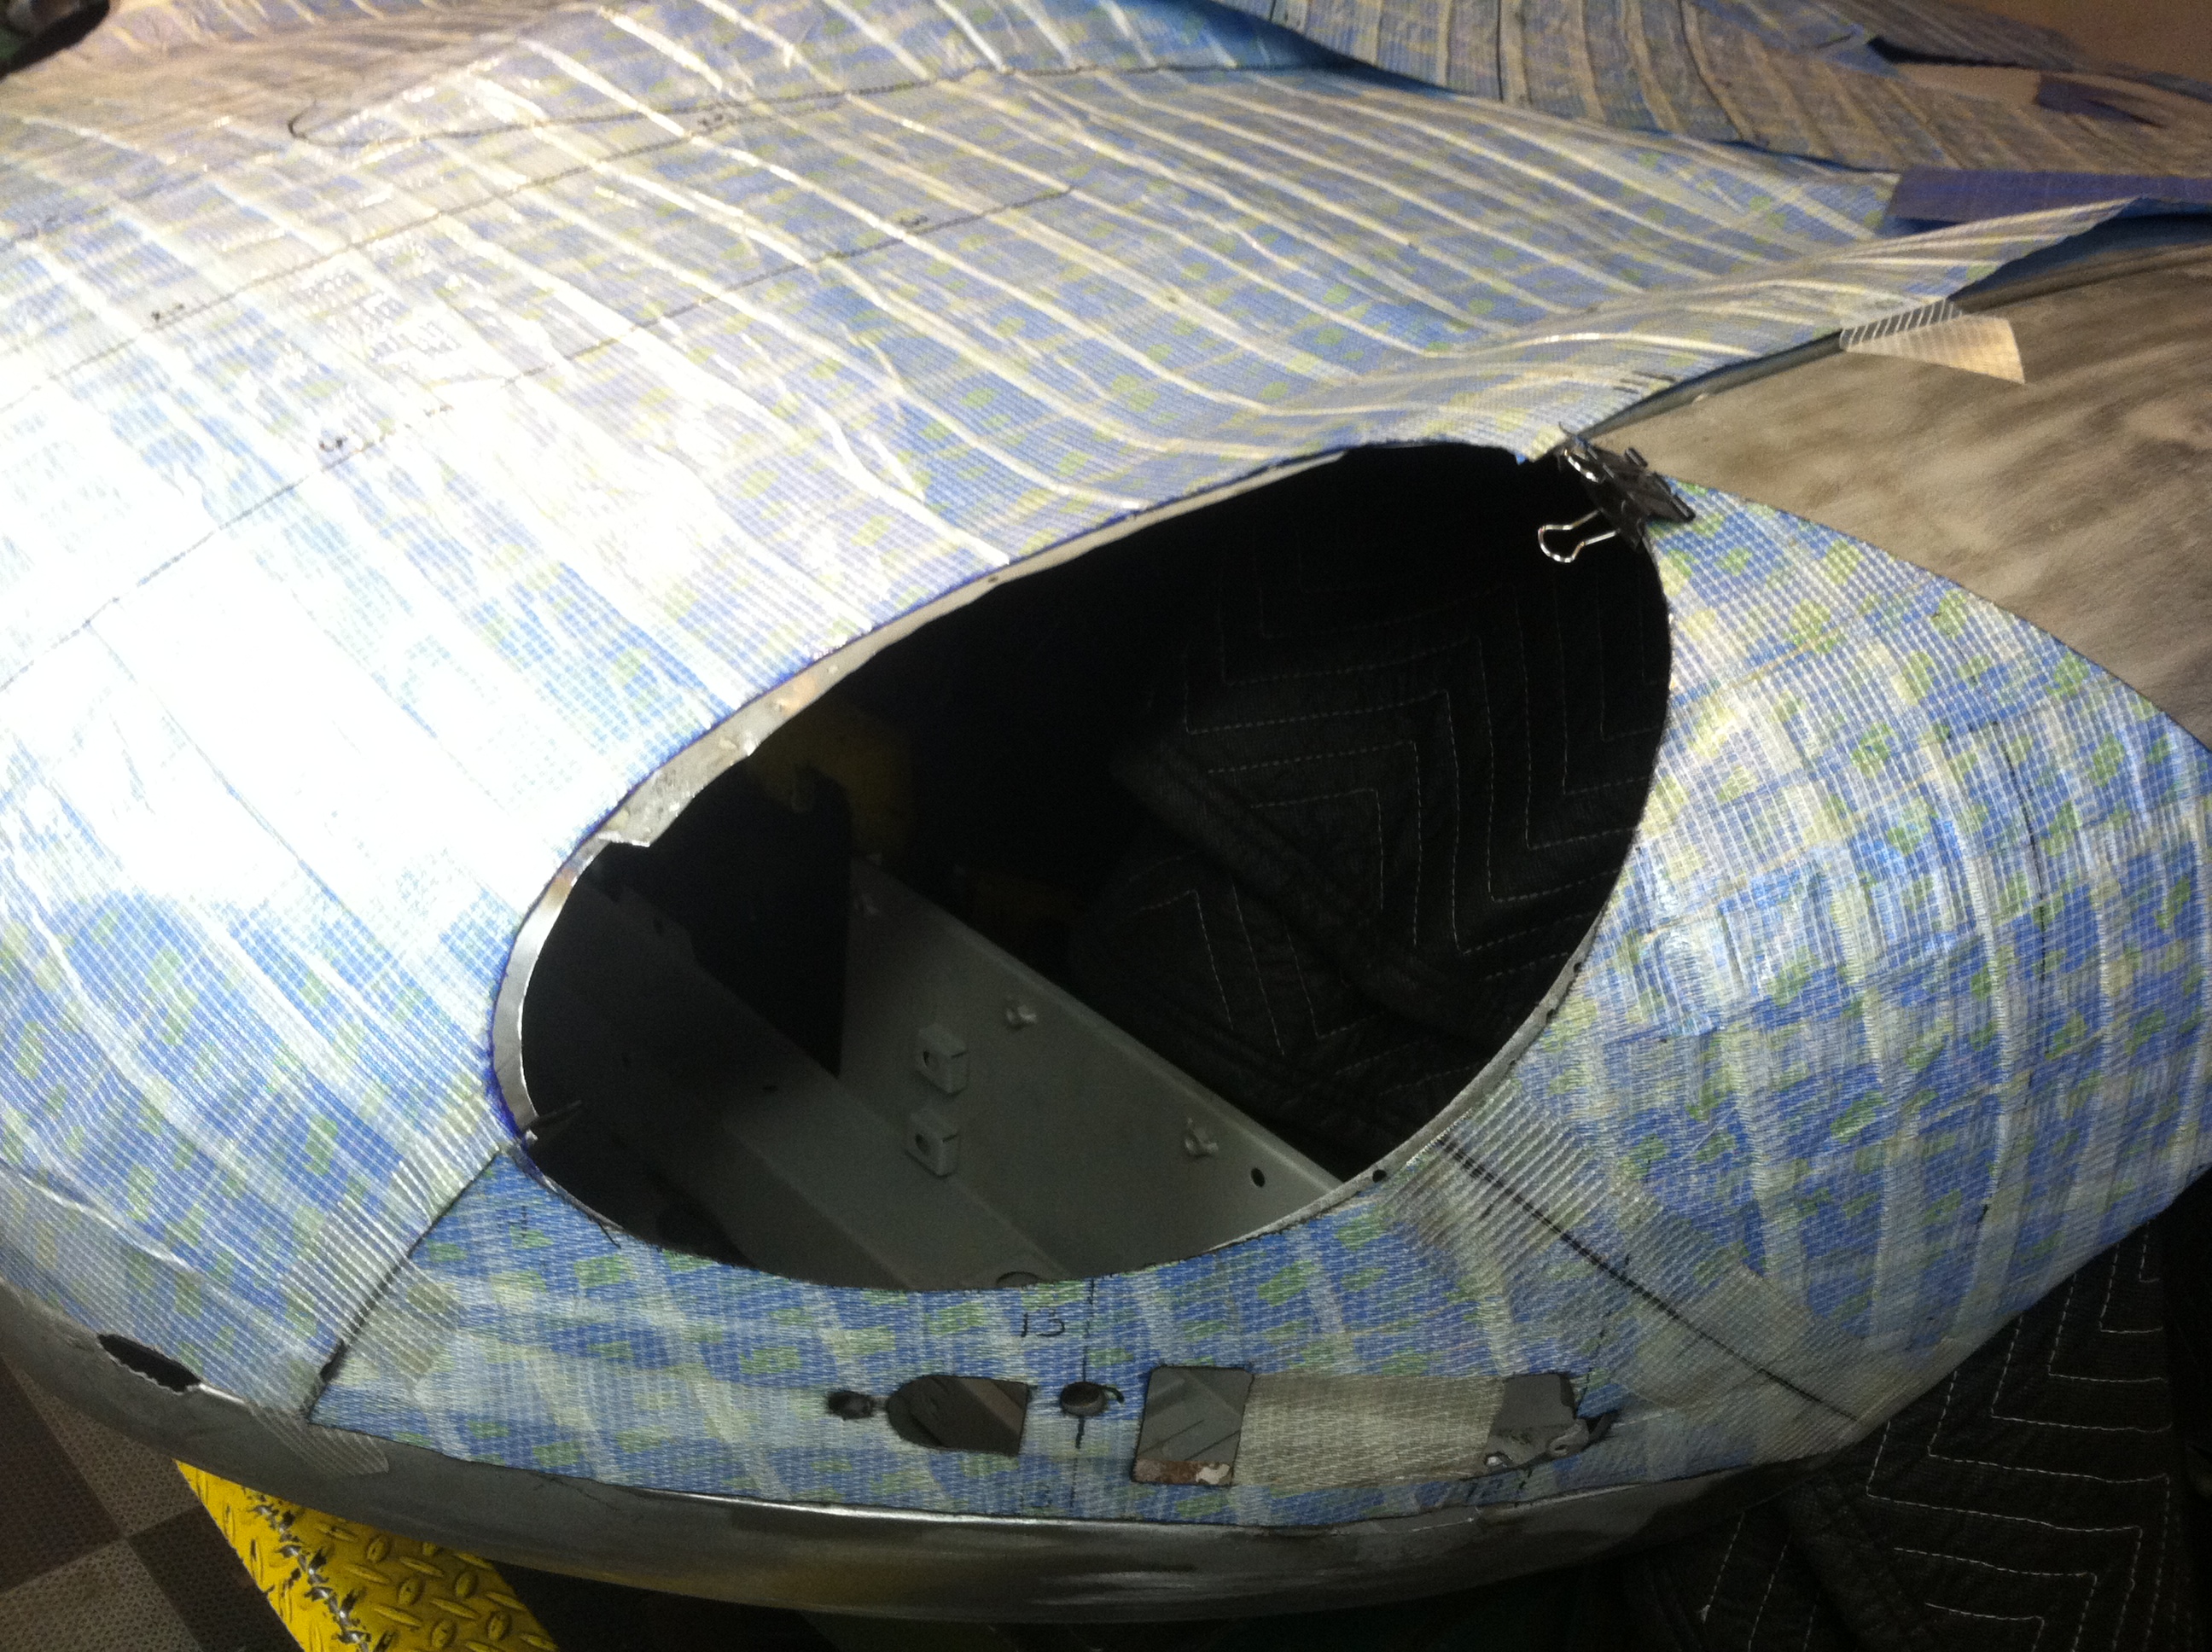
This particular bonnet was a little weird – I’m positive that it was an aftermarket or factory replacement center section. For one thing, the bonded flanges were stepped down on the very ends and spot welded to the skin with one spot on each end. I have never seen this before, but I did have someone send pictures of one like it a couple of years ago. In addition, there was WAY too much metal in the headlamp openings on both sides of the center panel. I’m pretty sure that this was intended to be trimmed down once it was installed, but whoever did install it didn’t do that – no wonder the Series 1.5 buckets fit SO bad when this came in!
It always amazes me when I see this type of thing – I think alot of people are “afraid to cut” – I guess they don’t have the confidence that THEY are right and the metal is wrong… I see this alot on replacement wings – which come long in the back on purpose so they can be trimmed down to fit. I have actually seen bonnets with one replacement wing, where the extra material was all left on, and a metal strip was ADDED to the center section! And then the wing is sticking past the end of the sill 3/4 of an inch as well! I have also had people call and say they purchased a new wing but it doesn’t fit because it is too long… Make new mistake – new wings DON’T fit worth a damn – but that’s not the reason!
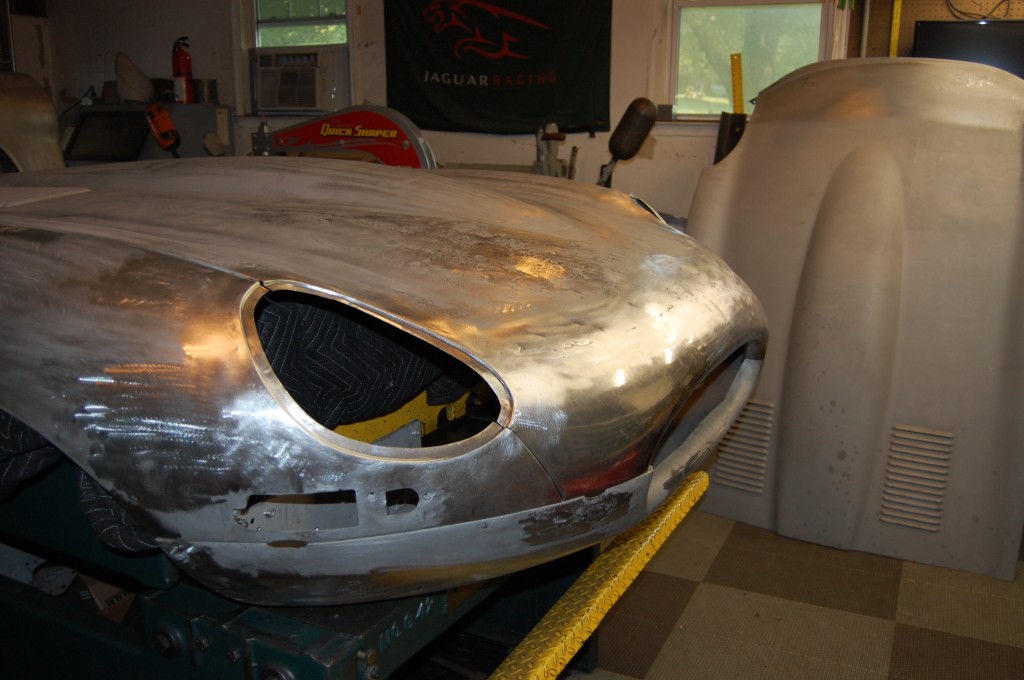
Anyway – enough of the soapbox… This conversion turned out really nice – and added some much needed stability and stiffening to the headlamp openings of this bonnet, since the new nose piece wanted to kink at the ends right at the weld line. The flanges not only stiffened that up, but welding them in shrunk things down a bit too – bringing everything right in line. It’s nice to get a break like that – especially on this bonnet – which has been fighting me all the way – but I’m winning!
-
- First step is to lay on our Series 1 bonnet patterns and see where we stand. You can see where the new nose piece ends in this photo, because it has about 1/2″ extra metal on it by design – we don’t cut that until we have the patterns out. But just above that, there is too much metal – a Series 1.5 bonnet should be just at the edge of this Series 1 pattern – or beyond it just a bit.

-

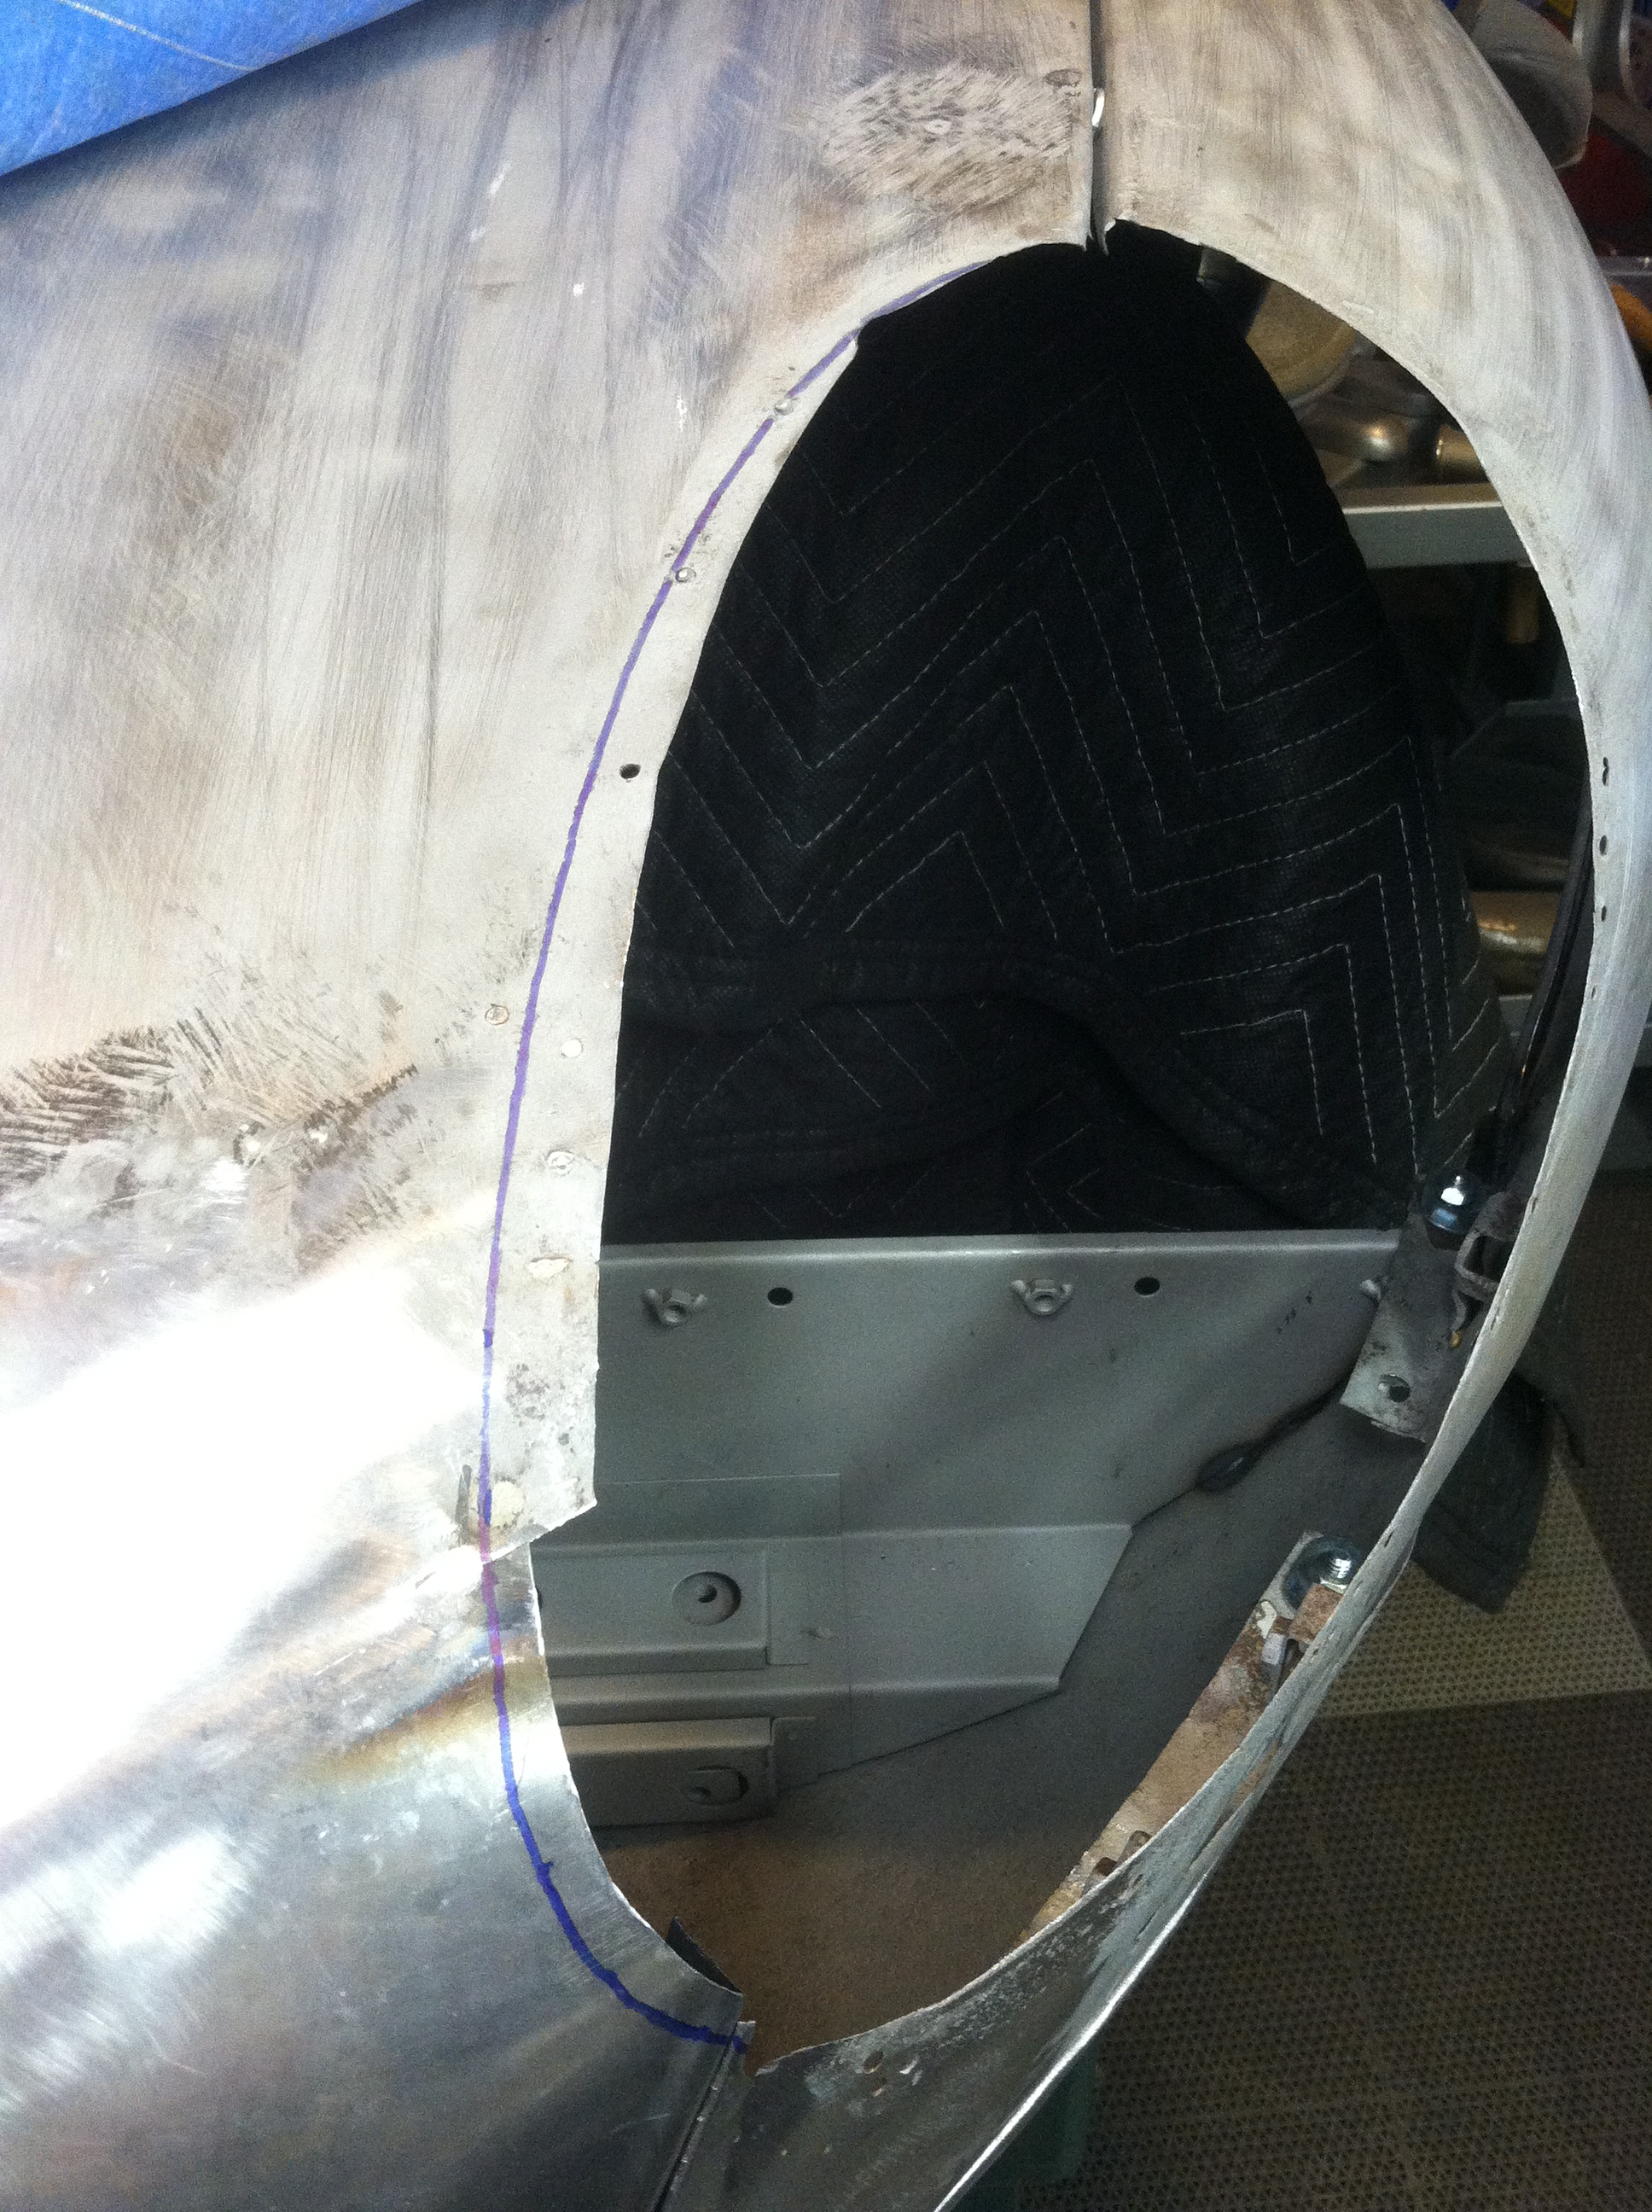
- Here’ I went ahead and cut the headlamp opening on the center section side to the standard Series 1 size already. Now I am laying on our headlamp conversion pattern, which is designed to give us a hole exactly 1/4″ too large.
-
- This is 1/4″ oversize headlamp hole pattern for the wing. This is what is typical for a Series 1.5 – showing that the opening is basically cut just beyond the Series 1 flange location. I am still convinced that Series 1.5 bonnets all started life as Series 1 bonnets, and the flanges were just cut out after they were pressed with something akin to a reciprocating saw.
-
- This is a shot of the 1/4″ oversize pattern at the top of the wing. We typically remove some metal from the Series 1.5 when we lay these on, but not much – not a whole 1/4″ all the way around, because they are already oversize a bit compared to a Series 1. If you are overlapping your fanges (or underlapping is a better term I guess…), keep in mind that you are probably going to be inside the stock Series 1.5 opening, but NOT an equal distance all the way around – they are “sloppy” compared to the Series 1 opening shape you need to get to…

-

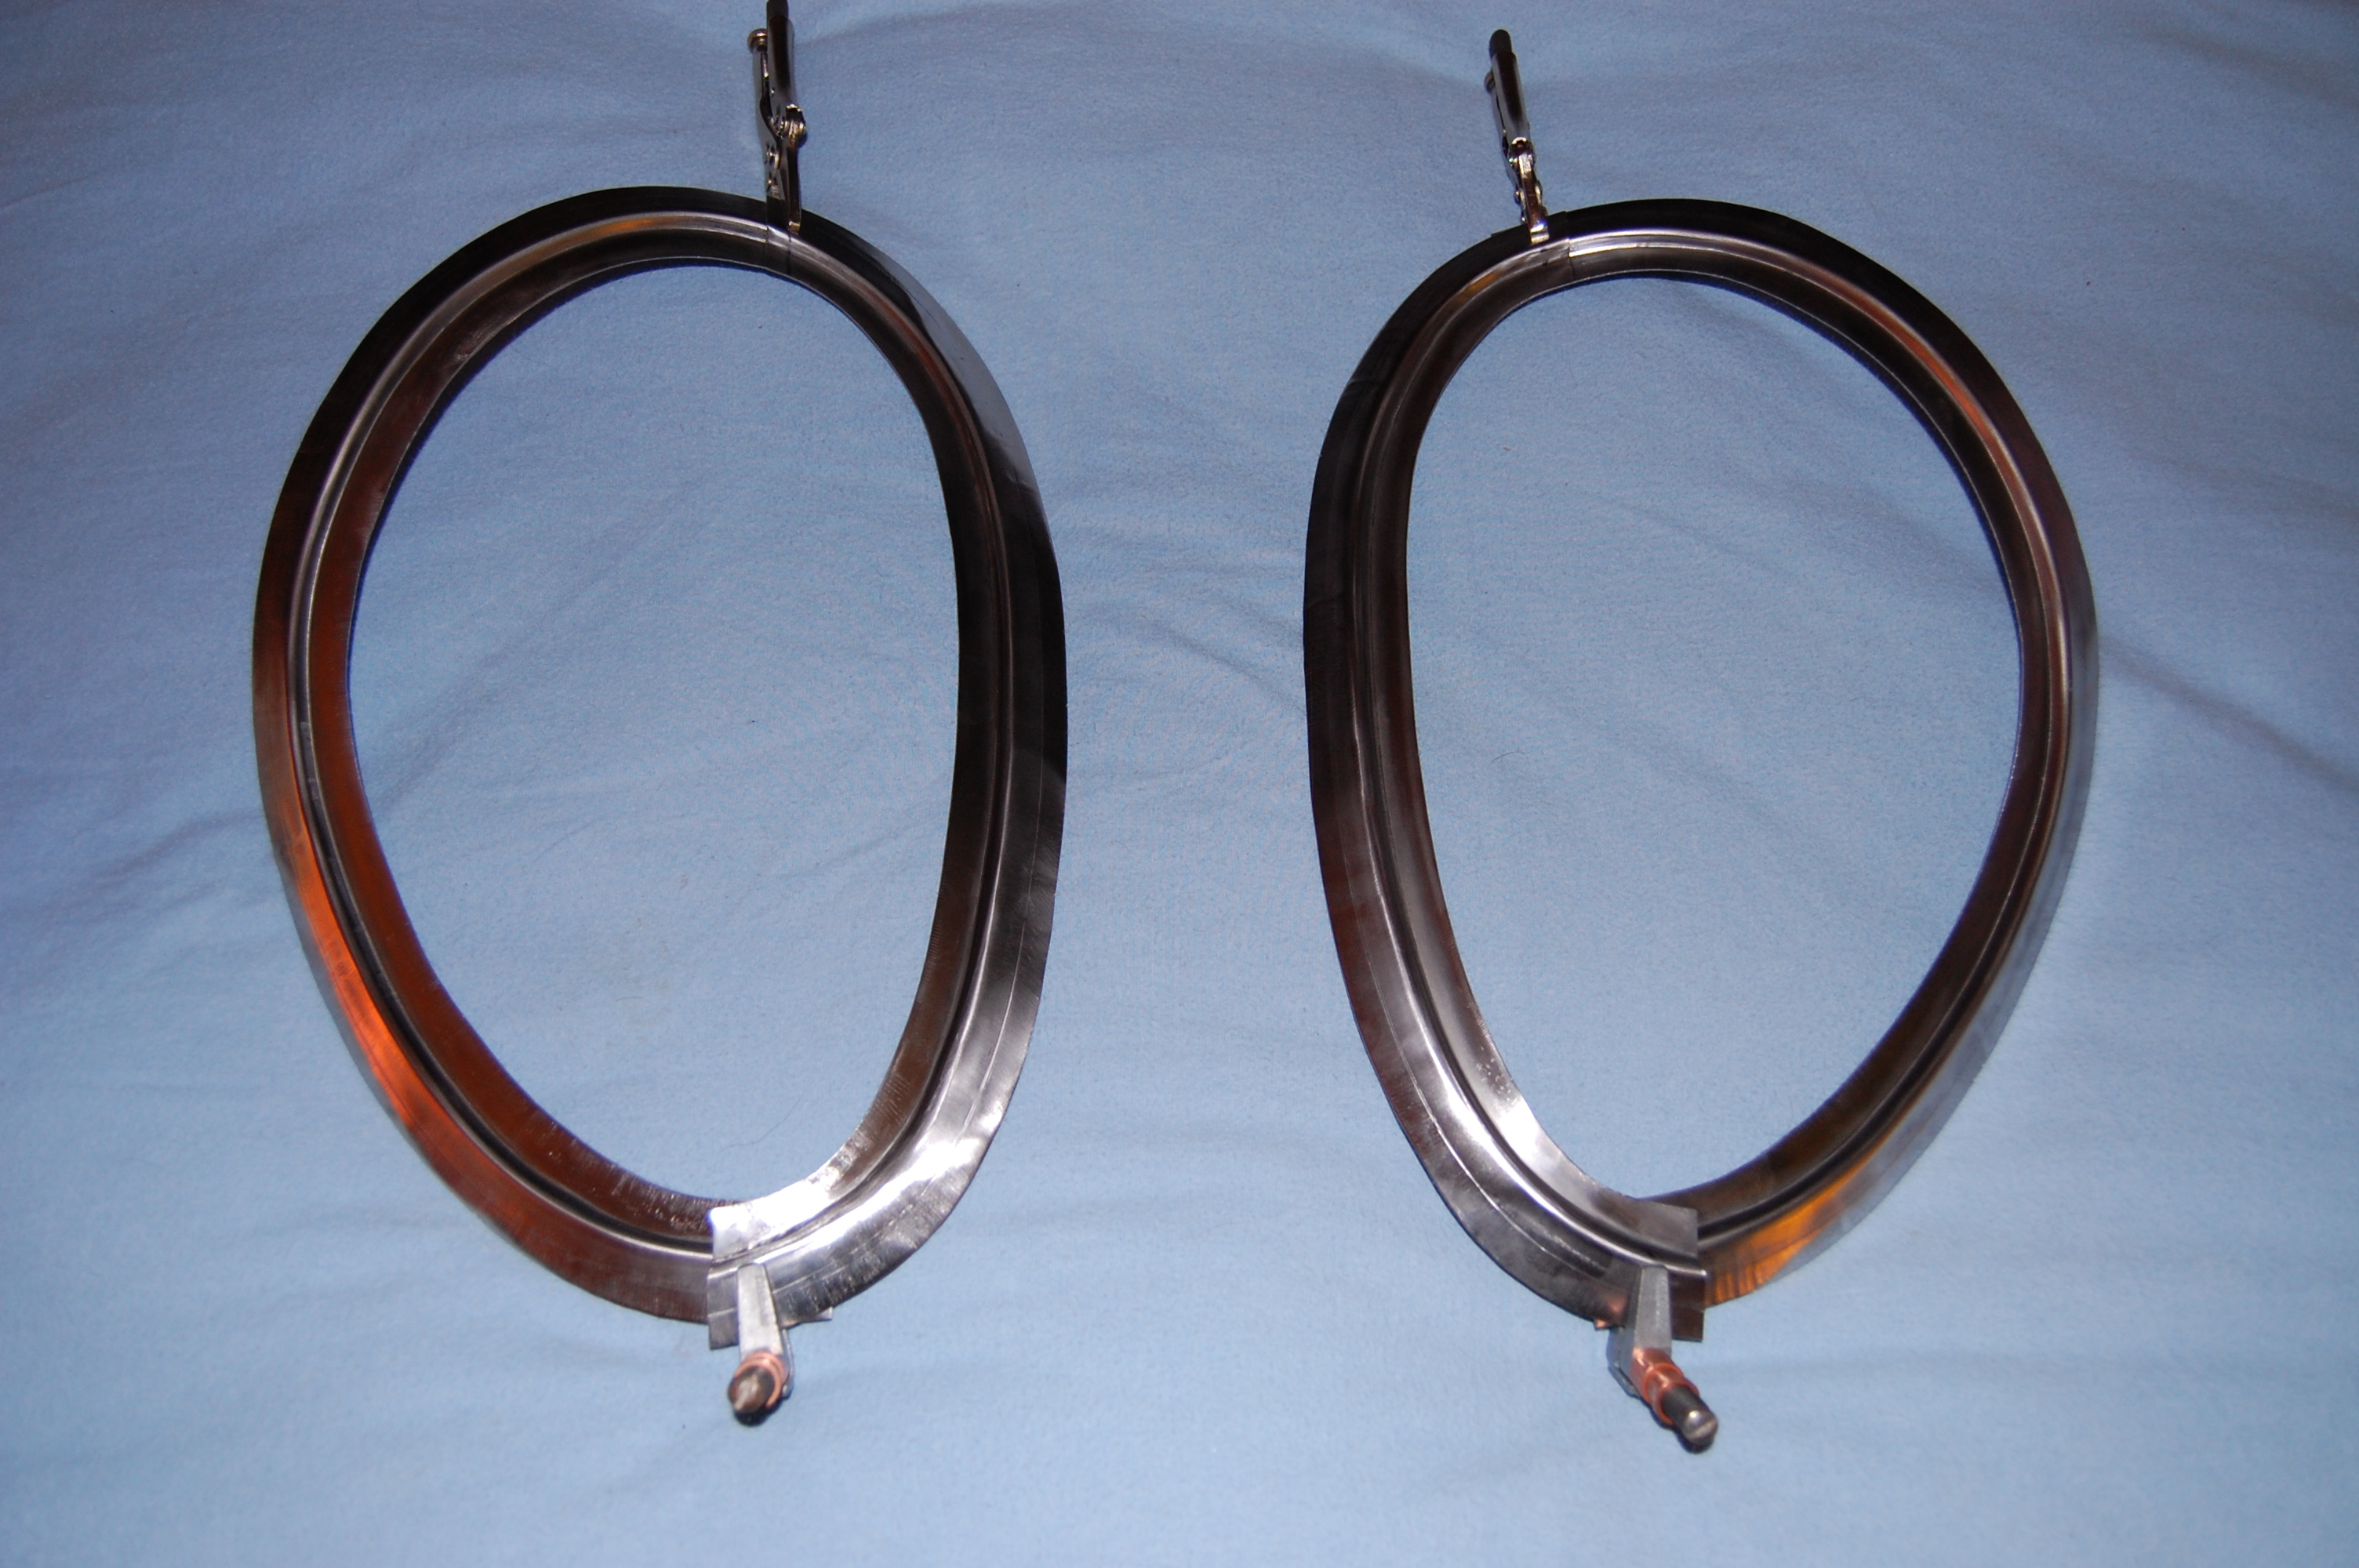
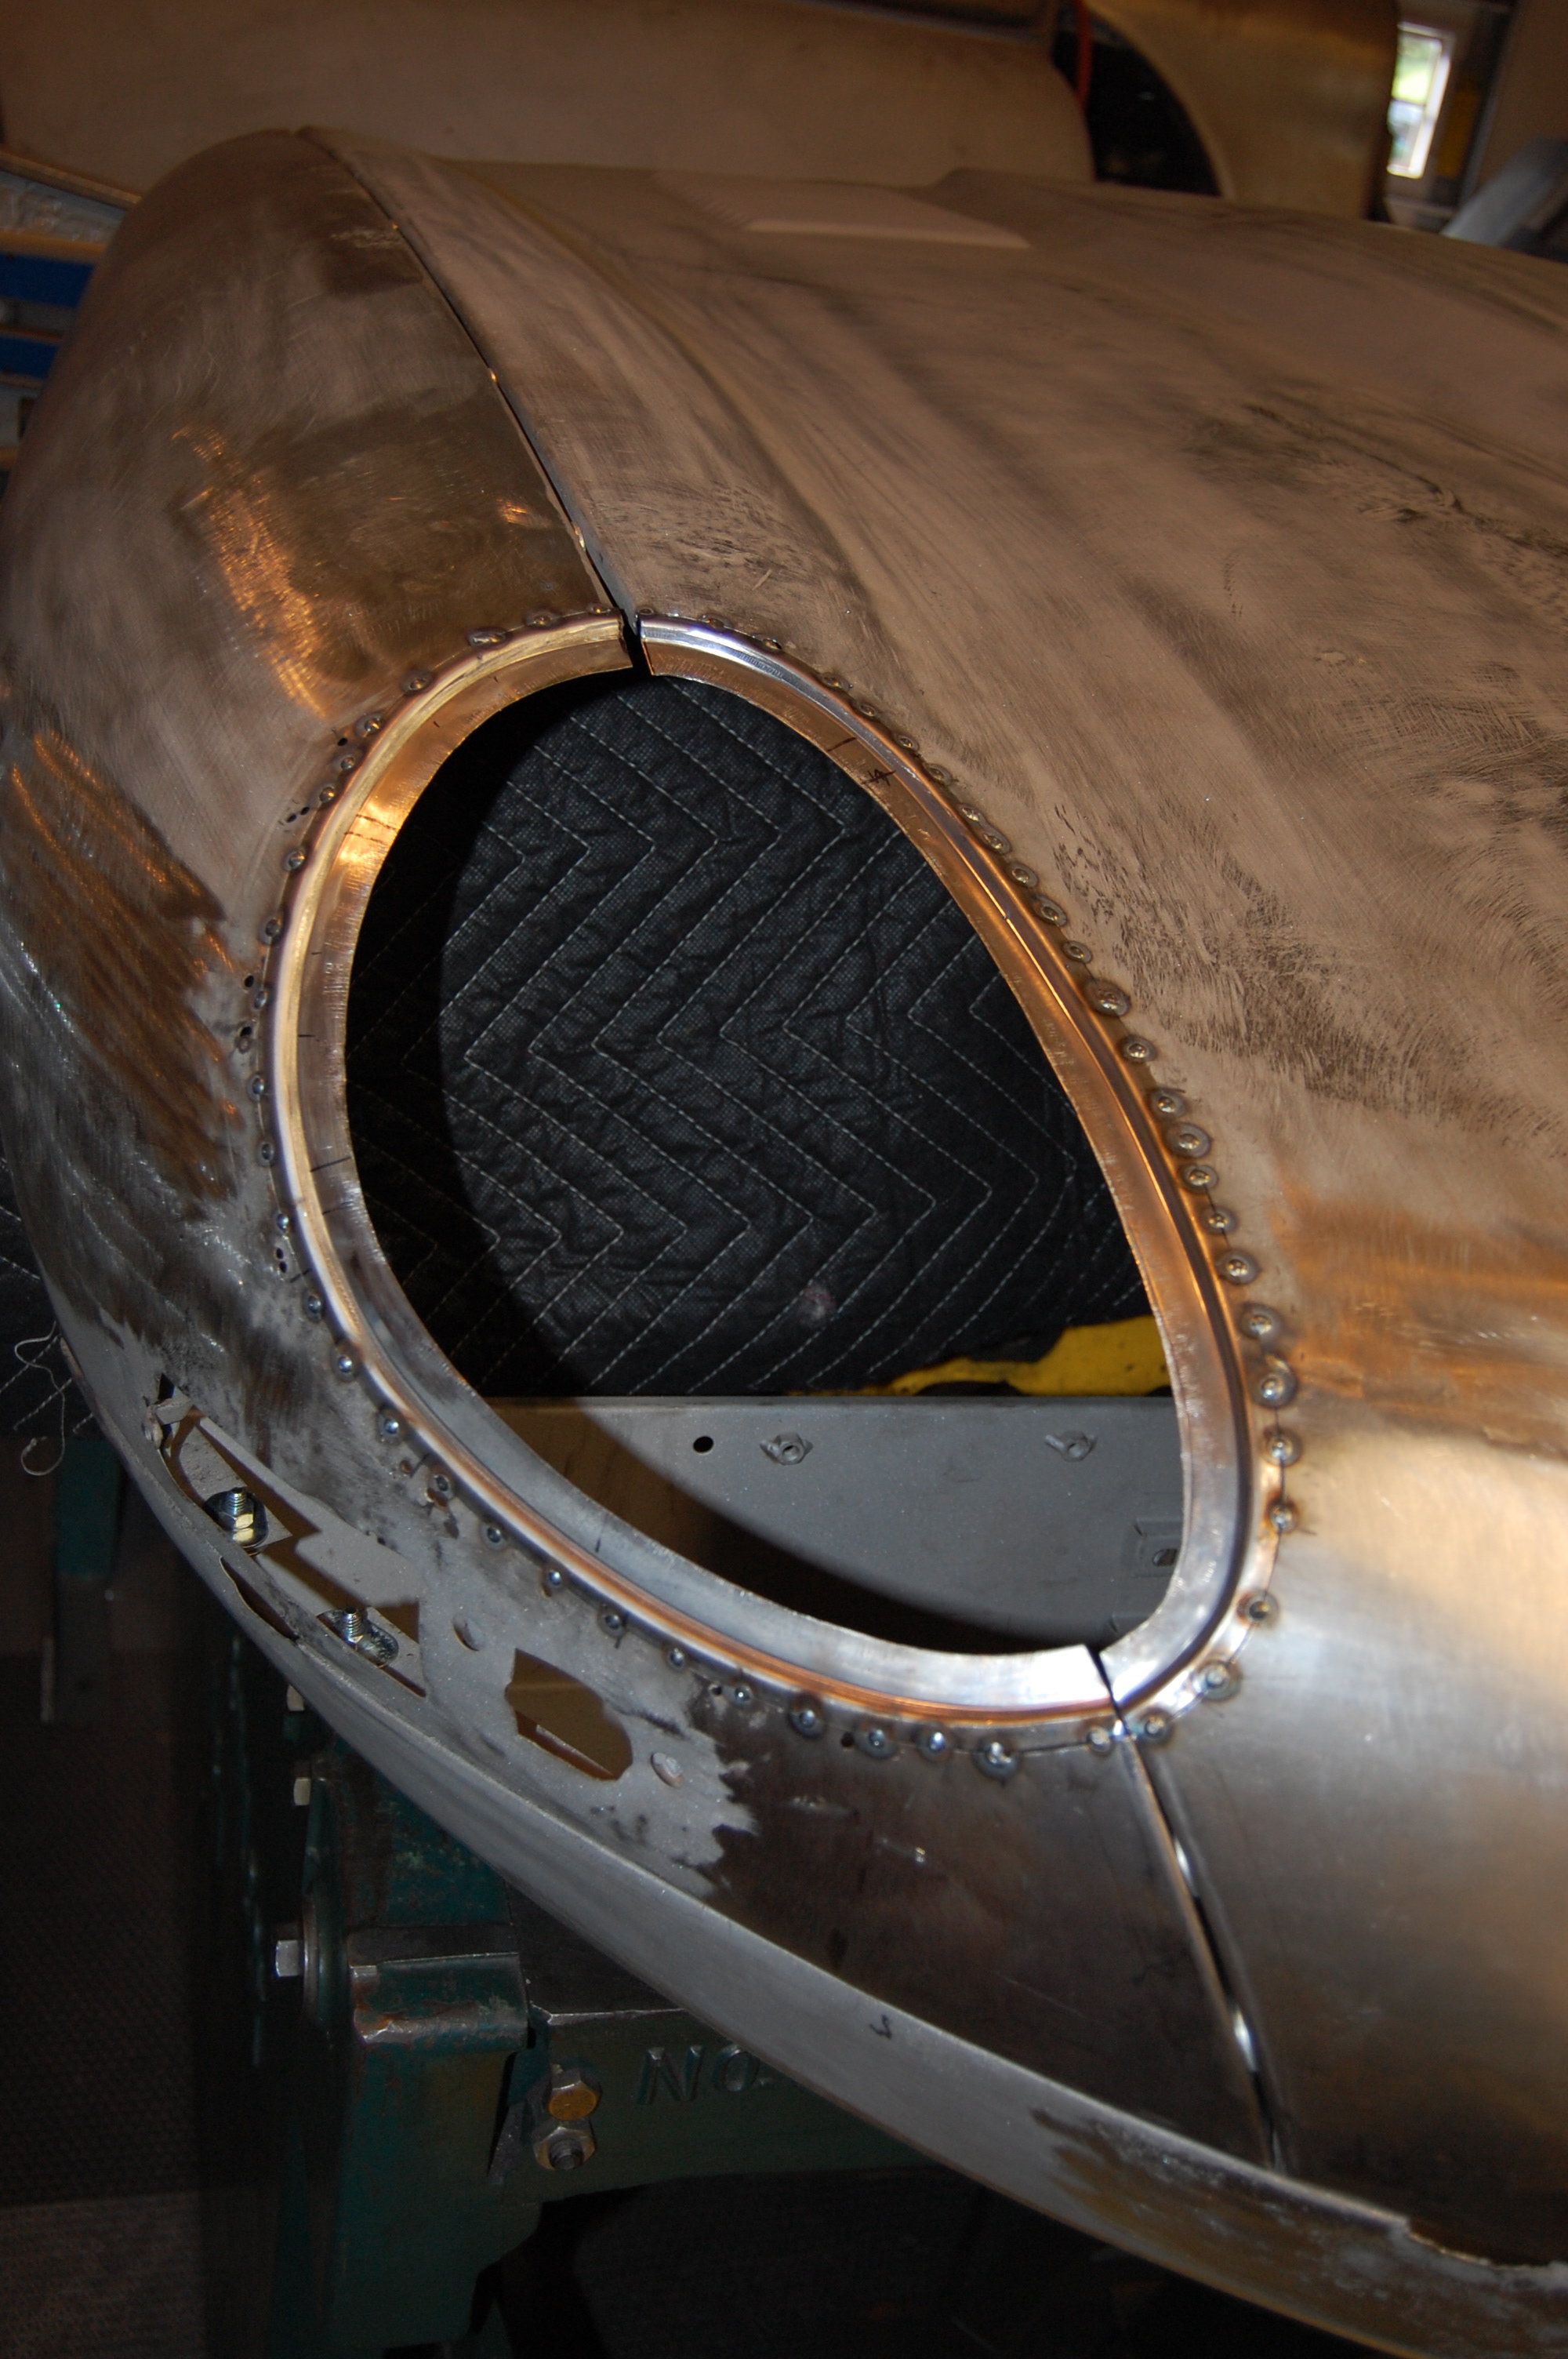
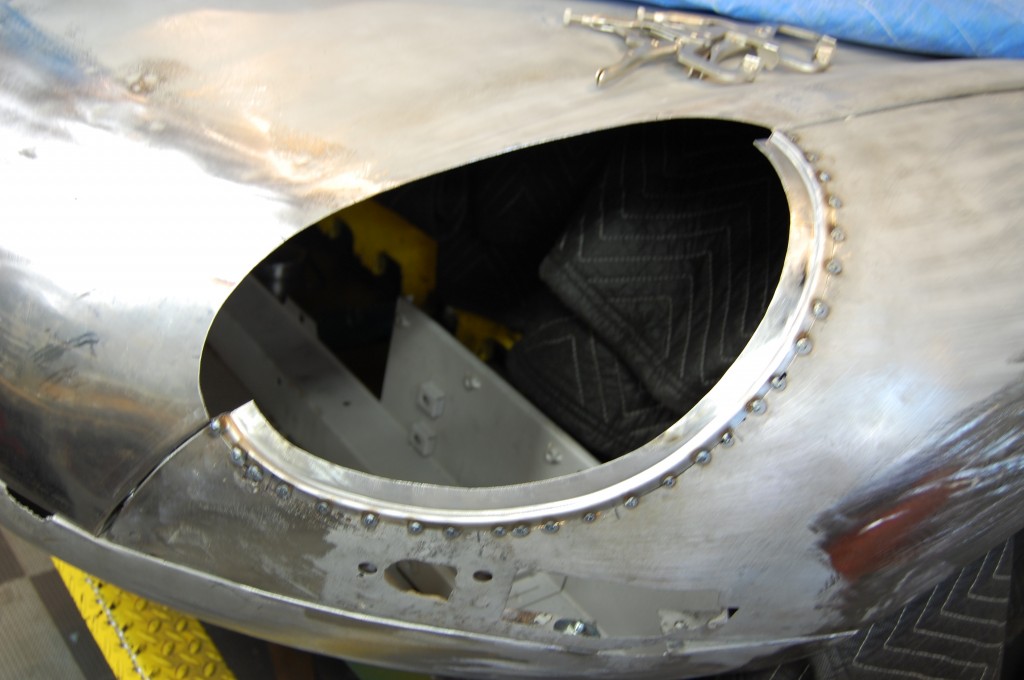
- Now that the hole is cut out and ready, it’s time to pull a set of our Series 1.5 E-Type covered headlamp conversion flanges off the shelf. These have 3/4″ of material on the outside edge, so there is plenty there for you to “underlap” – OR you can trim them down like we do and butt-weld them. But only do that if you are VERY experienced with welding and have a TIG. DON’T EVEN THINK ABOUT butt-welding them in with a MIG – you are going to warp things – alot…
-
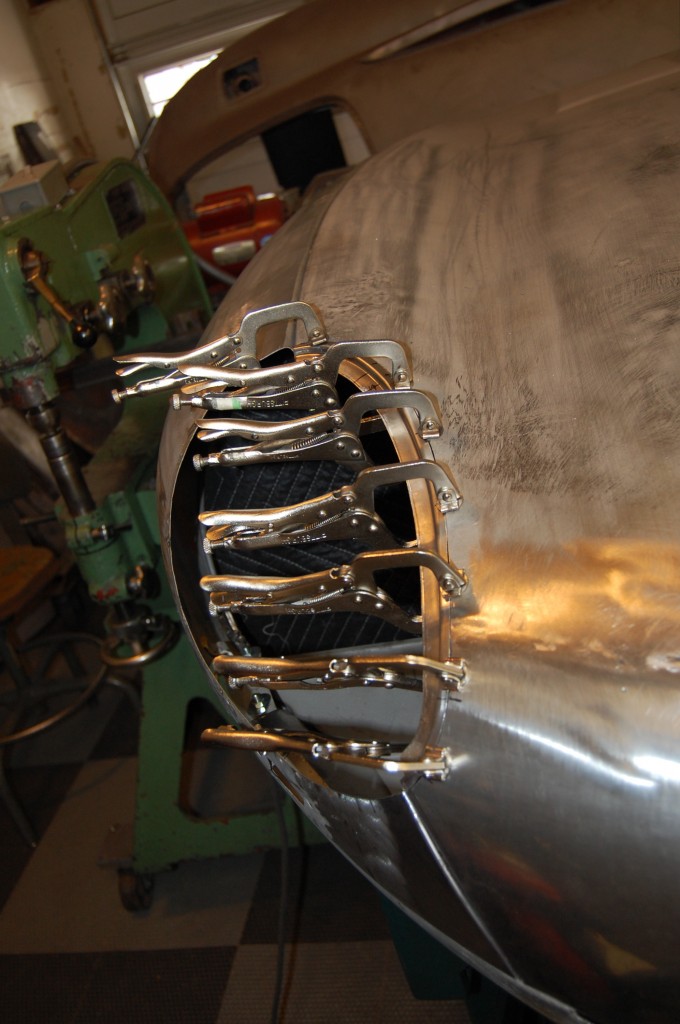
- The first flange is trimmed down and fit into place. You can never have enough vice-grips in this business!
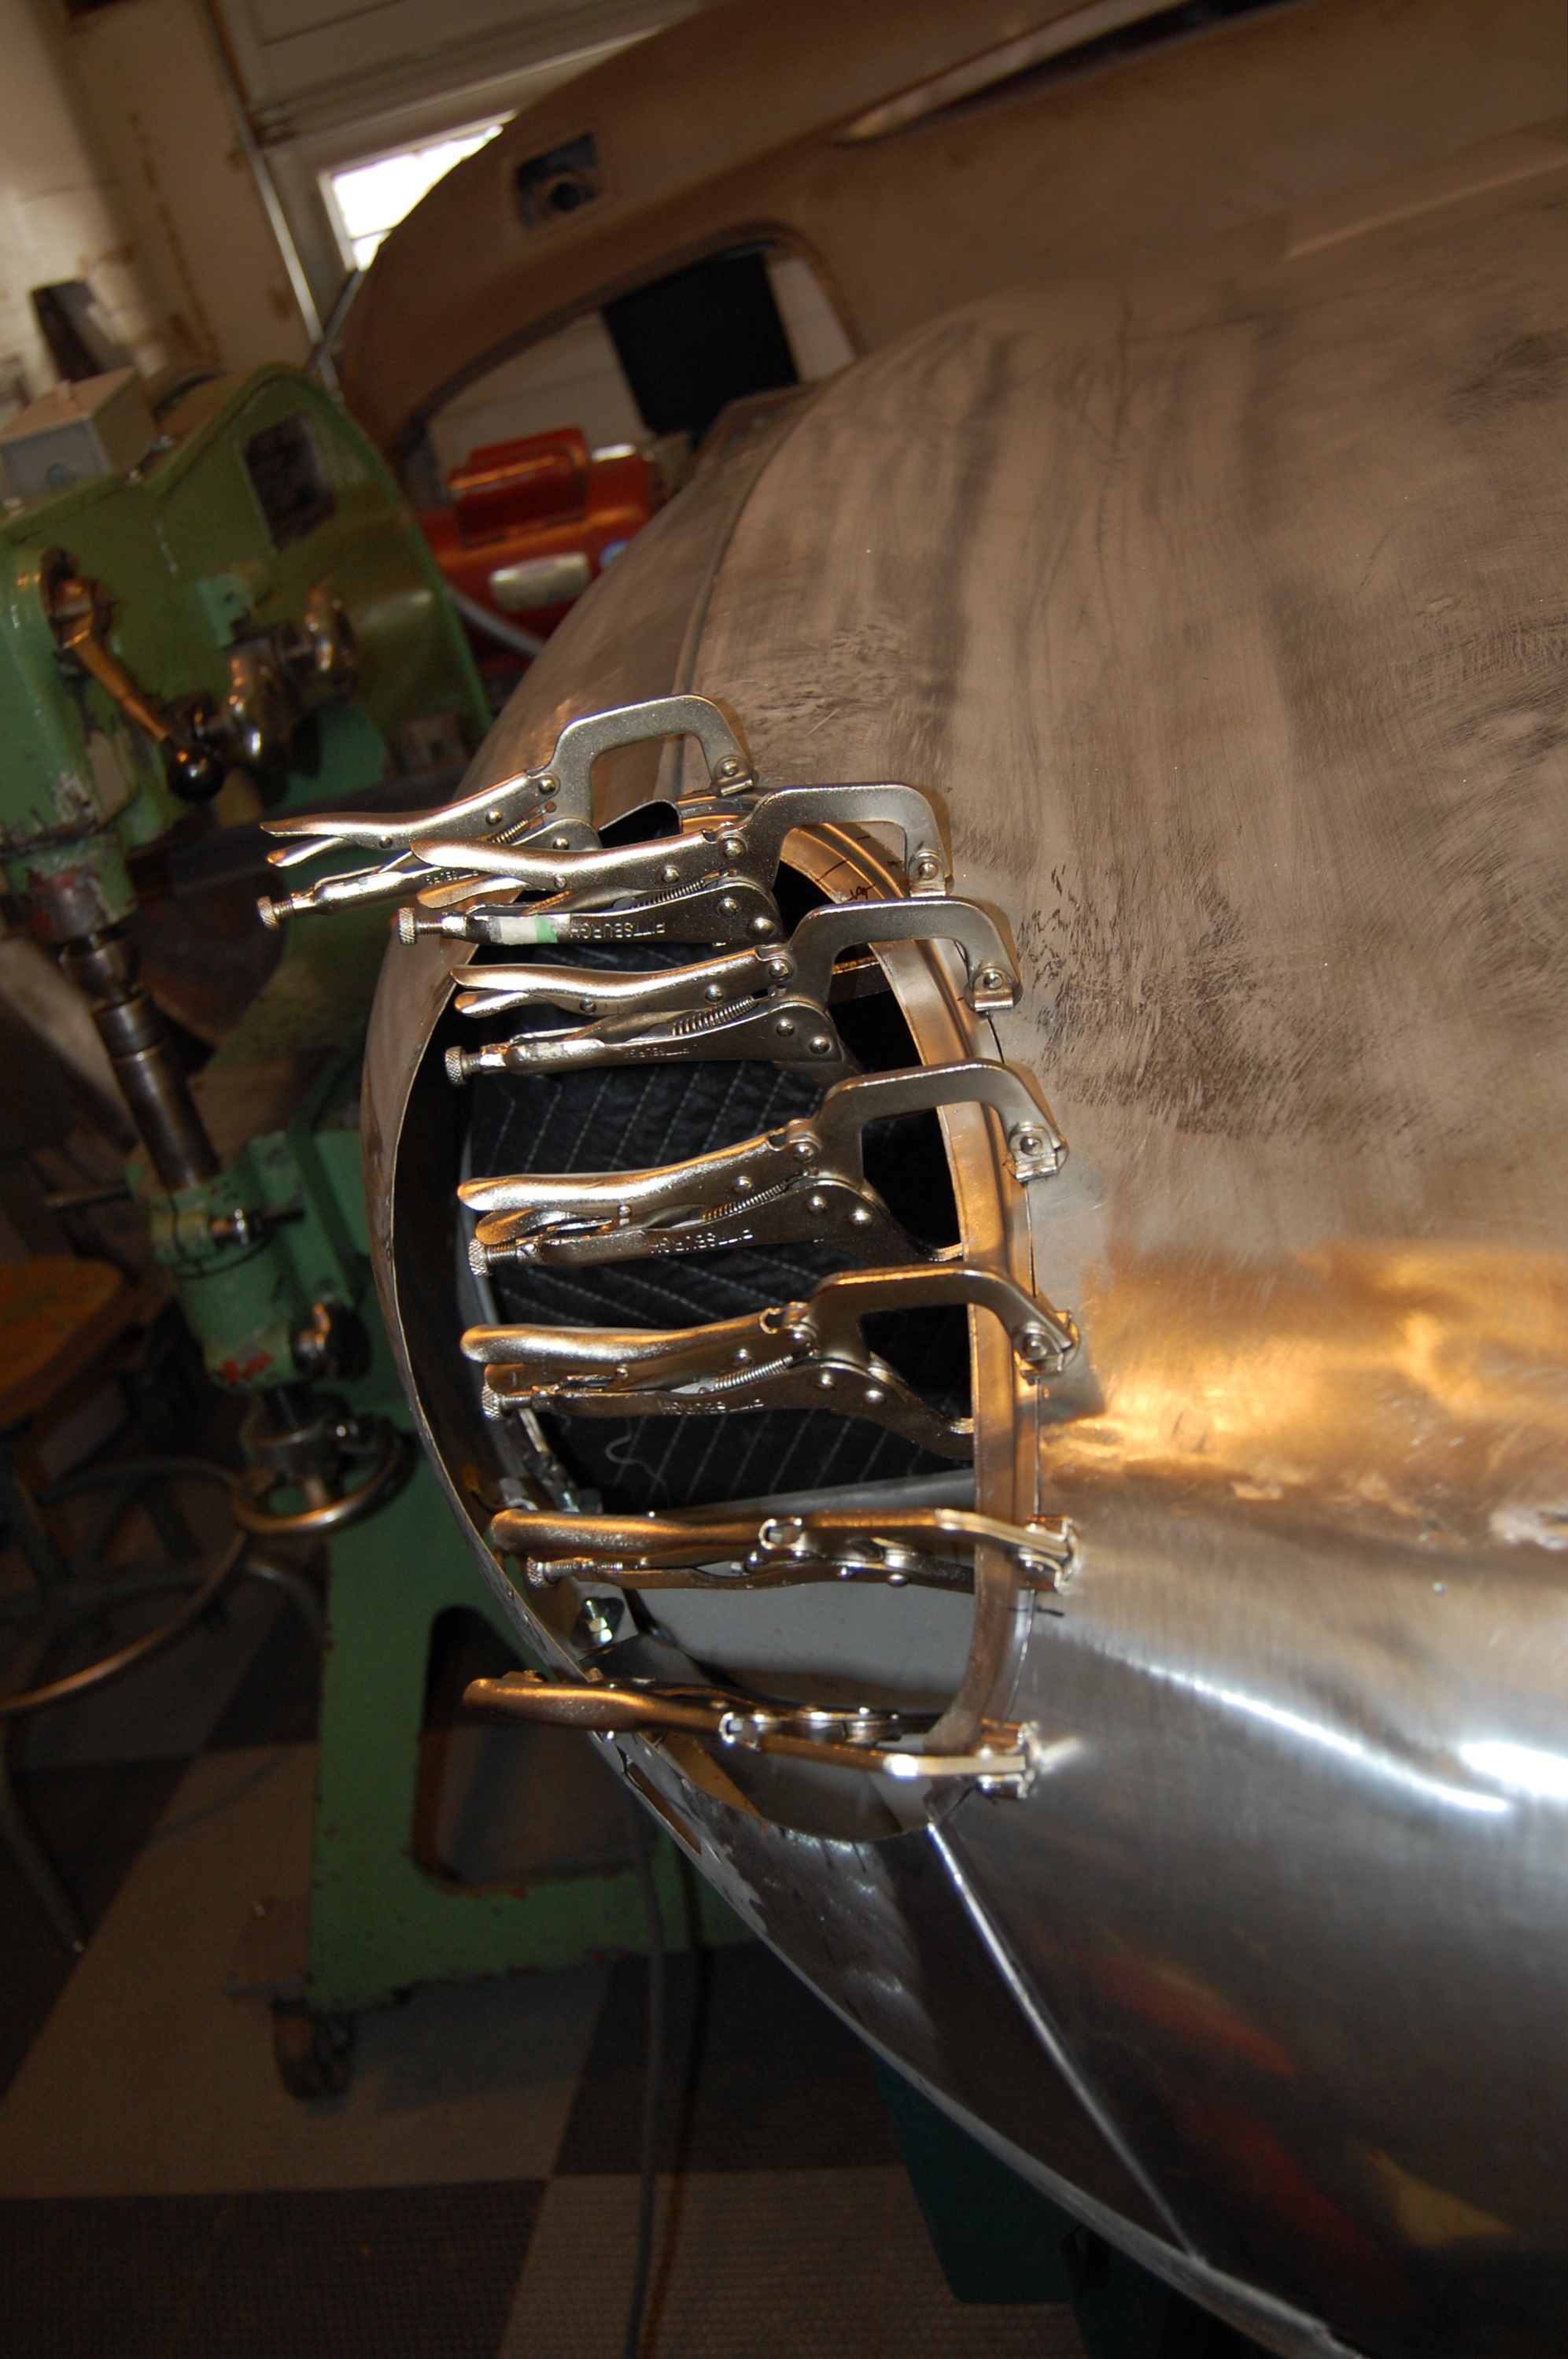
-
- We use a MIG to tack the flange into place.

-

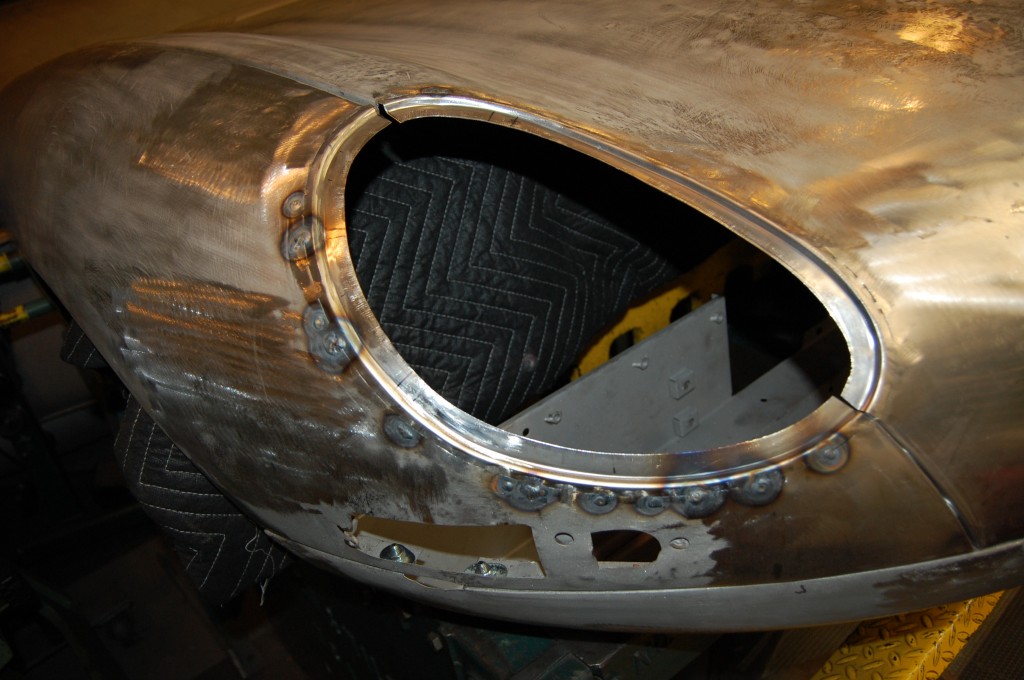
- Here comes the next one… Note the new nose piece – AND that we have also replaced the first 4 inches or so of the wing as well. If you look at those pieces plus the flanges, there’s not much of the old bonnet left!
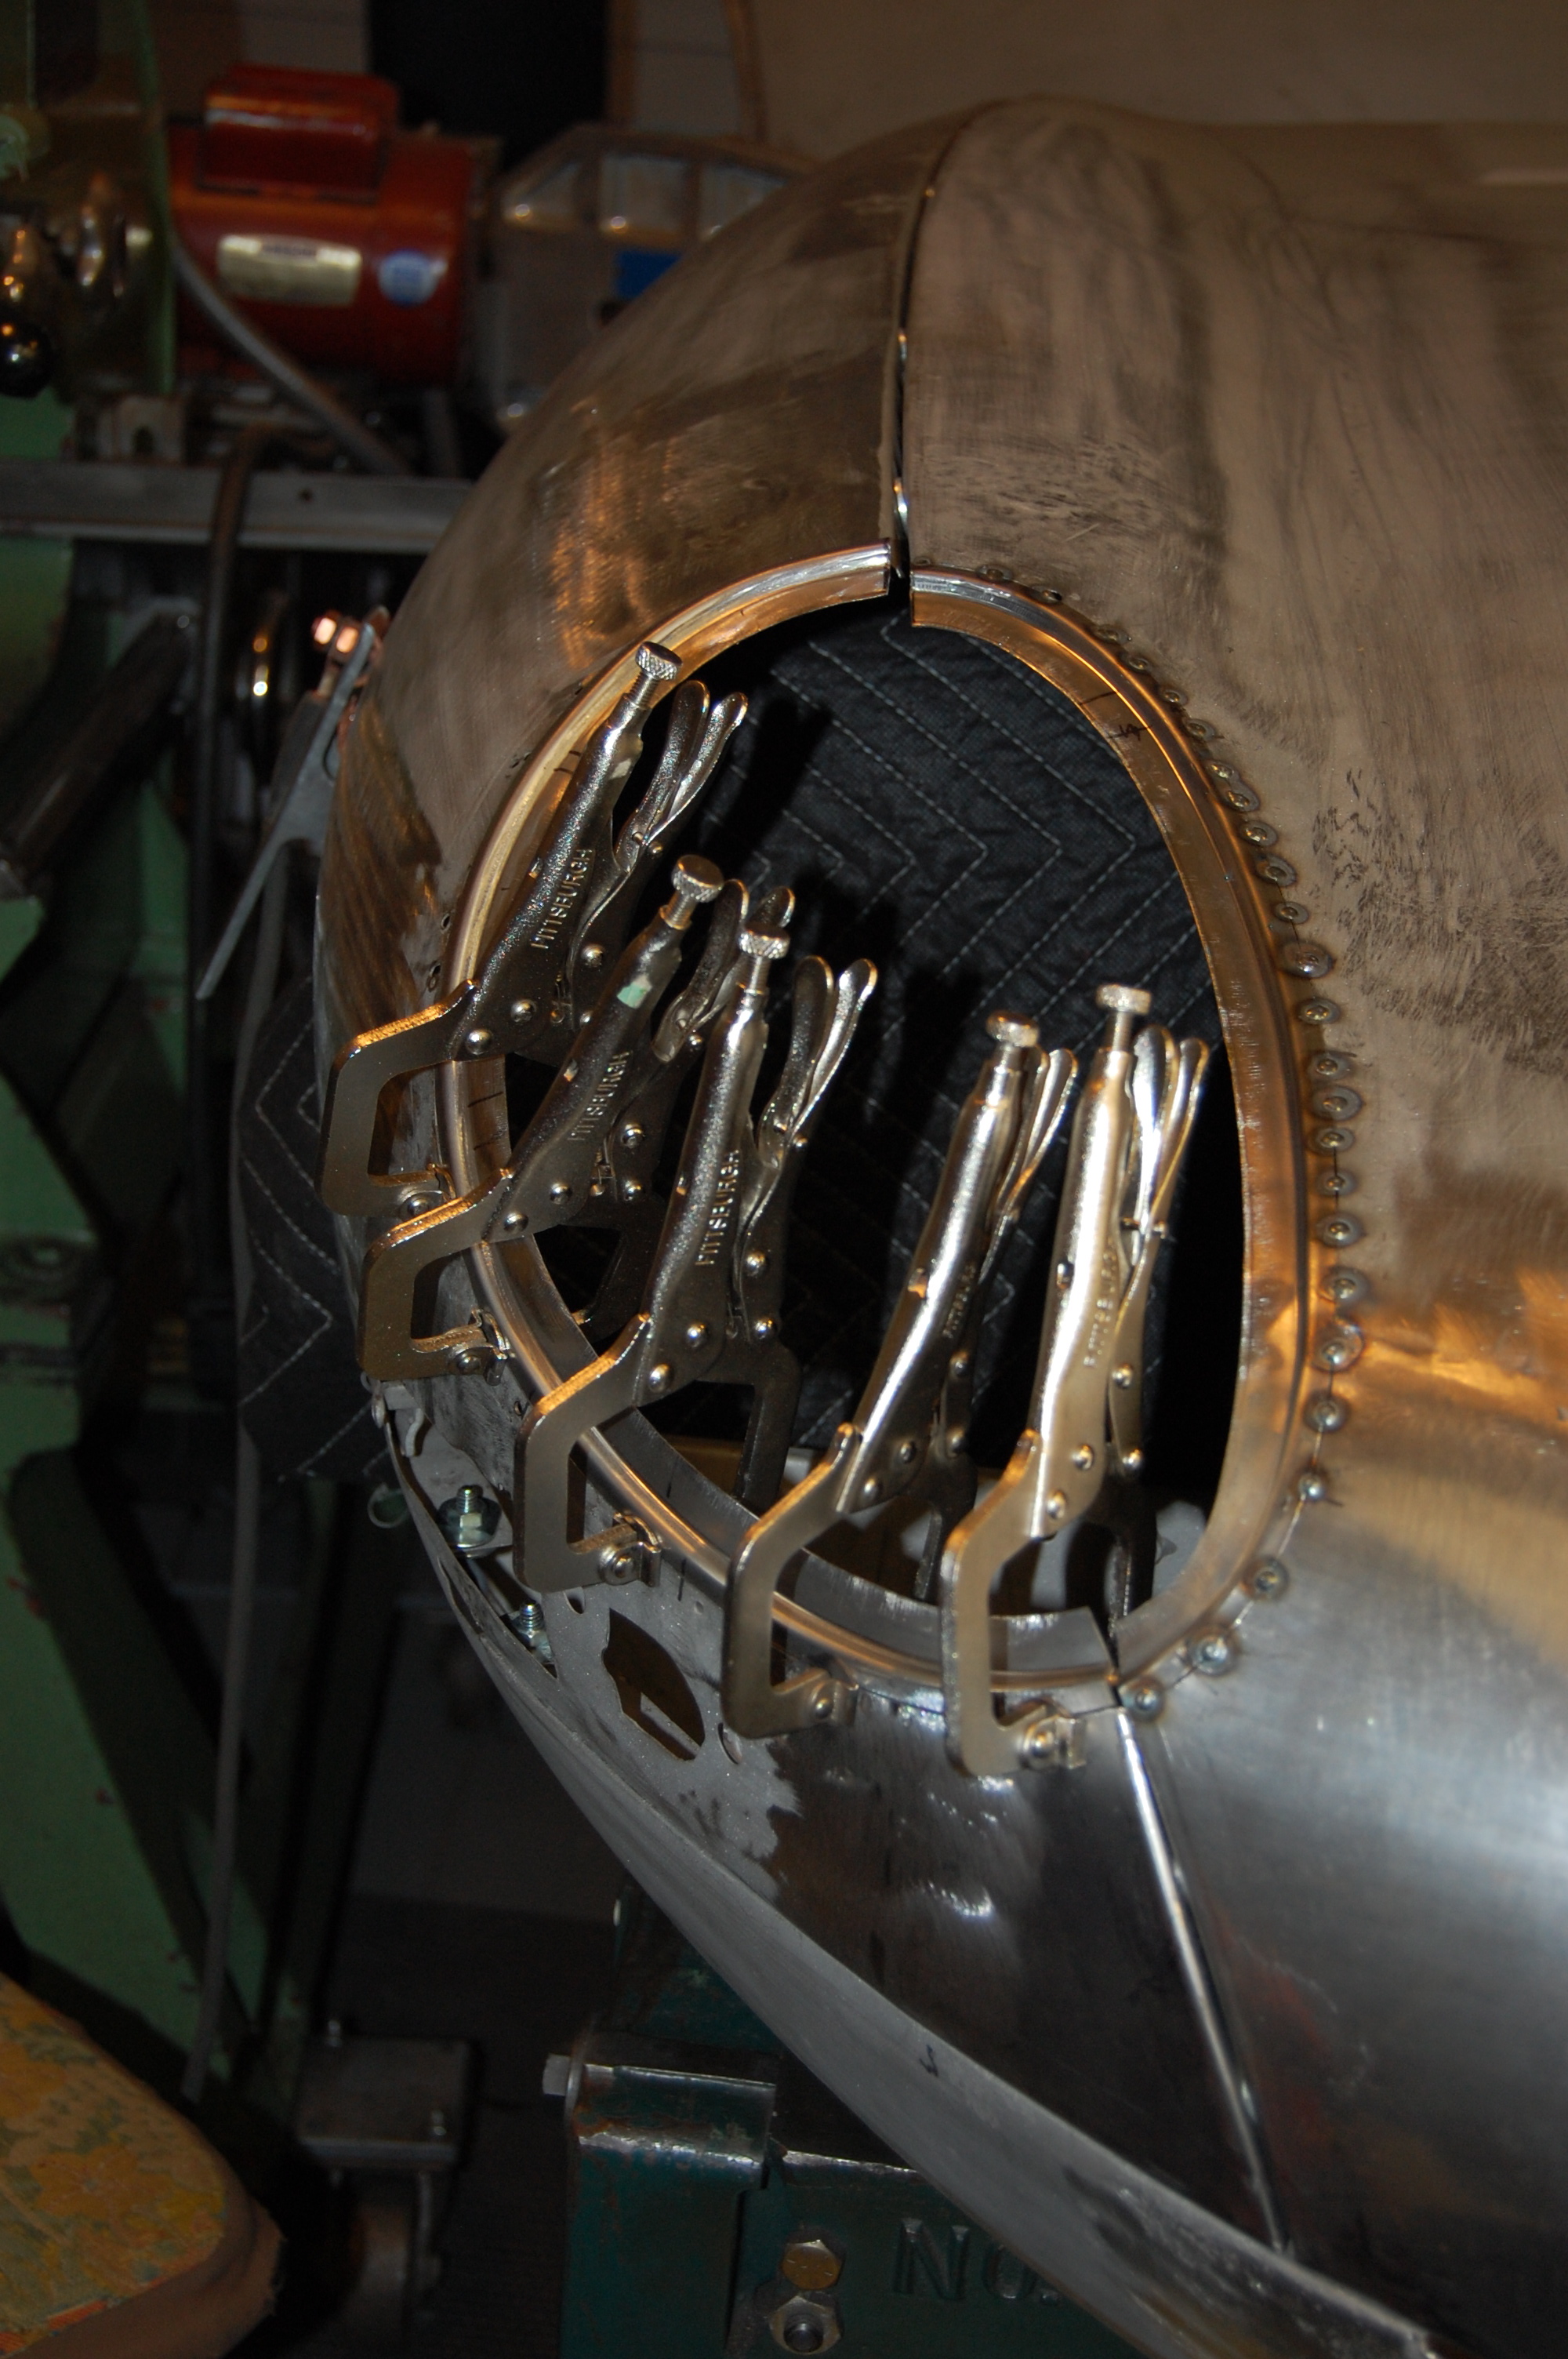
-
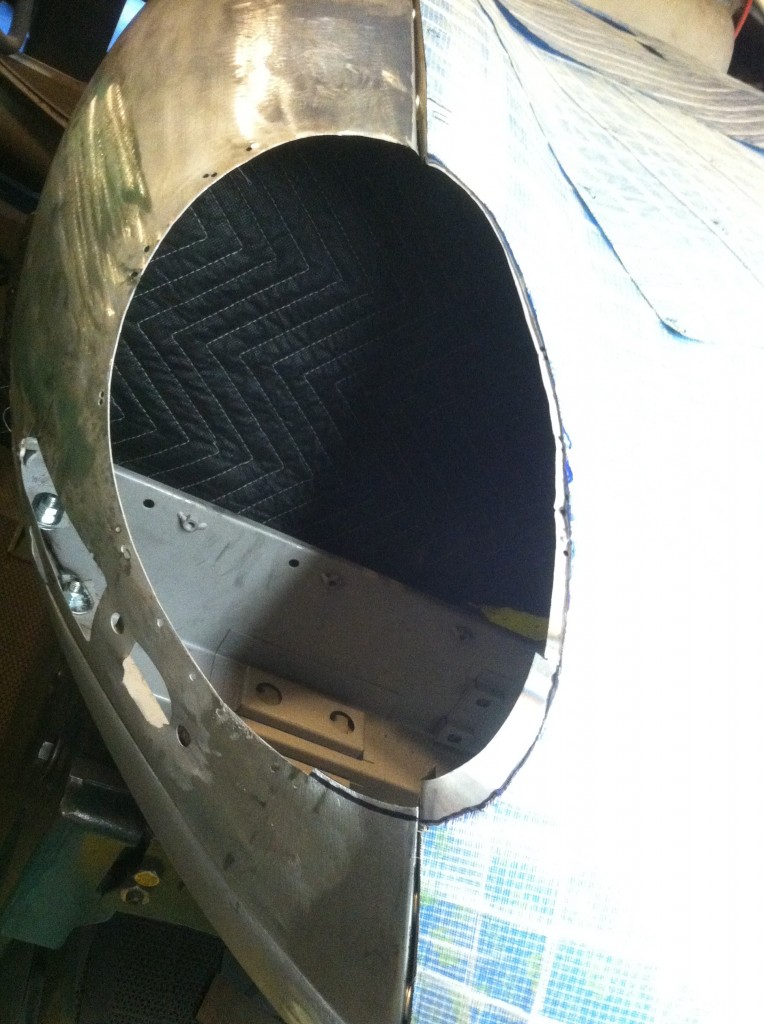
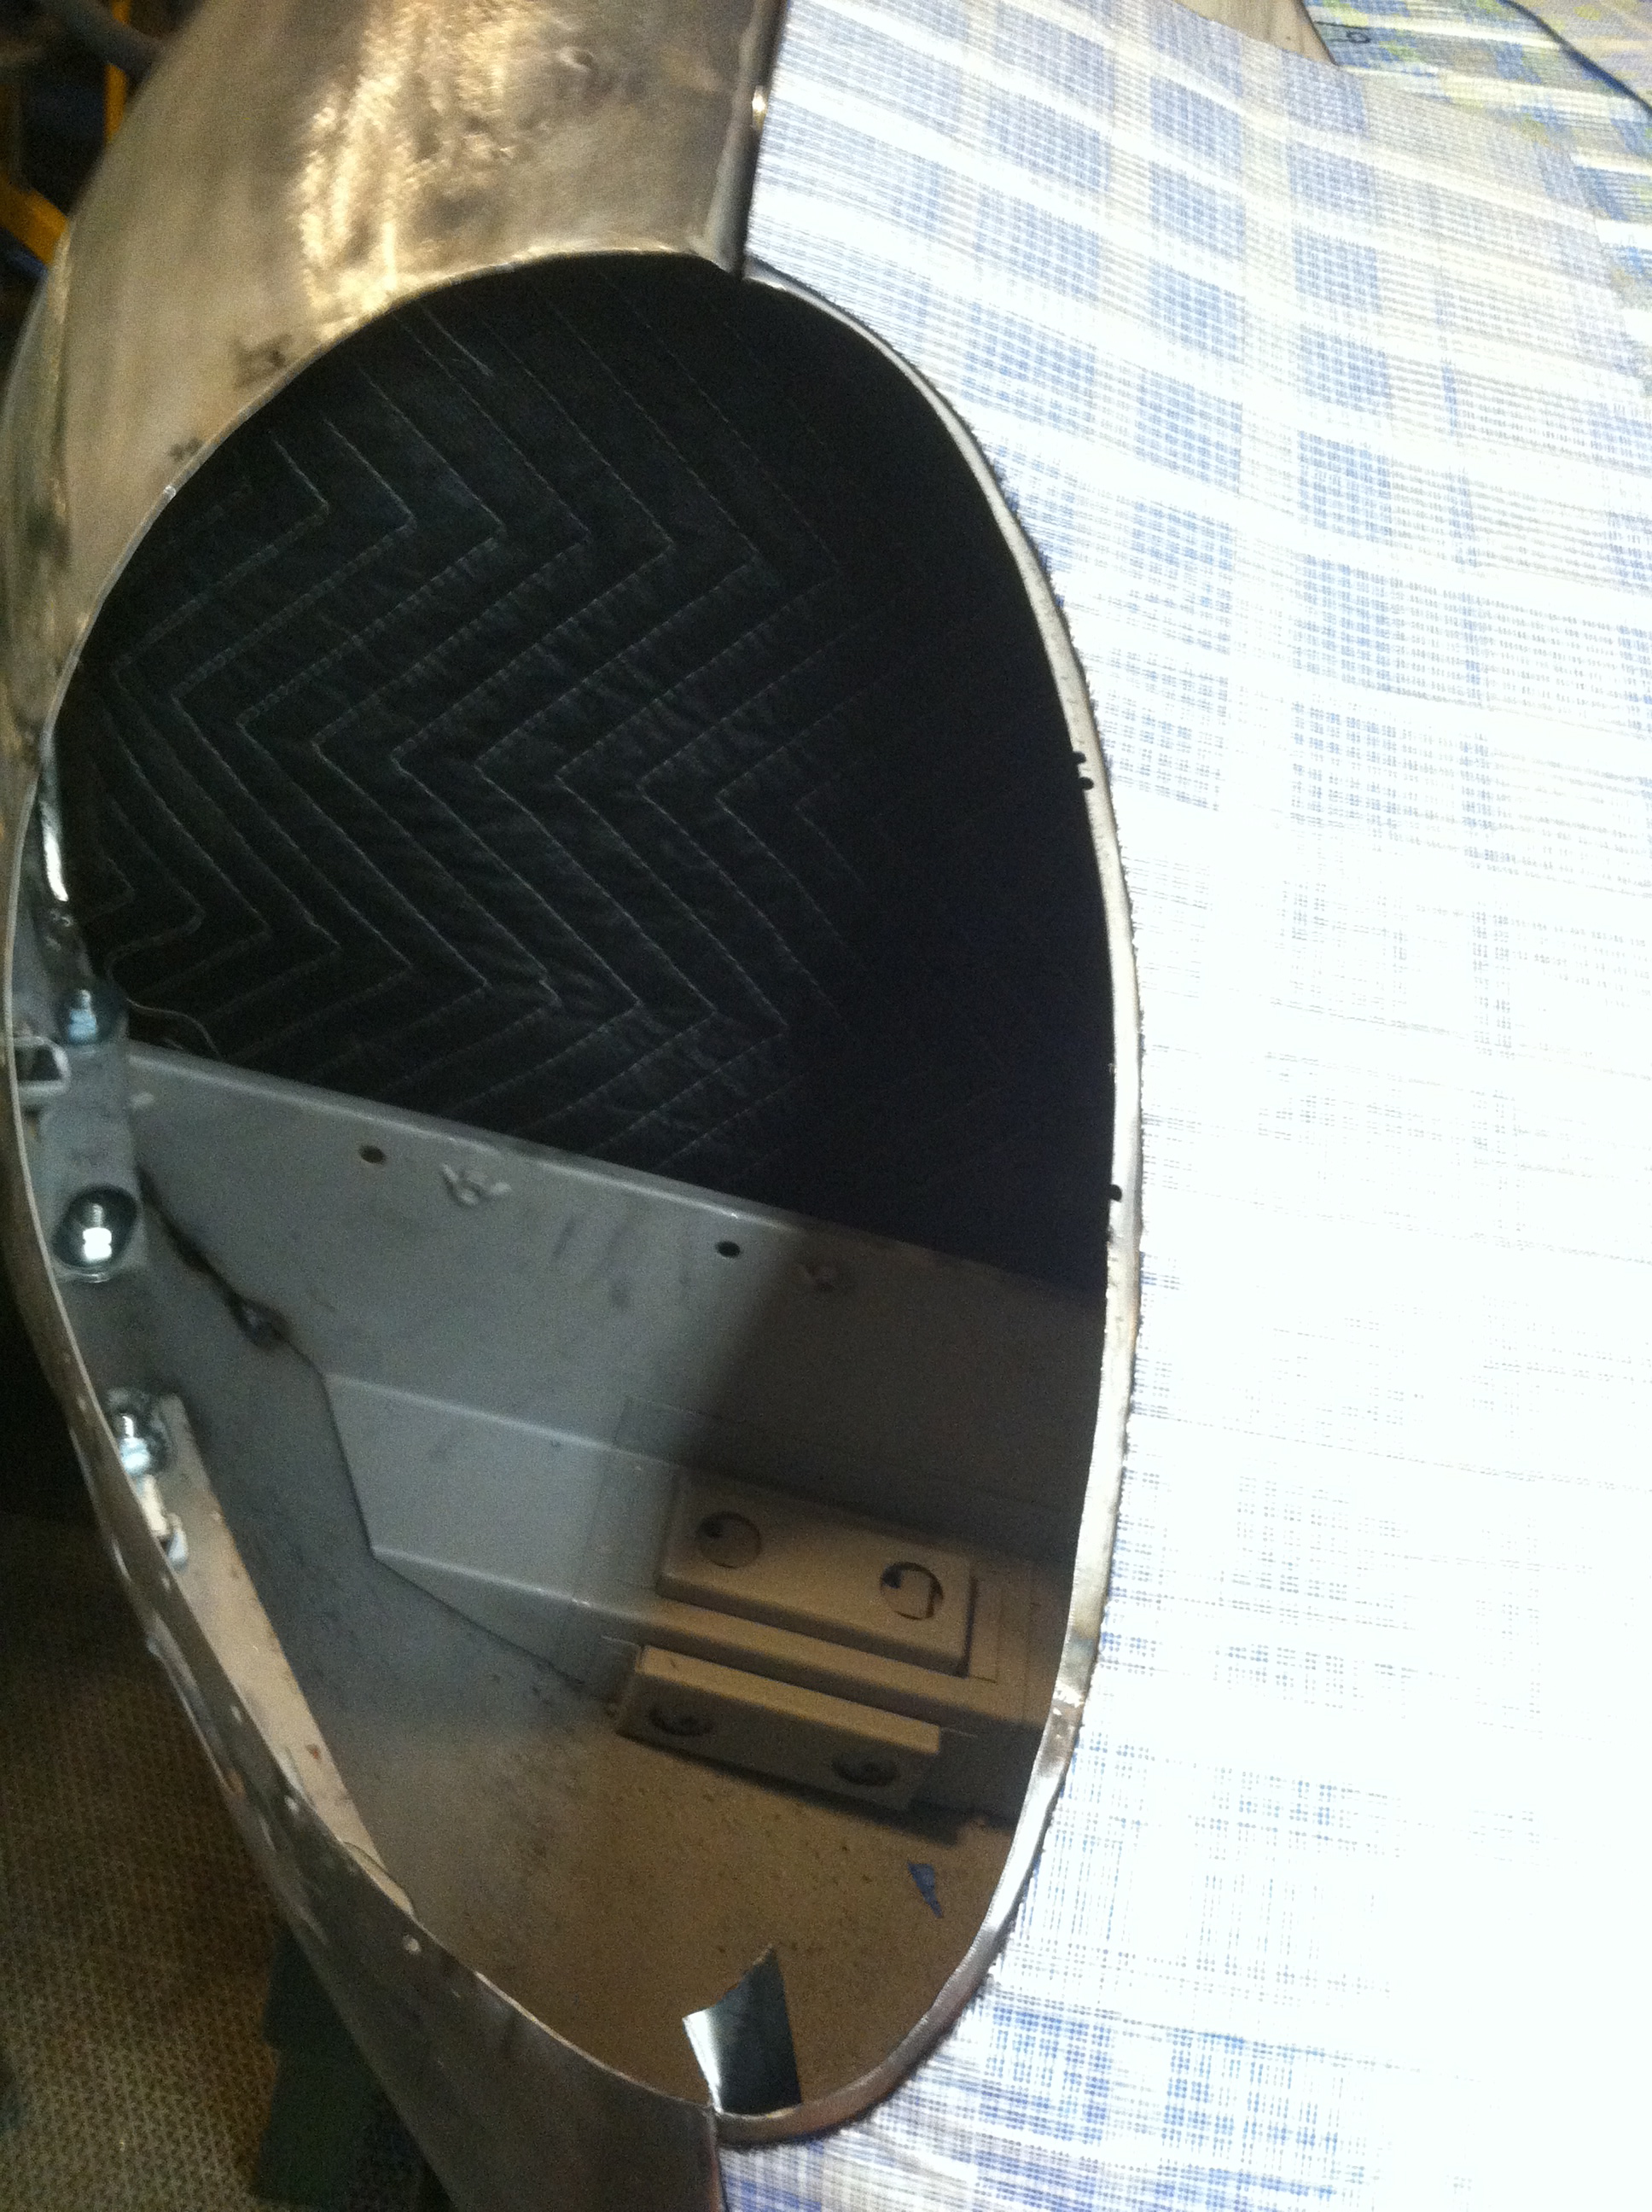
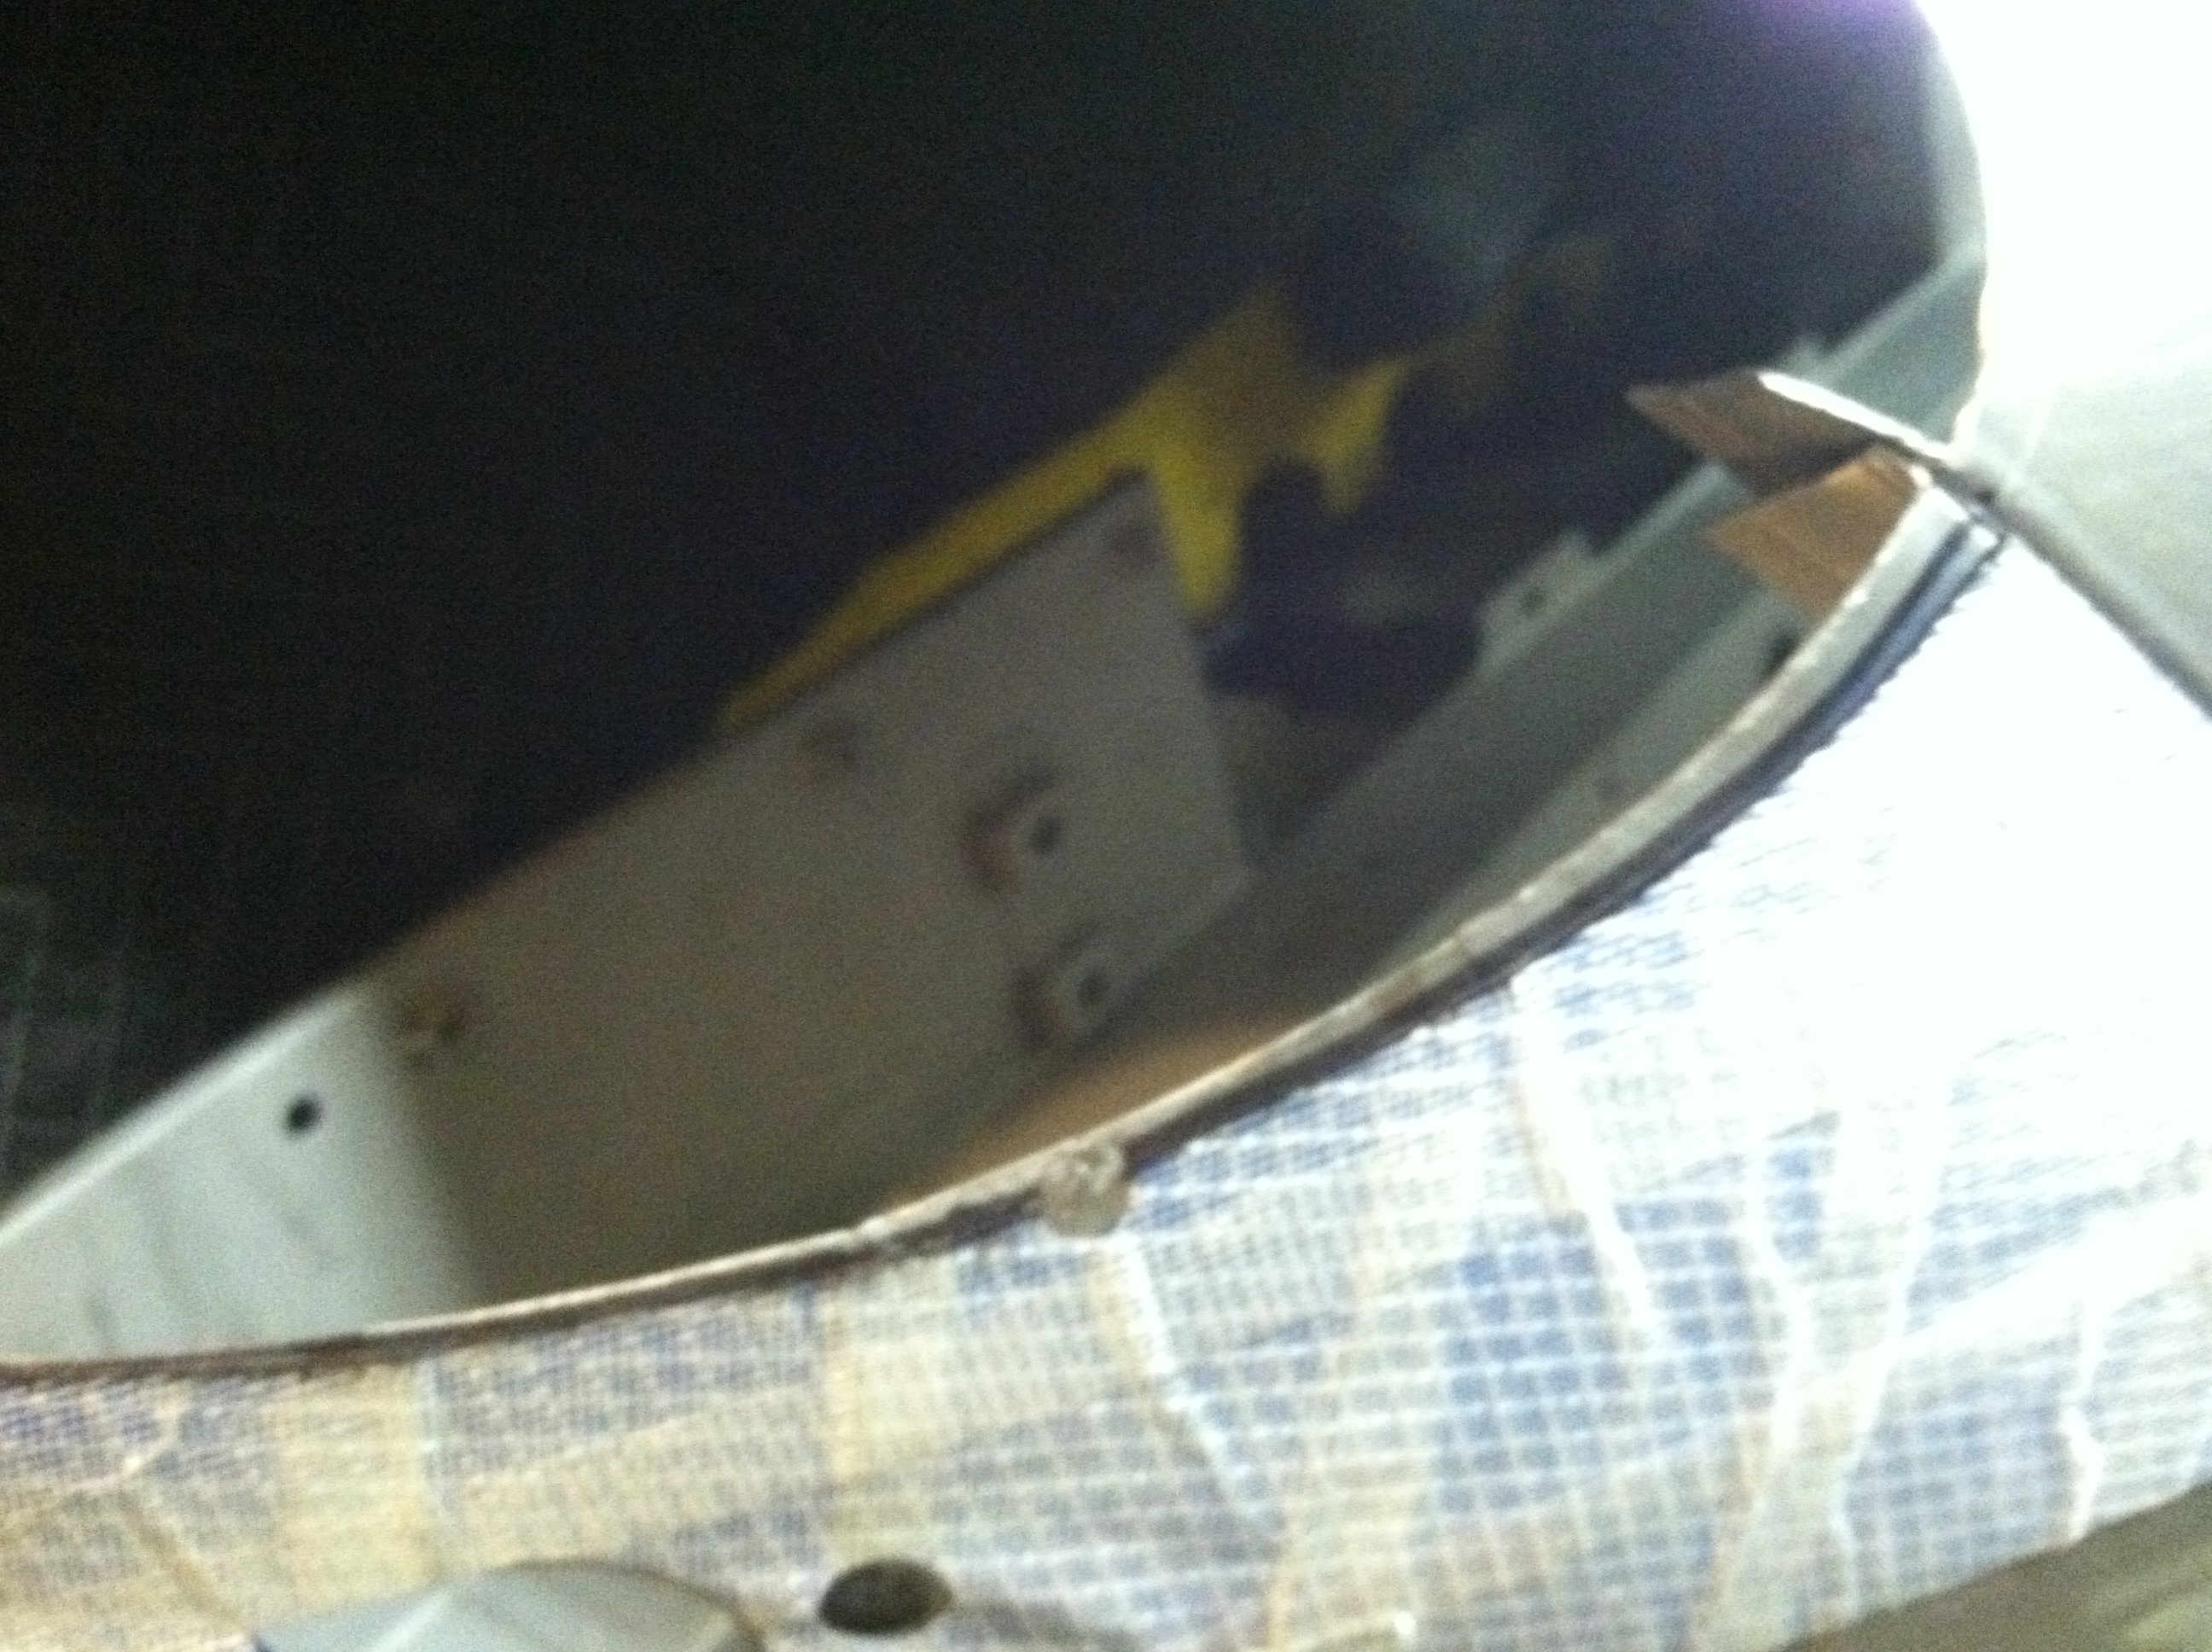
- Both flanges are now completely tacked in. It’s typical to have leftover holes from the Series 1.5 headlamp scoop rivets outseid of your weld line – note that on the wing.
-
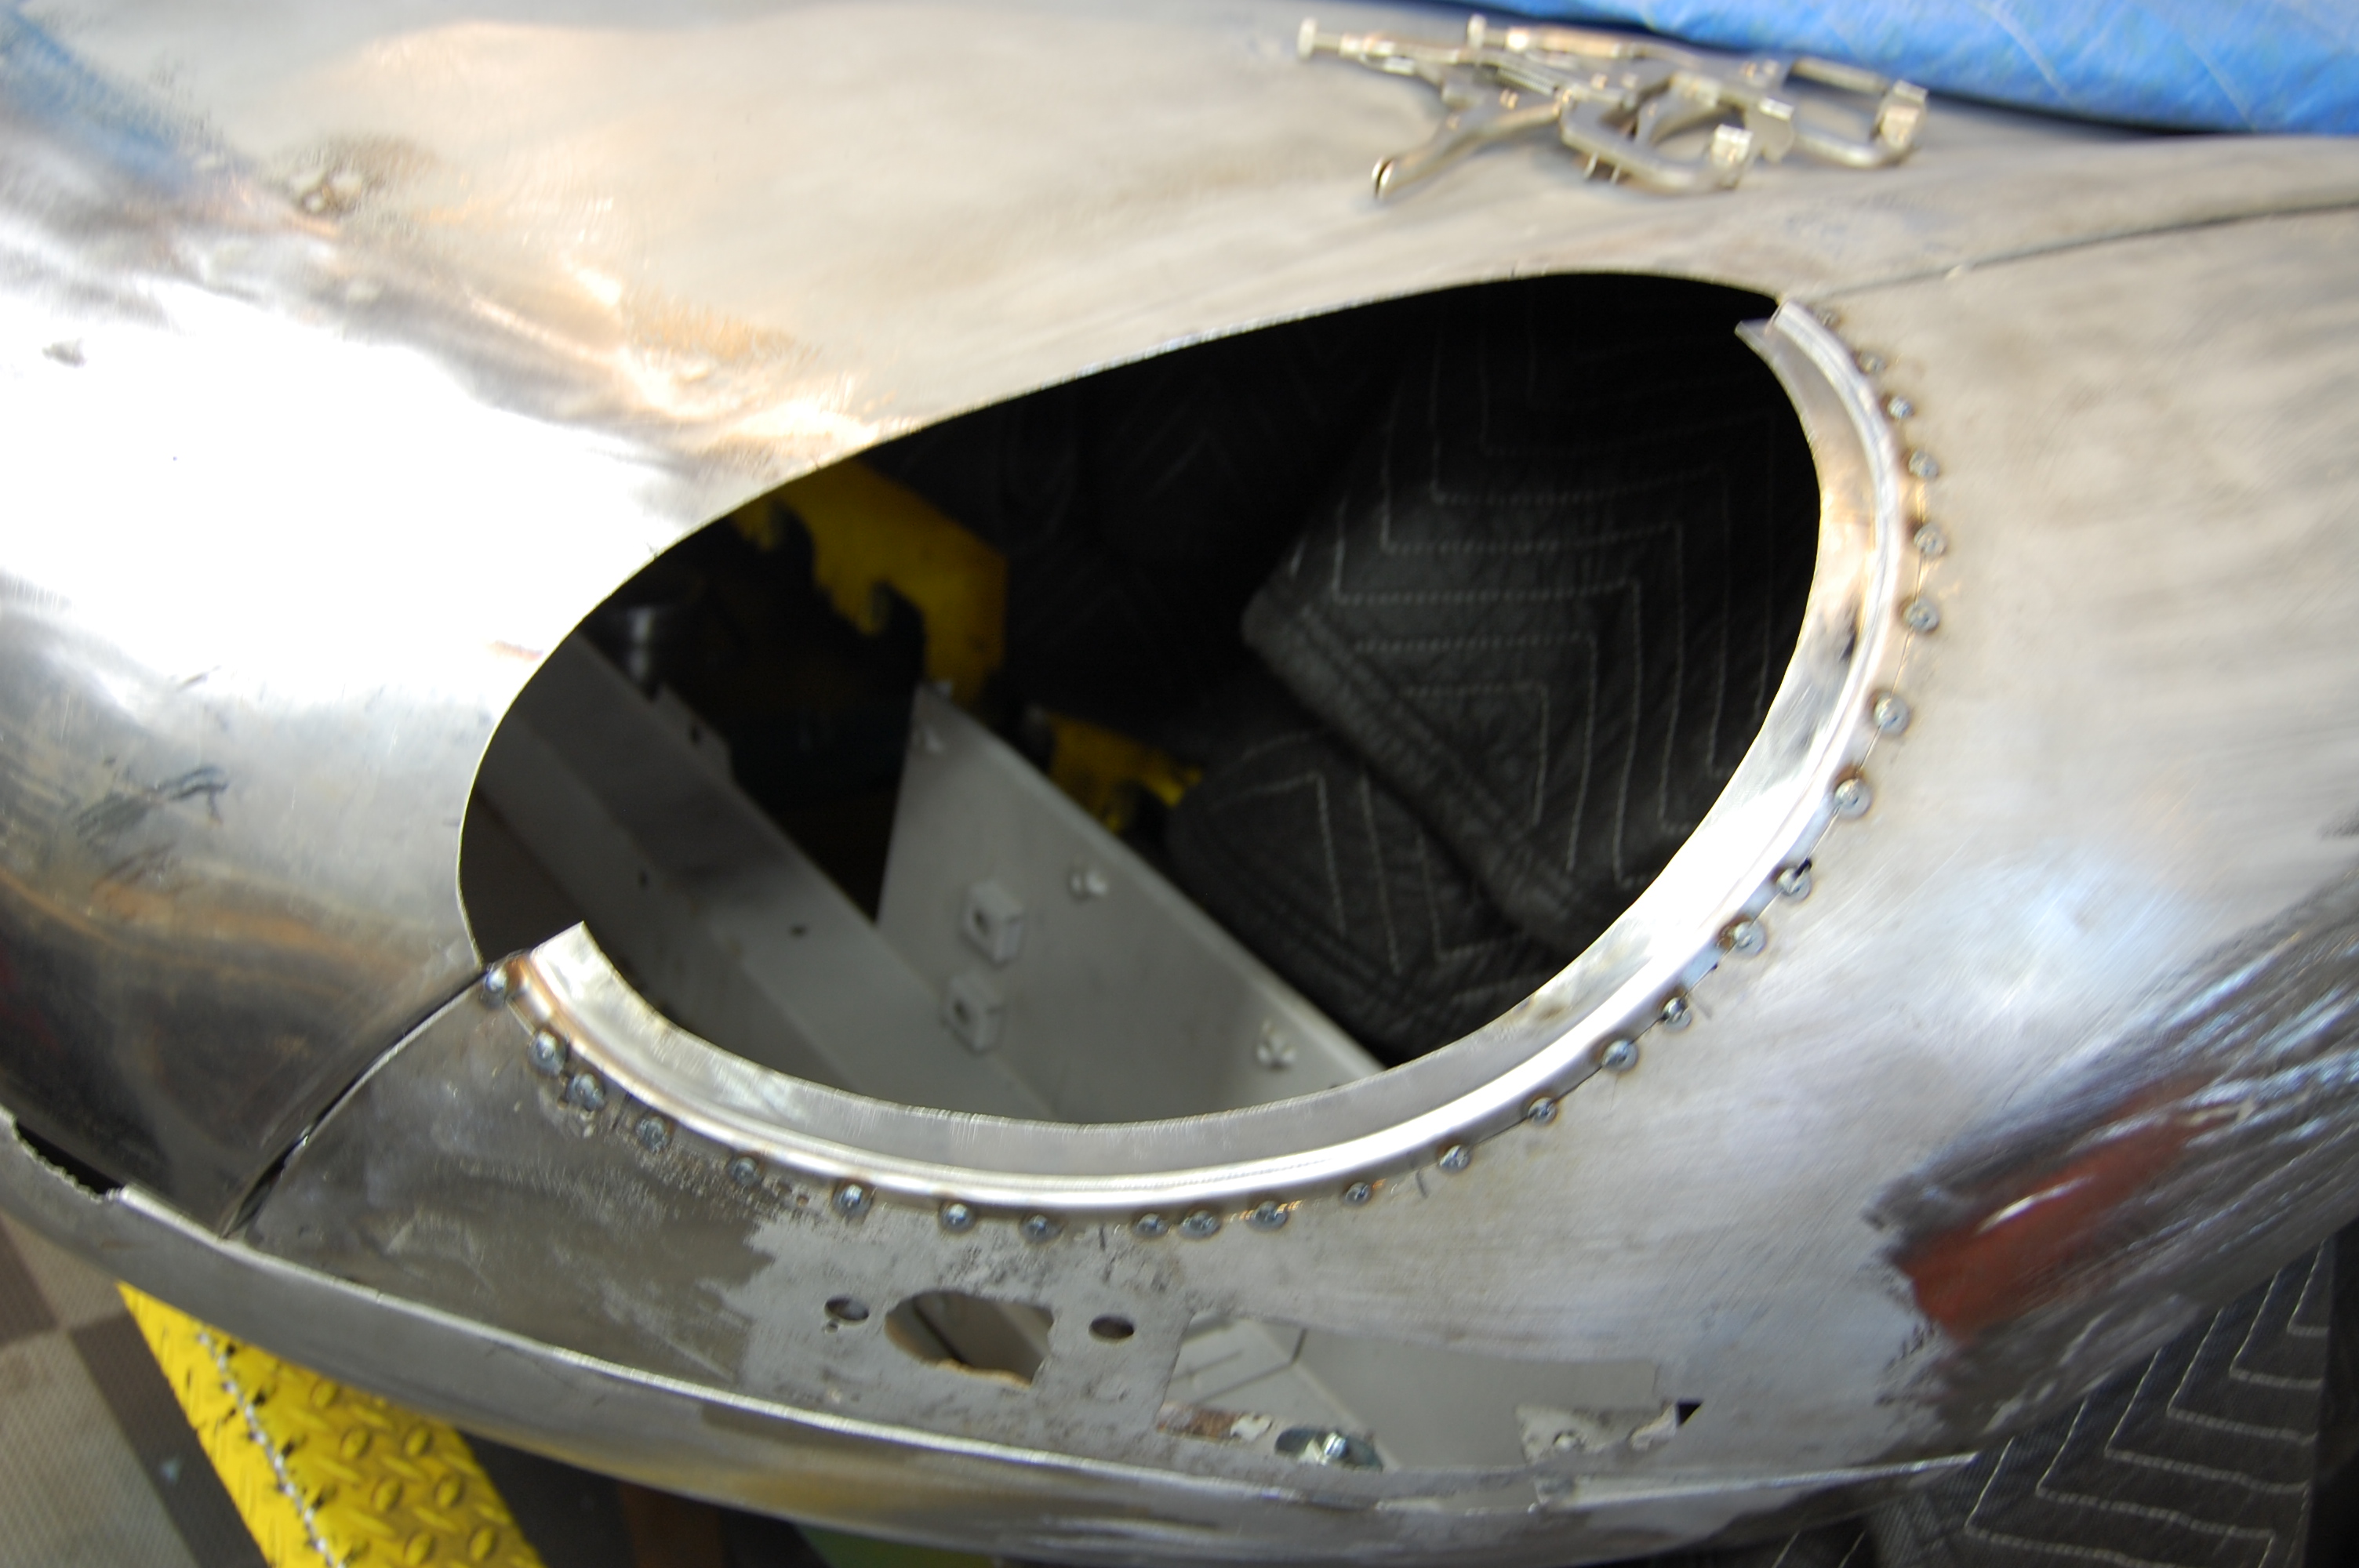
- In order to prevent problems while welding up the seam, we first fill these holes carefully using the TIG and a thick piece of filler rod – this is a tricky procedure that I have perfected over the years because E-types have SO MANY dent-puller holes in them – AAGGGHHHHH!!!!! These were especially tricky because some of the wing metal was really thing from past butchers grinding the hell out of it – and many of the holes were right on the edge – PLUS it was all vertical!

-
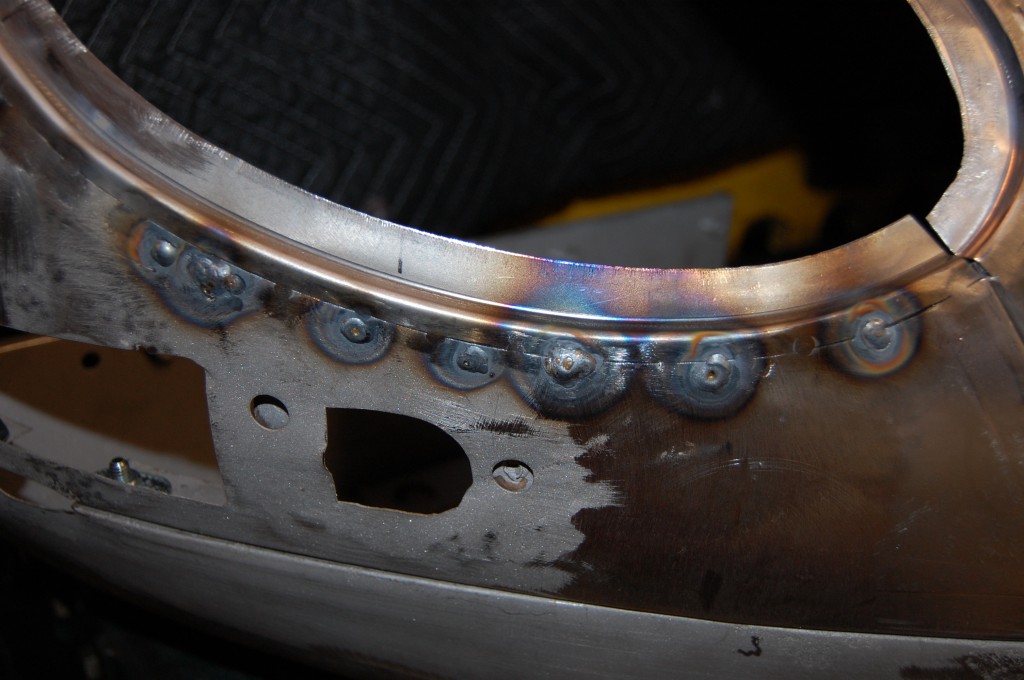
- Here’s a close-up of the rivet holes being filled. Usually there would be 5 on the Series 1.5 wing – this one had about a dozen – VERY common…

-

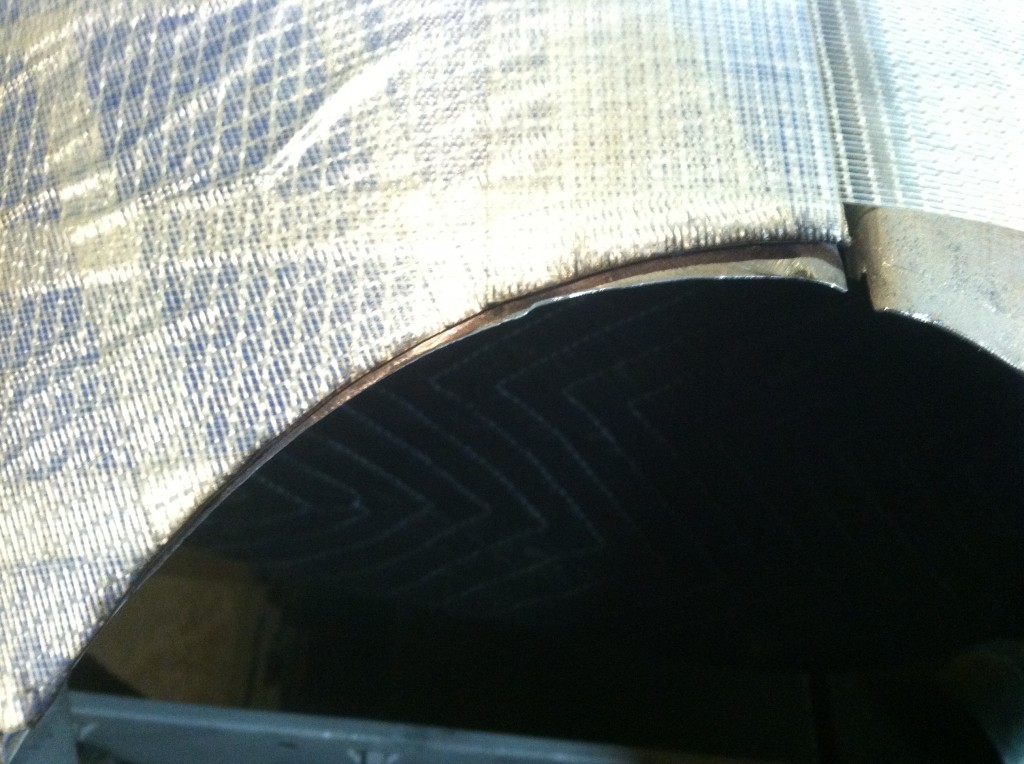
- Finally, we can go ahead and TIG the entire seam all the way around.

-
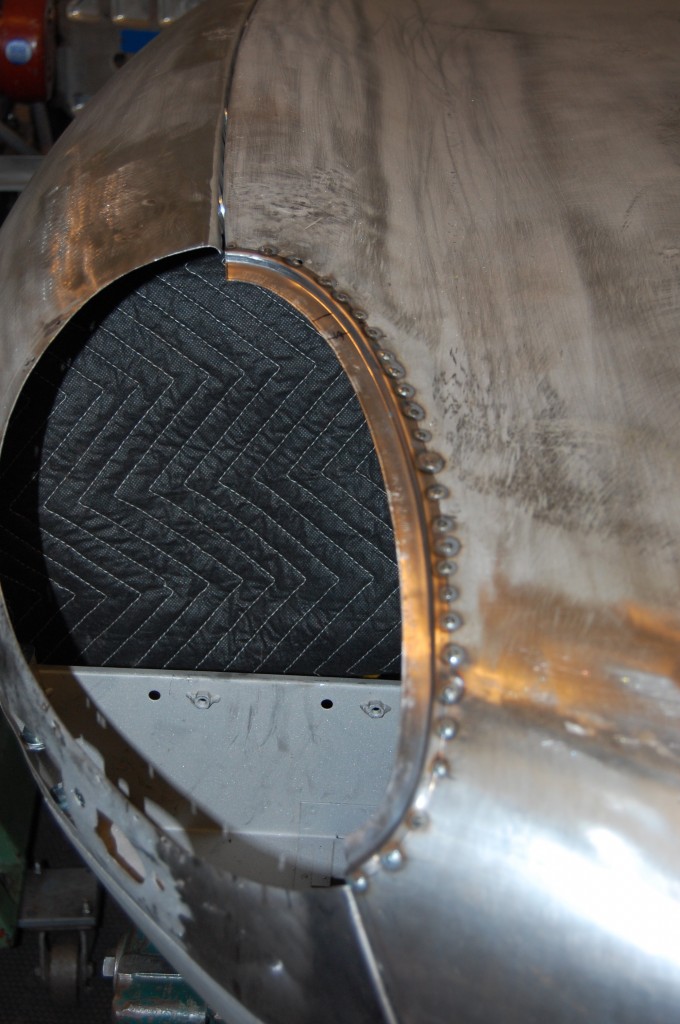
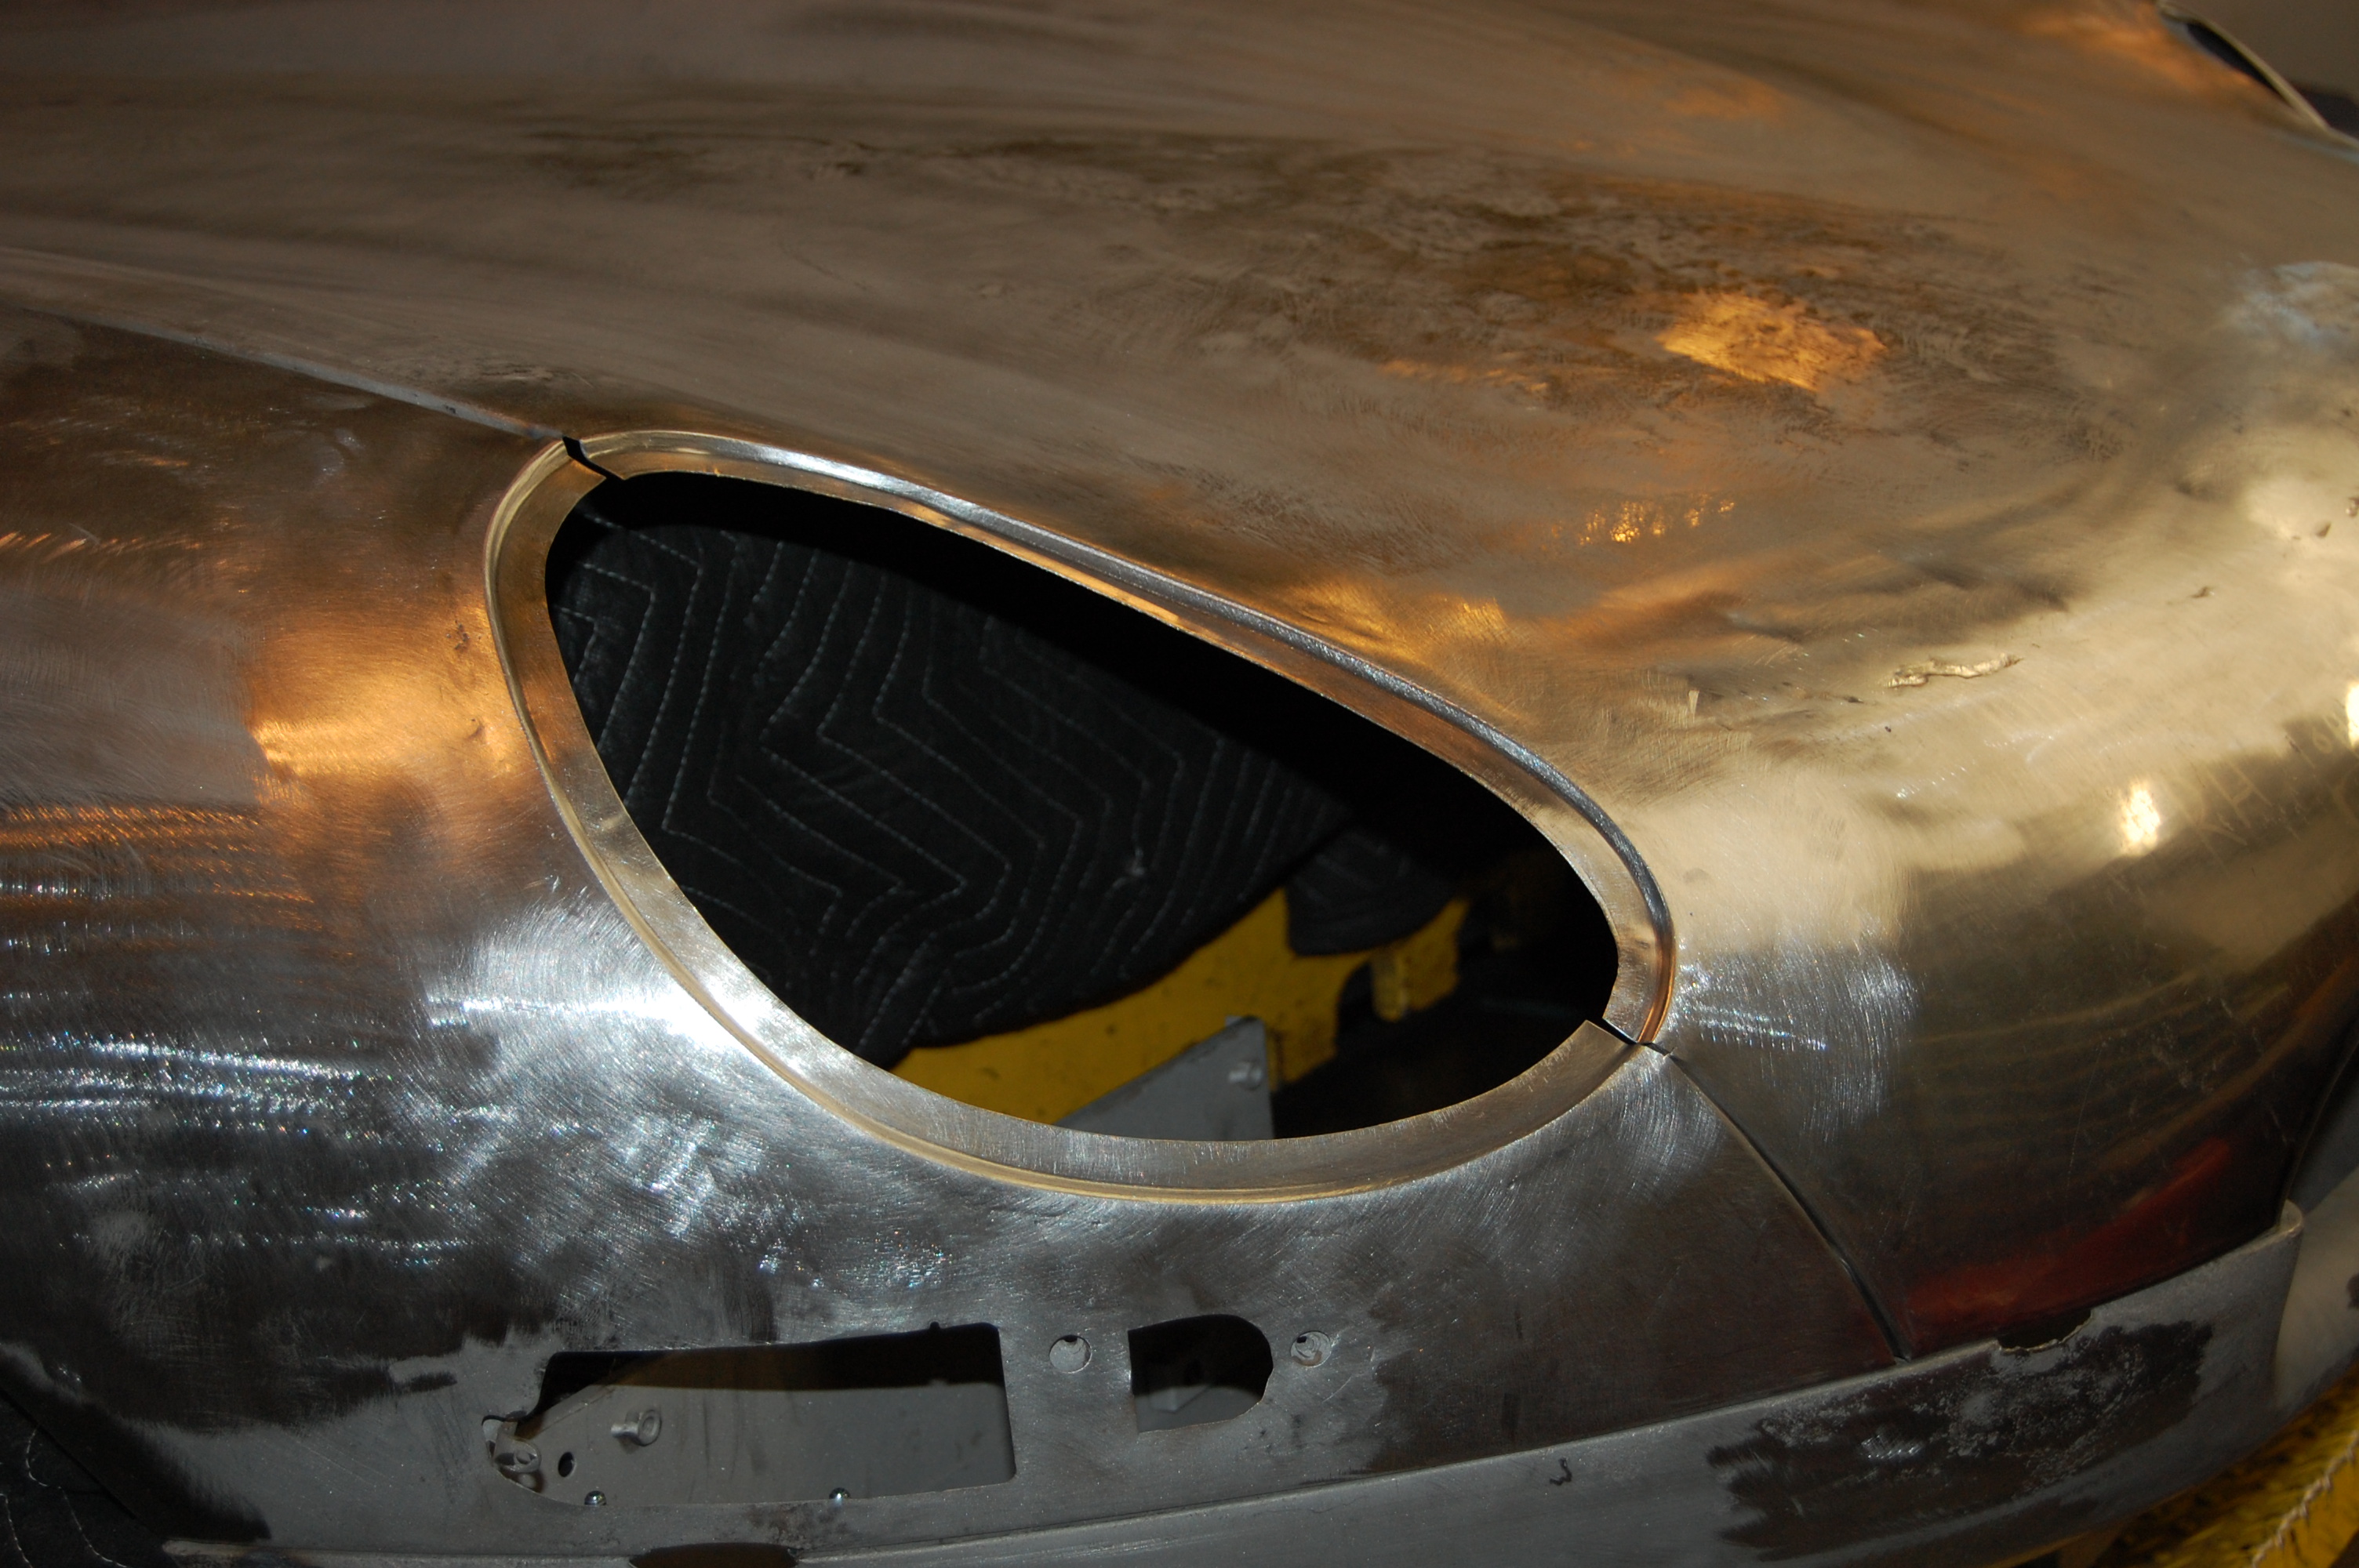
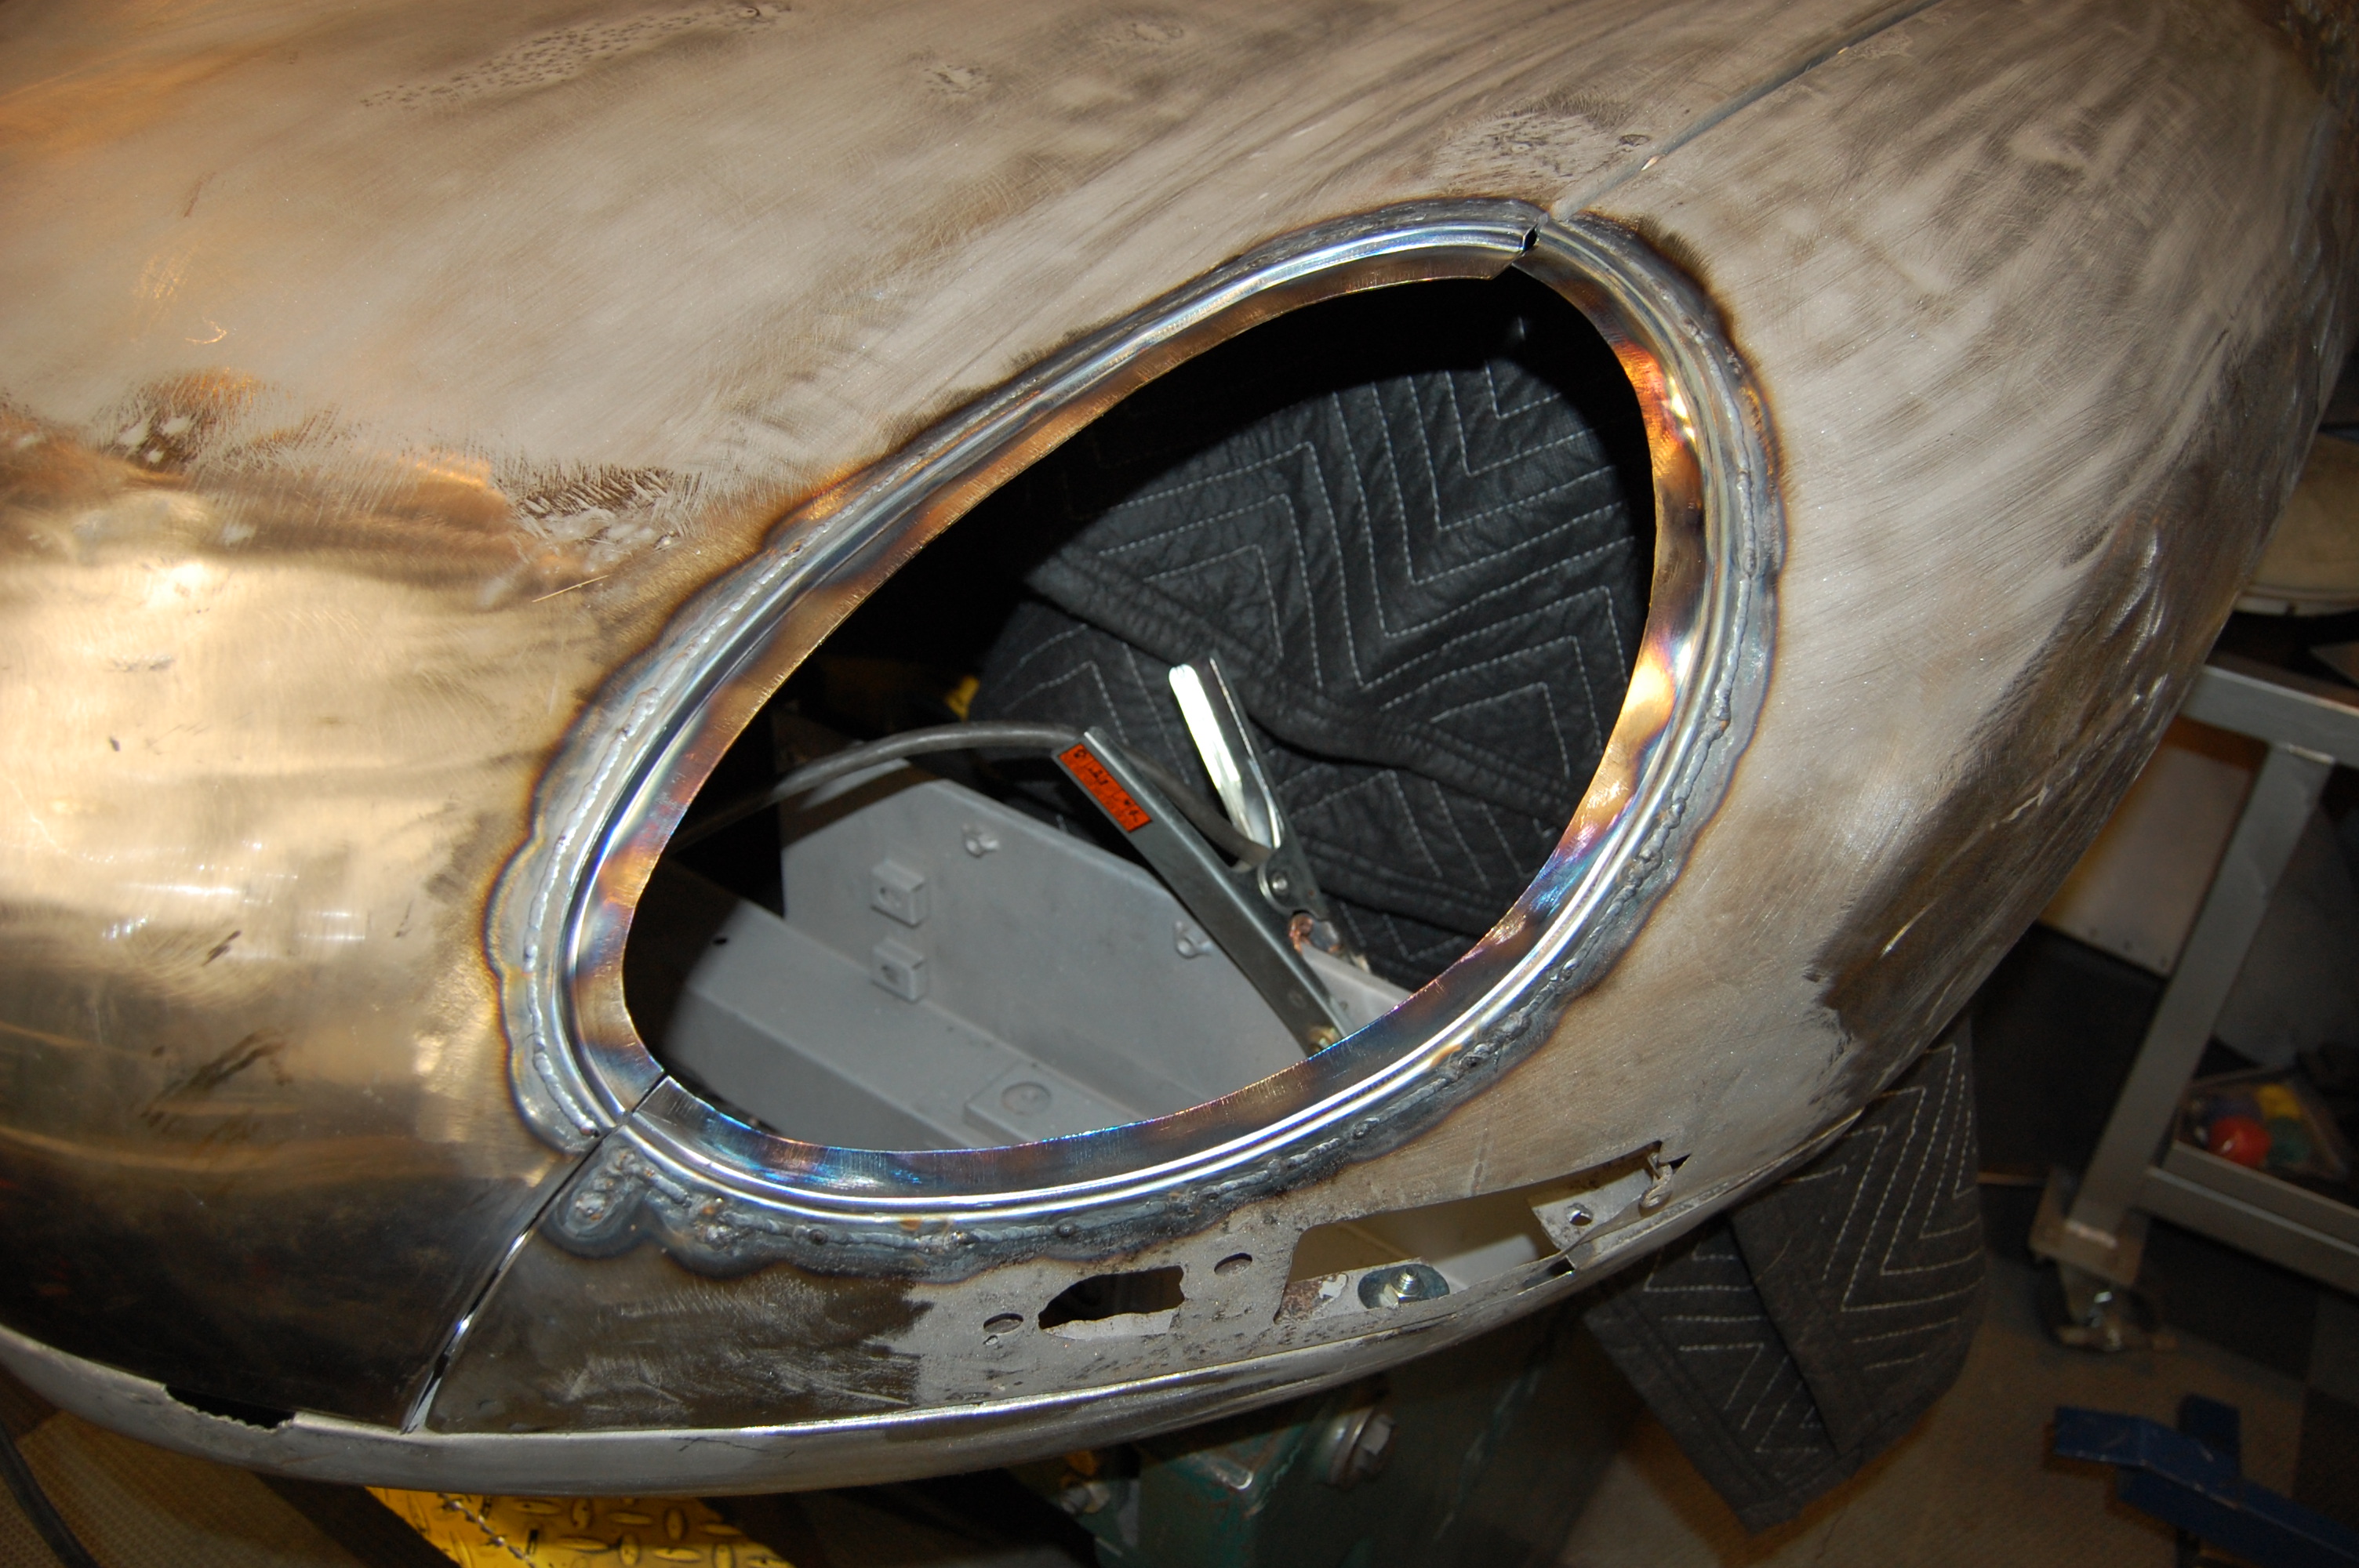
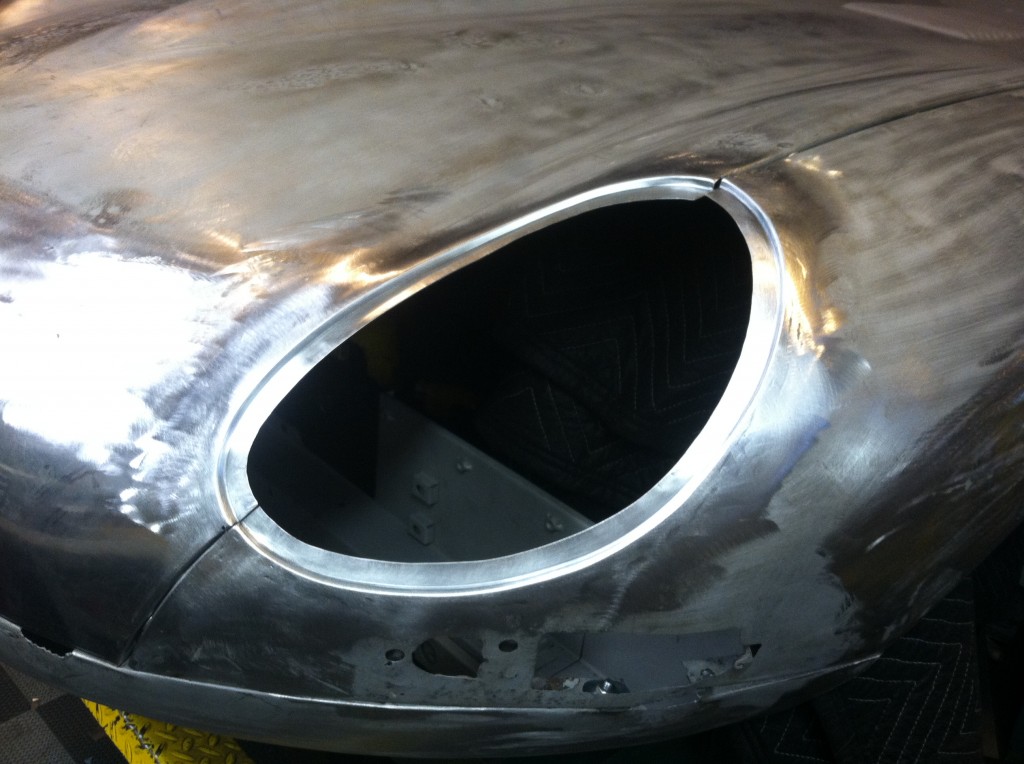
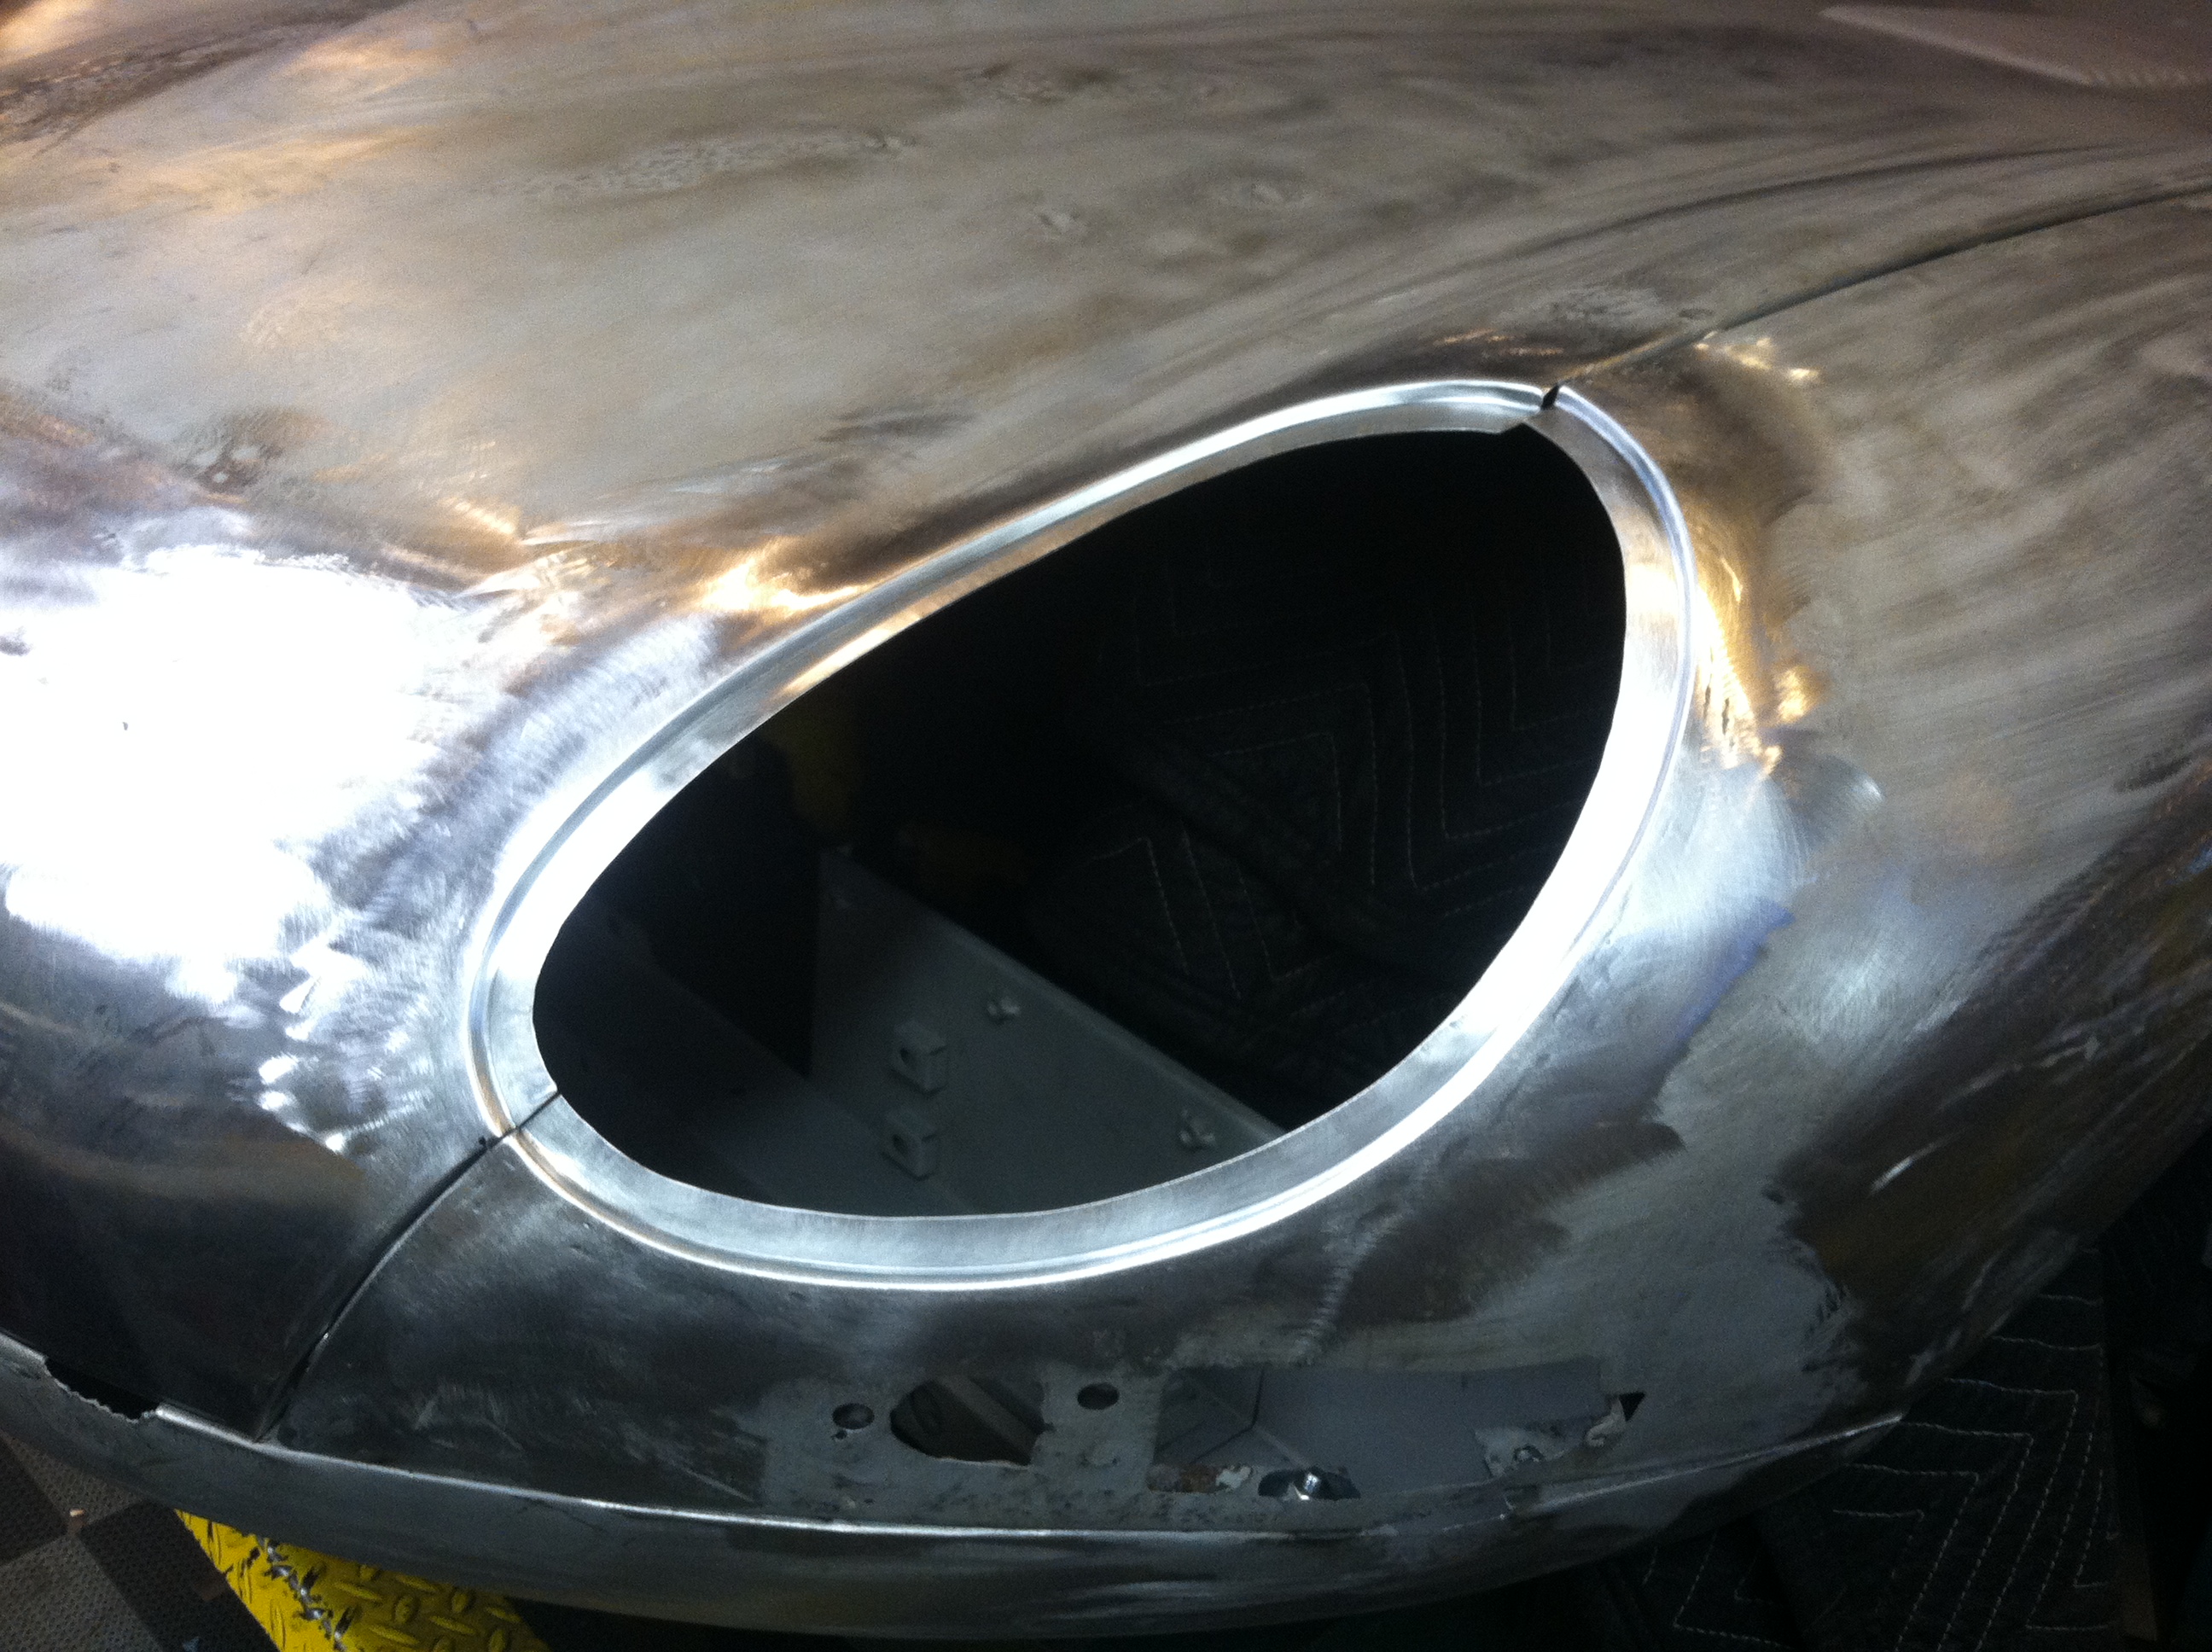
- And after some careful grinding and a little hammer and dolly work in places, VOILA! – It’s a Series 1 now!

-

- I can’t overstress the need to be very careful and patient when grinding off this weld – remove the weld, and NOTHING else!
-
- Are you kidding me!?! Get some of that, baby!
-
- Over to the other side now (I don’t actually do it that way, we do all the patterning, then all the cutting, then all the fitting, then all the tacking, etc…) These are the standard Series 1 patterns.
-

- Now you can REALLY see the excess material of this aftermarket center section. My new nose piece has about 1/2″ extra on it still, but that center panel has TONS!
-

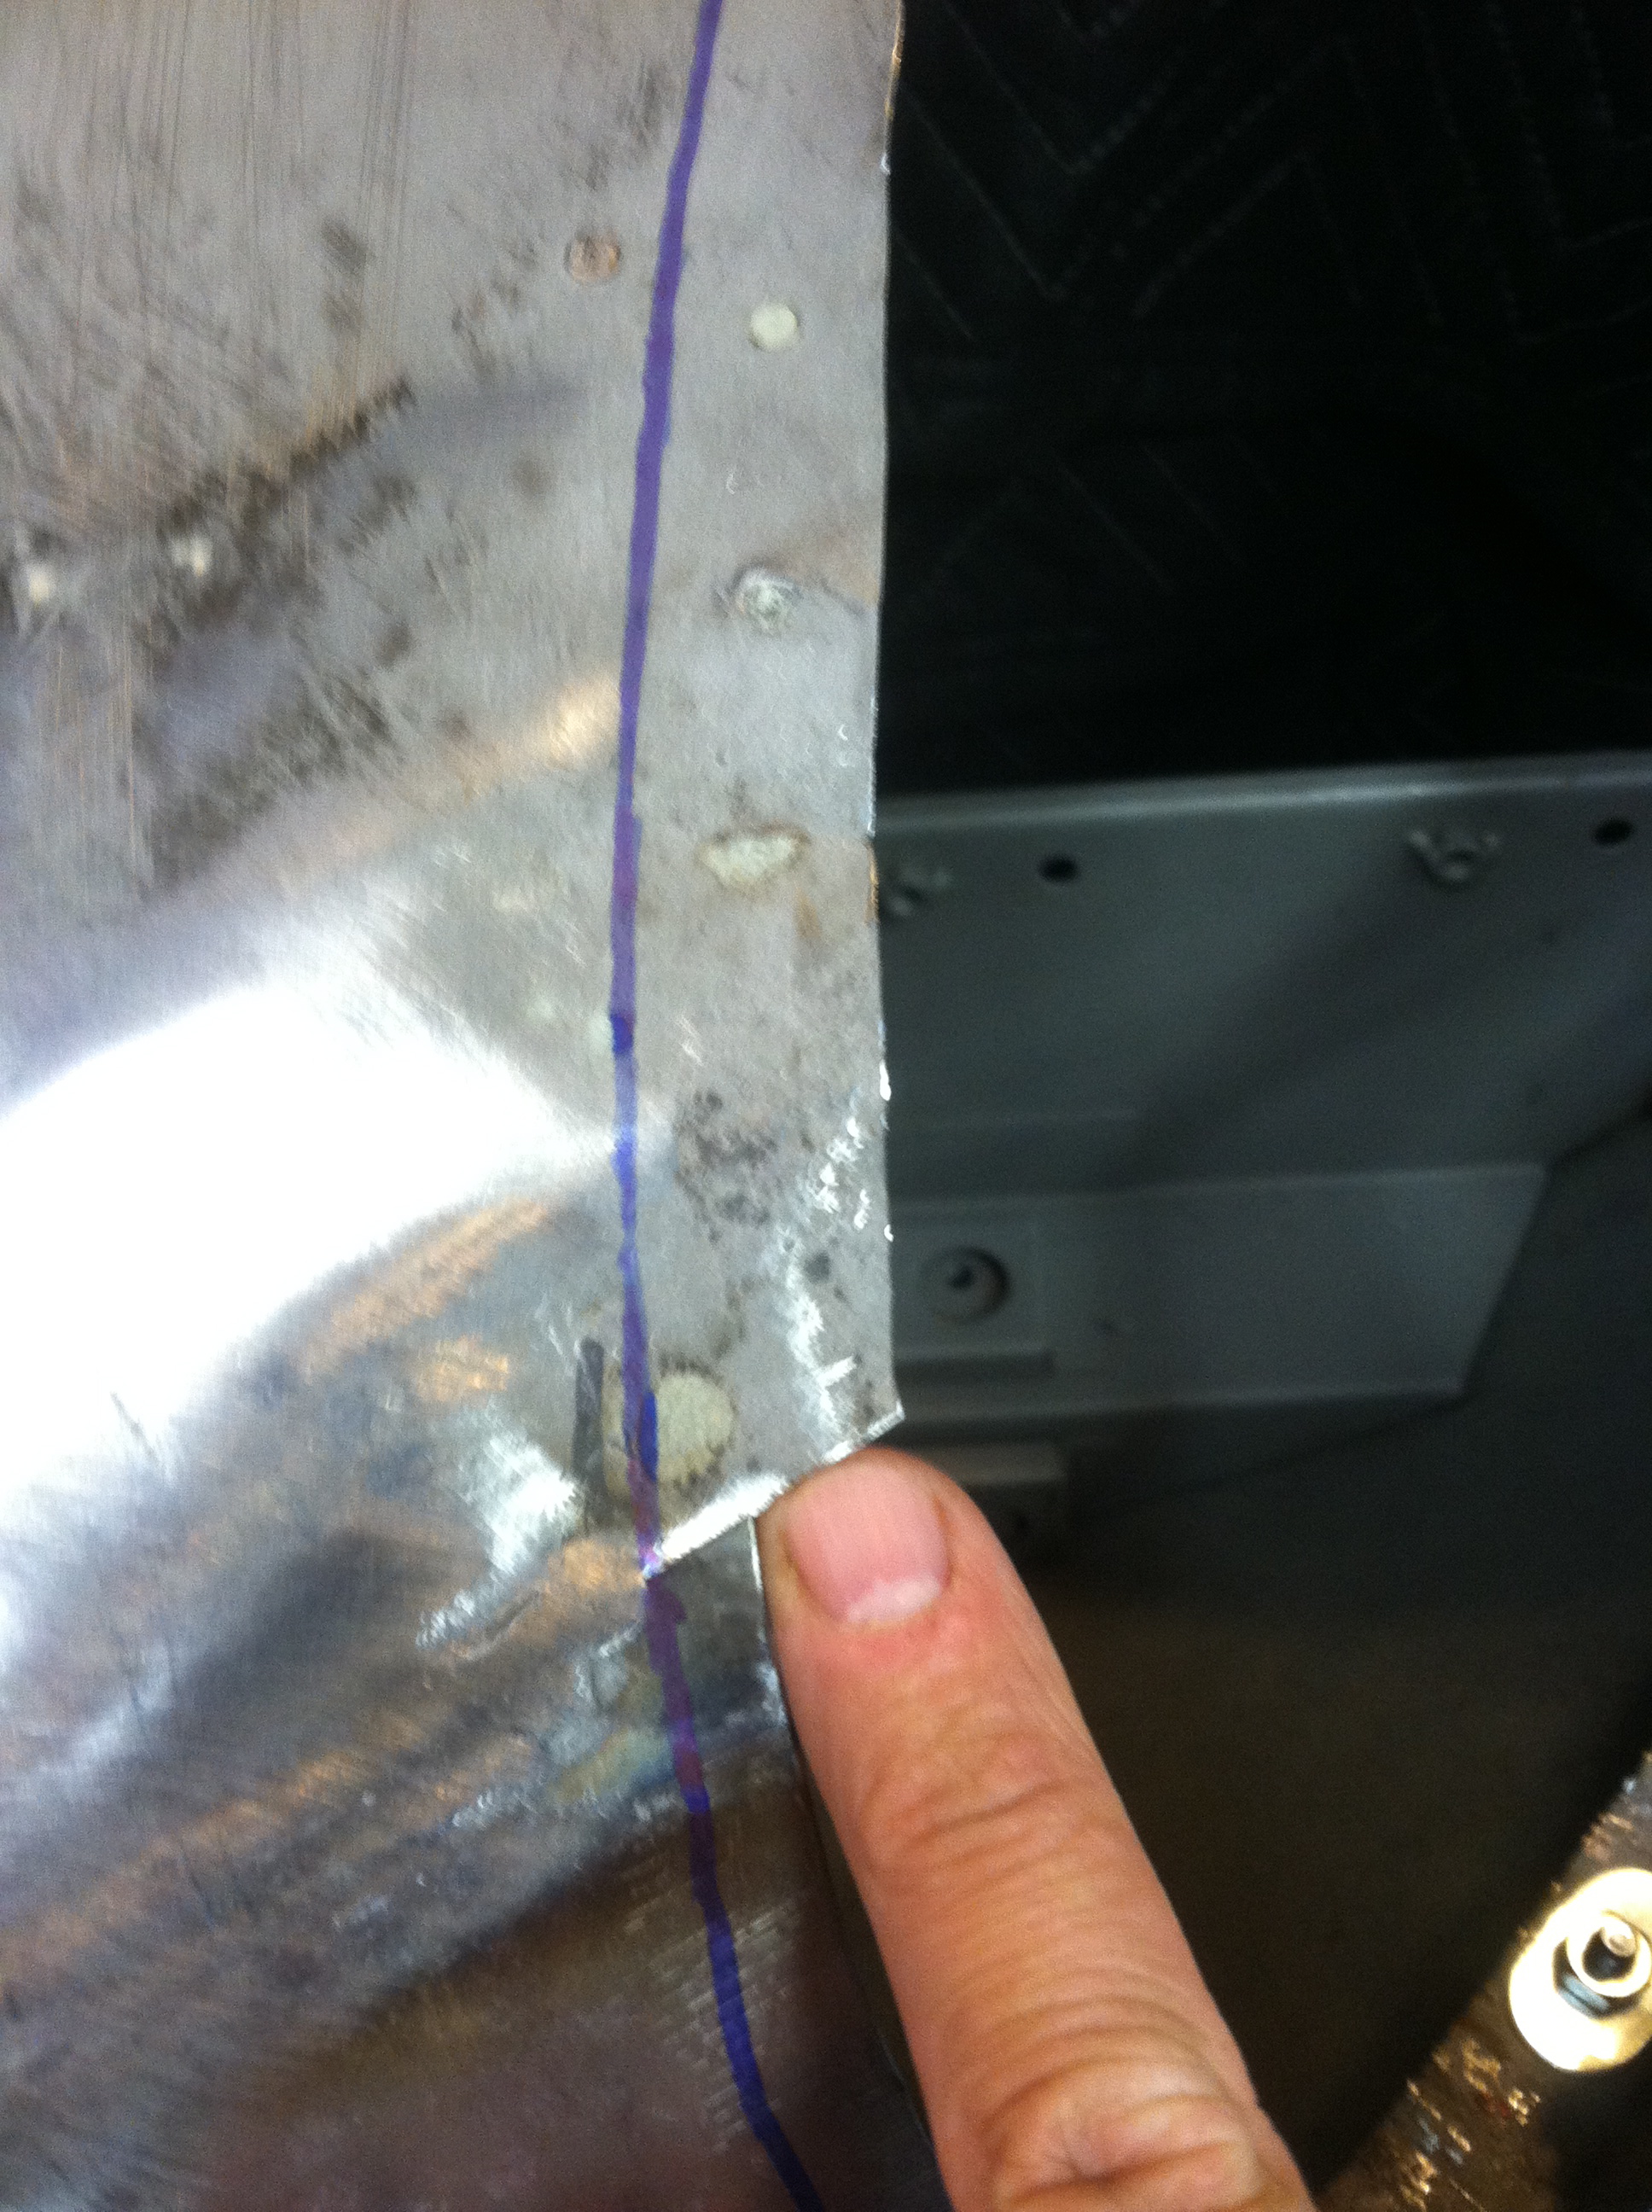
- This is my pinky for size – it was the best looking finger for the photo… It’s about 3/4″ too big, and was hammered down in around the Series 1.5 scoop (and covered with 18 tons of filler…)
-
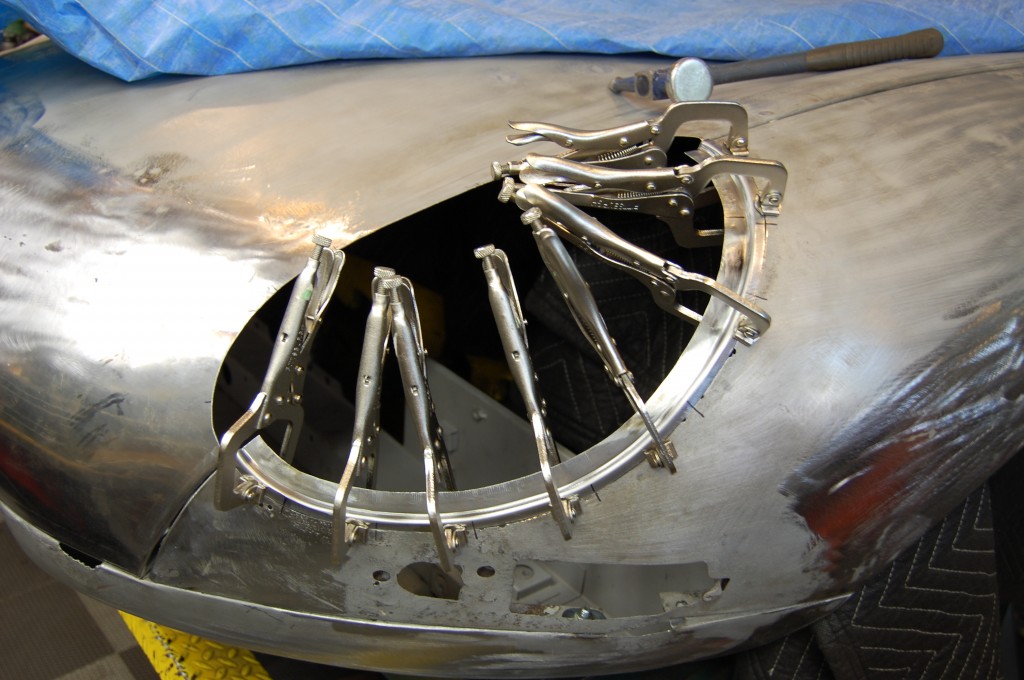
- Fitting the flanges after opening up the hole 1/4″. Remember, you DON”T do that if you are underlapping the flanges!

-
- All tacked in.
-

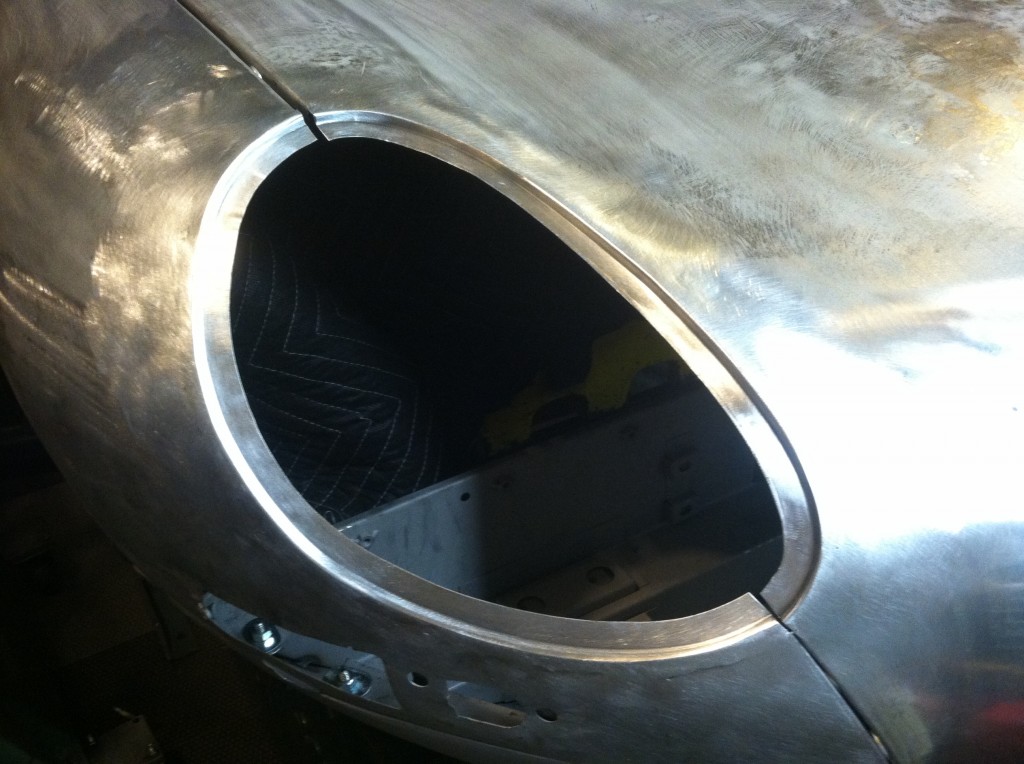
- Fast forward a bit and both sides are TIG welded into place.
-
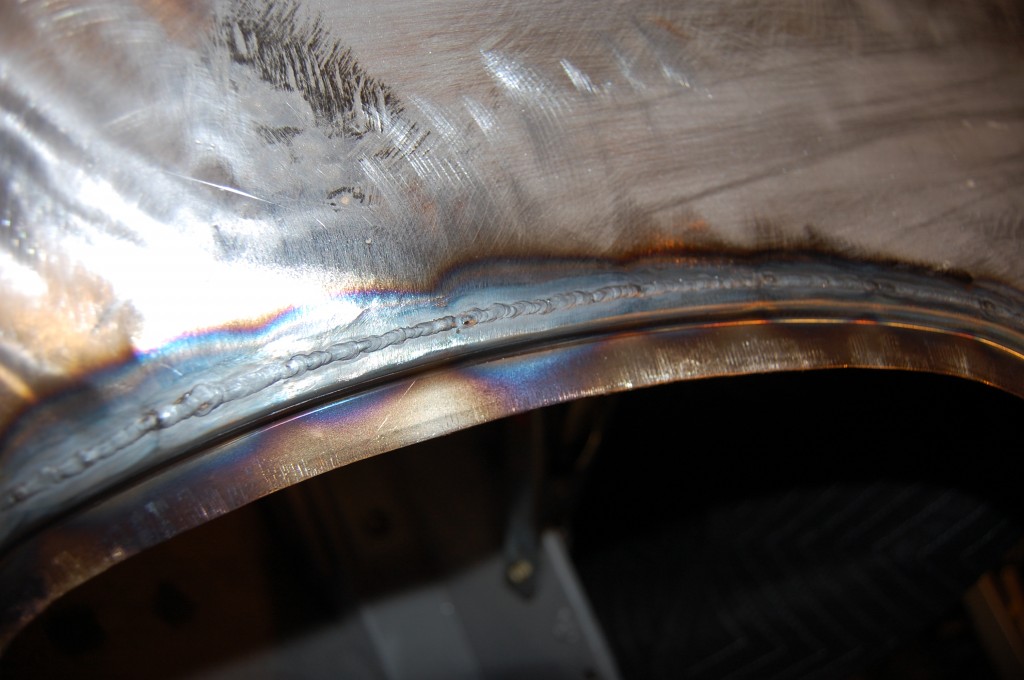
- Close up shot of the TIG weld – which introduces very little heat, and also very little excess material that you have to grind back off!

-
- Carefully ground down.
-
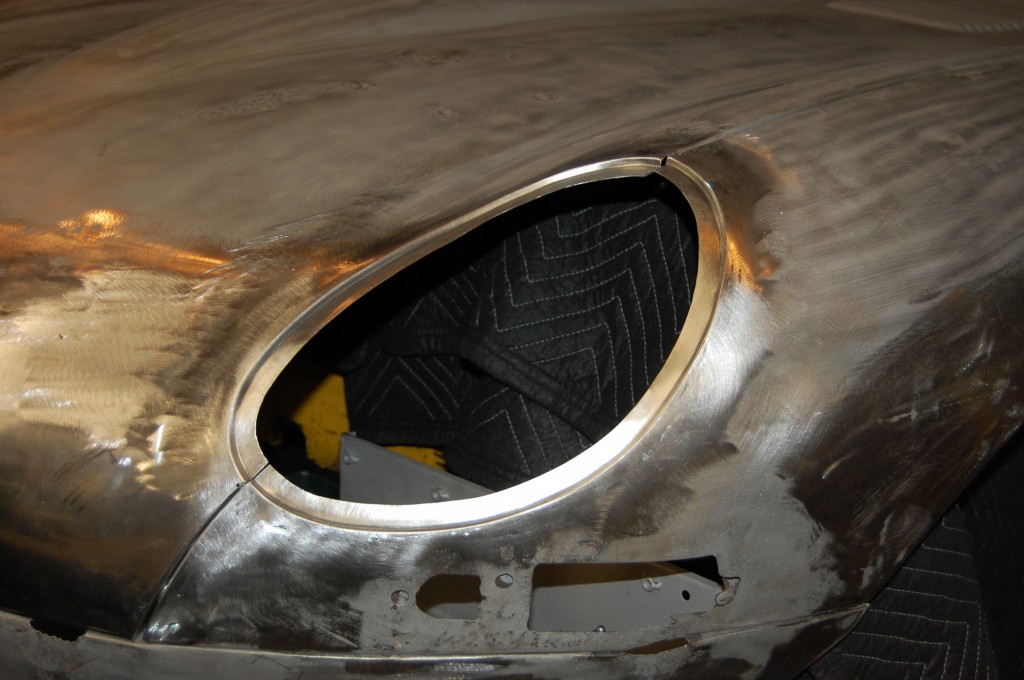
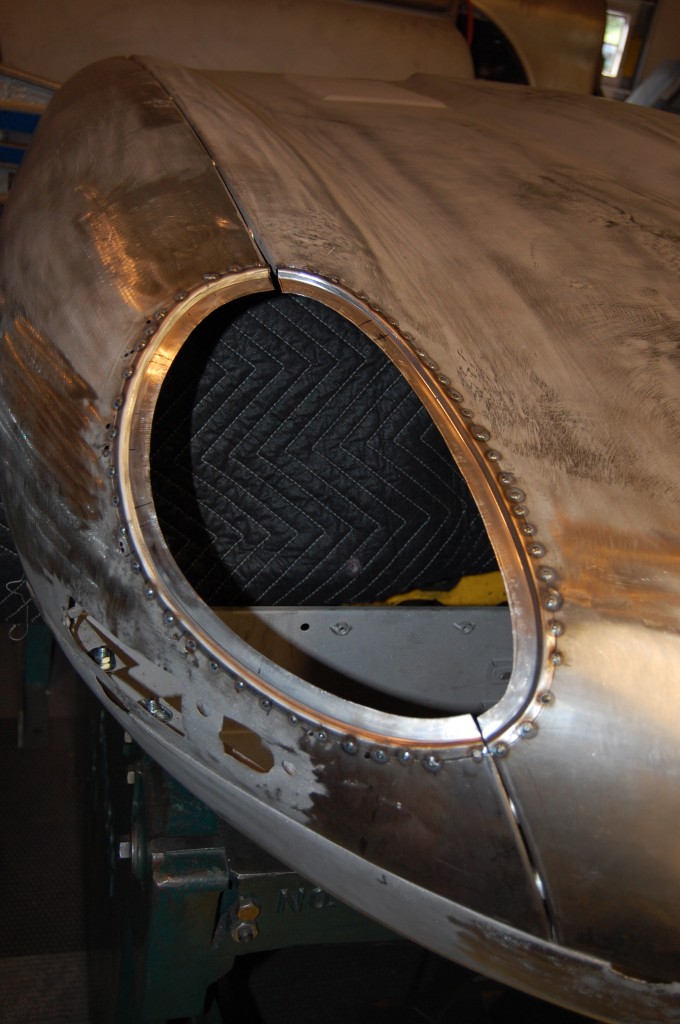
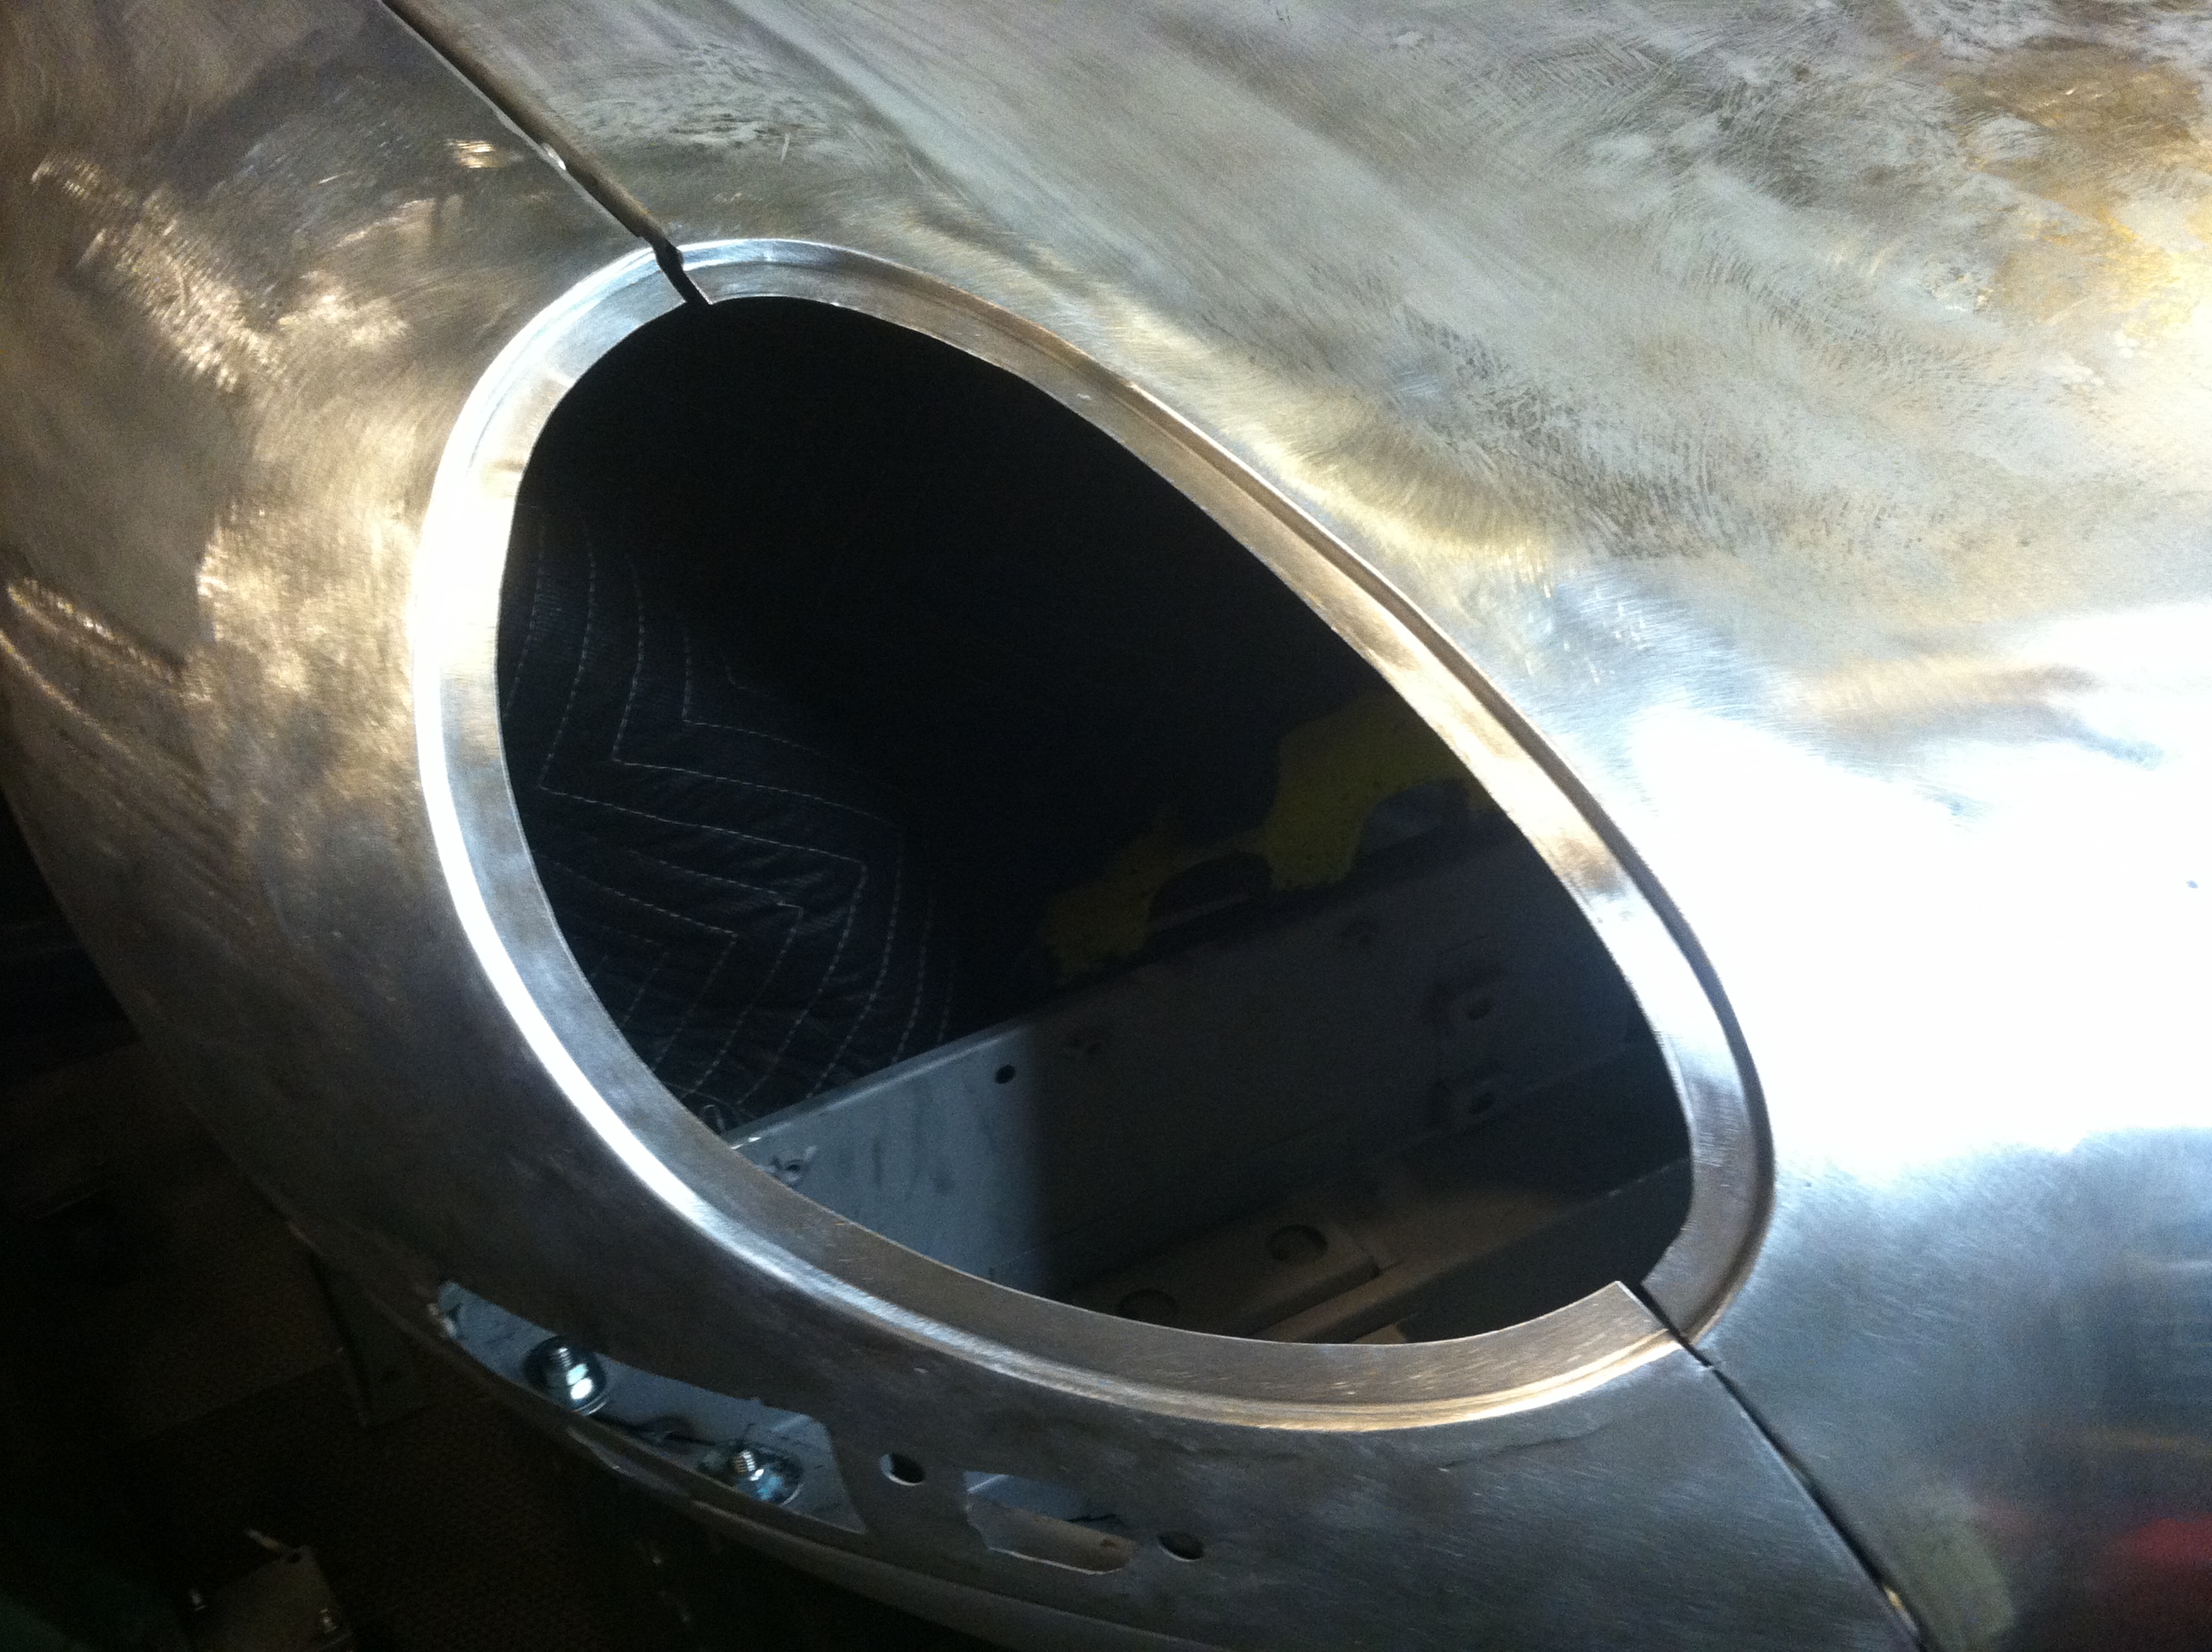
- Another shot of the finished product!

-
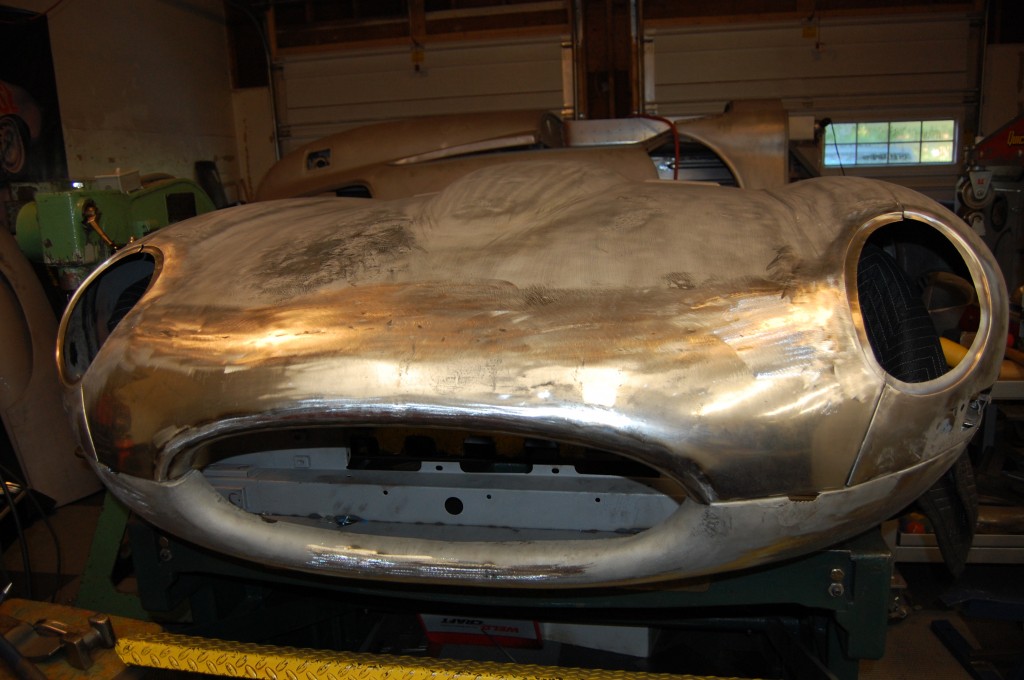
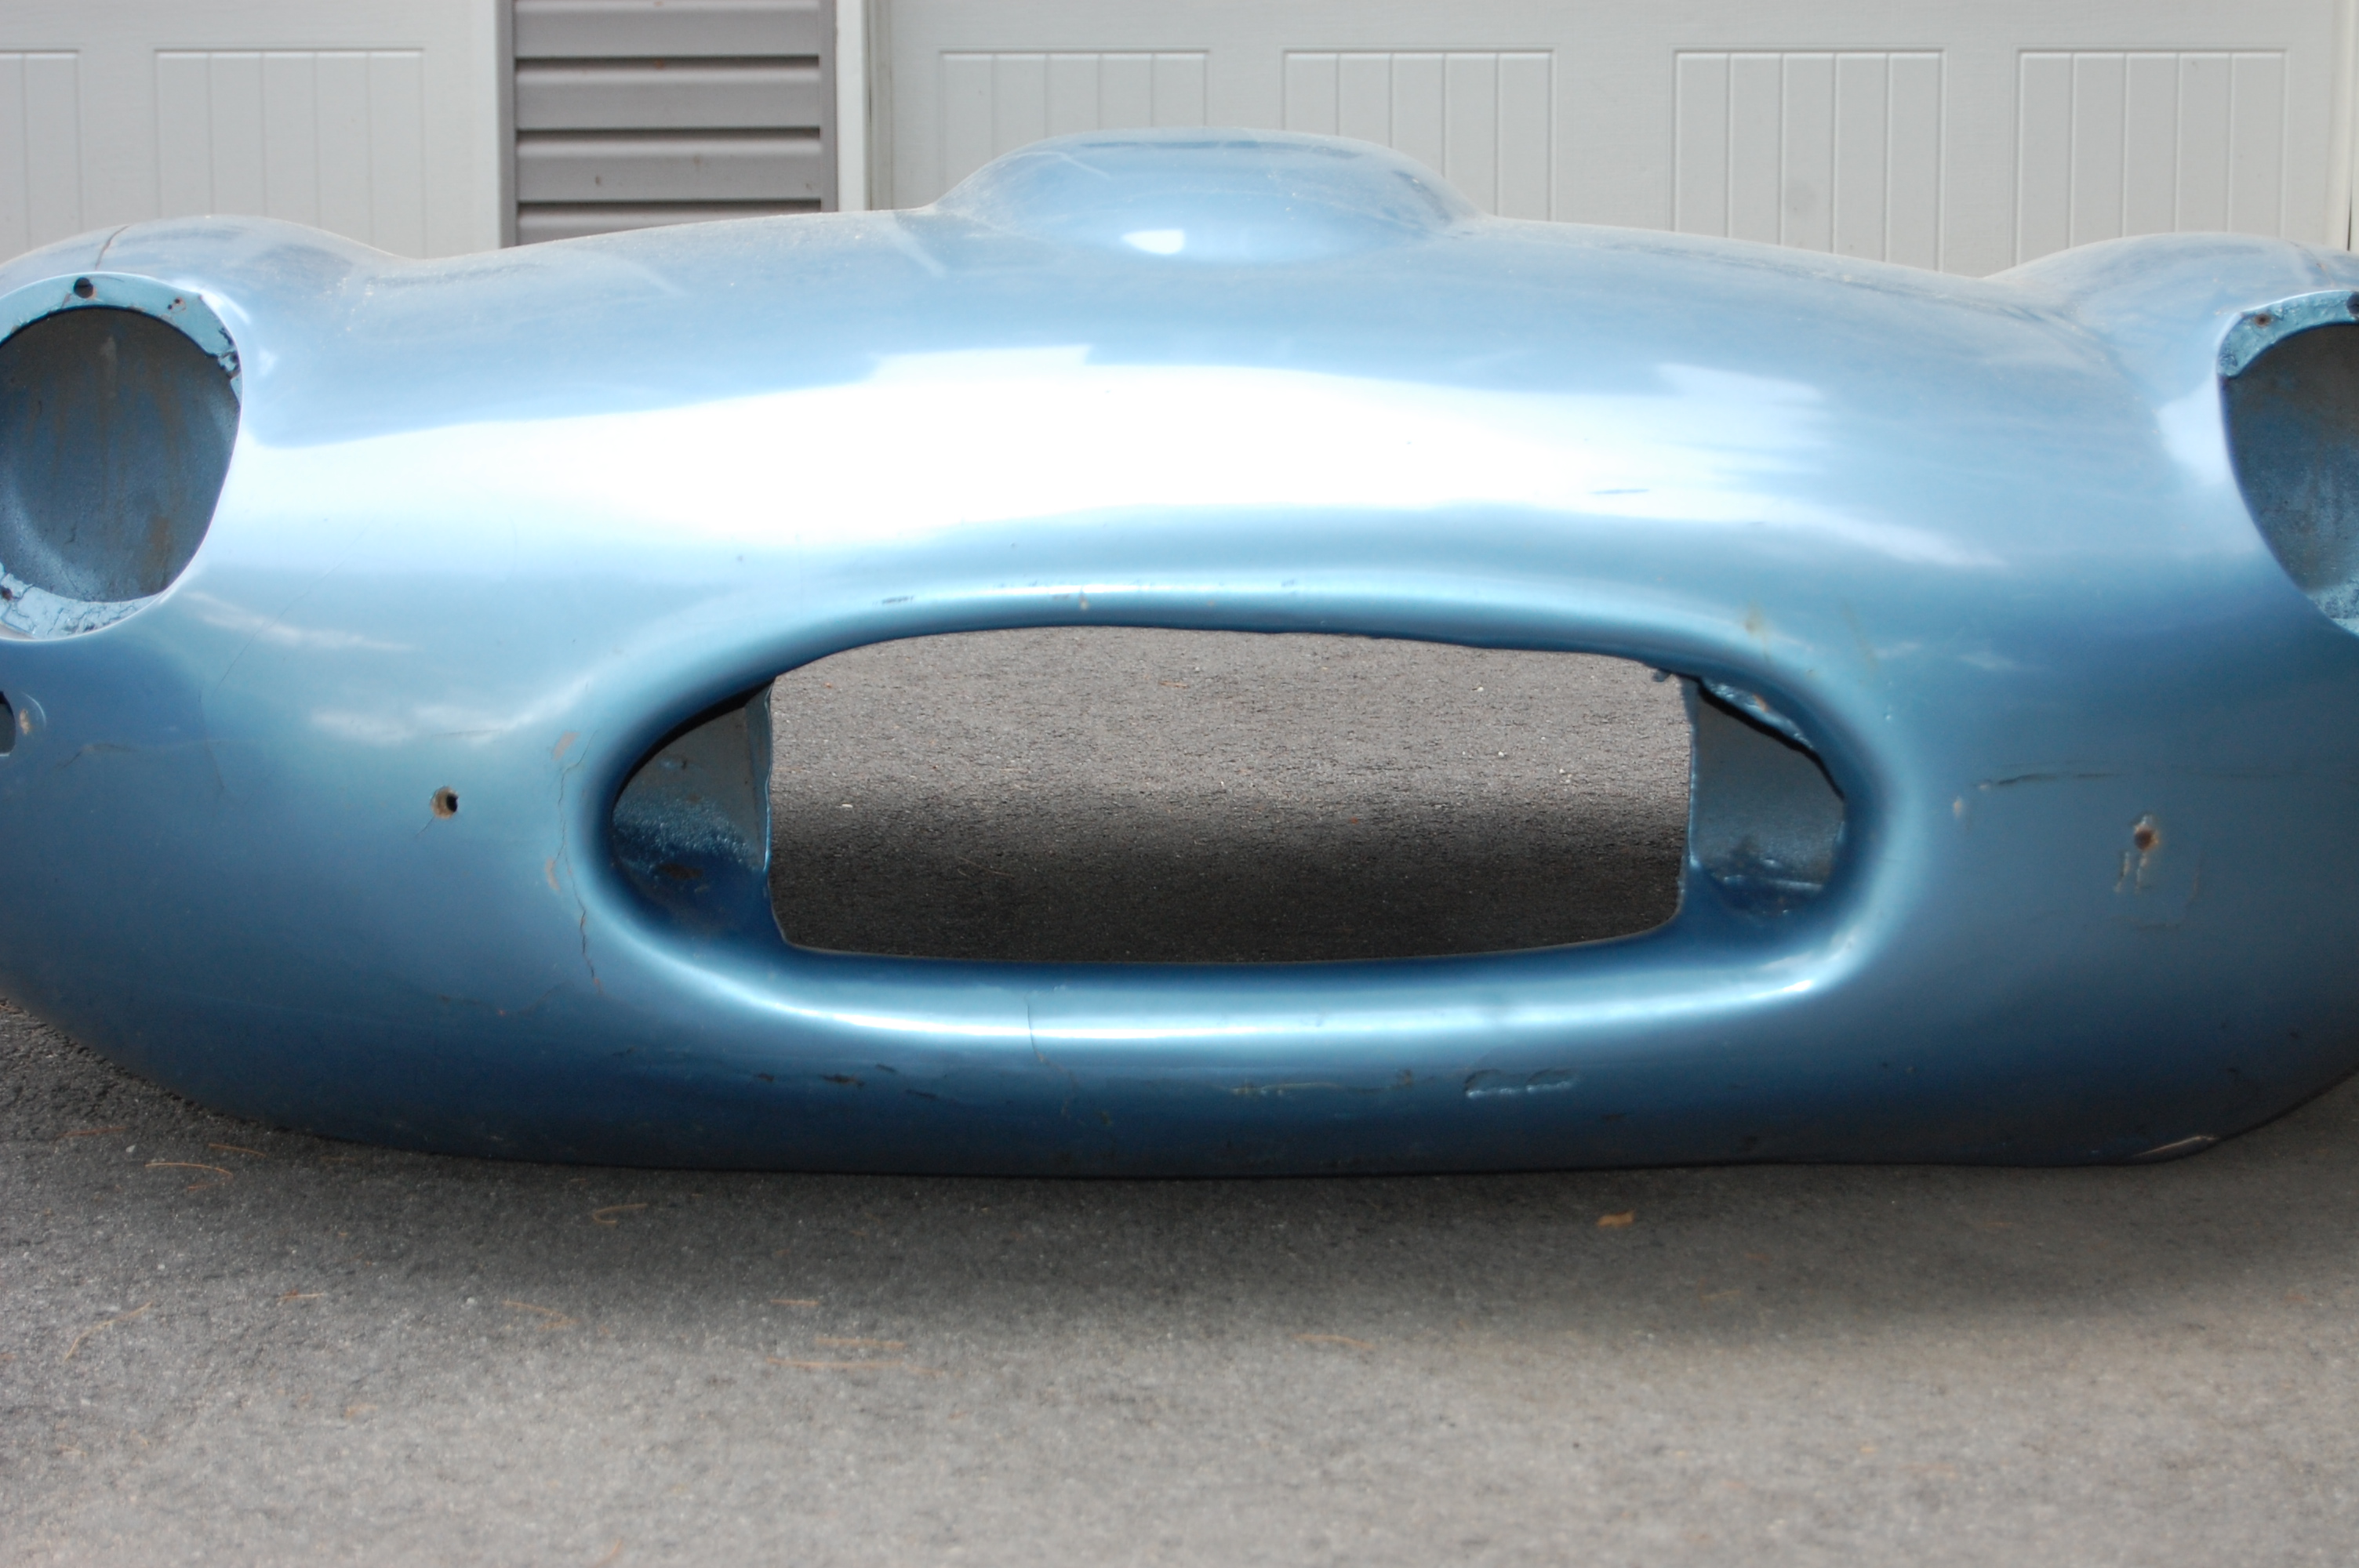
- Yeah, baby – SUCCESS! Here you can see a good shot of the new nose piece – after Brent and I spent a few hours “coaxing” the repaired wings and center panel to fit together nicely… This bonnet has come a LONG way since…

-

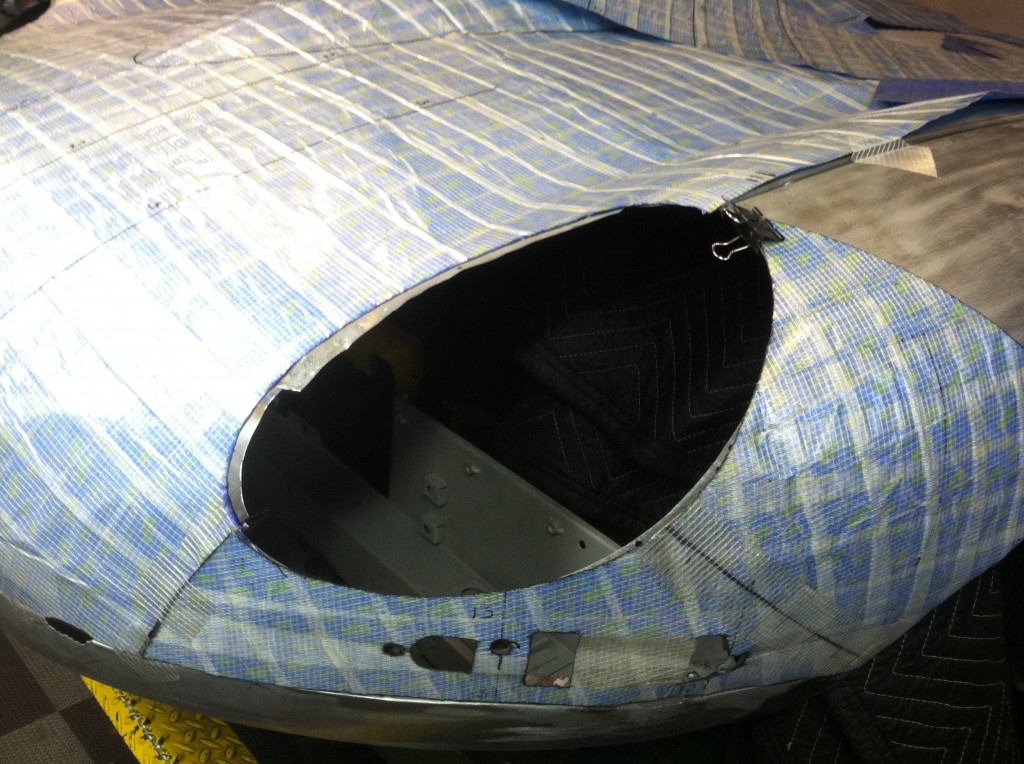
- …OH MY GOD! I forgot how bad it was! We had to replace nearly everything in this photo – first 6 inches of the center section, first few inches of both wings, and we replacd the lower valance completely with a better original piece.
-
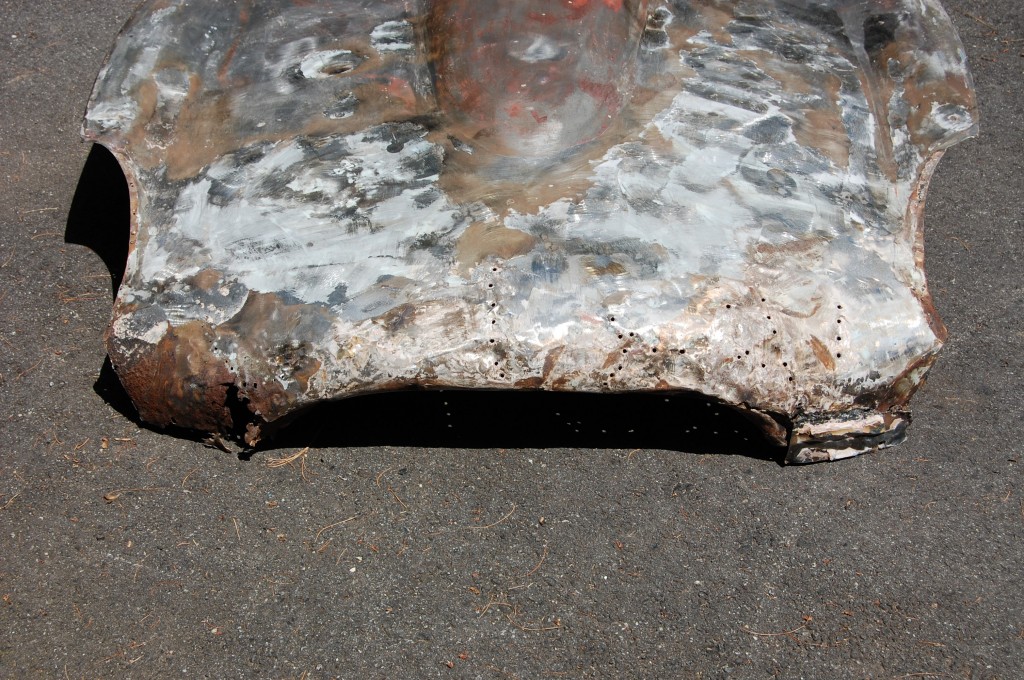
- And here’s another shot of what we started with – YIKES!

-

- But nothing we can’t handle! This was once wrecked, rusted, poorly assembled and filled with Bondo Series 1.5 open headlight bonnet – WITH an aftermarket center section! Now, it’s a PERFECT Series 1 E-Type bonnet!