I always seem to save the center section until last – especially when I know it’s going to be tricky – and this one turned out to be even trickier than it looked…
This car was badly damaged in a front-end collision at some point in its past, and it was hammered back out. It’s hard for me to judge how good or bad that work was – overall, they got close to the bonnet shape, and it’s obvious that someone put ALOT of work into the task. They didn’t get the mouth shape right, though, and relied much too heavily on filler to complete the repair, so that the end result was a car that was obvioulsy wrecked at first glance.
My goal was to correct the mis-shapen mouth and leading edge, smooth out the very lumpy flat sections between and behind the headlight openings, and repair some other small tears and issues.
In the end, the work on this panel took alot more time and skill that I had anticipated, and I considered throwing in the towel several times along the way and pulling a less-damaged center section off the shelf, but I stuck with this one and I’m pleased with the end result.
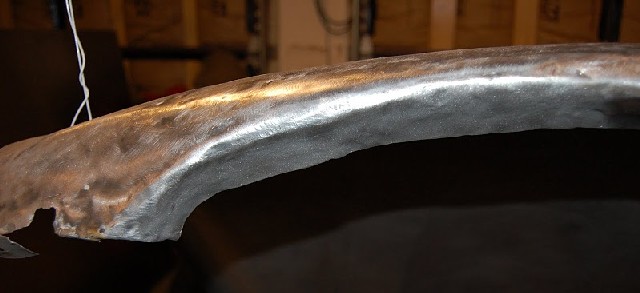
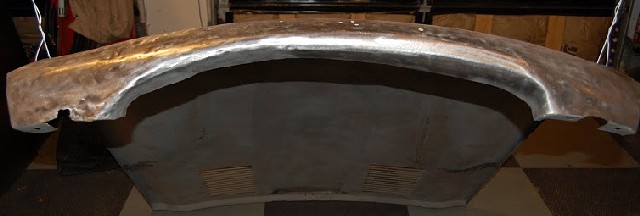
The day we ground the filler out of the bonnet was cold and the fine dust created was all over the place, so I didn't end up taking any photos of the bonnet in bare steel before it was taken apart, and it would have helped show how far we came with this one. This picture shows the leading edge of the center section as it existed under the filler - LOTS of filler...
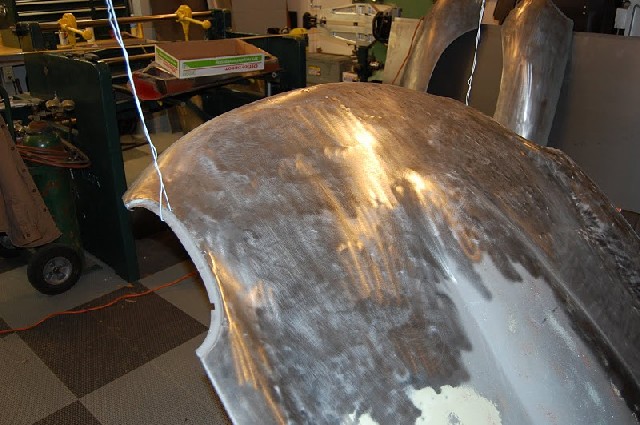
Look just to the left of the light reflection - there was a large, deep valley there that looked like it was there on purpose in an attempt to shrink out some of the stretch on that side. It was covered with filler, of course, and had to come out - if not just because it's the right thing to do, then because that is right where the inner valance flanges are bonded to the outer skin. Of course, both sides weren't even connected to the outer skin up there when the bonnet was taken apart...
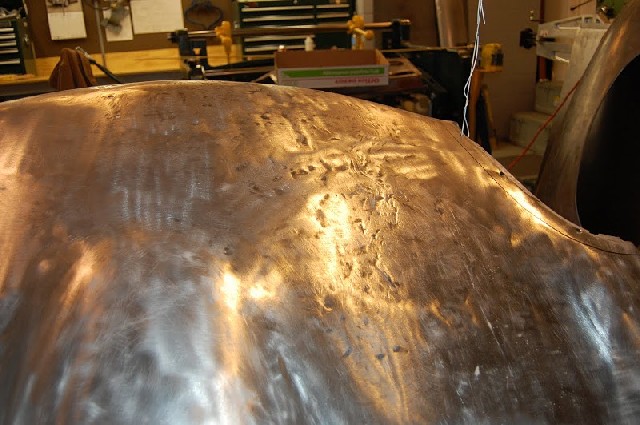
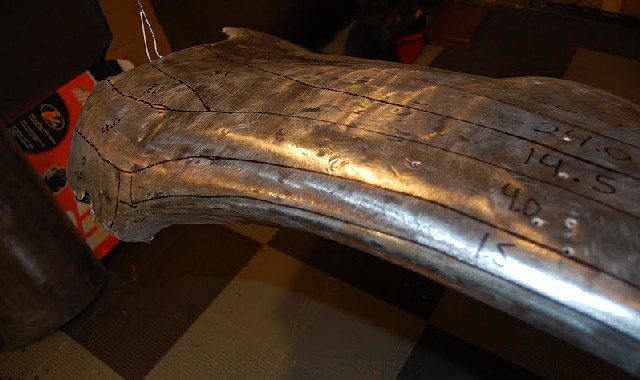
Here's a shot of the excessive hammering that took place on the RH side - this whole section was a "minefield" of deep lumps and creases (they don't look as deep on film but trust me...) - with alot of stretch...
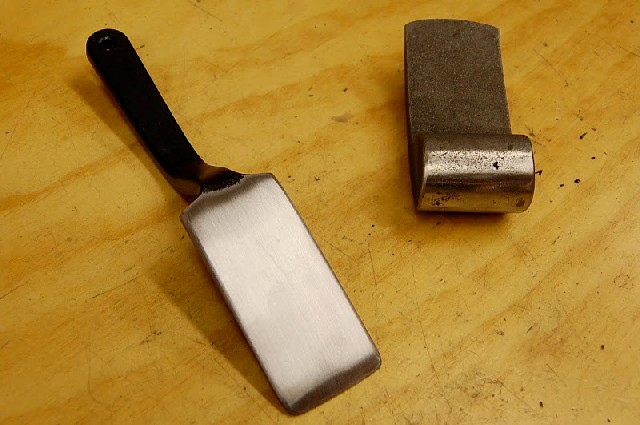
To start in on the lip, I modifed some tools. I heavily rounded all the edges of a new slapper so that the sharp edges did not crease the panel when I was slapping on the inner curve of the lip, and I also cleaned up and smoothed my favorite "E-Type lip dolly" which is cheap but perfectly shaped - I have had it since I was 19 - I got it right after "the big wreck"...
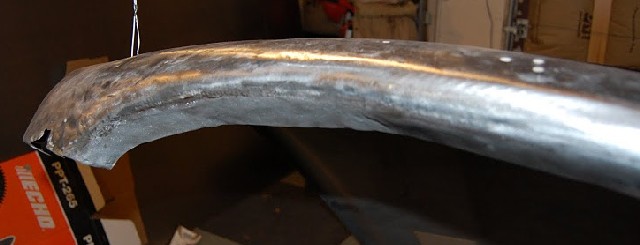
With the slapper and dolly, I came this far after only a few minutes - it was easy to take that sharp edge off, but that was just the beginning...
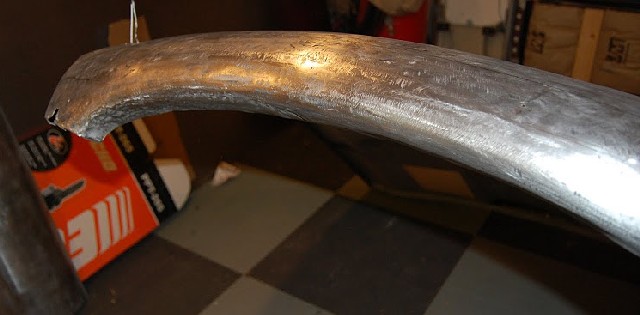
Here is the same section after planishing - we've smoothed things out considerably, but it was very nerve-wracking... I had to constantly adjust the air pressure to walk the fine line of smoothing the lumps without stretching things even more than they already were.
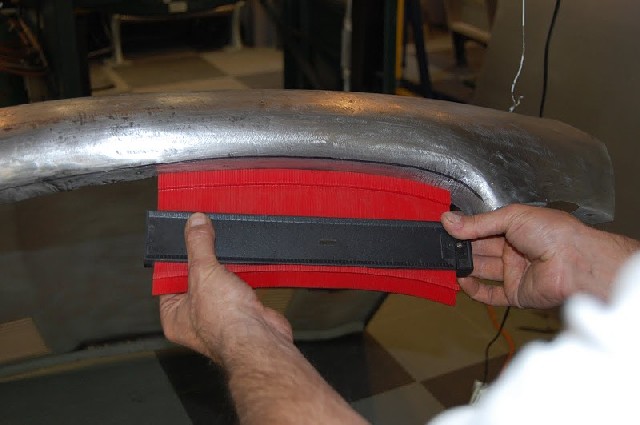
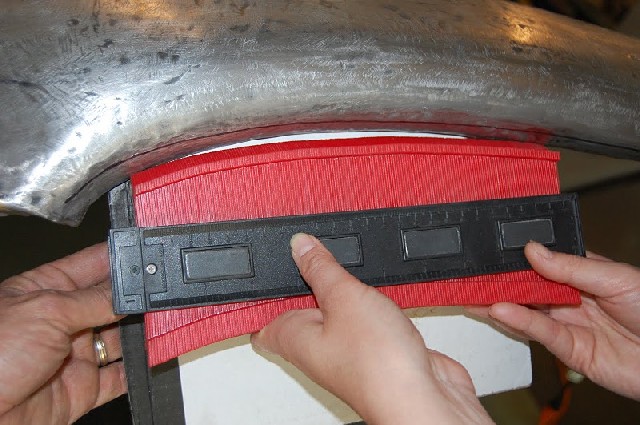
Now it's time to see if we're getting anywhere on getting the mouth lip organized properly and evenly side to side...
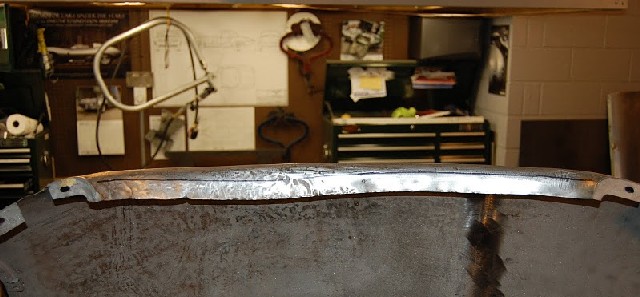
Here's the issue - when the panel was repaired in the past, the lip was rolled in too far, creating that section that arched up. So I started in on onrolling the lip and re-rolling it in this section. Sounds easy, but what followed was several hours of the most frustrating panel-beating of my life - needless to say, there weren't any pictures taken during that.
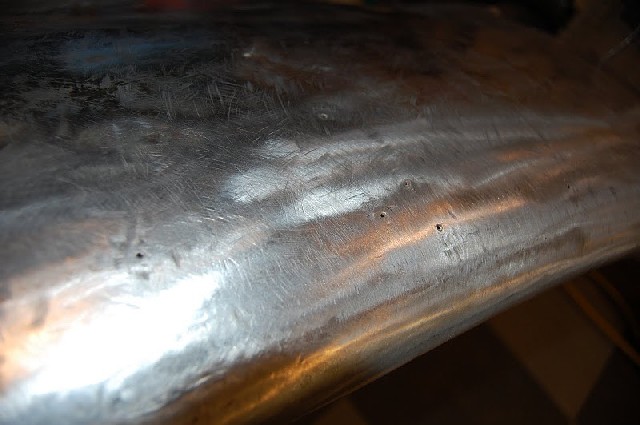
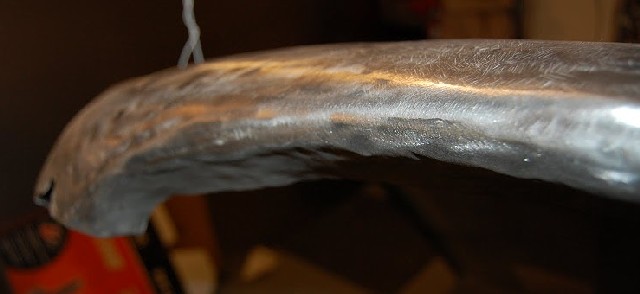
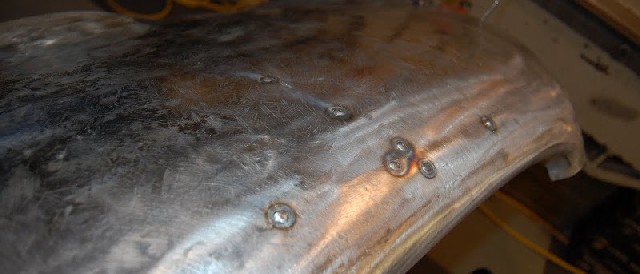
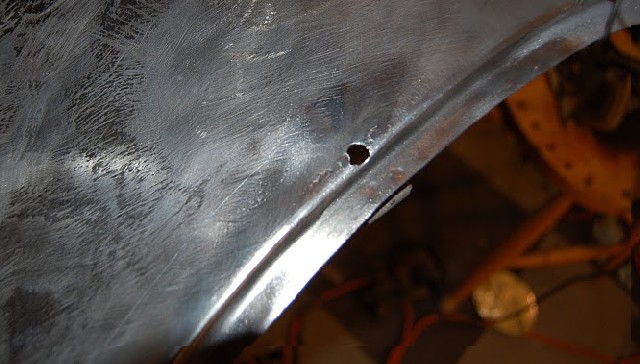
After I managed to get things all squared away from a "shape" standpoint, I started in the following day on "repairs" - the first being to weld up the holes left in the past by a dent puller. Unfortunately, I run into these ALOT on E-Types... They've already been well flattened during all of the planishing. Notice the finger shape below the flash reflection - that is a stress fracture that will need to be dealt with...
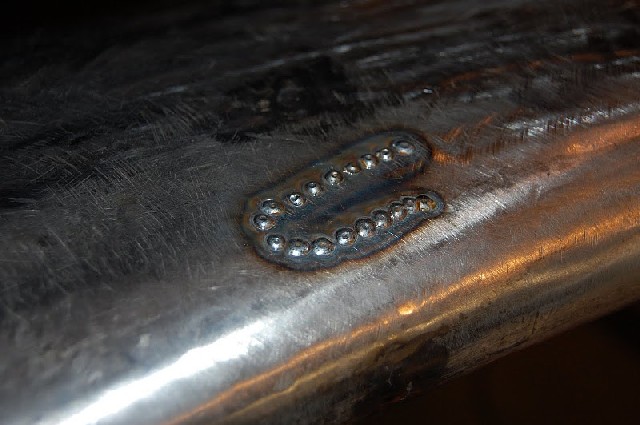
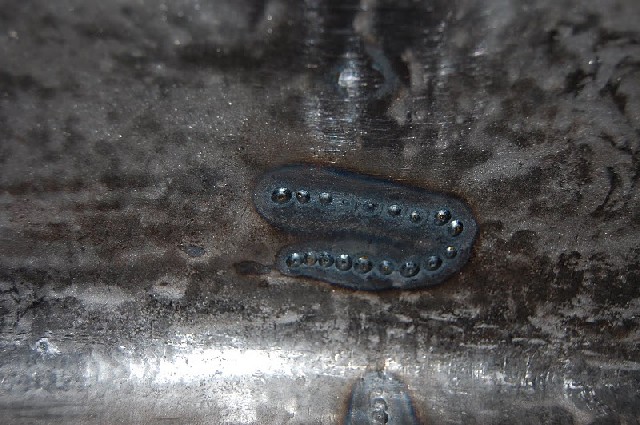
After the initial wreck, the first attempt to repair, the planishing, and my fight to reshape the lip properly, the metal of the leading edge was beginning to be work-hardened, and a stress fracture popped up here - right above the really bad area. It's tough to see on film (look at the picture a couple above this one to see it better), but it was cracked all the way around and this finger-shaped section was trying to jump out of the panel. Since I was sure it eventually would - like 5 years from now after a beautiful paint job, I very lightly tacked the crack all the way around to pin it down - kind of like stitches.
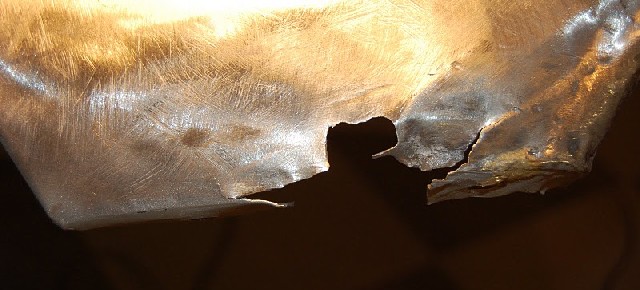
The next task - this is what happens when the bumpers are torn out of a 3.8 bonnet since they just have a bolt head and washer back there...
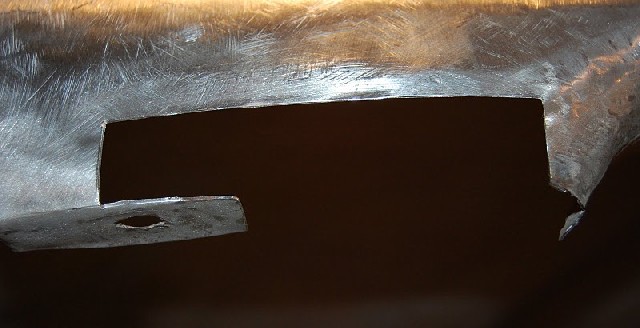
We might as well get all of the thin and torn metal out of there - and that corner flange on the right was crummy so I decided to replace that too - I doubted it was string enough to pull the bonnet together during assembly. That's where the brass tower was before.
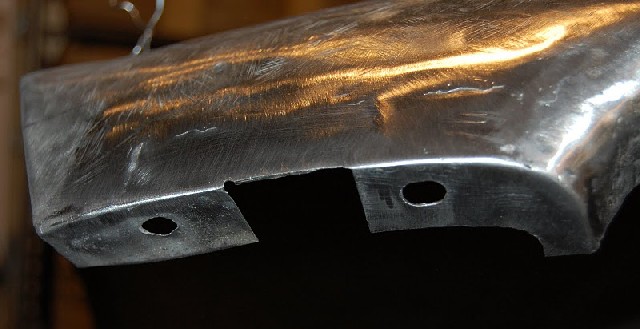
The finished product - a new corner flange and a patch that is properly arched to match that section. I did go back later and arch that area in the center where the bumper bolt goes through.
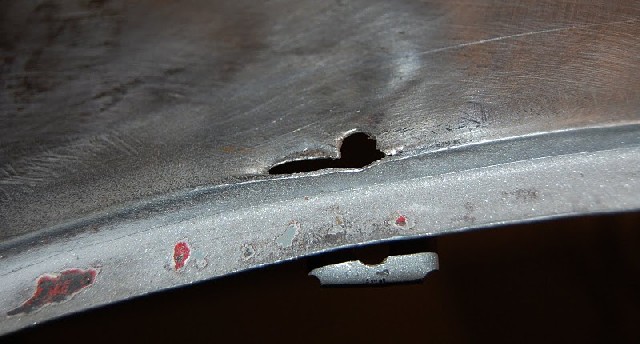
Next, we needed to fix this damage caused by an overly aggressive grinder operator during the original repair. Actually, the whole panel had been heavily ground with a DA sander and 40-grit during the first repair - cutting and thinning the metal, and making all of the repairs more difficult.
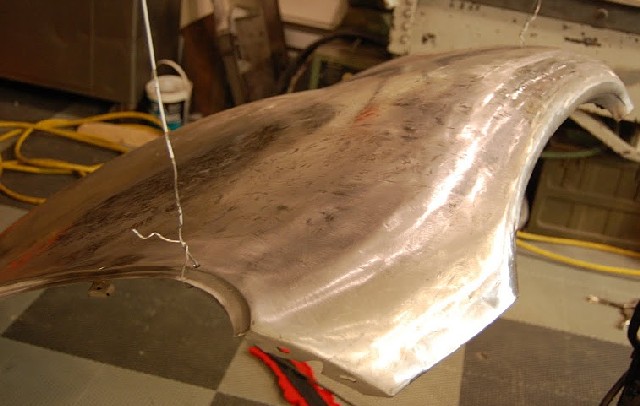
The final step was to spend several hours with the shrinking disc - attempting to smooth the panel and get as much of the stretch out as possible. In the end, it came out OK and should be all the way there on shape with just a little filler - 1/8" tops here and there, and just some slick sand - NOT the 5/8" of filler and epoxy it did have in places! The panel is nearly dead smooth, but there is a "ghost image" of the previous dents and creases - it's actually kind of cool!

