The following photos will walk you through the typical Jaguar E-Type Coupe or 2+2 rear wheel arch repair – when it is due to rust from moisture being trapped between the inner and outer wheel arch.
This is what you can expect to see when no-one else has already been in there are “repaired” it in the past. When this is the case, our “Stage 1” basic repair panel will work just fine. You’ll see from the picture below, and once you get into your own E-Type, that you will also definitely need a repair panel for the inner wheel arch as well.
WARNING! – you will note that this repair is plug-welded, and then tacked along the seam between the old wing and the new repair panel. It is NOT completely stitched closed. DON’T DO THAT! This seam is TIGHT and it is NOT going to flex and crack in the future when done as shown and done right. However, if you decide that you really want that seam closed, you are going to warp the hell out of it, and I don’t care what you do or how you do it – it WILL distort the metal from too much heat! DON’T DO IT – this is the classic type of move that screws up this repair royally!
-
- This is a ’62 E-TYpe Fixed-head coupe, with the typical rust damage. In the past, someone has just smeared filler over the problem, but thankfully, they have not cut out and welded in new metal – which they almost ALWAYS make a mess of…

-

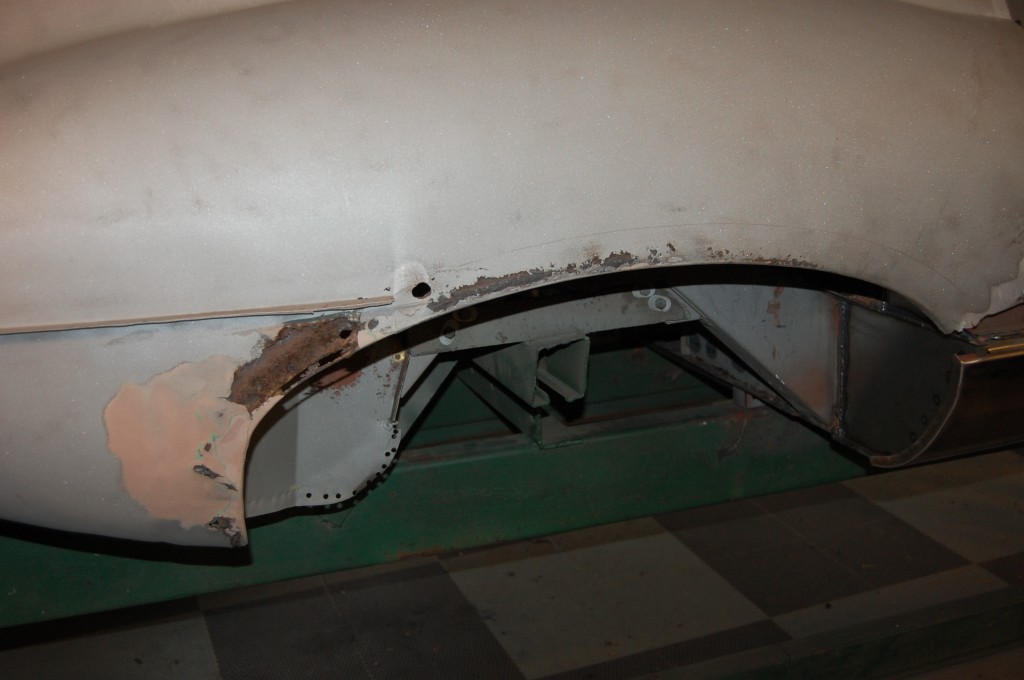
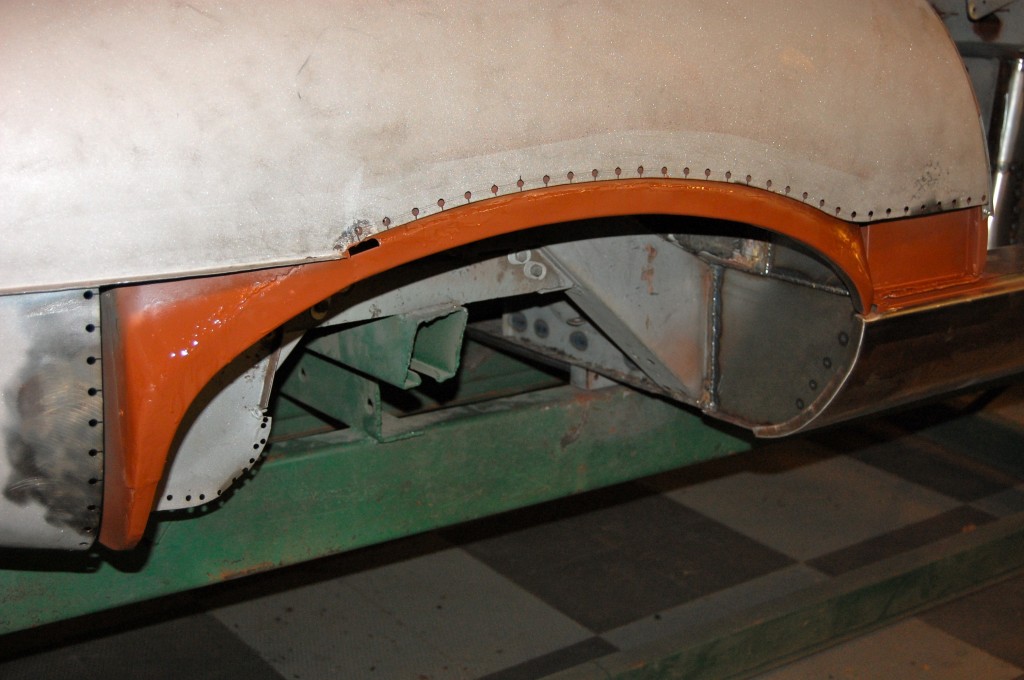
- Everything about this E-Type’s rear wheel arch is 100% typical – it has rusted out in the bottom seam of the wing, where it meets the outer sill at the B-Post. We also have about 1″ of rust all along the wheel arch itself…

-
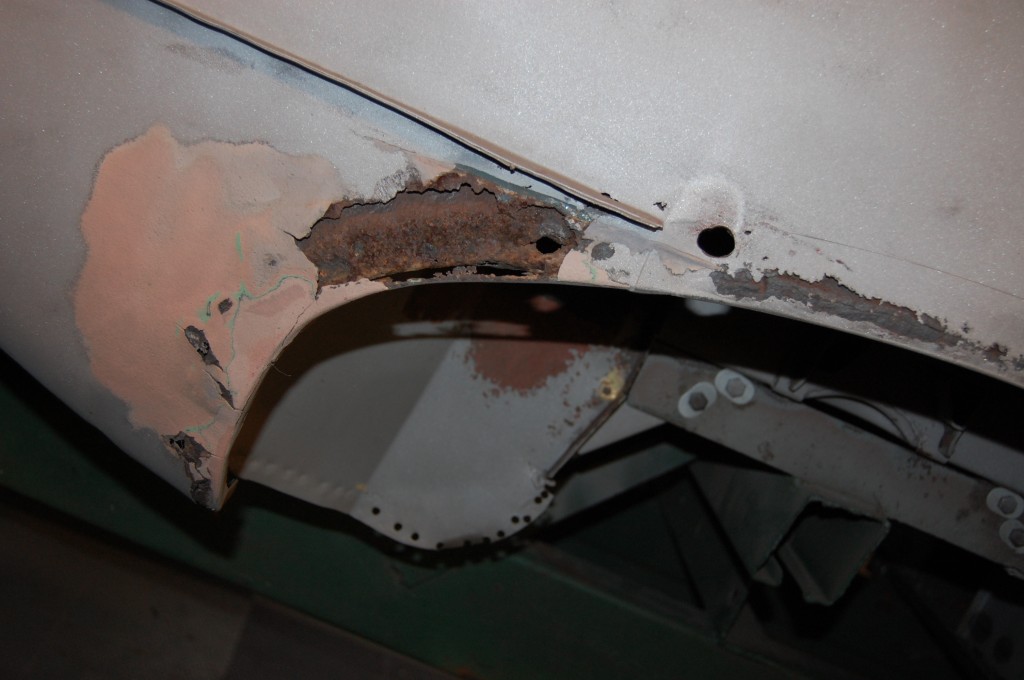
- …and we also have the typical rust in the leading edge of the rear lower valance.

-

- This photo jumps forward a few steps – we have carefully marked and cut out JUST ENOUGH of the original metal to get all of the rust out, and NO MORE! The one caveat to that is that you want to make sure you have enough room to work on the repairs for the inner wheel arch – which are already completed here. So you may need to take the cut of the outer wing itself up just a little higher than what you need to, so you can access the inner wing. I do always recommend making your cut the same height above the rear wheel arch edge lip all the way around. This will re4ally help you keep things aligned as you make the repair.
-
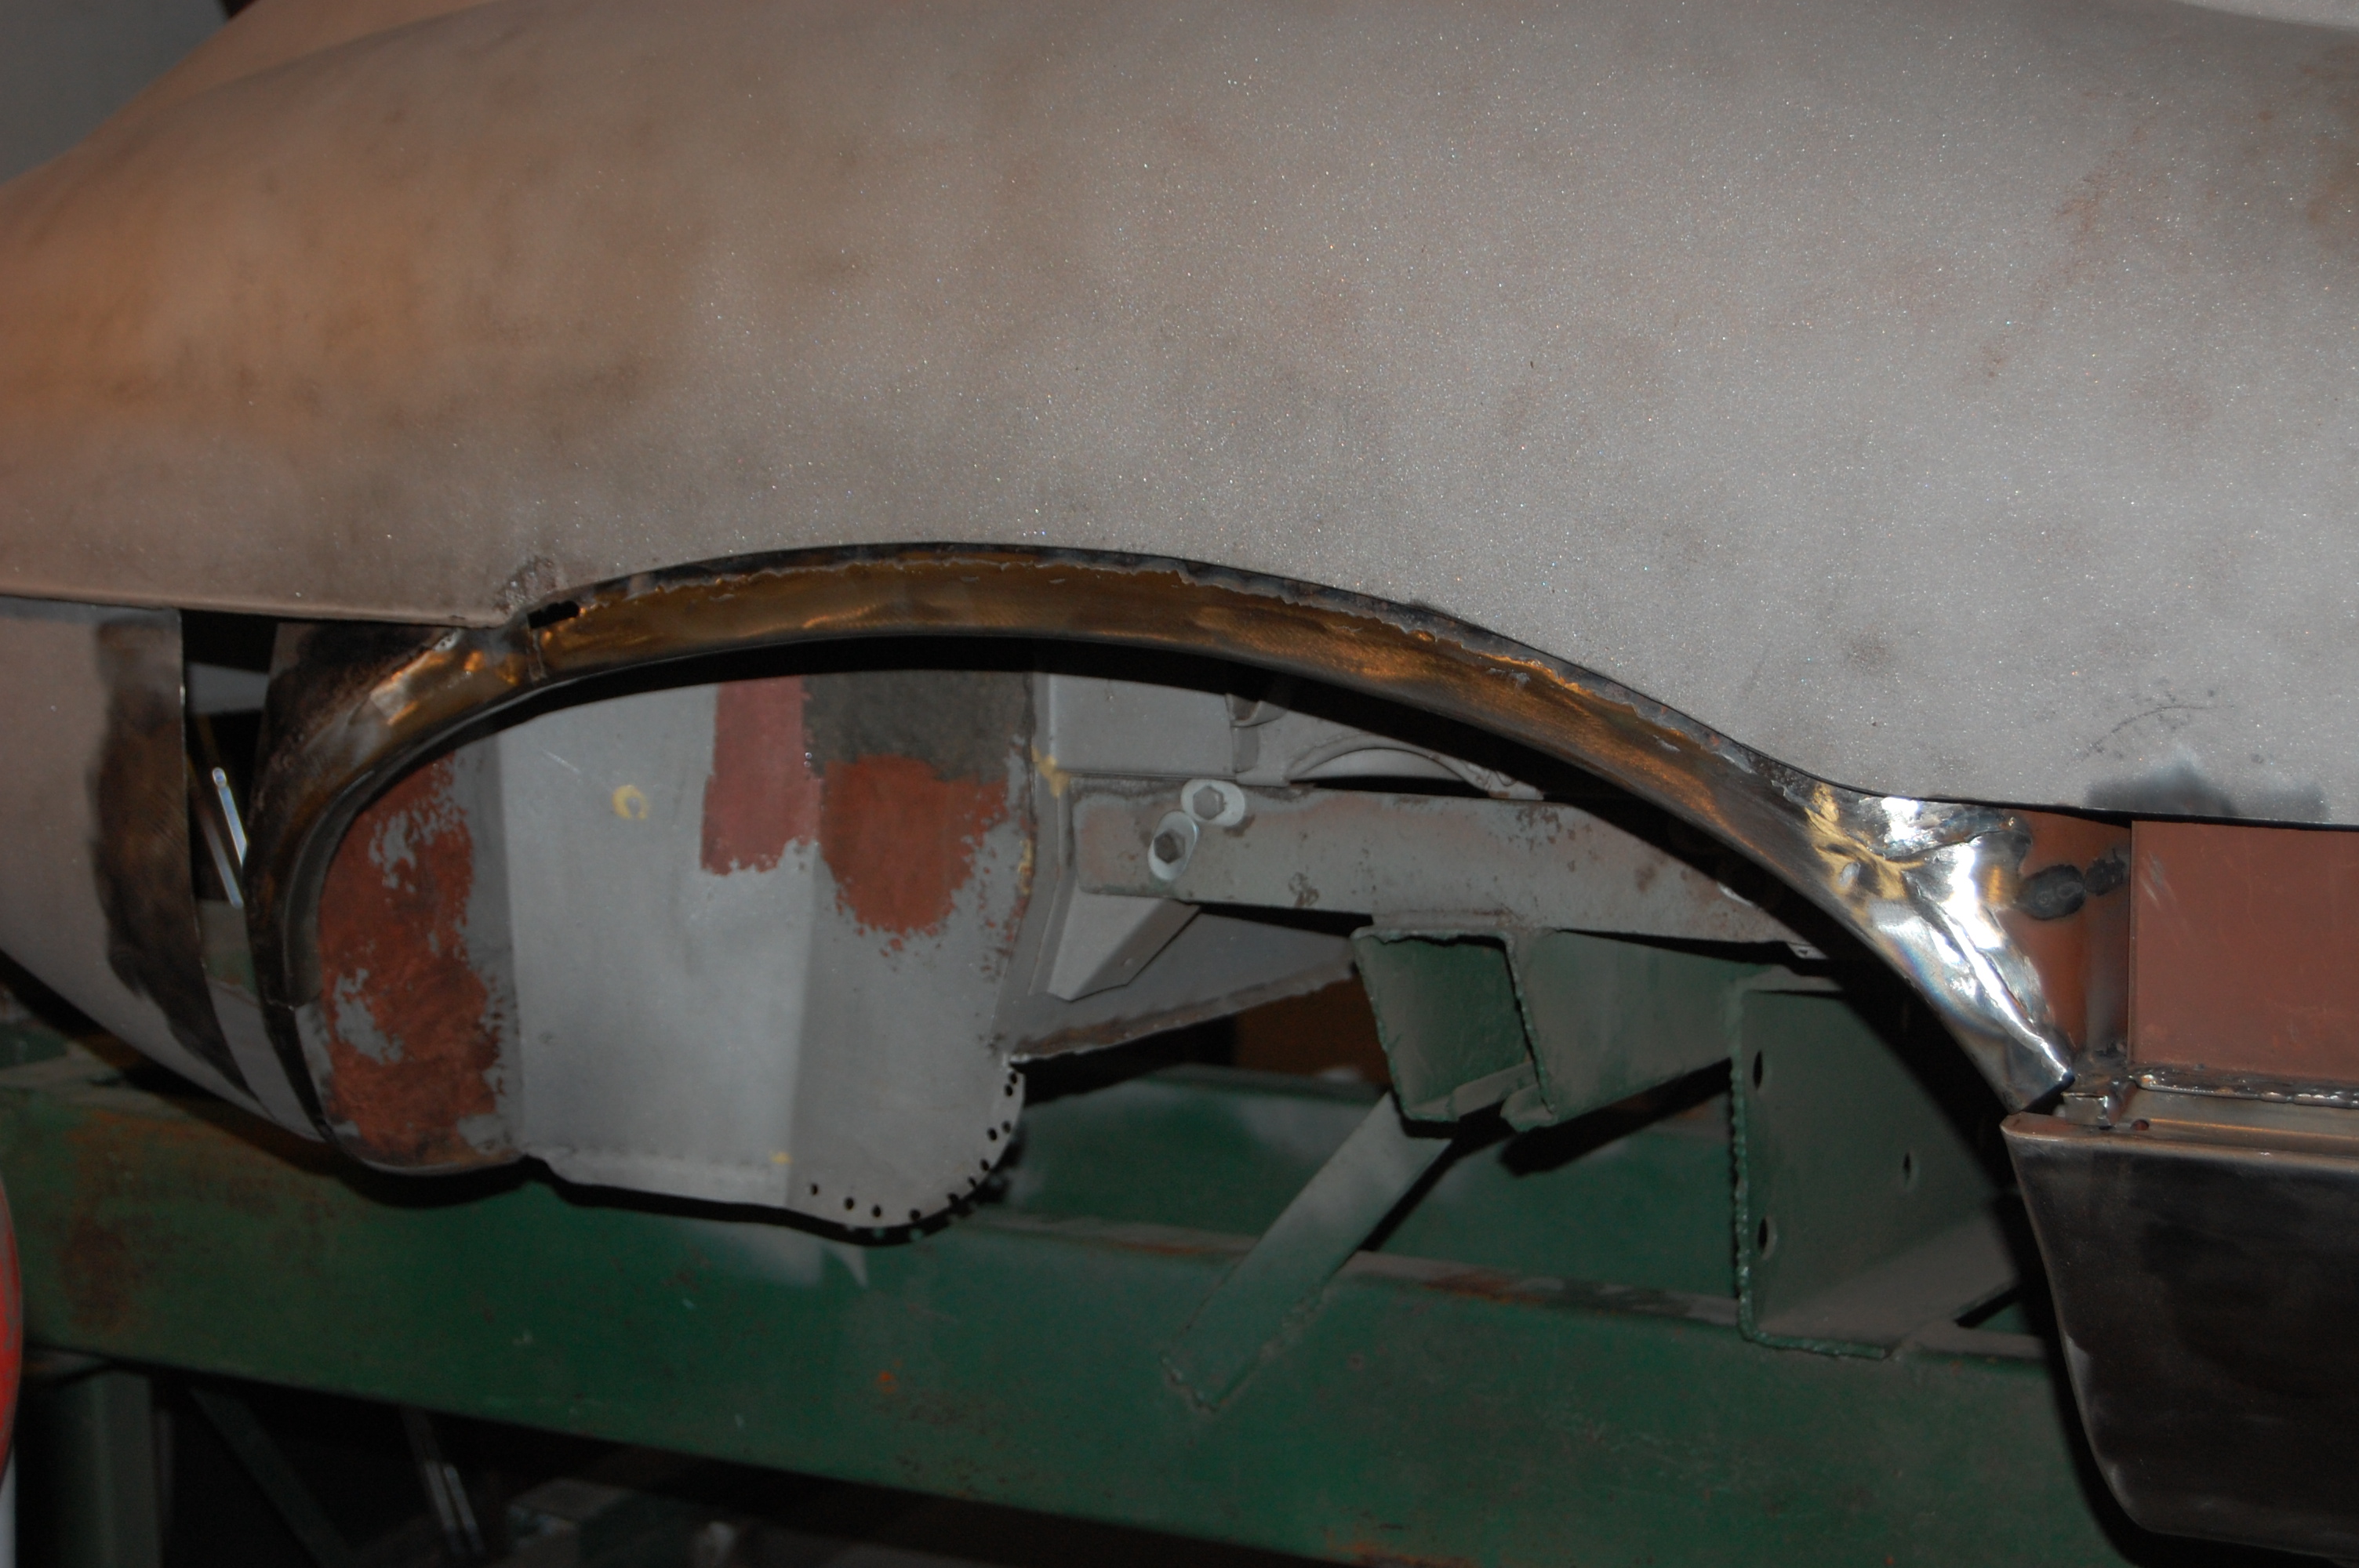
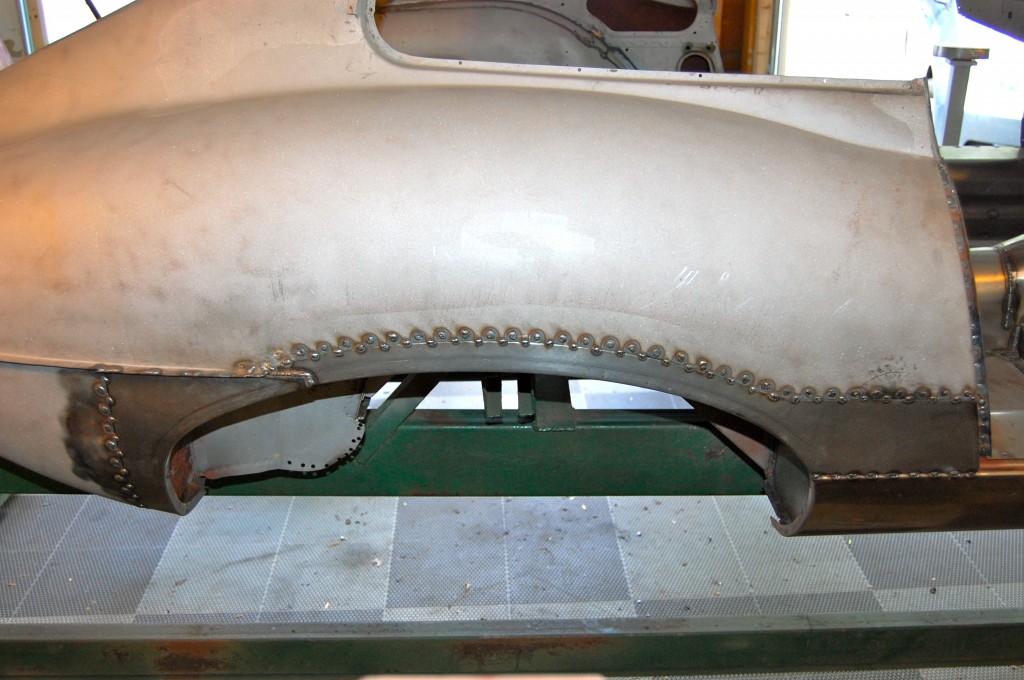
- In this photo, the inner wheel arch is repaired completely, and so is are the inner panels below it that make up the rear of the wheel house. Note that the edge of the wing is smooth and equidistant all the way around, and we have carefully layed out and drilled our plug-welding holes.

-
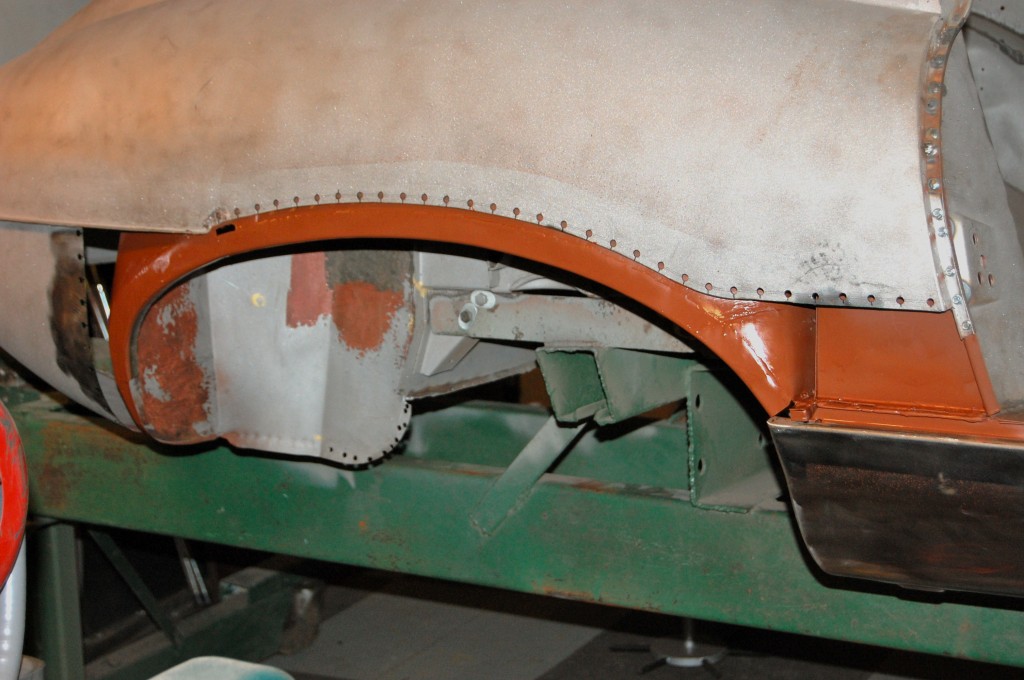
- Here is another angle showing that all of the inner panels are repaired – and don’t forget to coat them with a decent primer or paint. 2-part epoxy primer works great, but on pre-existing surface rust that you have scuffed very well, red oxide is also excellent. The patch panel has been fitted and removed several times by now – you want to have the inner AND outer panels all screwded into place with each other BEFORE you start welding in the inner panels!

-
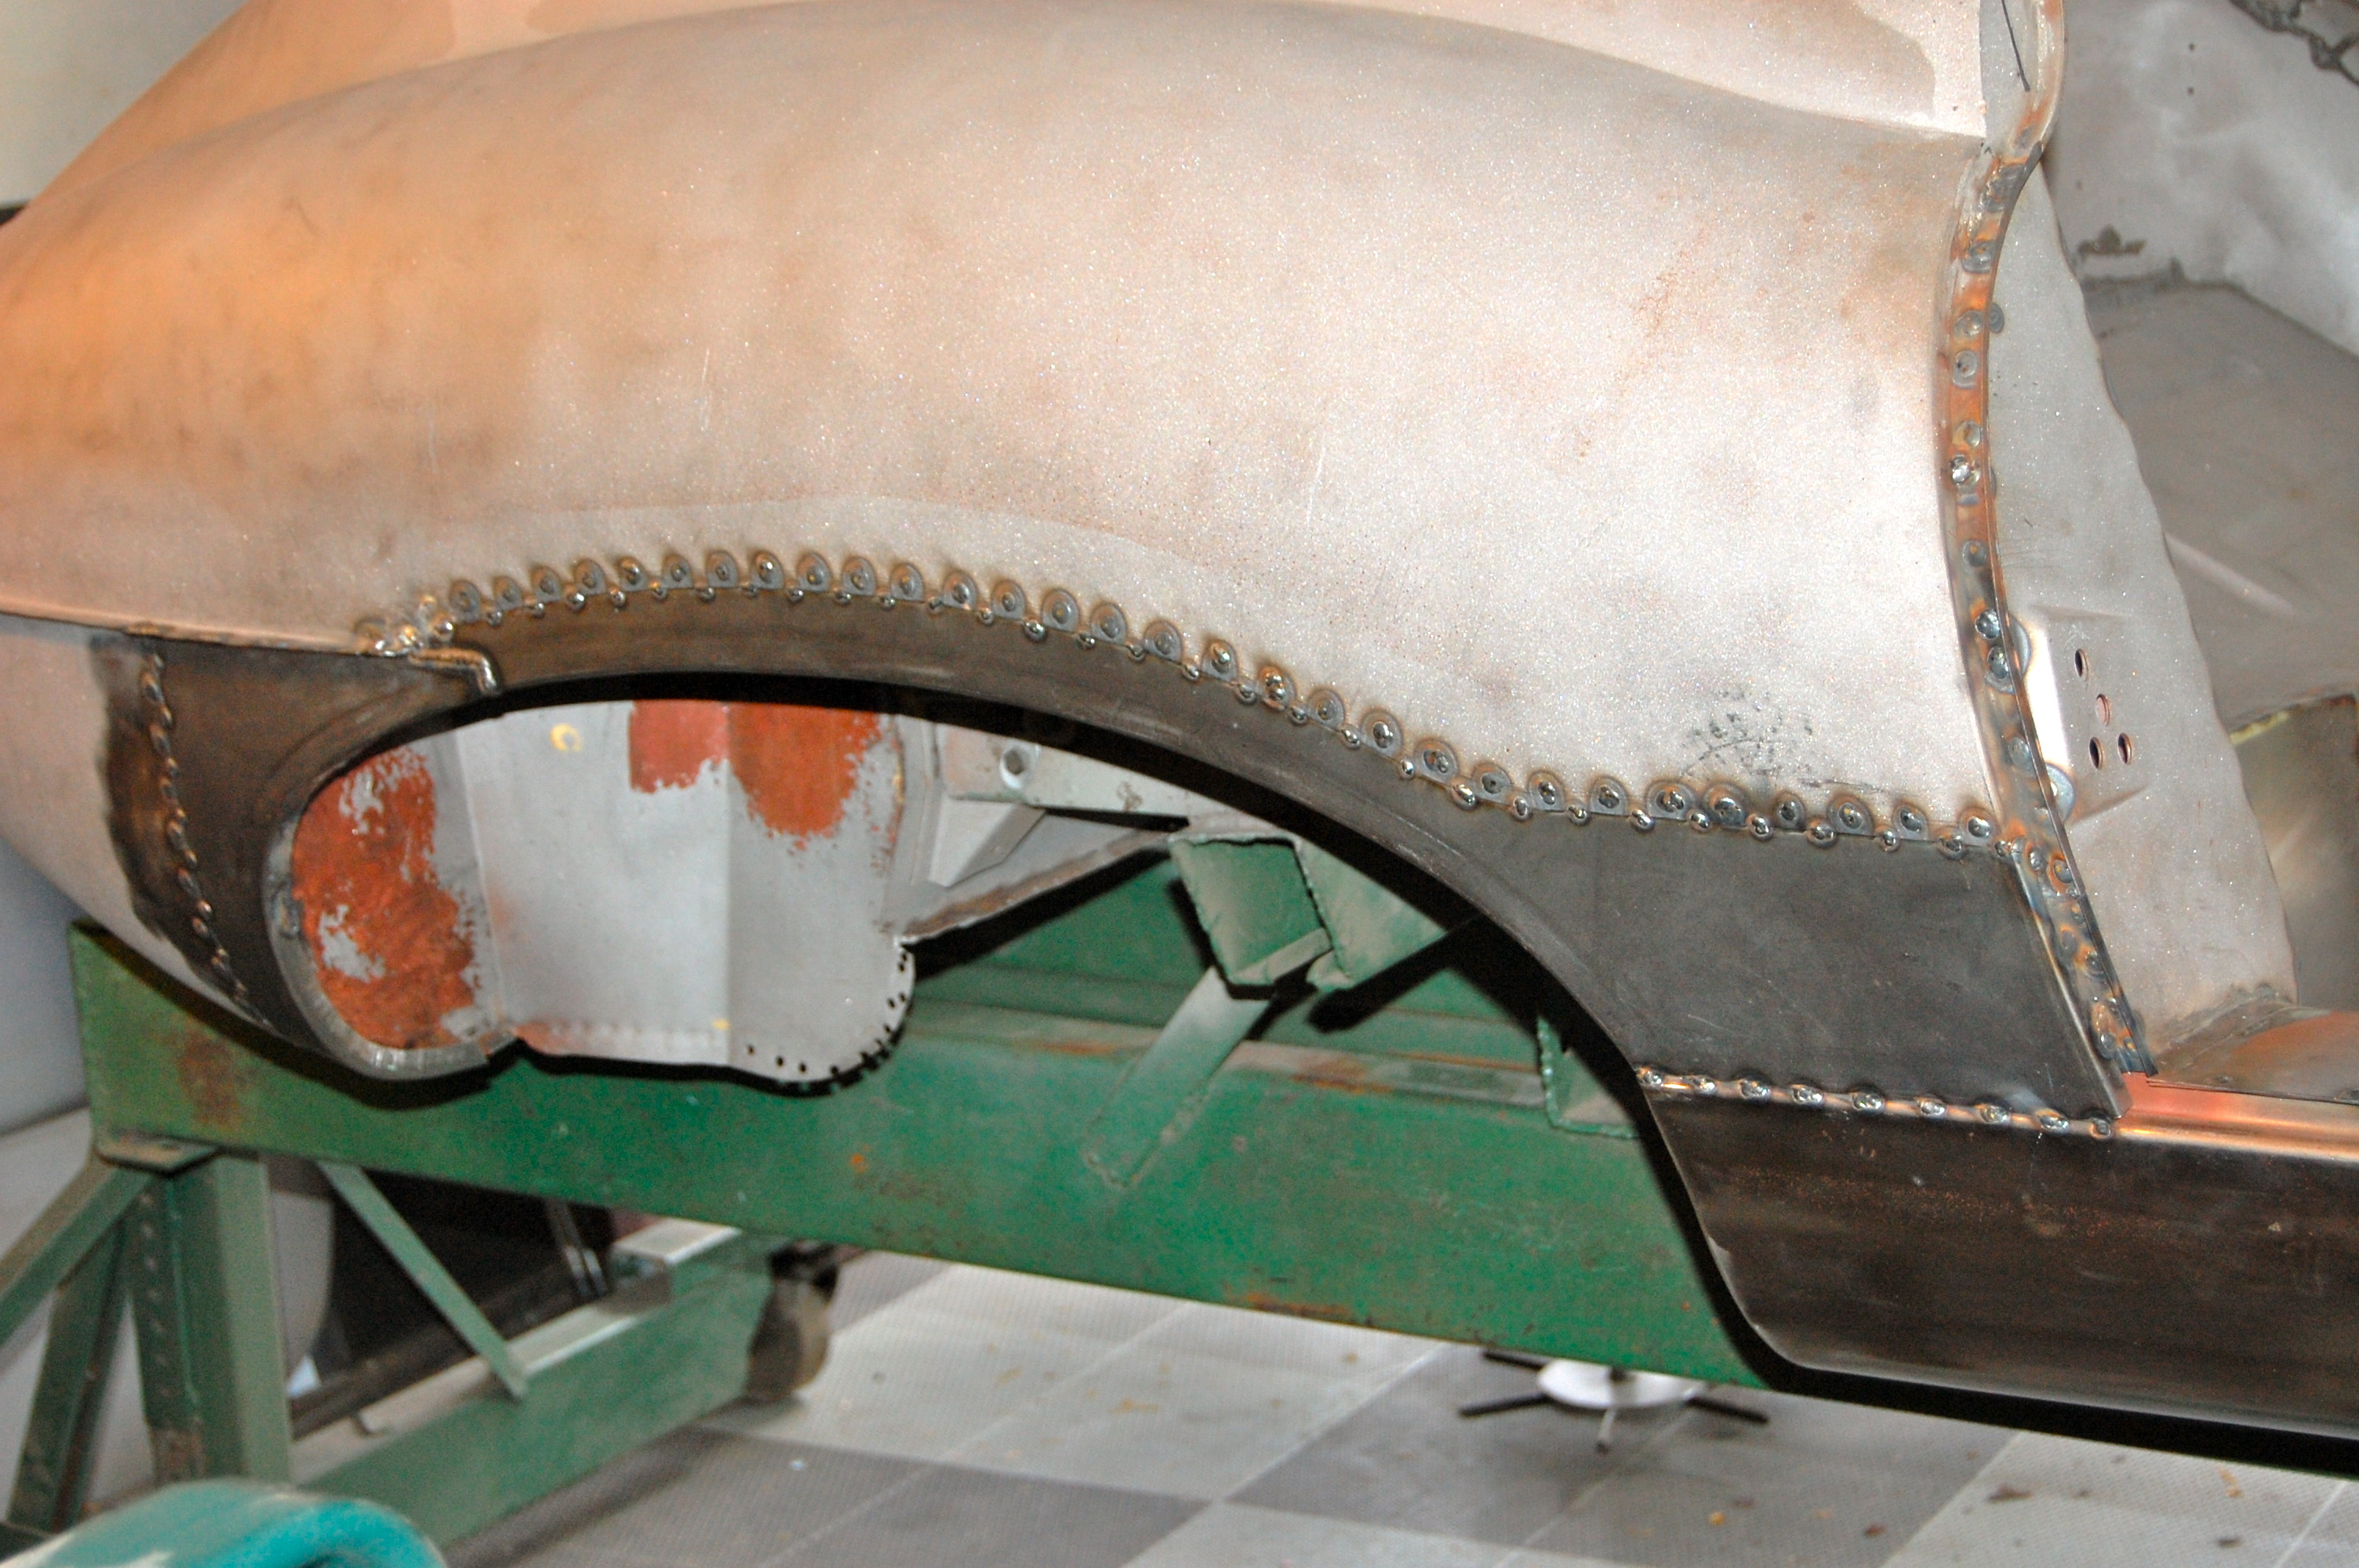
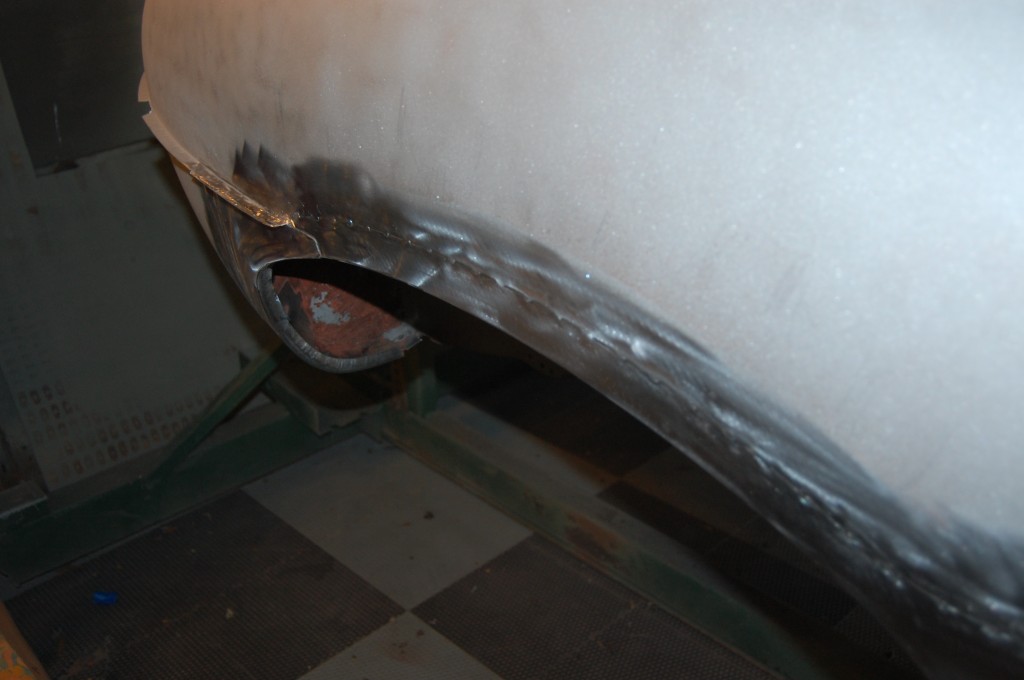
- Also prime the inner surfaces of the new repair pieces. Note the stepped edge that has been rolled into the new repair panel – AND the fact that it has been cut down from its original 3-inch height.
-

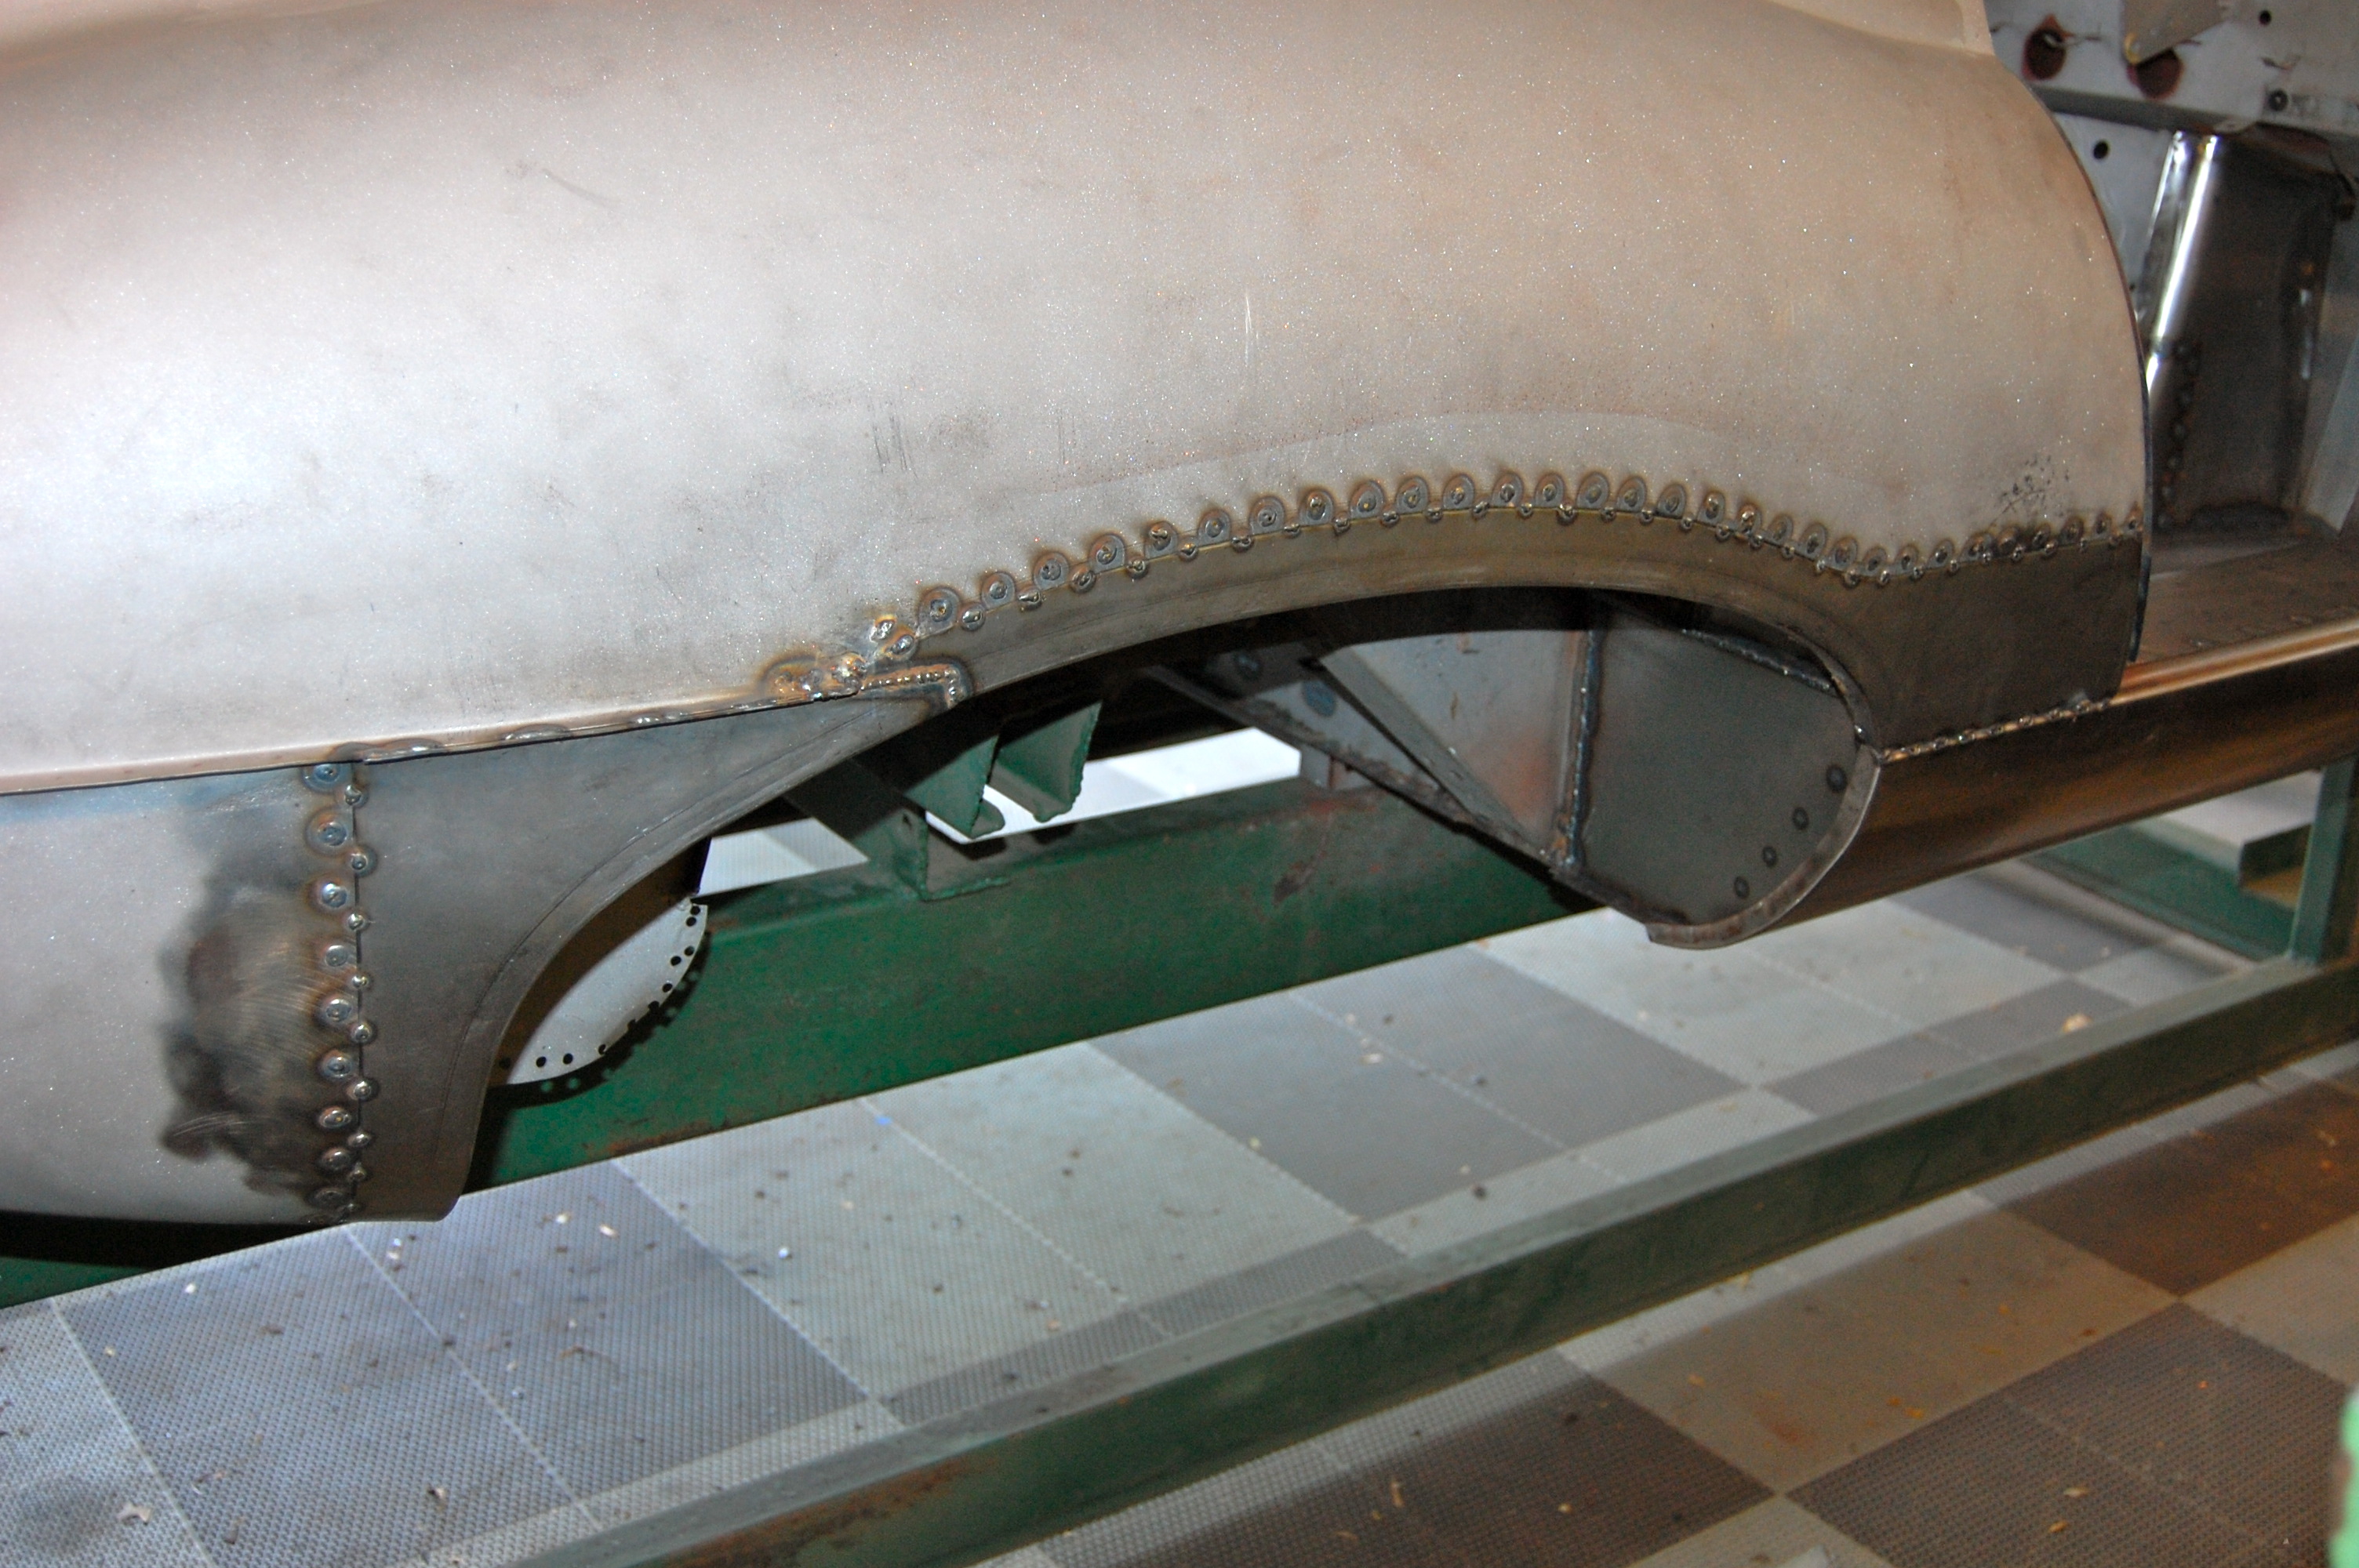
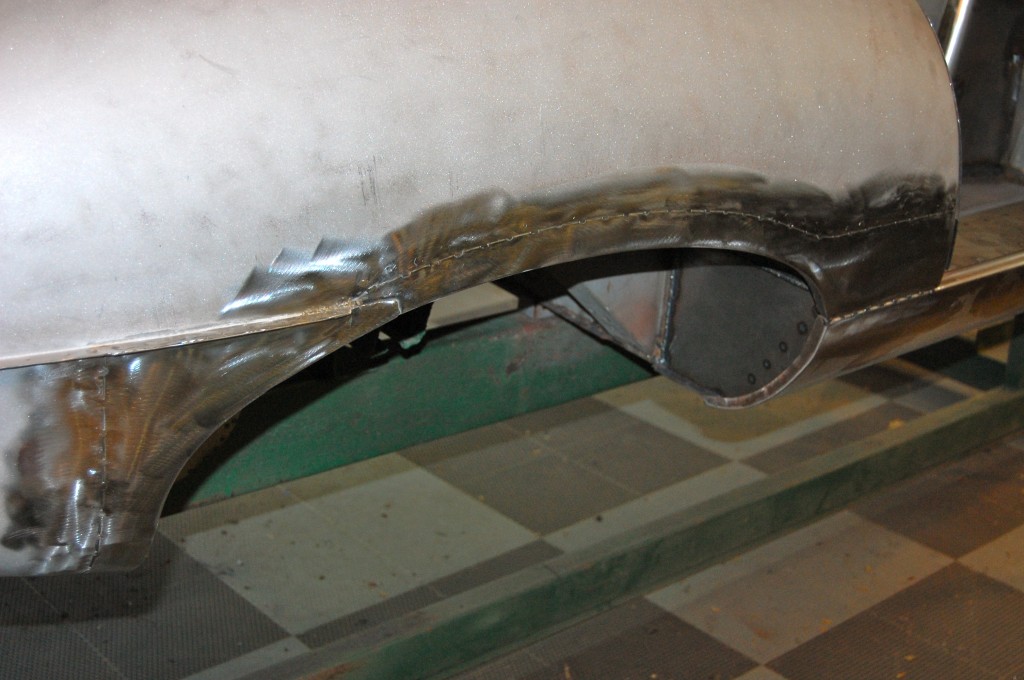
- Voila! The repair pieces have been plu-welded in using my signature layout – placing a tack along the edge of the seam between each plug weld. This entire repair can be completed with a MIG welder.
-
- Each of the plug weld holes gets a self-drilling screw of cleco into it before the welding starts. This way, the piece is screwed down tight along its entire length during the welding. First, weld in all of the tacks along the edge – jumping around to keep heat to a minimum, although that is probably overkill in this case. Then, once all of the edge tacks are completed, start removing the screws one at a time and welding up the plug-weld holes. Do this in a pattern like every fourth screw, then start over in between those, etc. until all of the welds are completed.

-

- Another shot of the completed welds. The combination of the small but effective tacks and plug welds, the stepped flange on the repair panel, and having the entire pieces screwed down along its length gives us a completed repair with NO warpage or distortion!
-
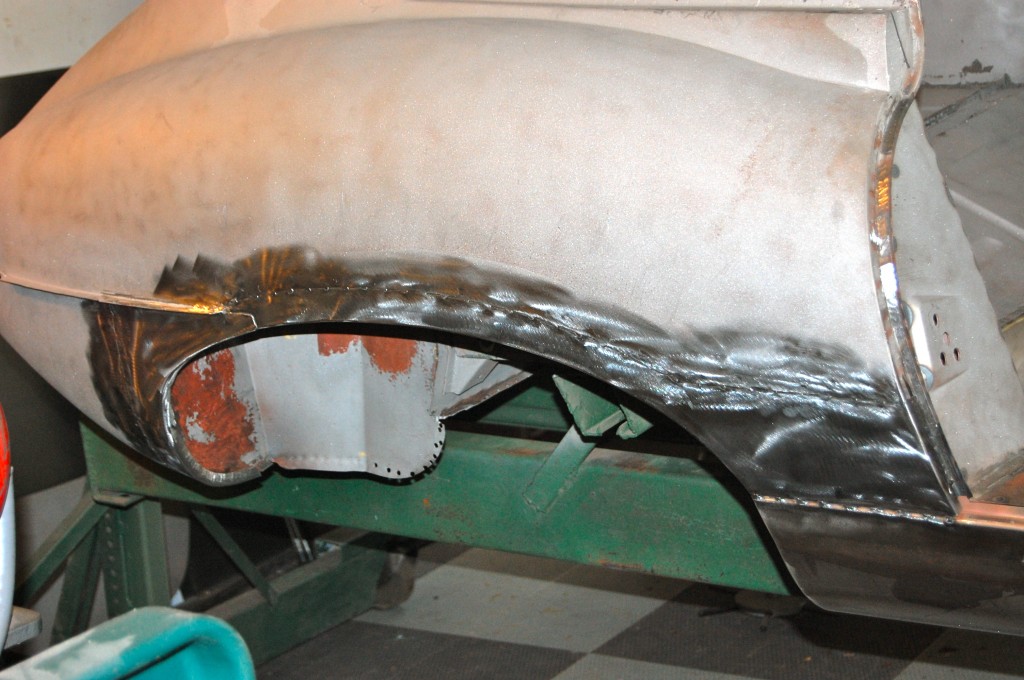
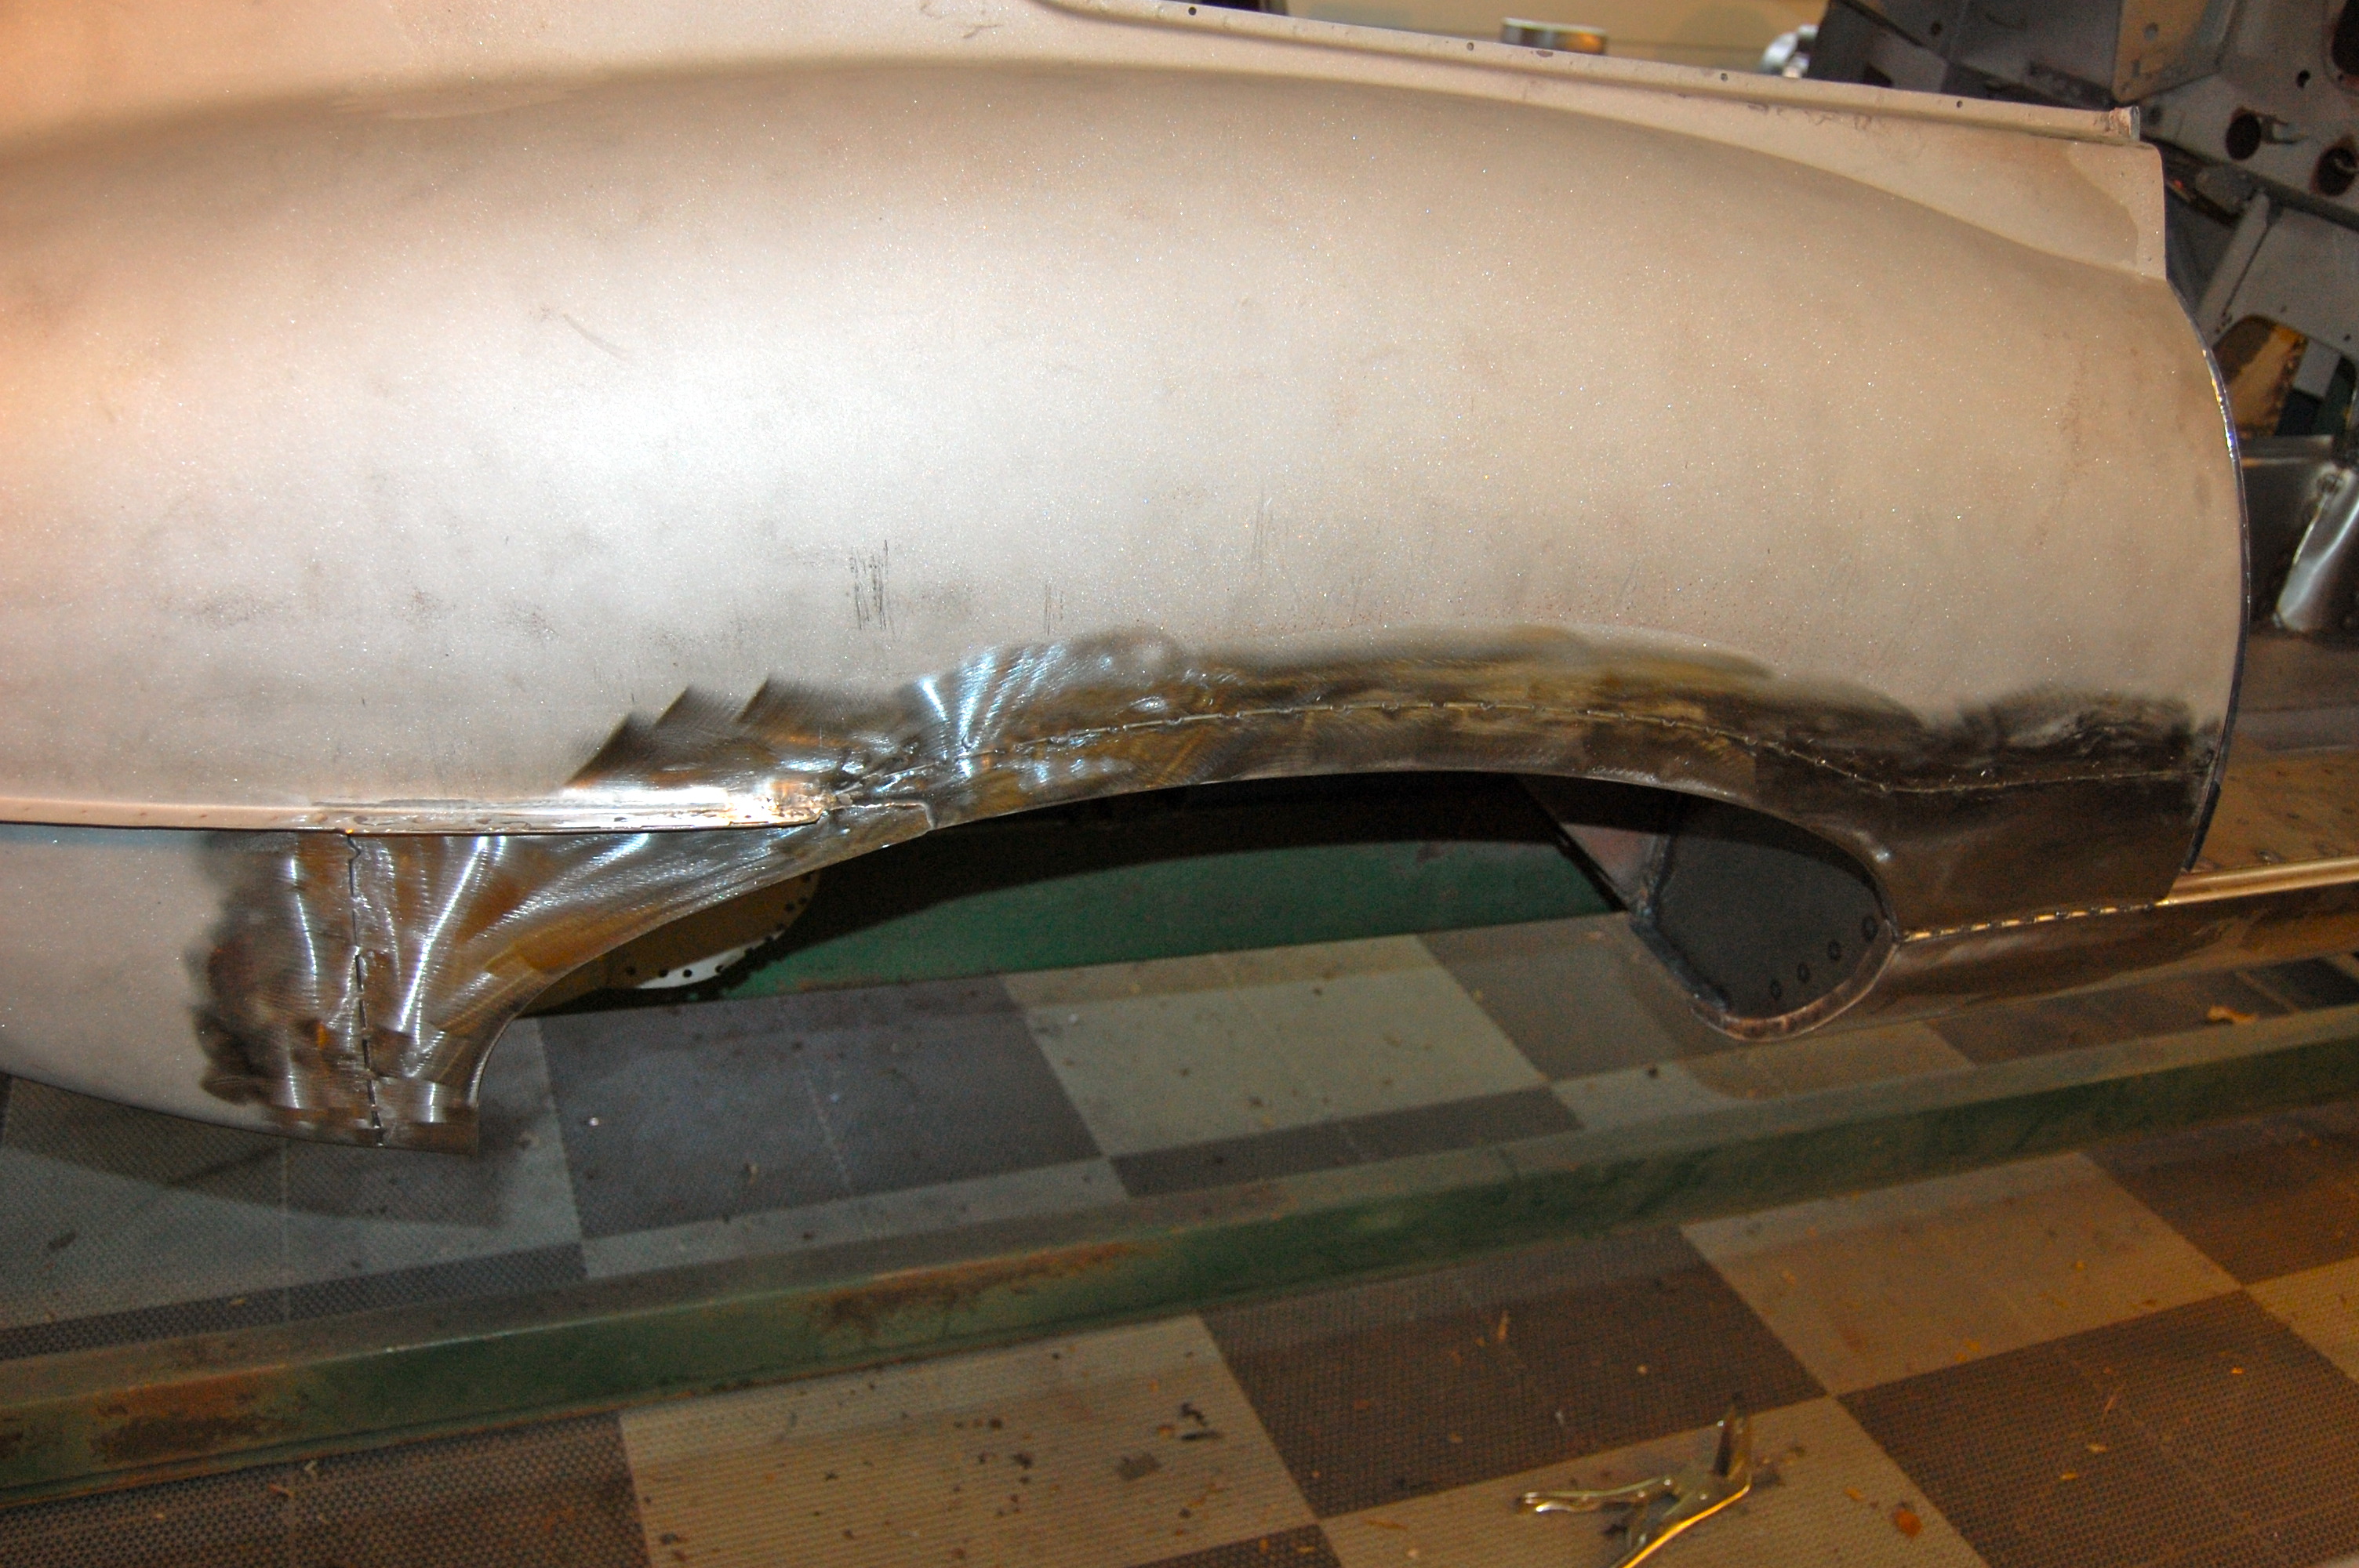
- Next, we carefully grind down each tack and weld, and then CAREFULLY grind the entire repair. This is meticulous work and much like sculpture – be VERY CAREFUL in your grinding!

-
- Another shot of the completed repair!

-

- Keeping the weld line VERY low on the original wing means that we still have the correct shape and “bulge out” of the “hips” of the car. Moving this seam up higher into the wing, and putting in too much heat, shrinks the metal and will flatten out the bulge of the wing – ALOT! So try to keep your repair panel as low as possible, as shown here.
-
- It’s tough to see, but this photo shows it a little but – ALL of our contours are correct. Don’t let the photos and the 3 minutes it took to read this fool you – what you see in this blog entry will be a whole weekend for you – PER SIDE!

-
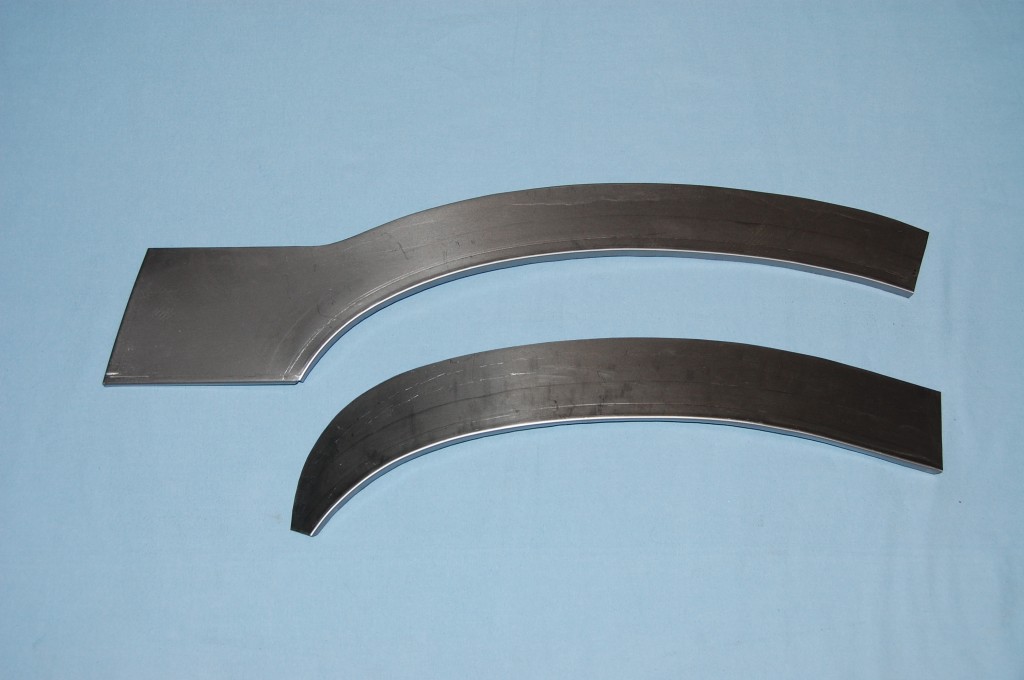
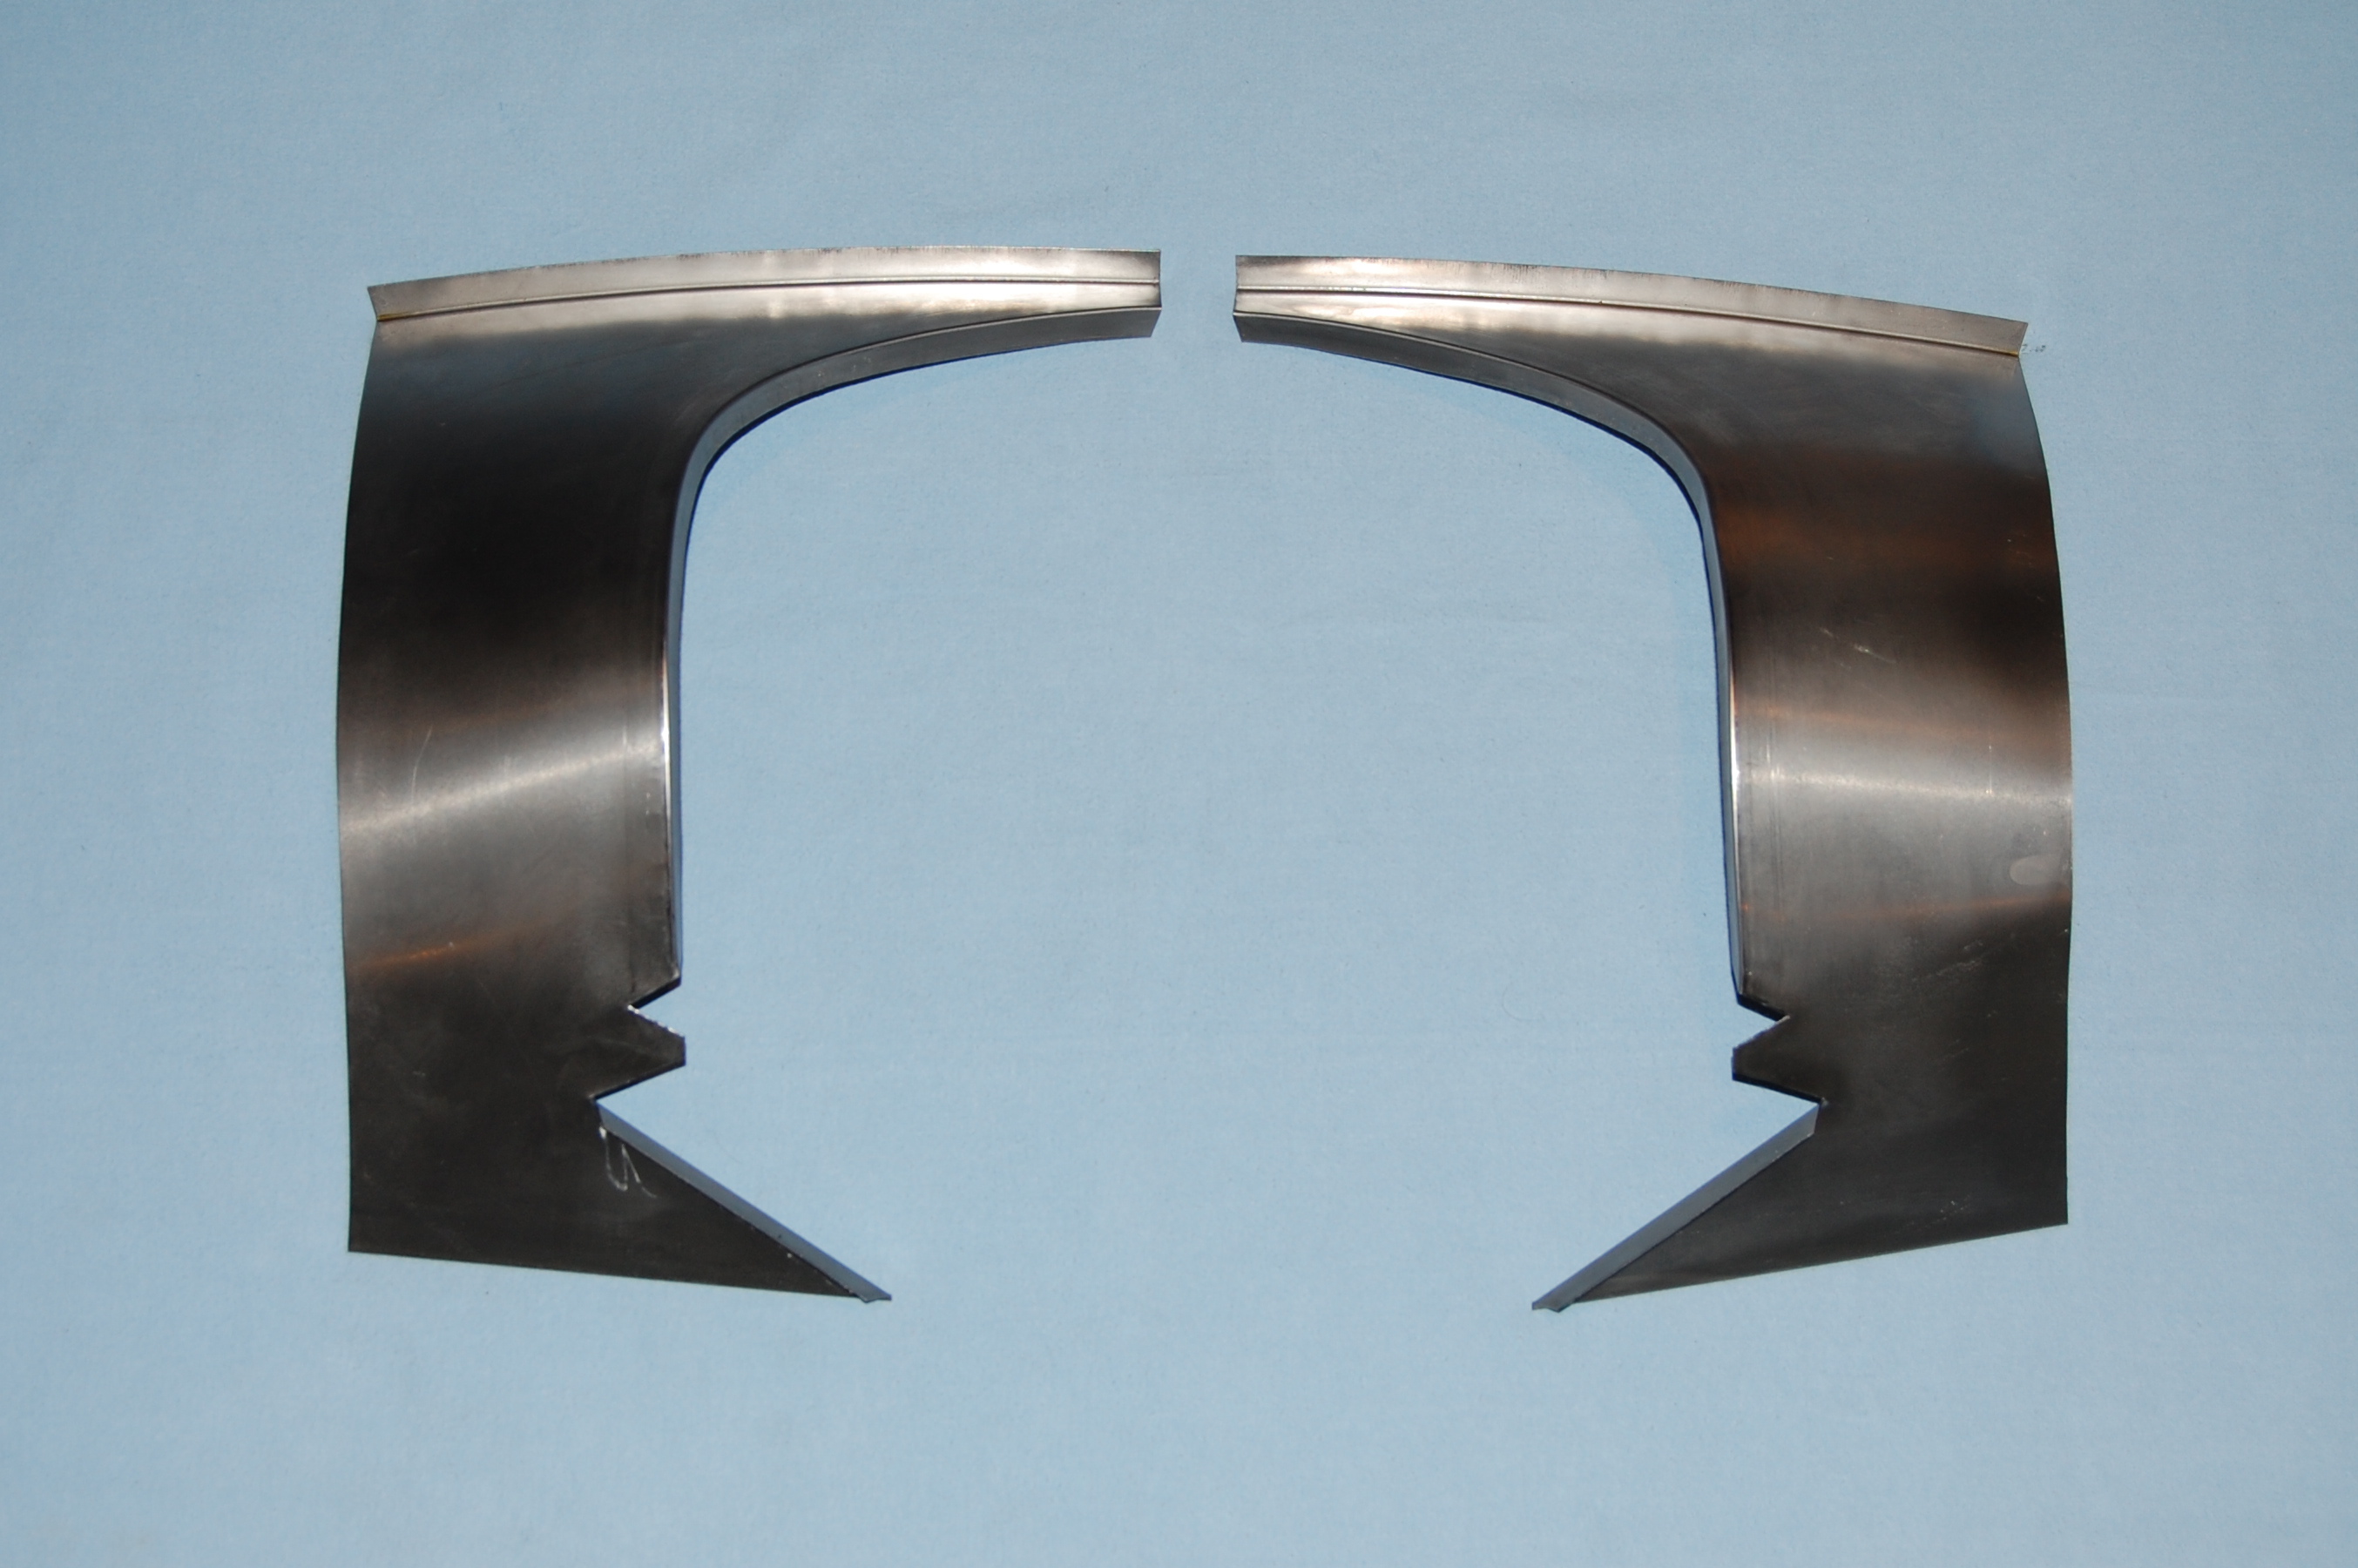
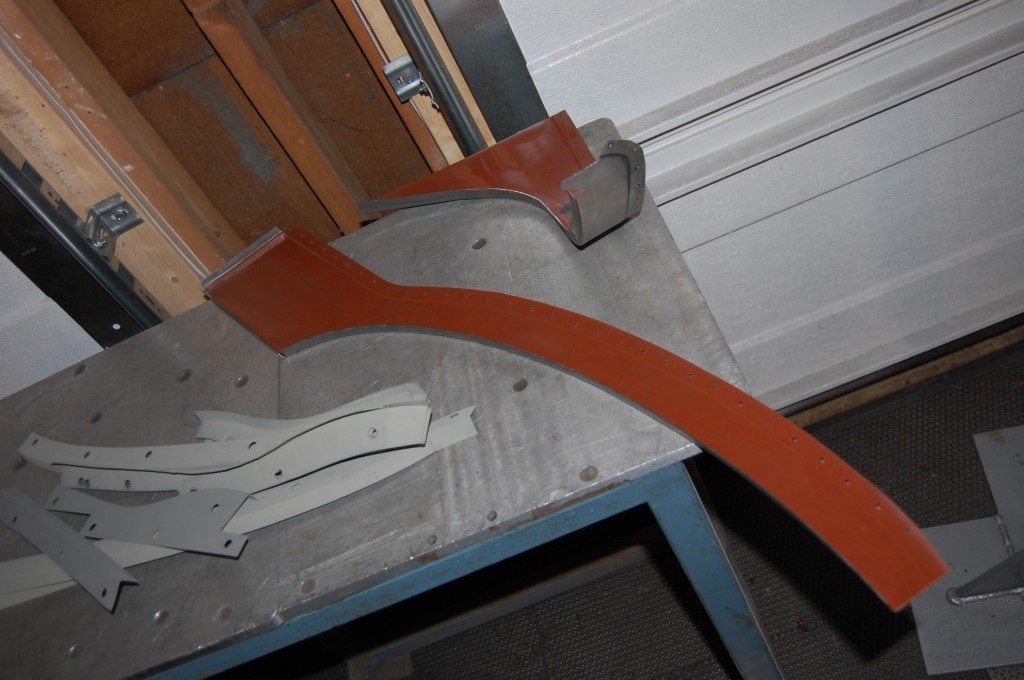
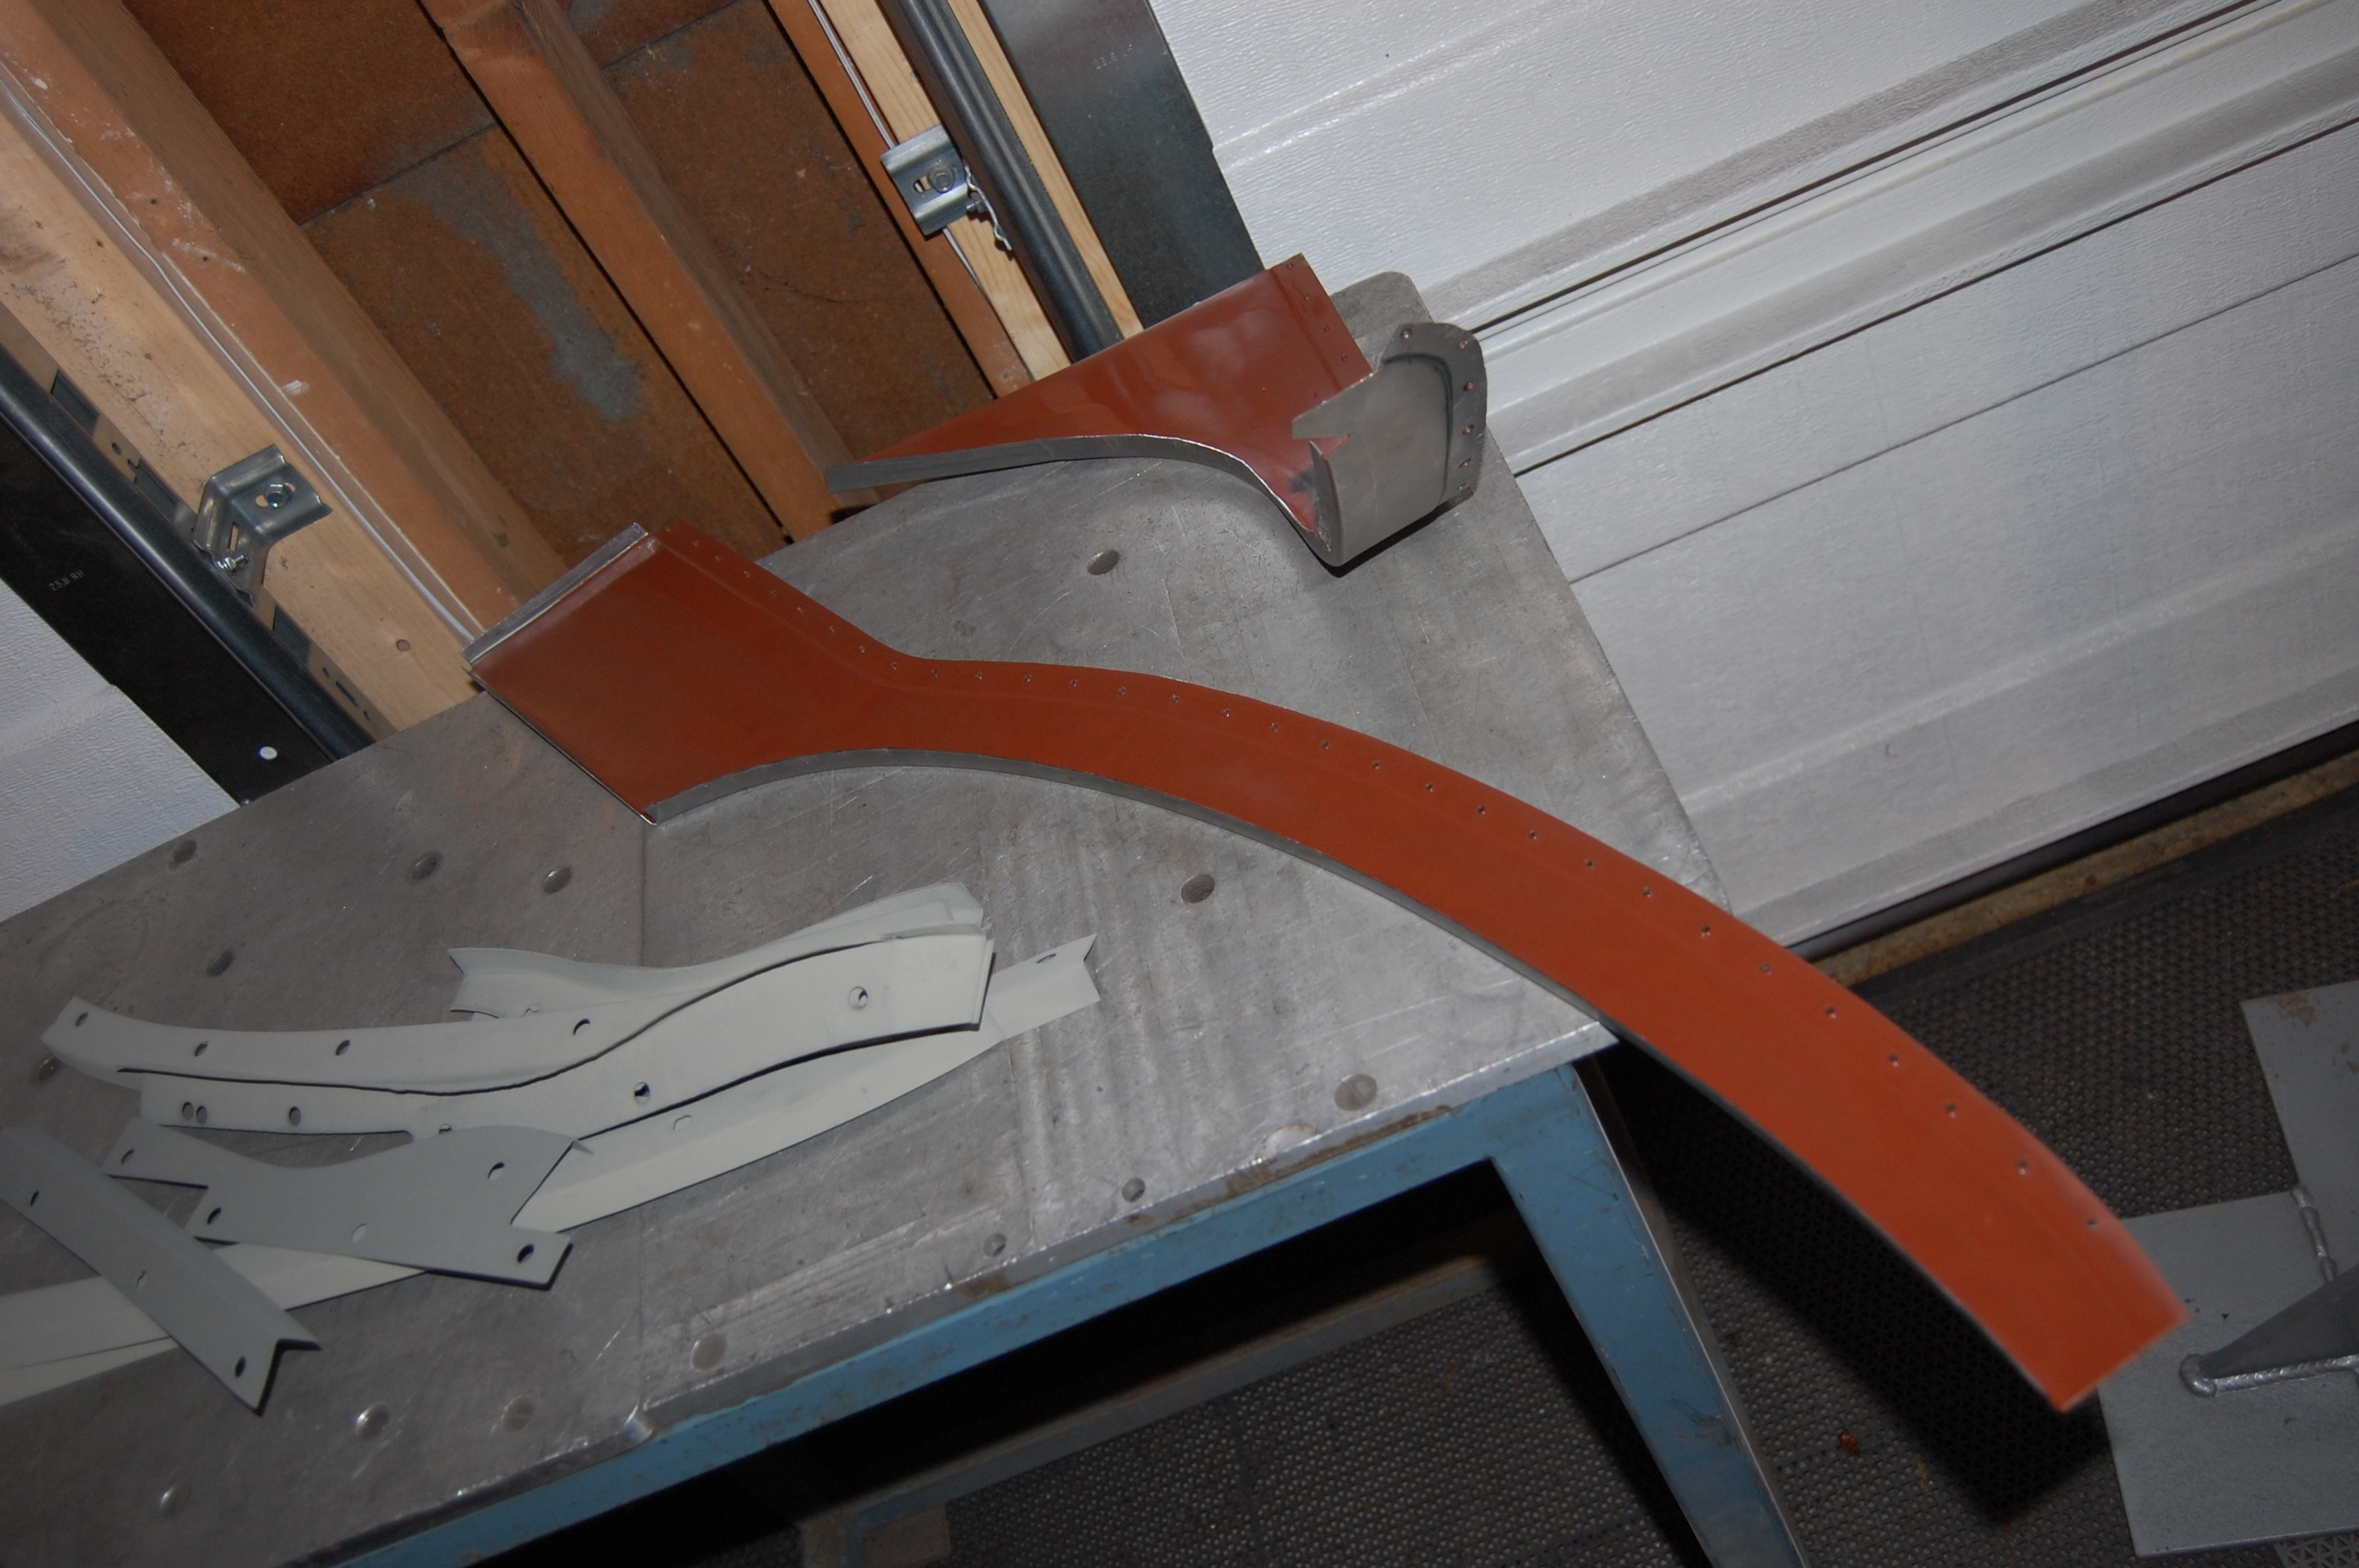
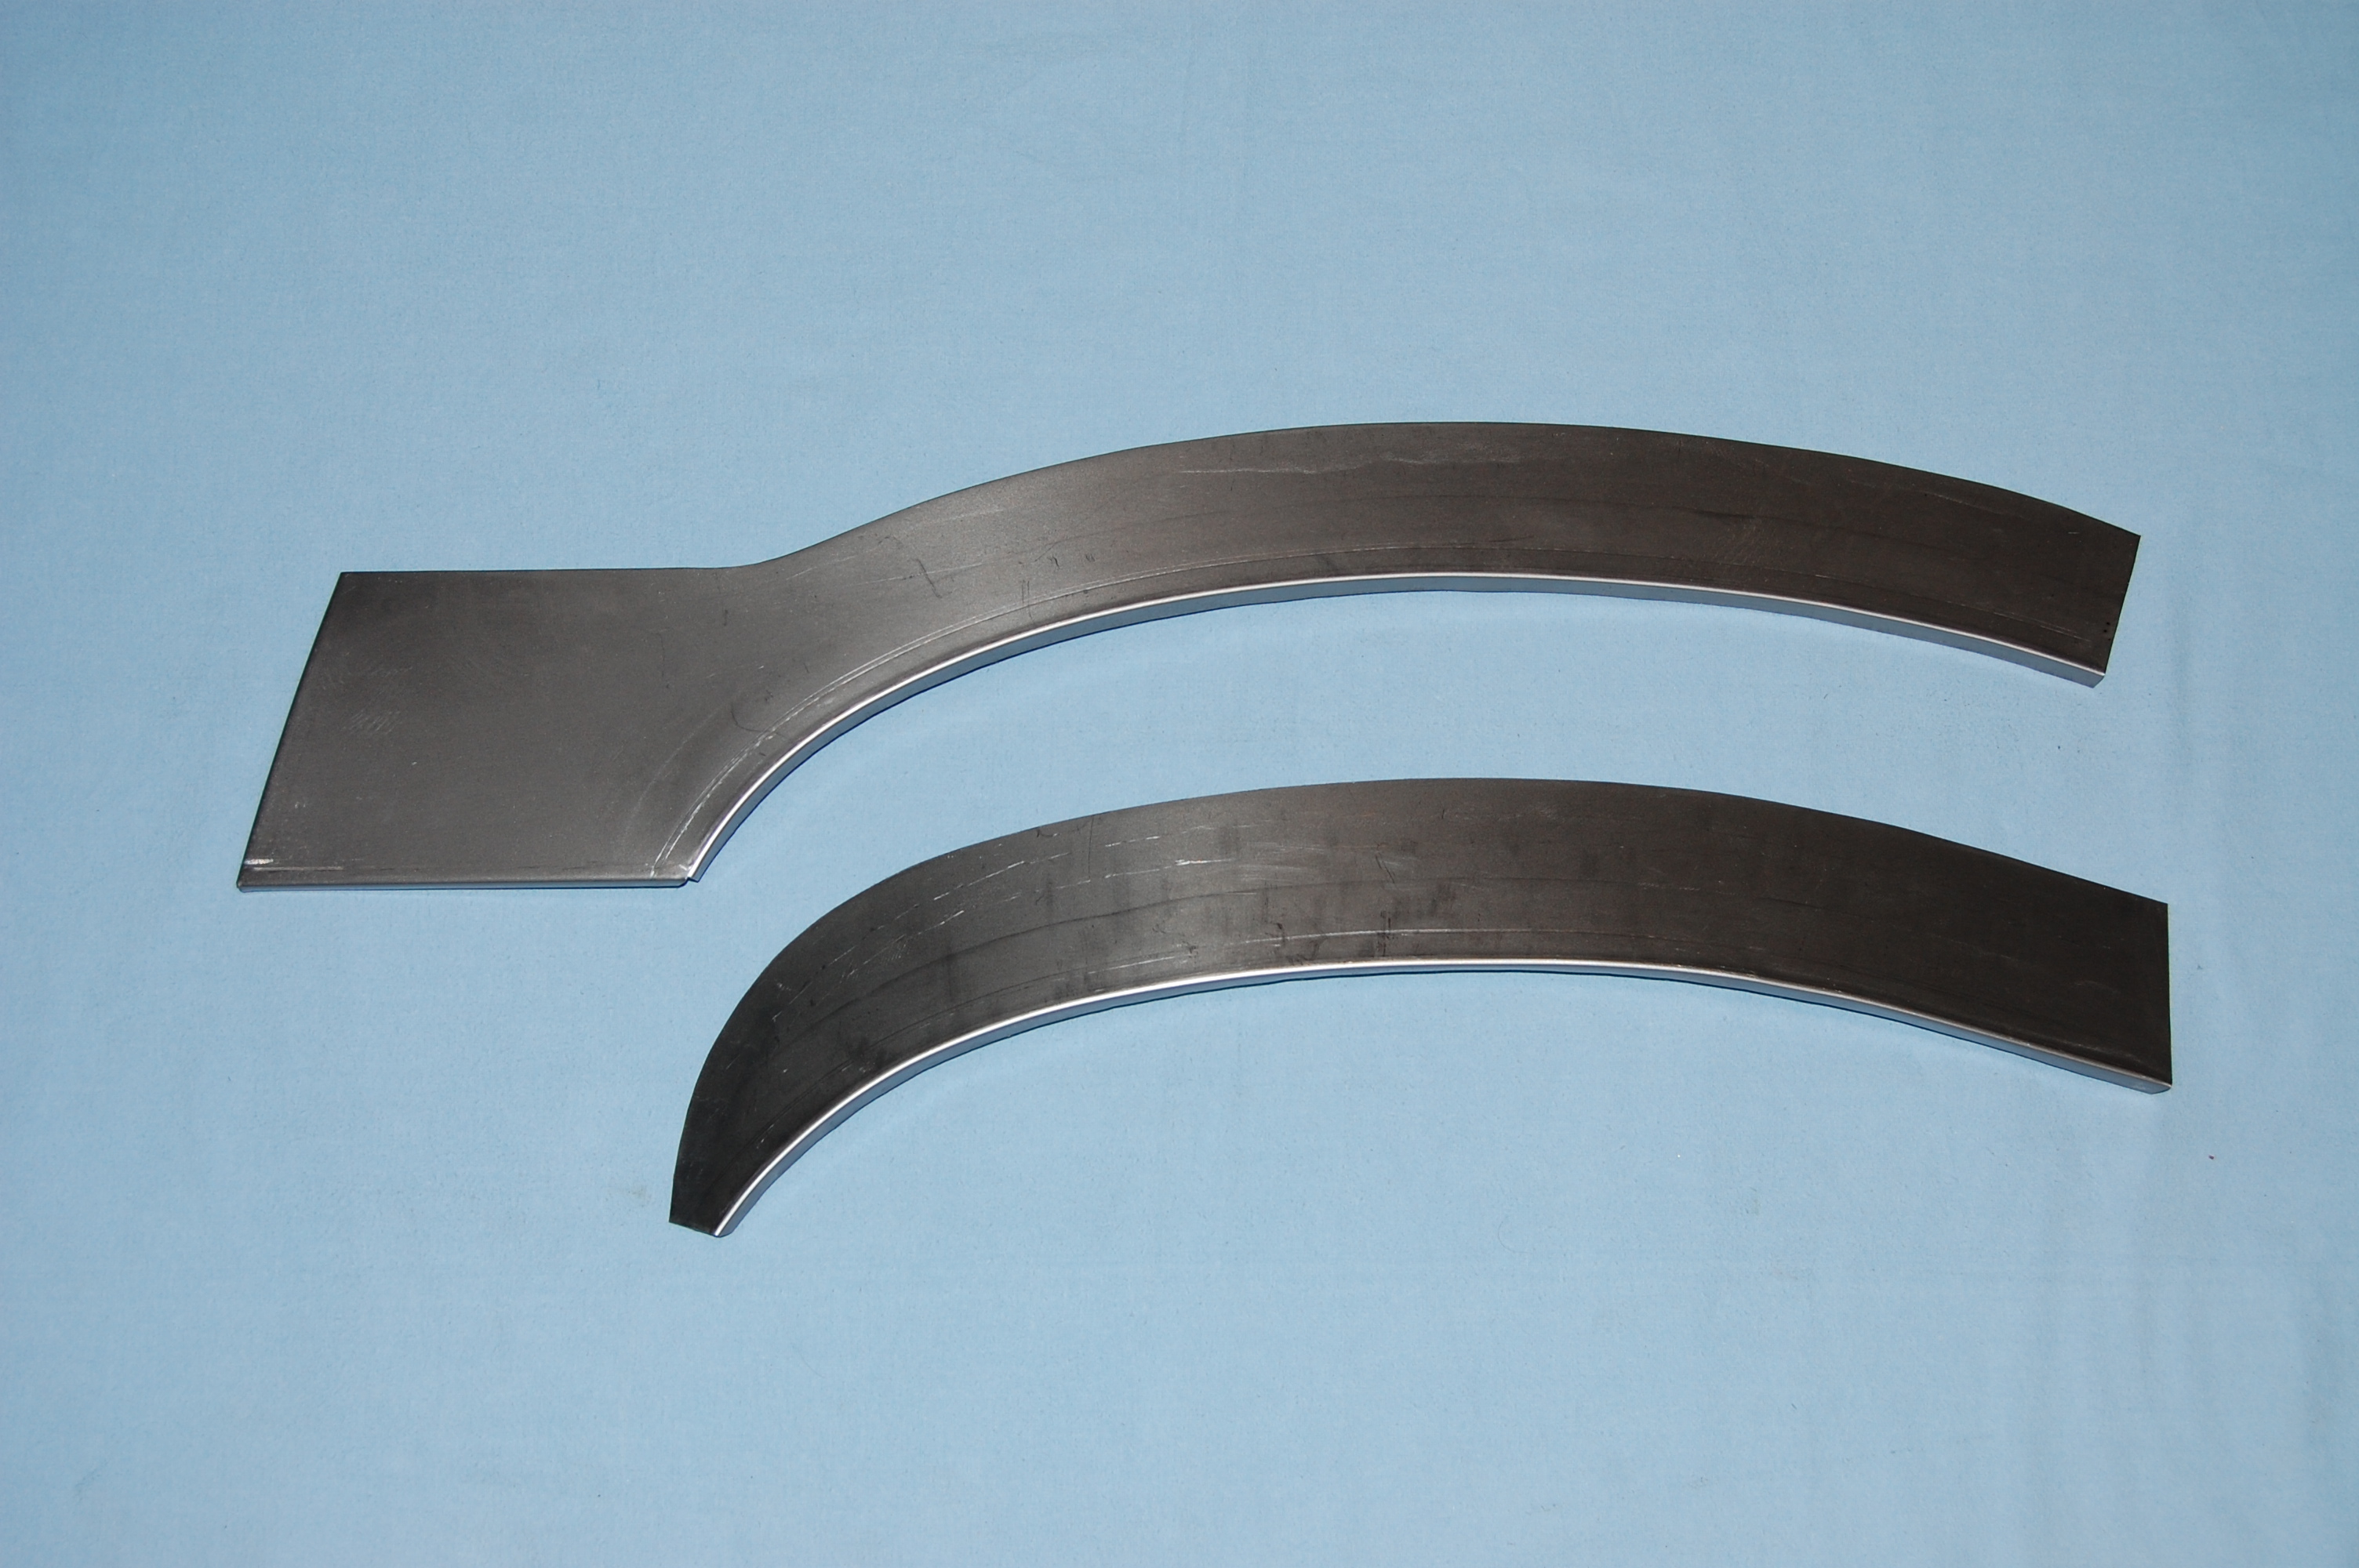
- These are the panels used for the repair – you should trim them down and then put a stepped flange on the upper edge where it makes sense for your car. If you can’t do that at home, we can do it here to your measurements for an additional fee. The outer rear wheel arch repair panel shown at the top of the photo is $85, the inner piece in the bottom of the photo is $68. You WILL need both, although you should only use SOME of each one…
-

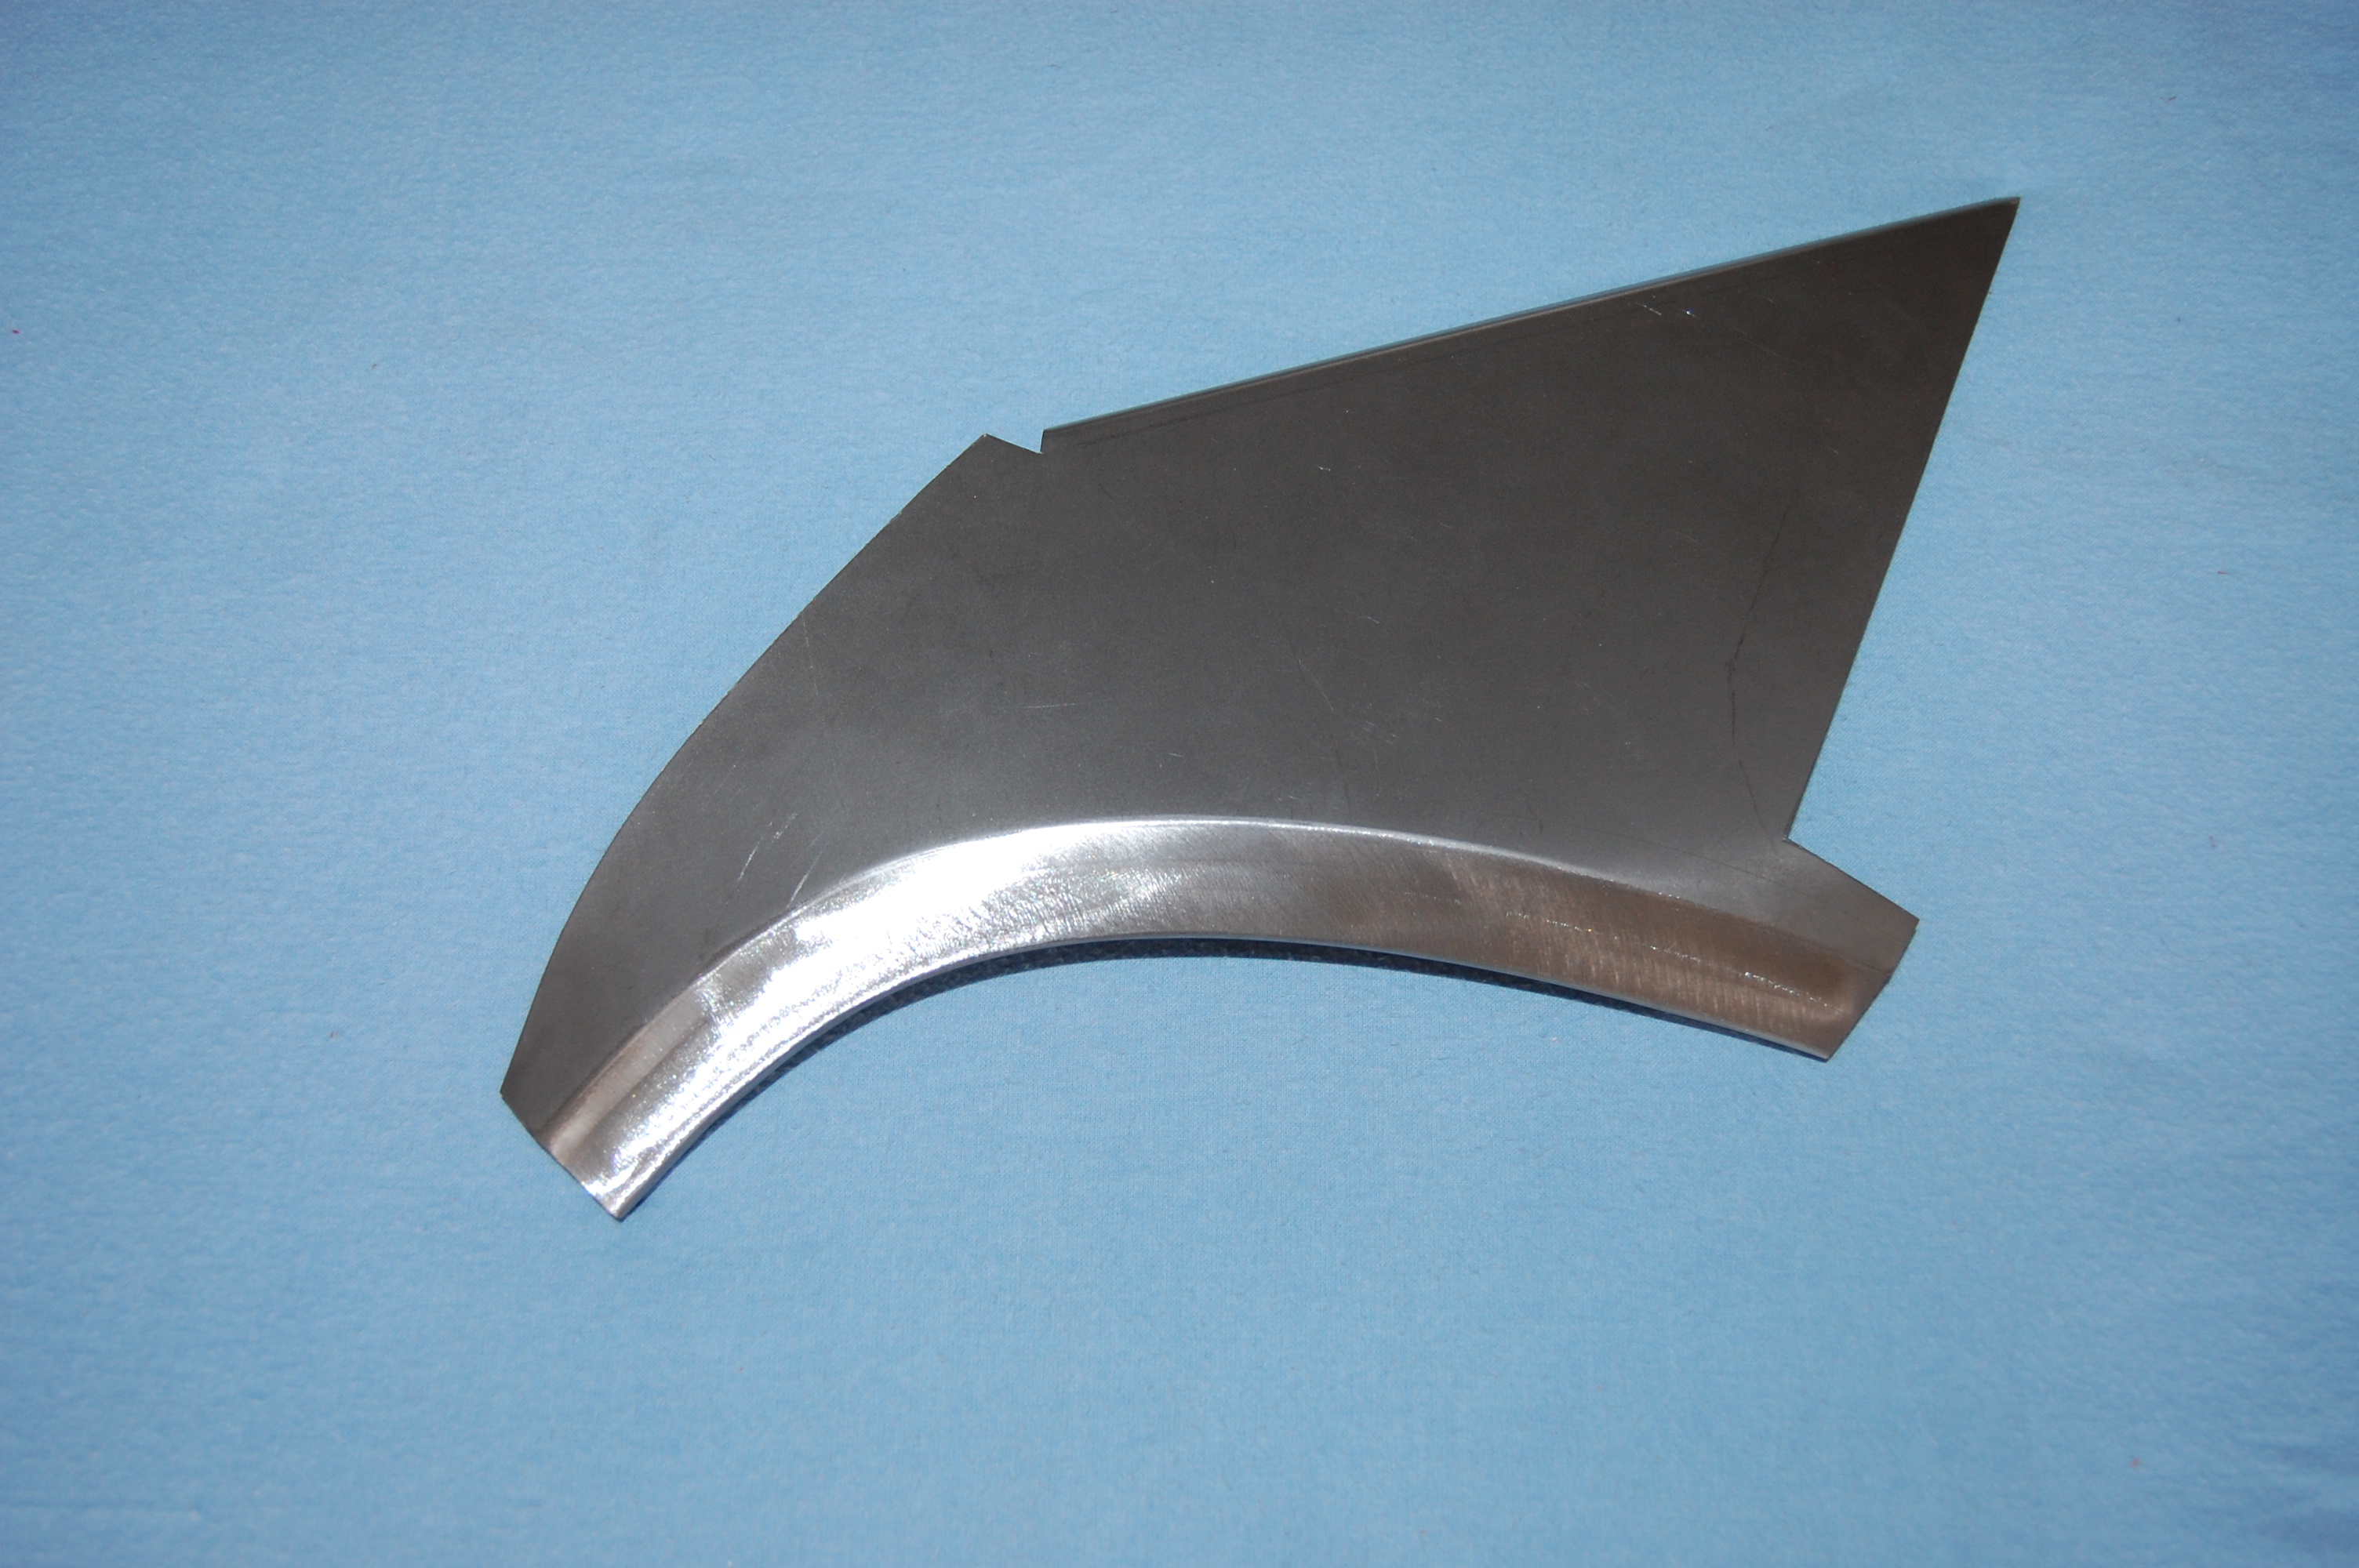
- This is the inner rear wheel arch upper inner piece. All of that sounds ridiculous – inner upper lower… blah, blah, blah… We call it “the boomerang” in the shop. This piece is on the inside of the shell, just below the tip of the rear bumper blades. This is another piece that is VERY often rusted as shown in these photos. And, this is a piece that you will probably only want to use a portion of – cutting it in half and using the bottom, and stitching it in just below the flange that is hidden by the rear bumper blades. That might not make sense to you right this minute while reading this, but trust me, it will once you get into this repair. We actually did something like that in this blog – only replacing a small portion of this piece… This piece is also available in our online store – it is $82.00.
-

- These are the rear lower valance repair sections – also featured in this blog. These are a very cost-effective and time-saving altrenative to replacing the complete piece – which gets REAL compliacted in the tail section, and is FILLED with LOTS of lead. Use this patch like we did above instead of replacing the whole thing. These are $115 – also available in our store.