
The second in our “Jaguar E-Type Rear Wing repair” series deals with the all-too-common situation where a past “restorer” has already been in there and made a REAL mess of things…
In the distant past, there was a panel very similar to size and shape as the one we are now offering as our “Stage 2” solution. Unfortunately, no-one knew how to properly use it, and they almost always did more harm than good when installing it.
In this blog entry, we are going to show you how to install a much larger rear wing repair panel – the RIGHT way!
-

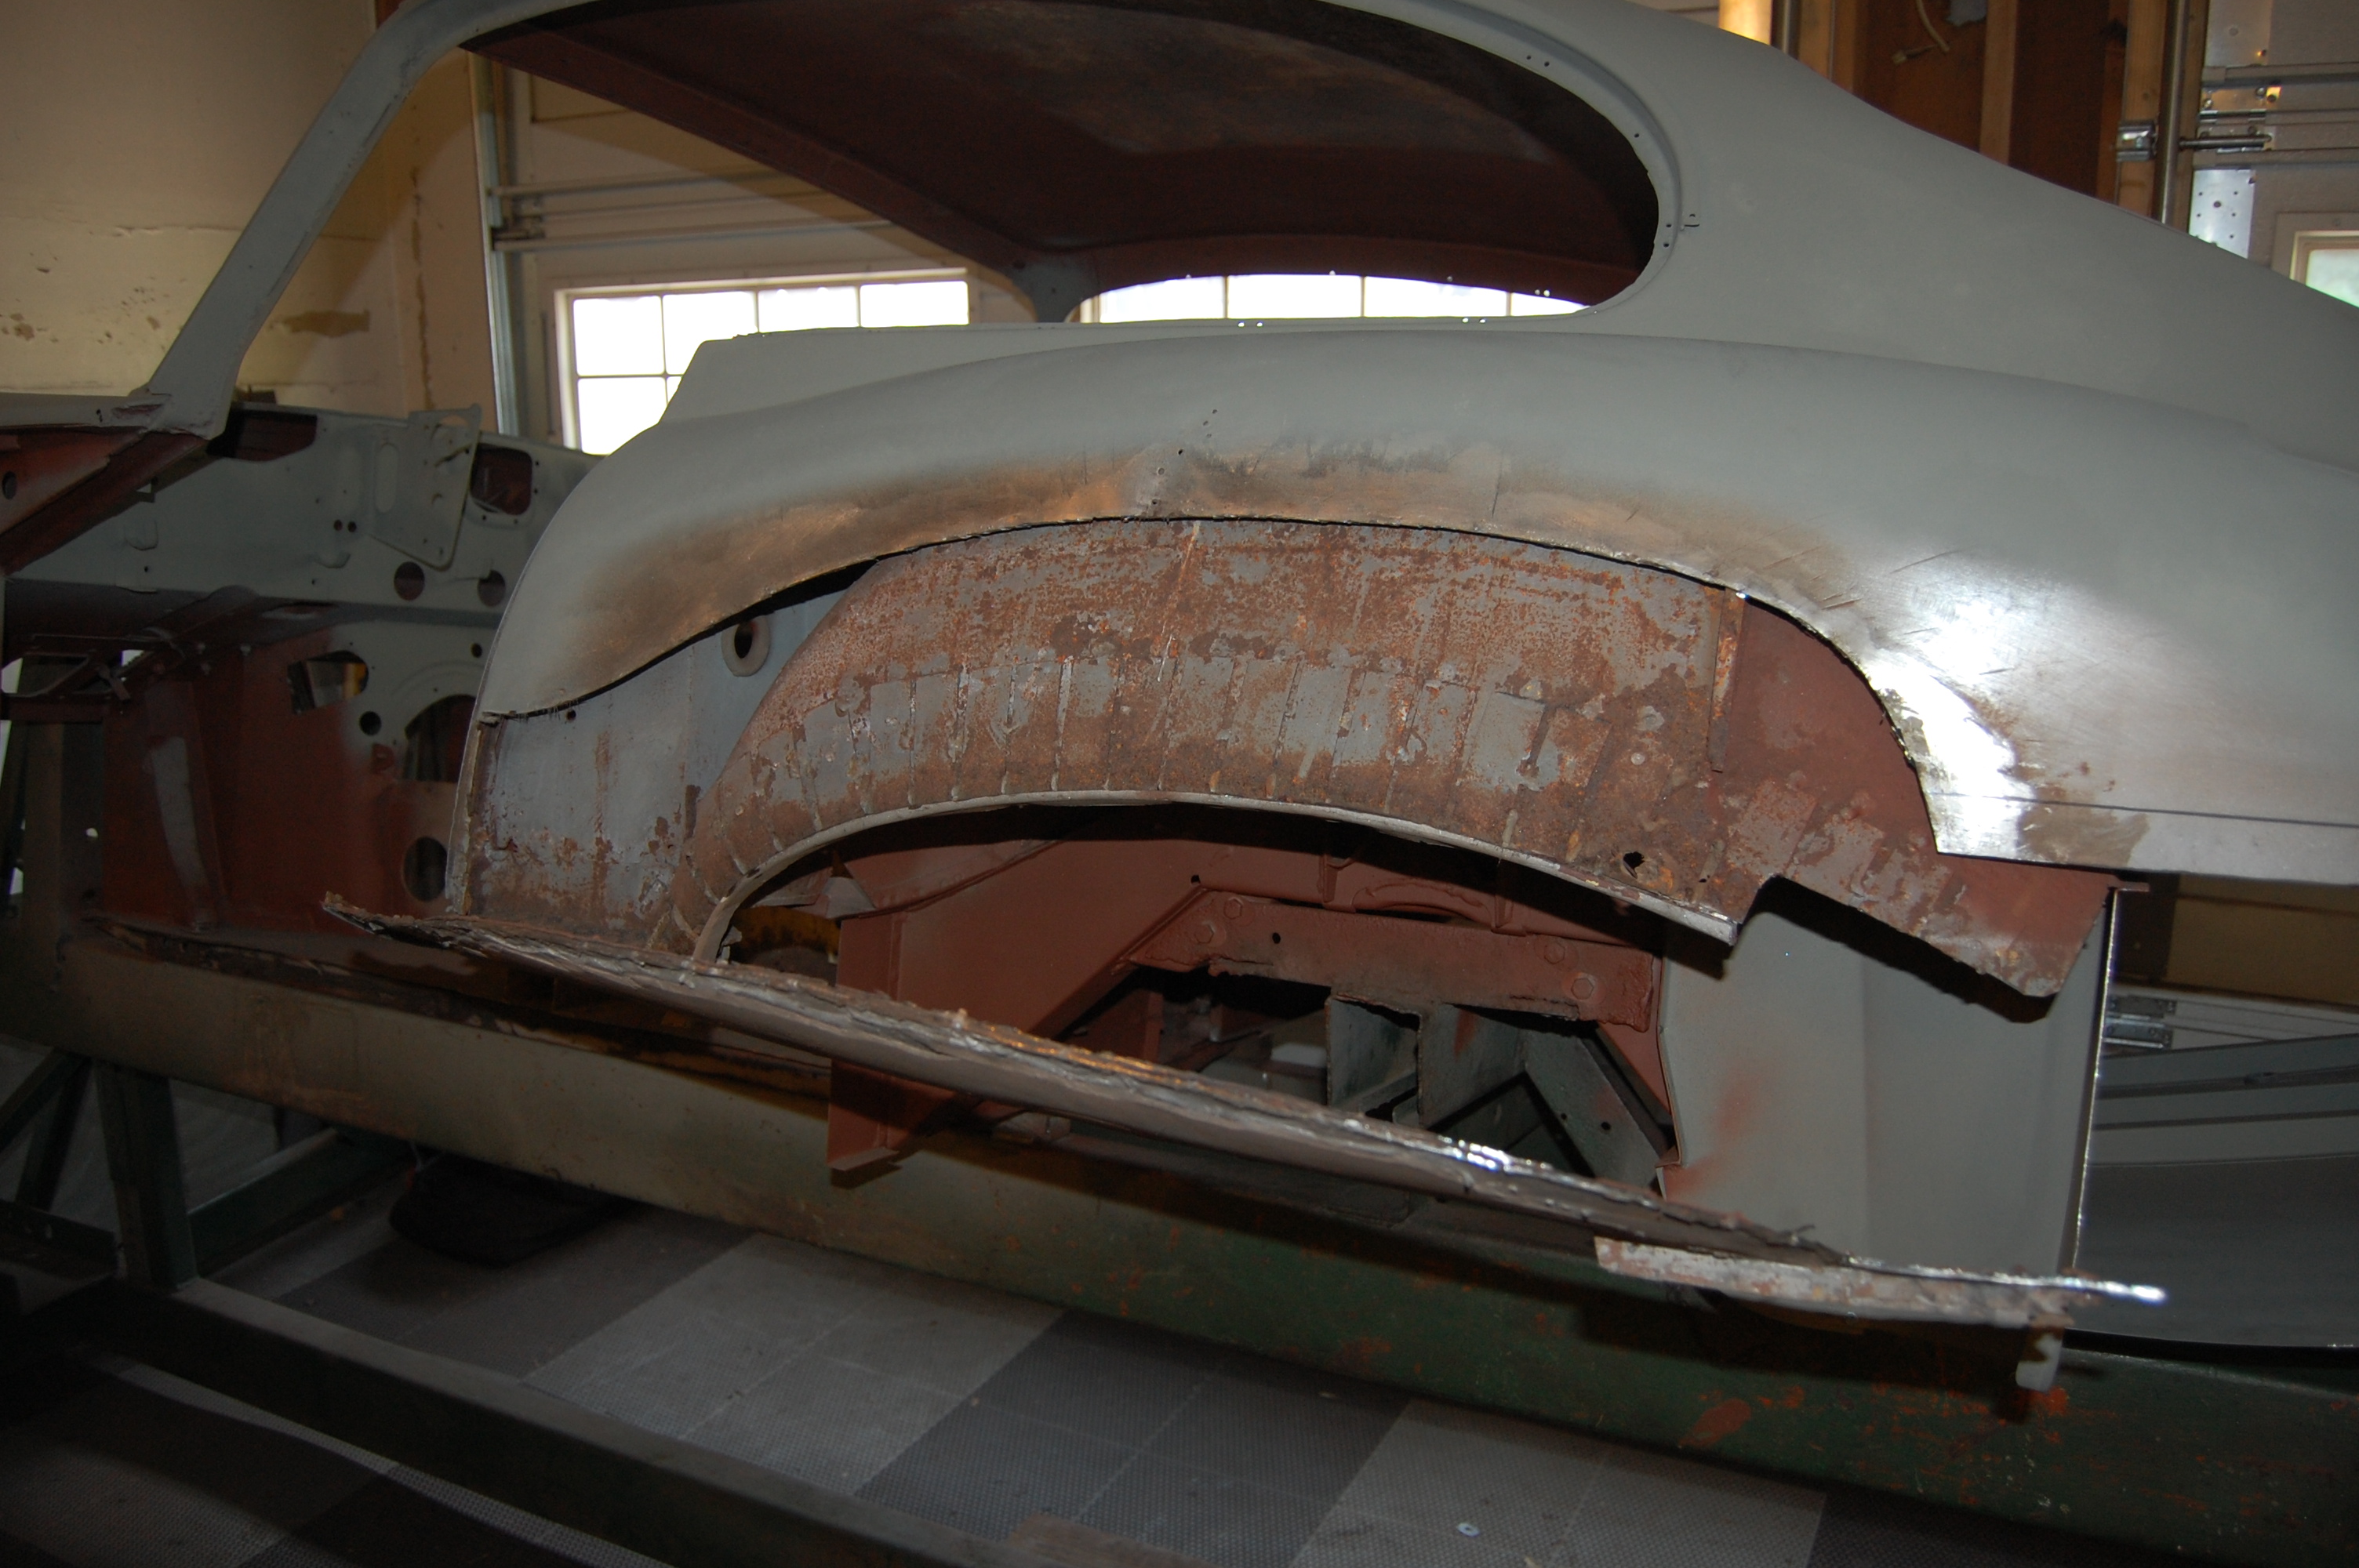
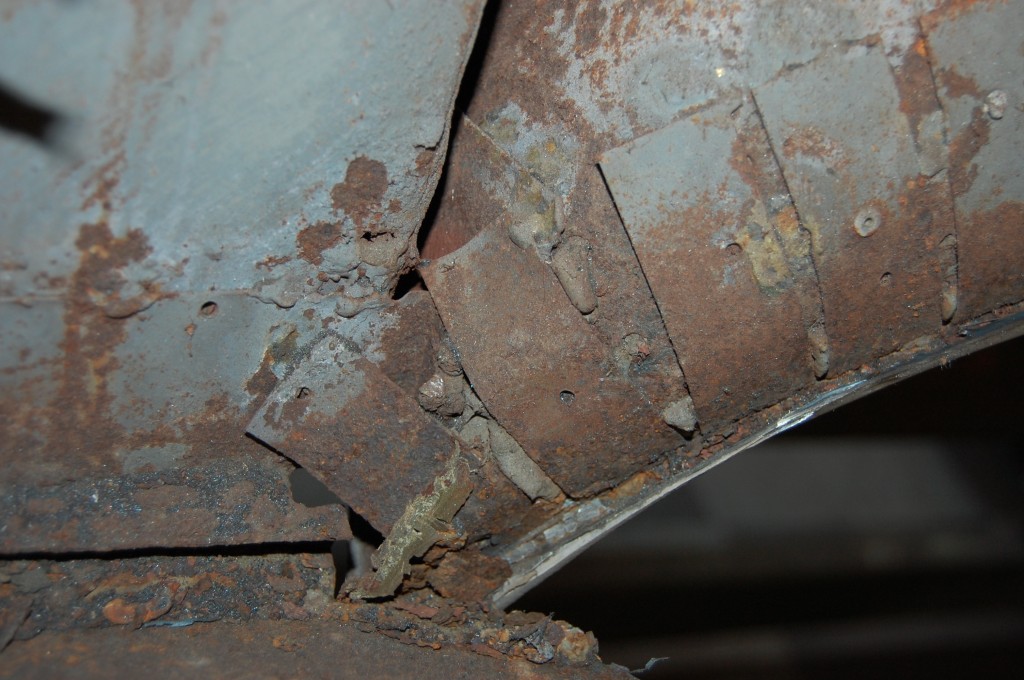
- Here’s a glimpse of what you might find when stripping down your coupe or 2+2. YIKES!
-
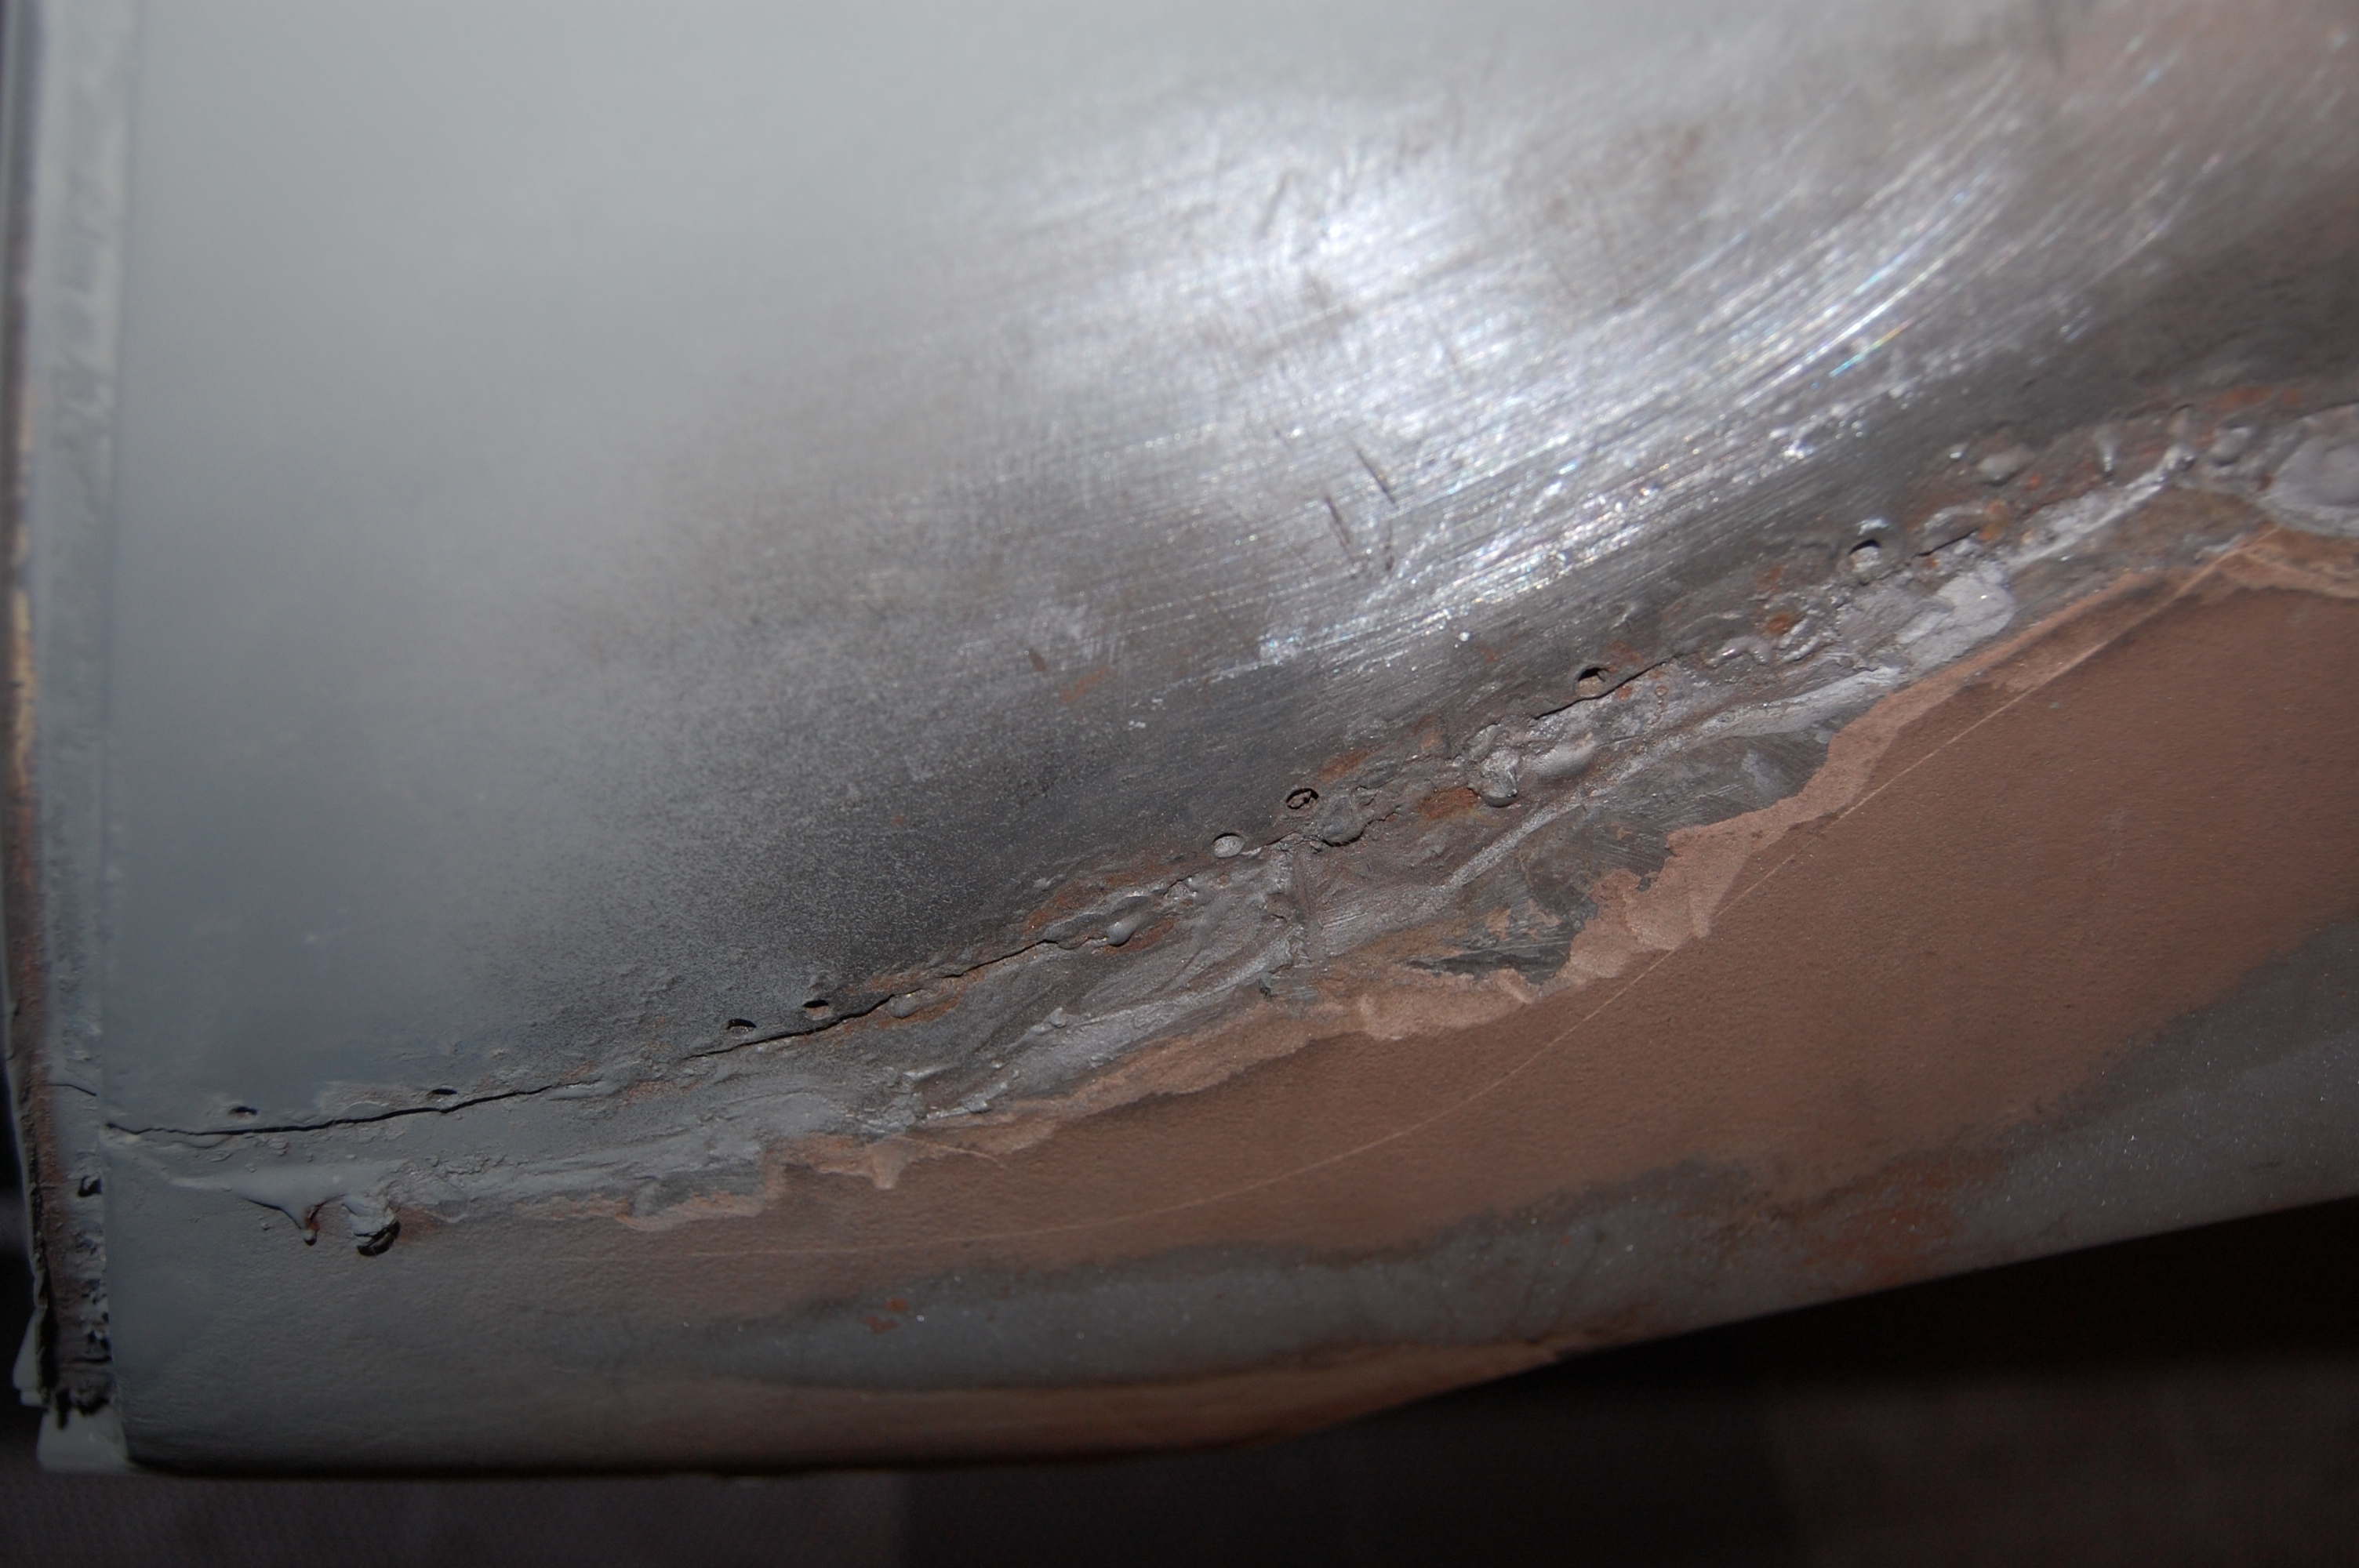
- This patch has placed the seam in the absolute WORST place on the wing – it’s “peak” considering the bulge. This makes distortion virtually impossible to avoid, and the person who butchered this repair in the past ran into this problem. You can actually see where the wing buckled from excessive welding (and lead loading), and they actually used a dent-puller after the fact! They LITERALLY had to “repair their repair!” – AAAGGGGHHHHH!!!!!
-
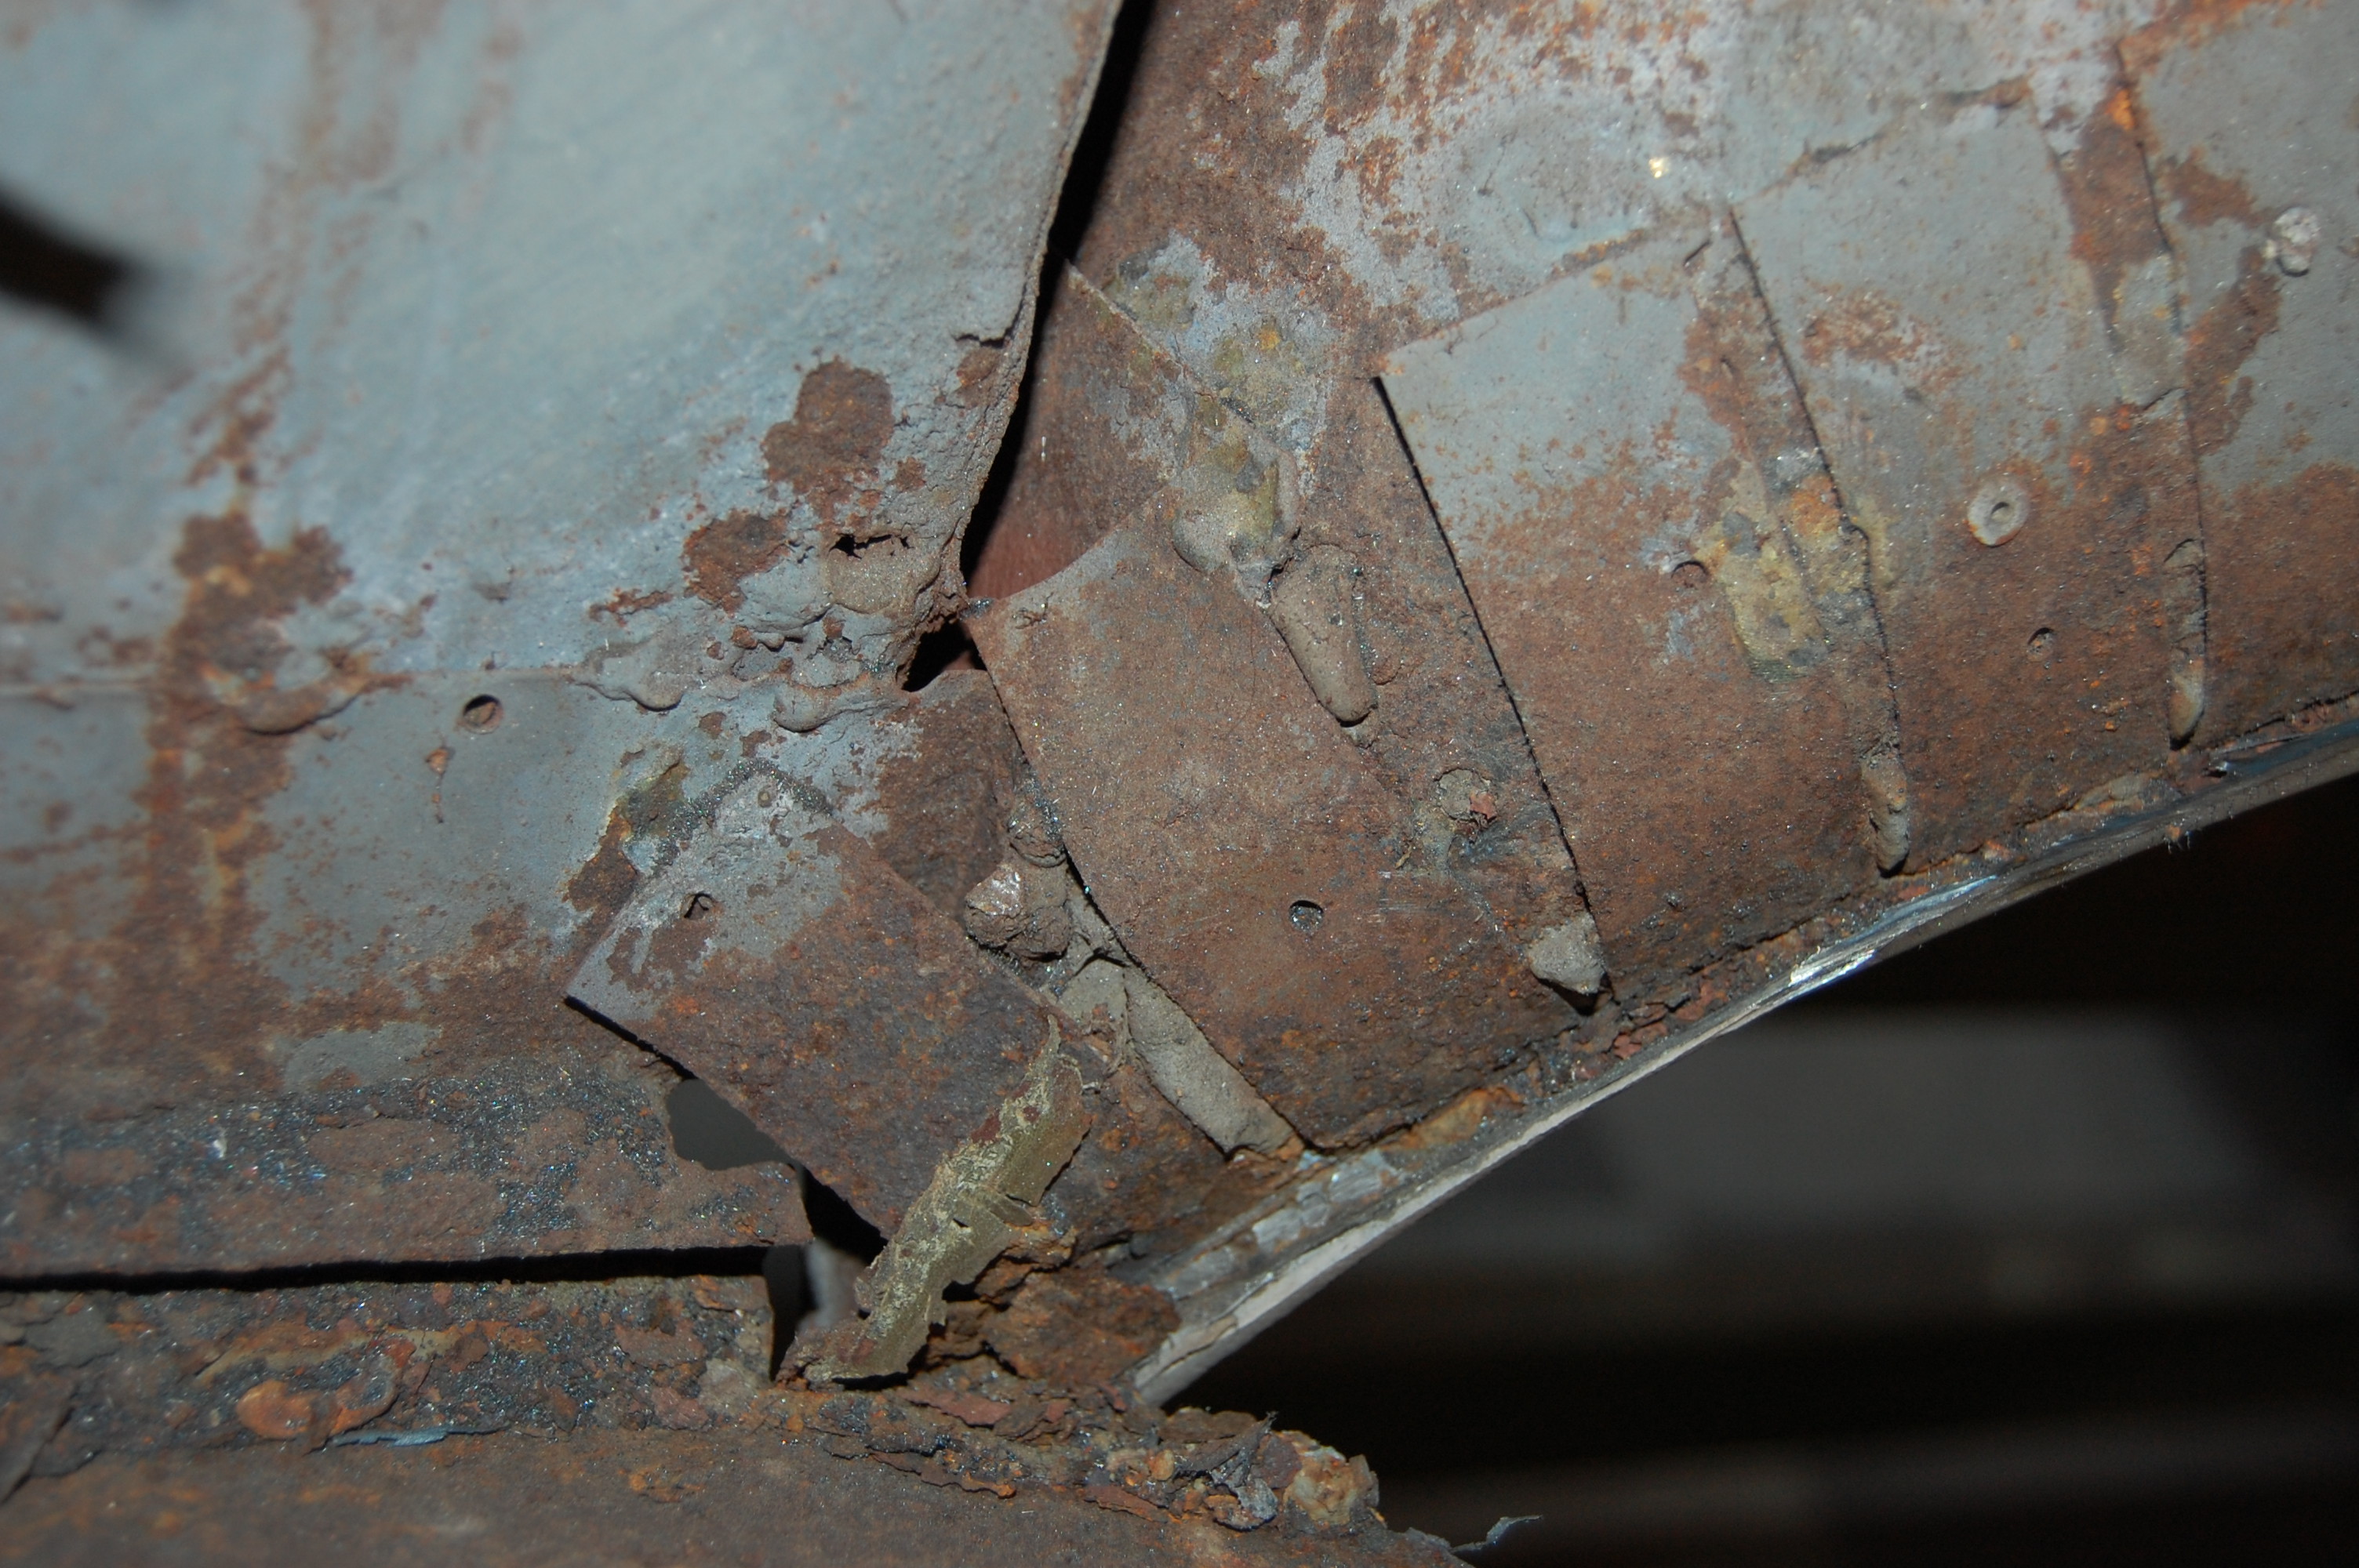
- And then after that, they started to realize that the wing did not have the bulge that it should have – or originally had. This could be due to weld heat, but is also caused by improper placement of the repair piece – watch out for that! So what did they do? You guessed it – TONS of lead AND plastic filler!
-

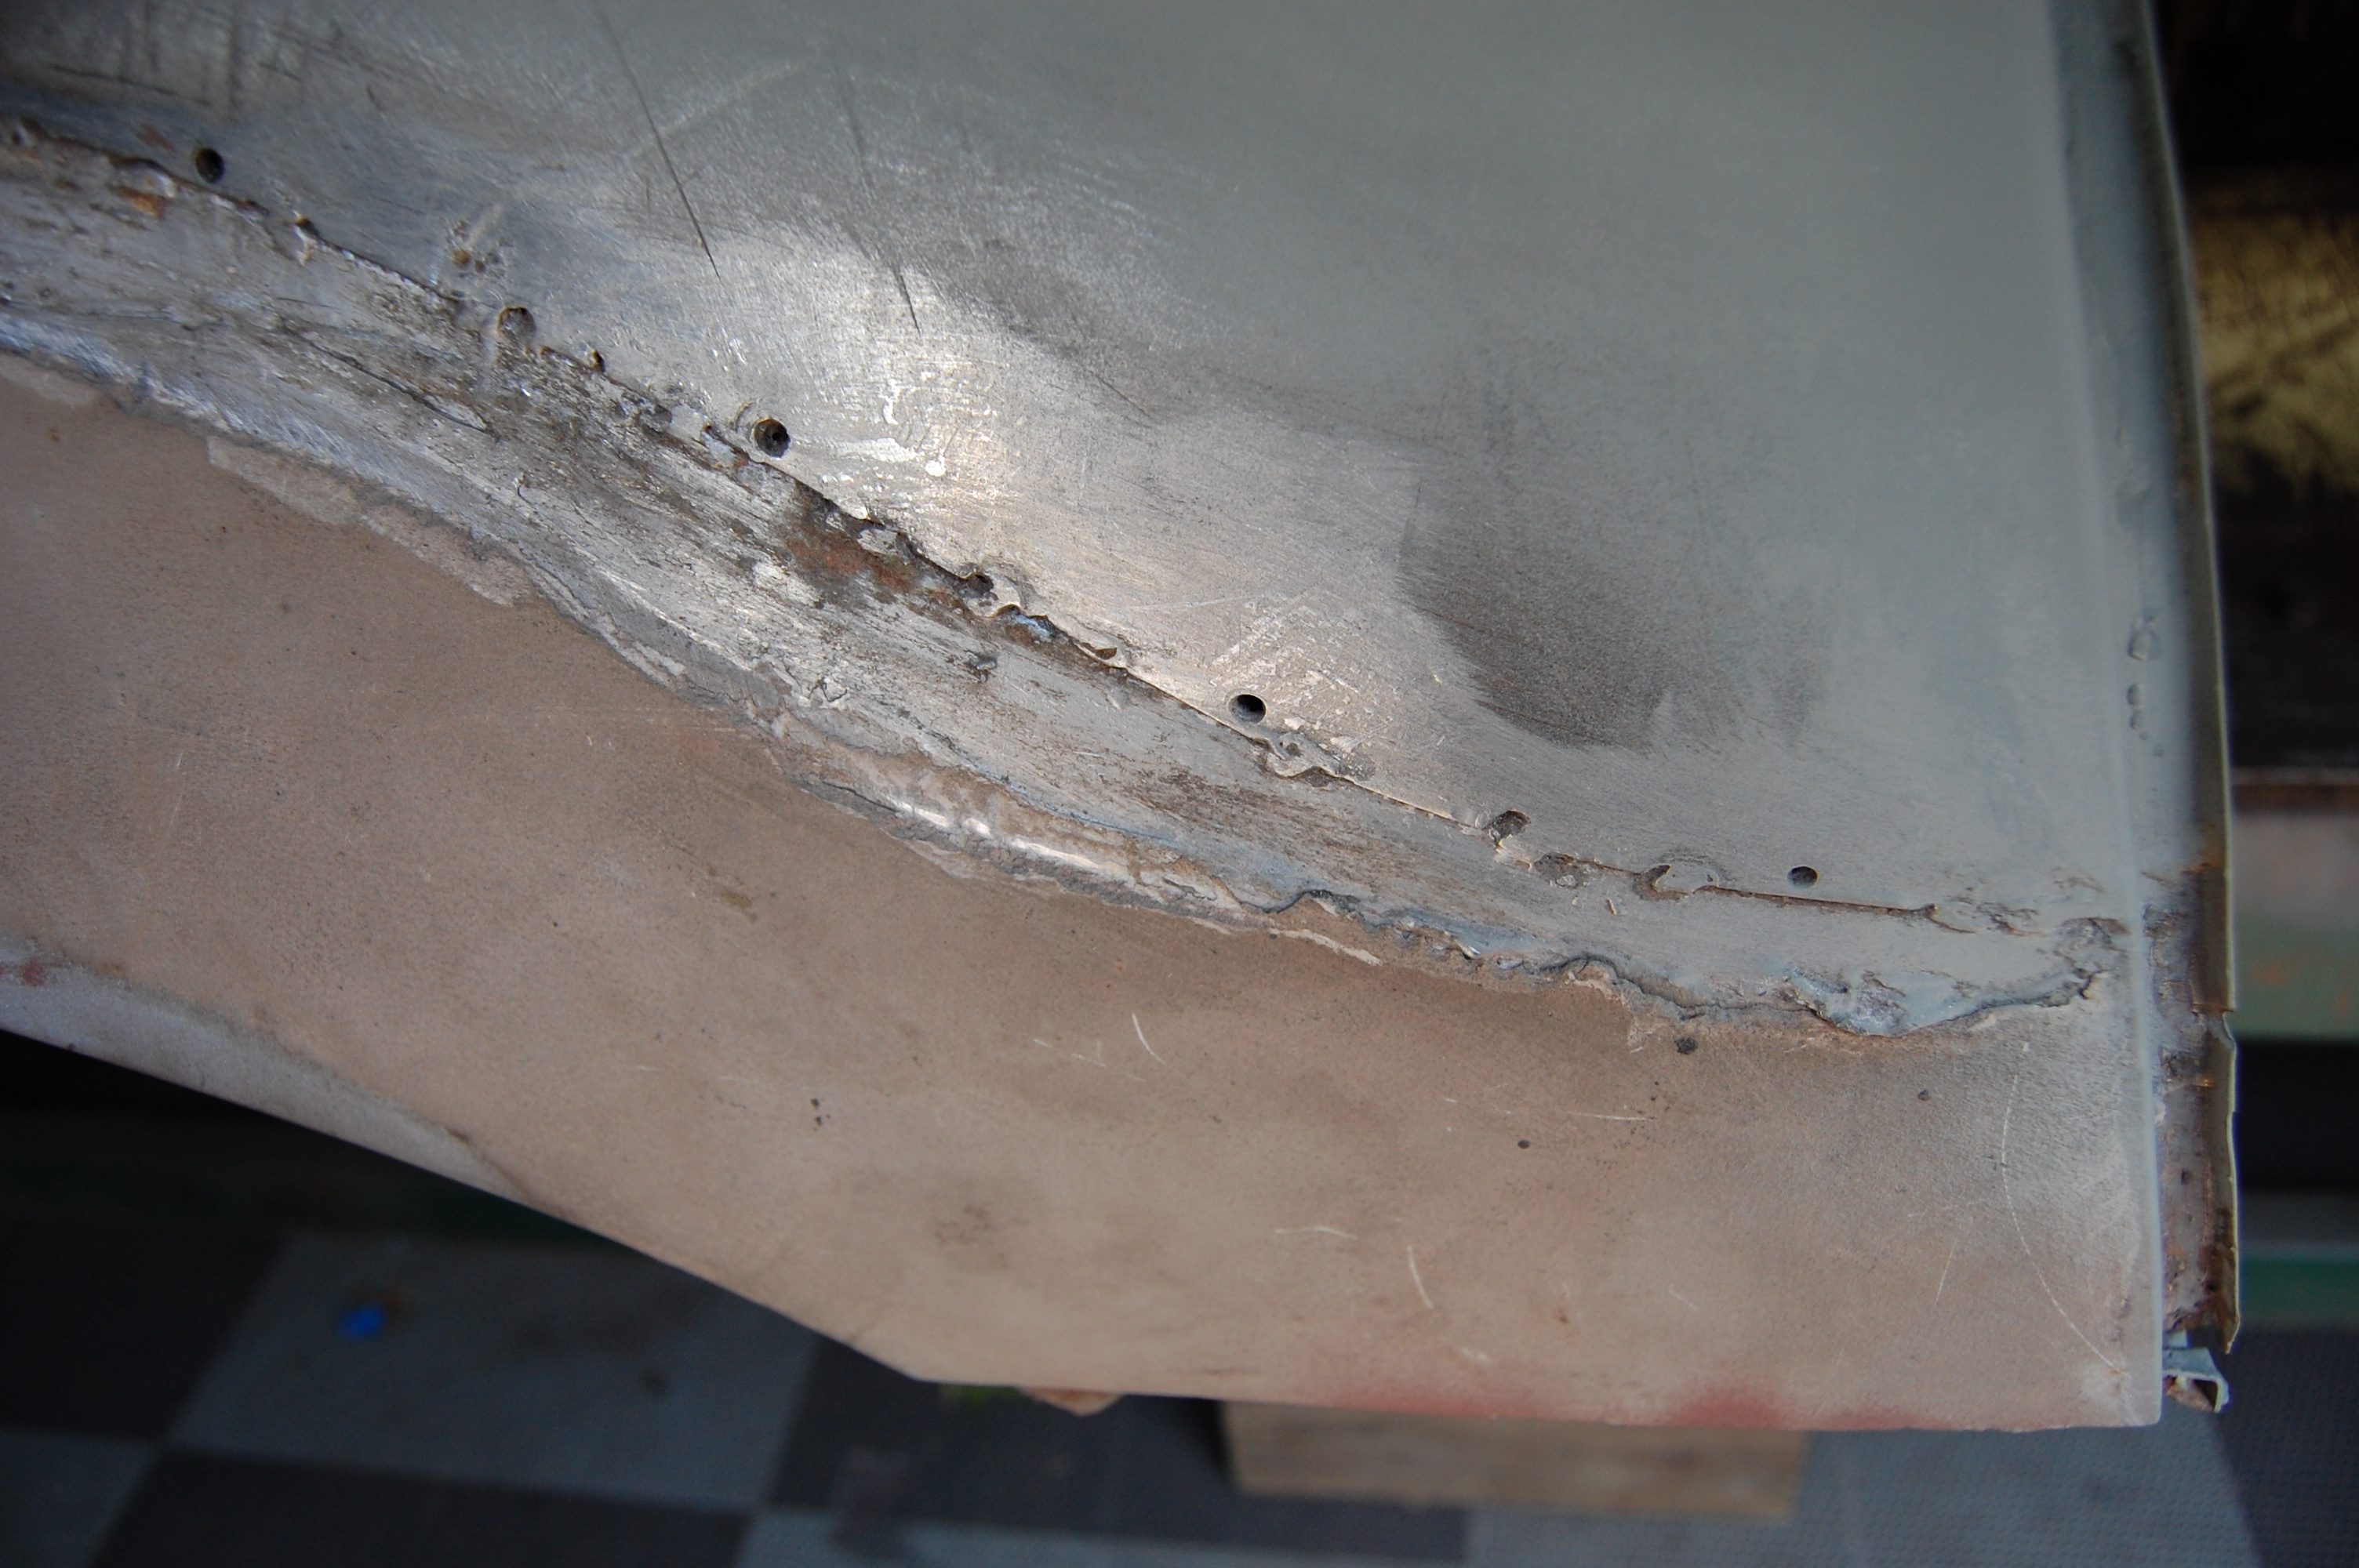
- And the other side? More of the same… LOTS more…
-
- This much of a mess makes you start to worry about what’s underneath…

-

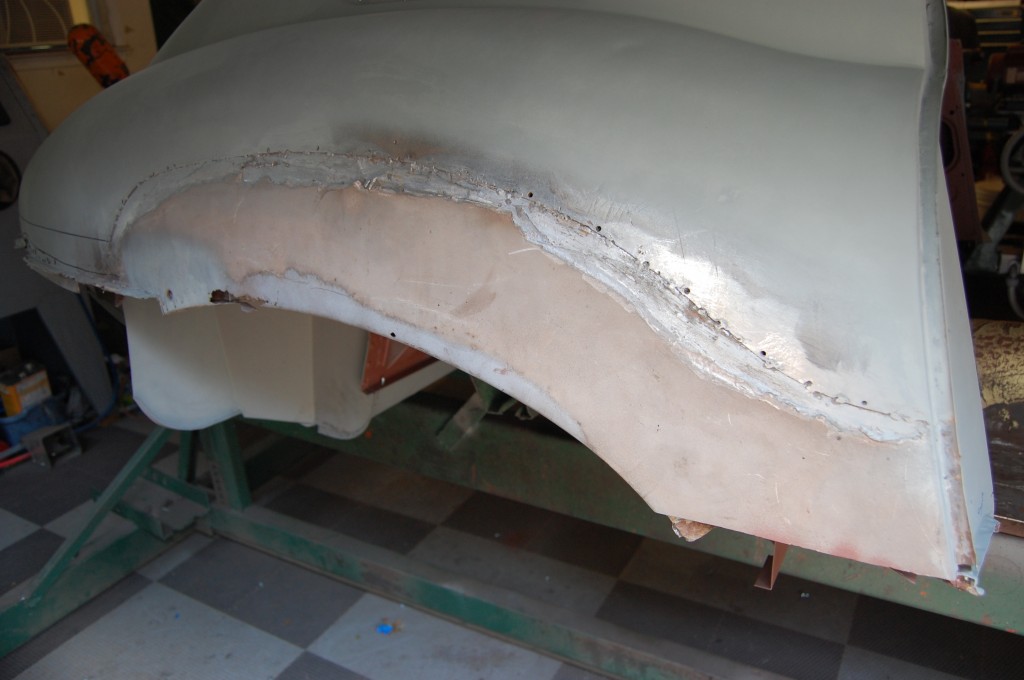
- OH MY LORD – ARE YOU KIDDING ME!?!!!! I blogged this about a year ago when we did this E-Type, and I think I said just about the same thing! What I ACTUALLY said out loud when this took place in real time is “unprintable” here…
-
- Some people just can’t admit they are in over their heads… I guess they get a few points for ingenuity and determination, but they really should have walked away and let someone else in here…
-

- This is where our inner rear wheel arch repair piece will solve just about any problem you run into here.
-
- In this photo, we have screwed the standard patch onto the inner wheel arch, after removing all of those tabs, and cutting back all of the cancerous rust.
-
- Another shot – this is our standard piece – off the shelf and avaiulable in our store.

-
- Here, we have marked the repair panel from the backside, and stitched it into the original panel using the TIG welder. None of this is seen, and so you can be a little less fancy here that a TIG-welded butt-joint, slightly overlapped and MIG-welded would be OK – just be neat and efficient in your welding so that the finished repair is a smooth seam that can be well sealed and will not trap moisture in the future.

-
- A shot of the completed inner wheel arch repair, ready to be liberally coated with red oxide.

-

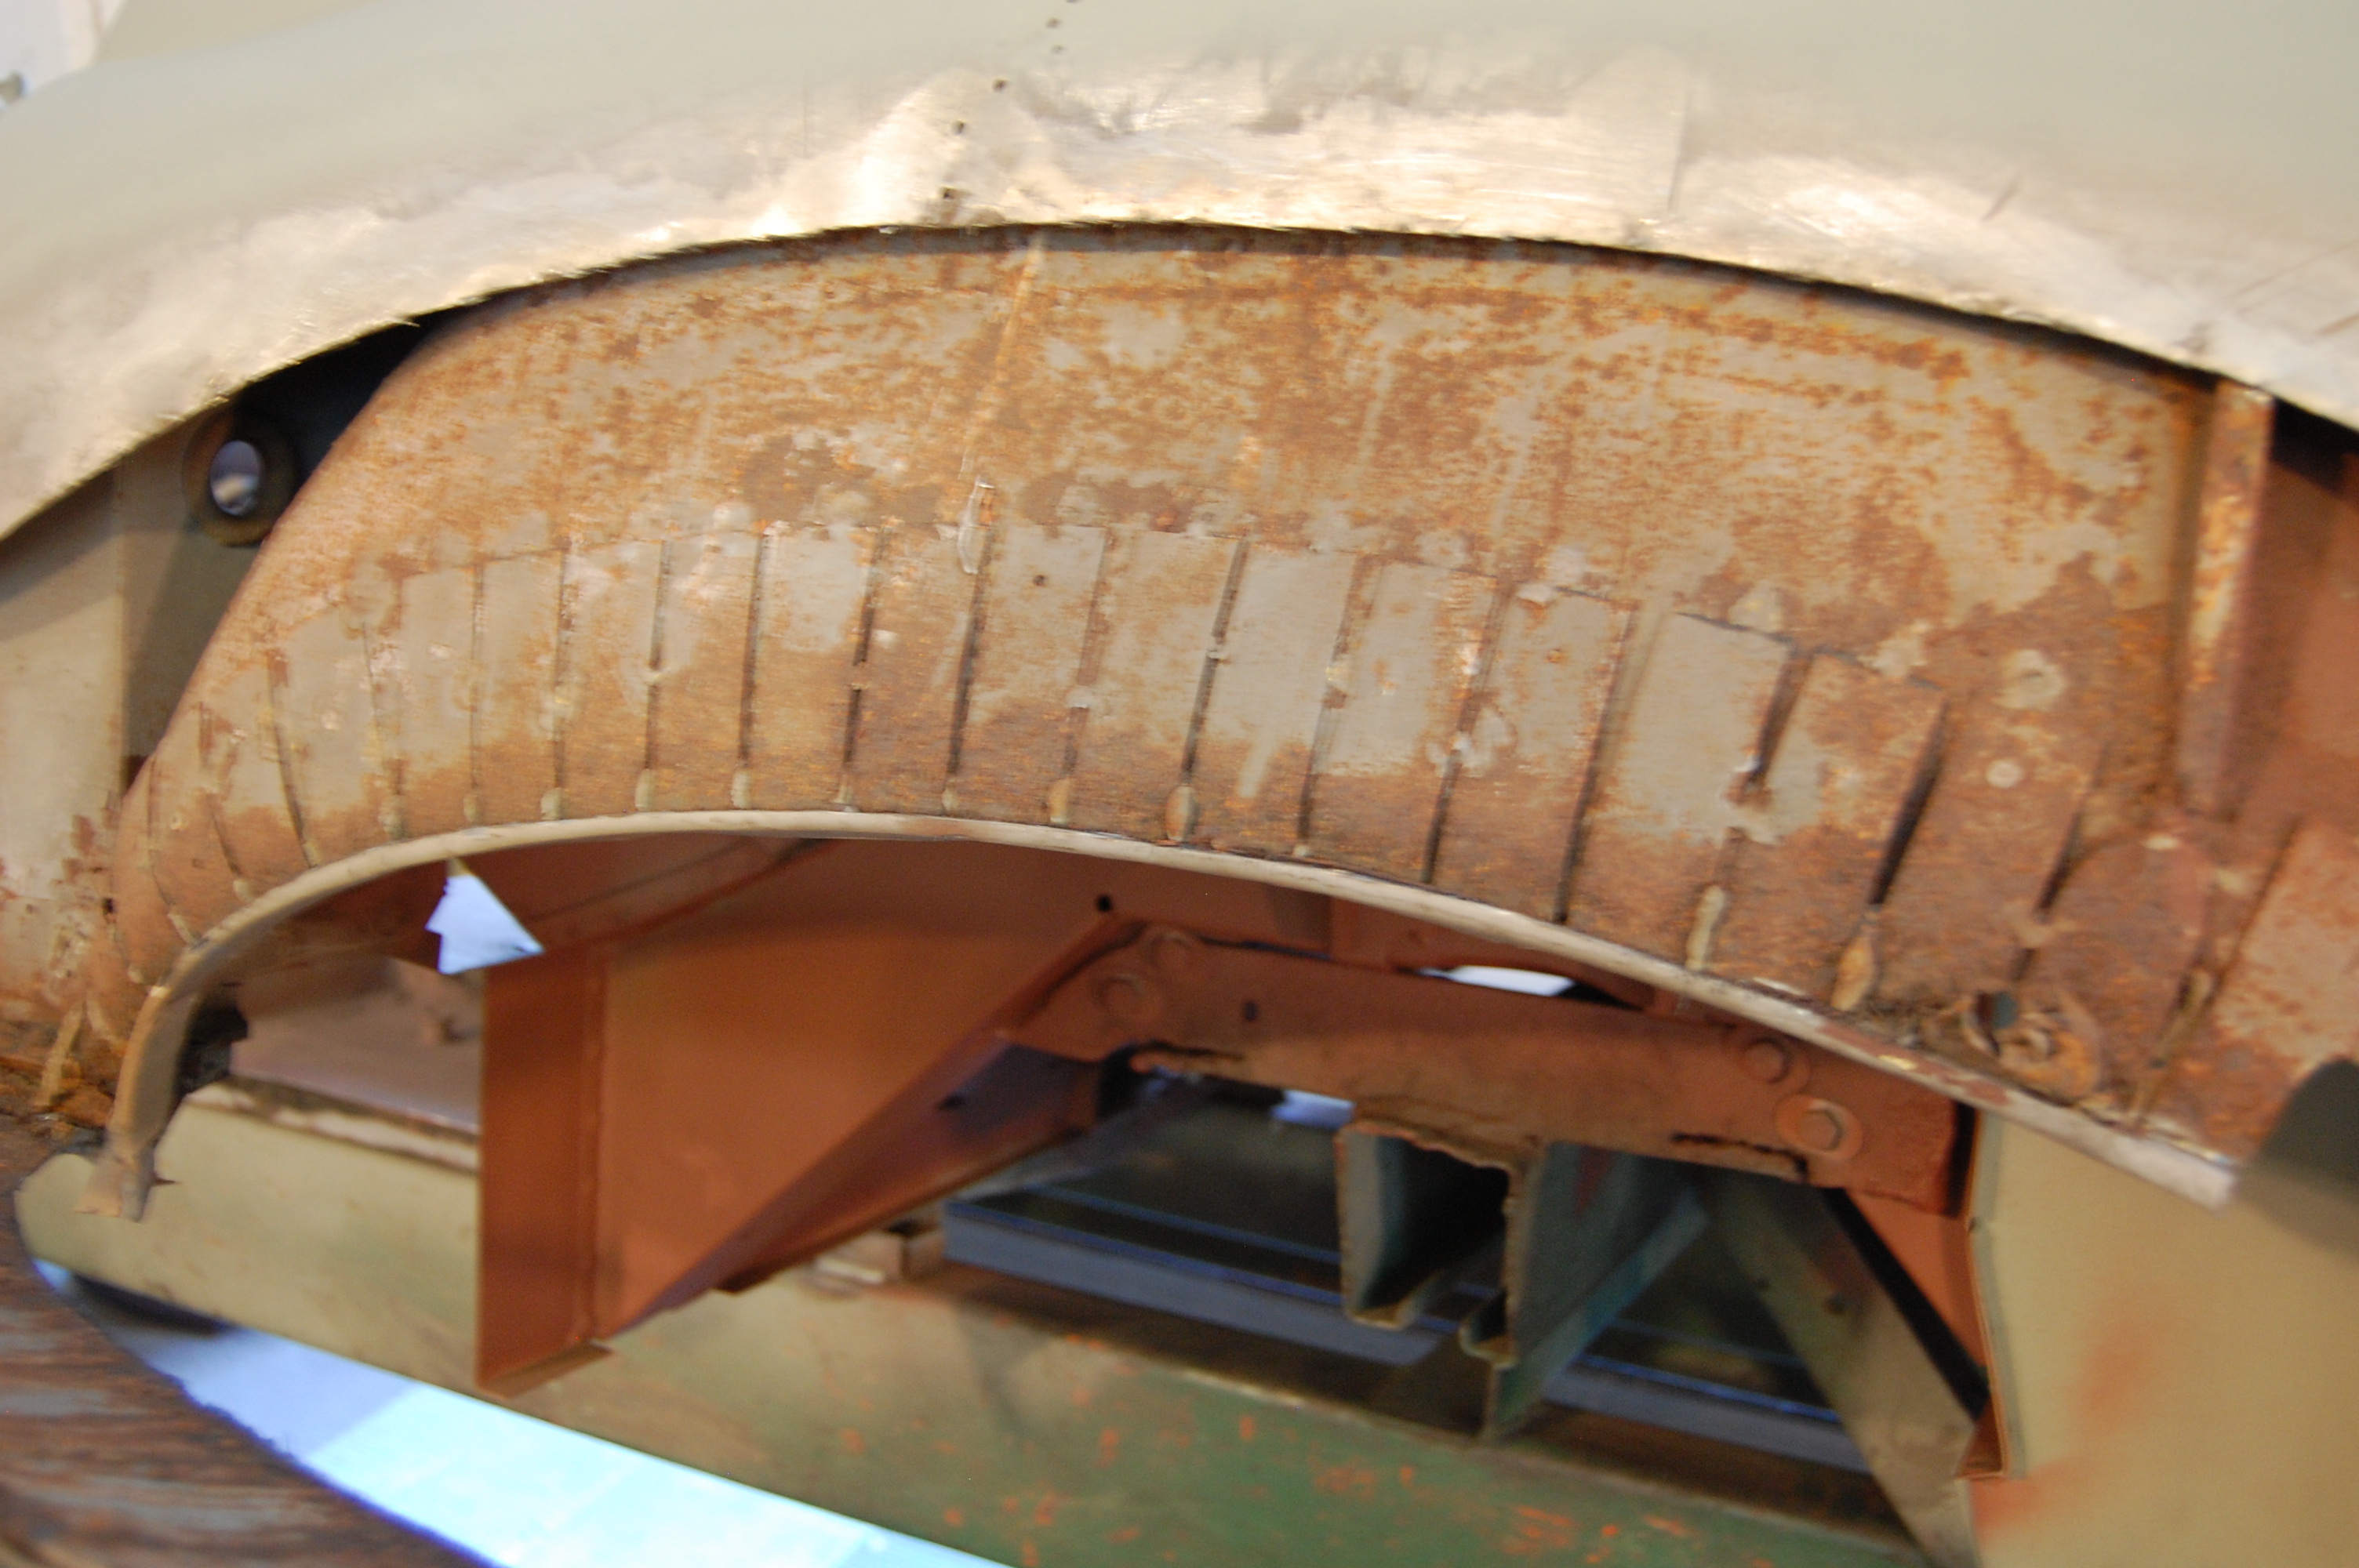
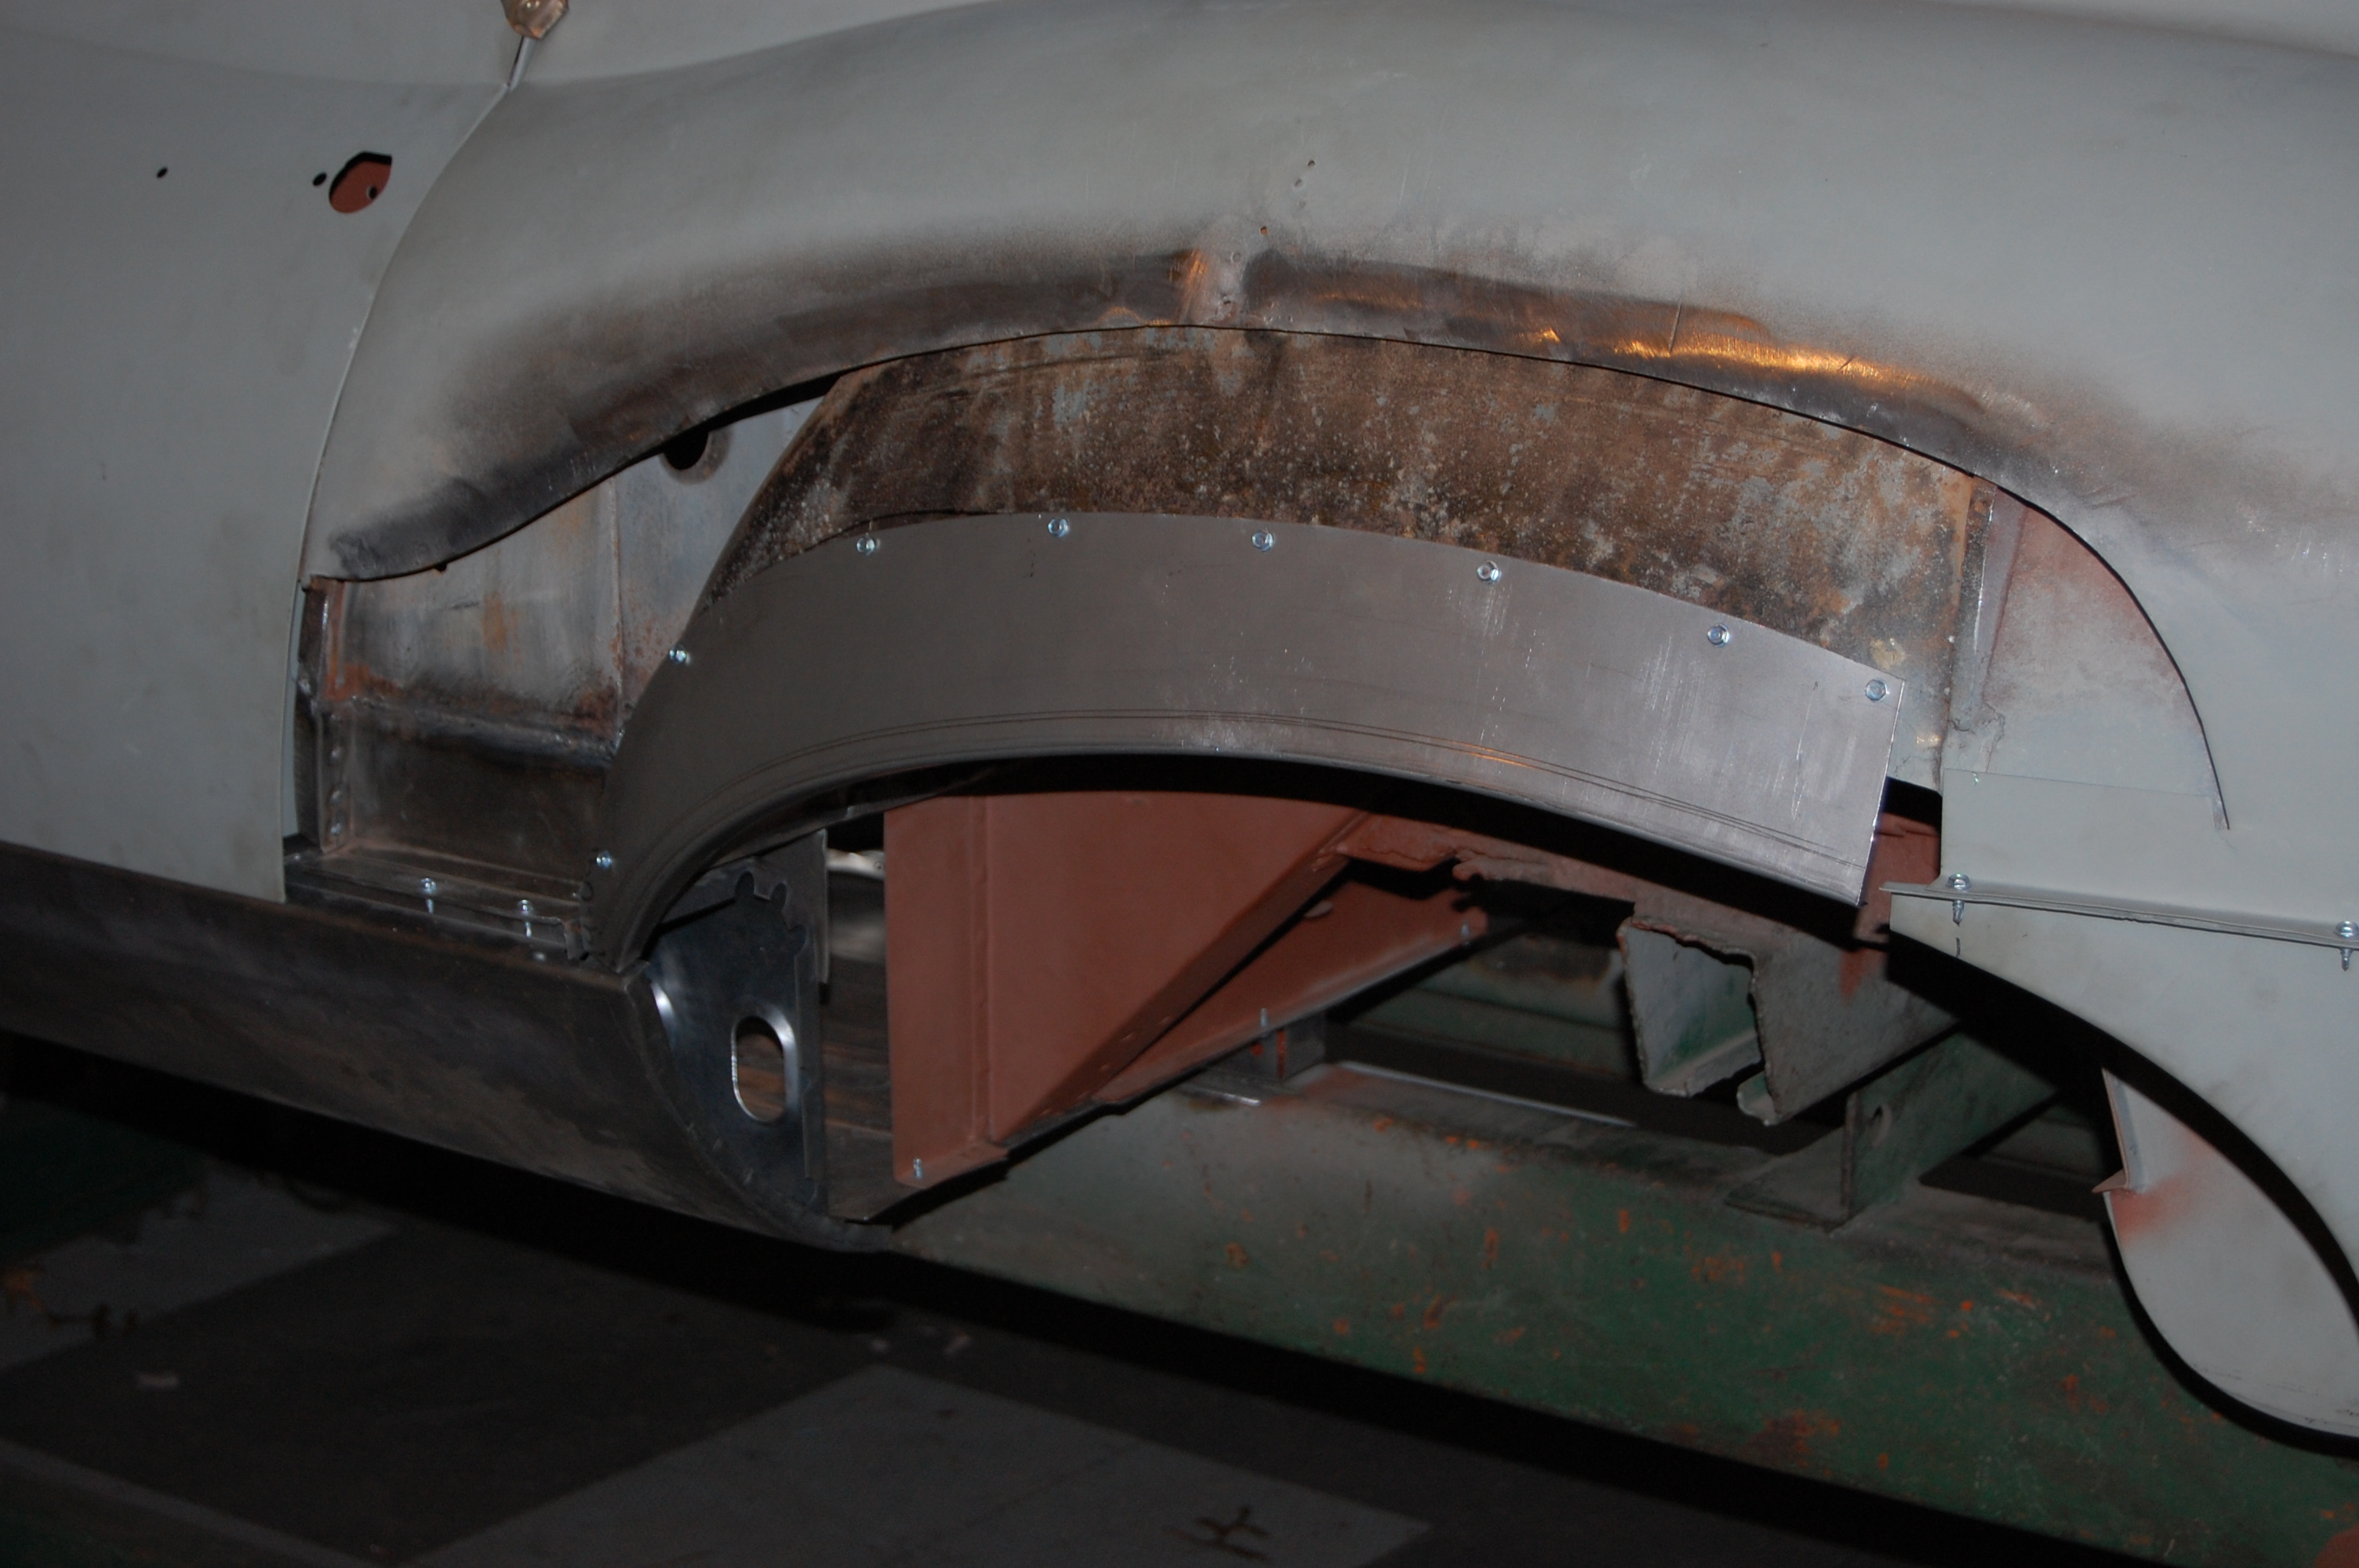
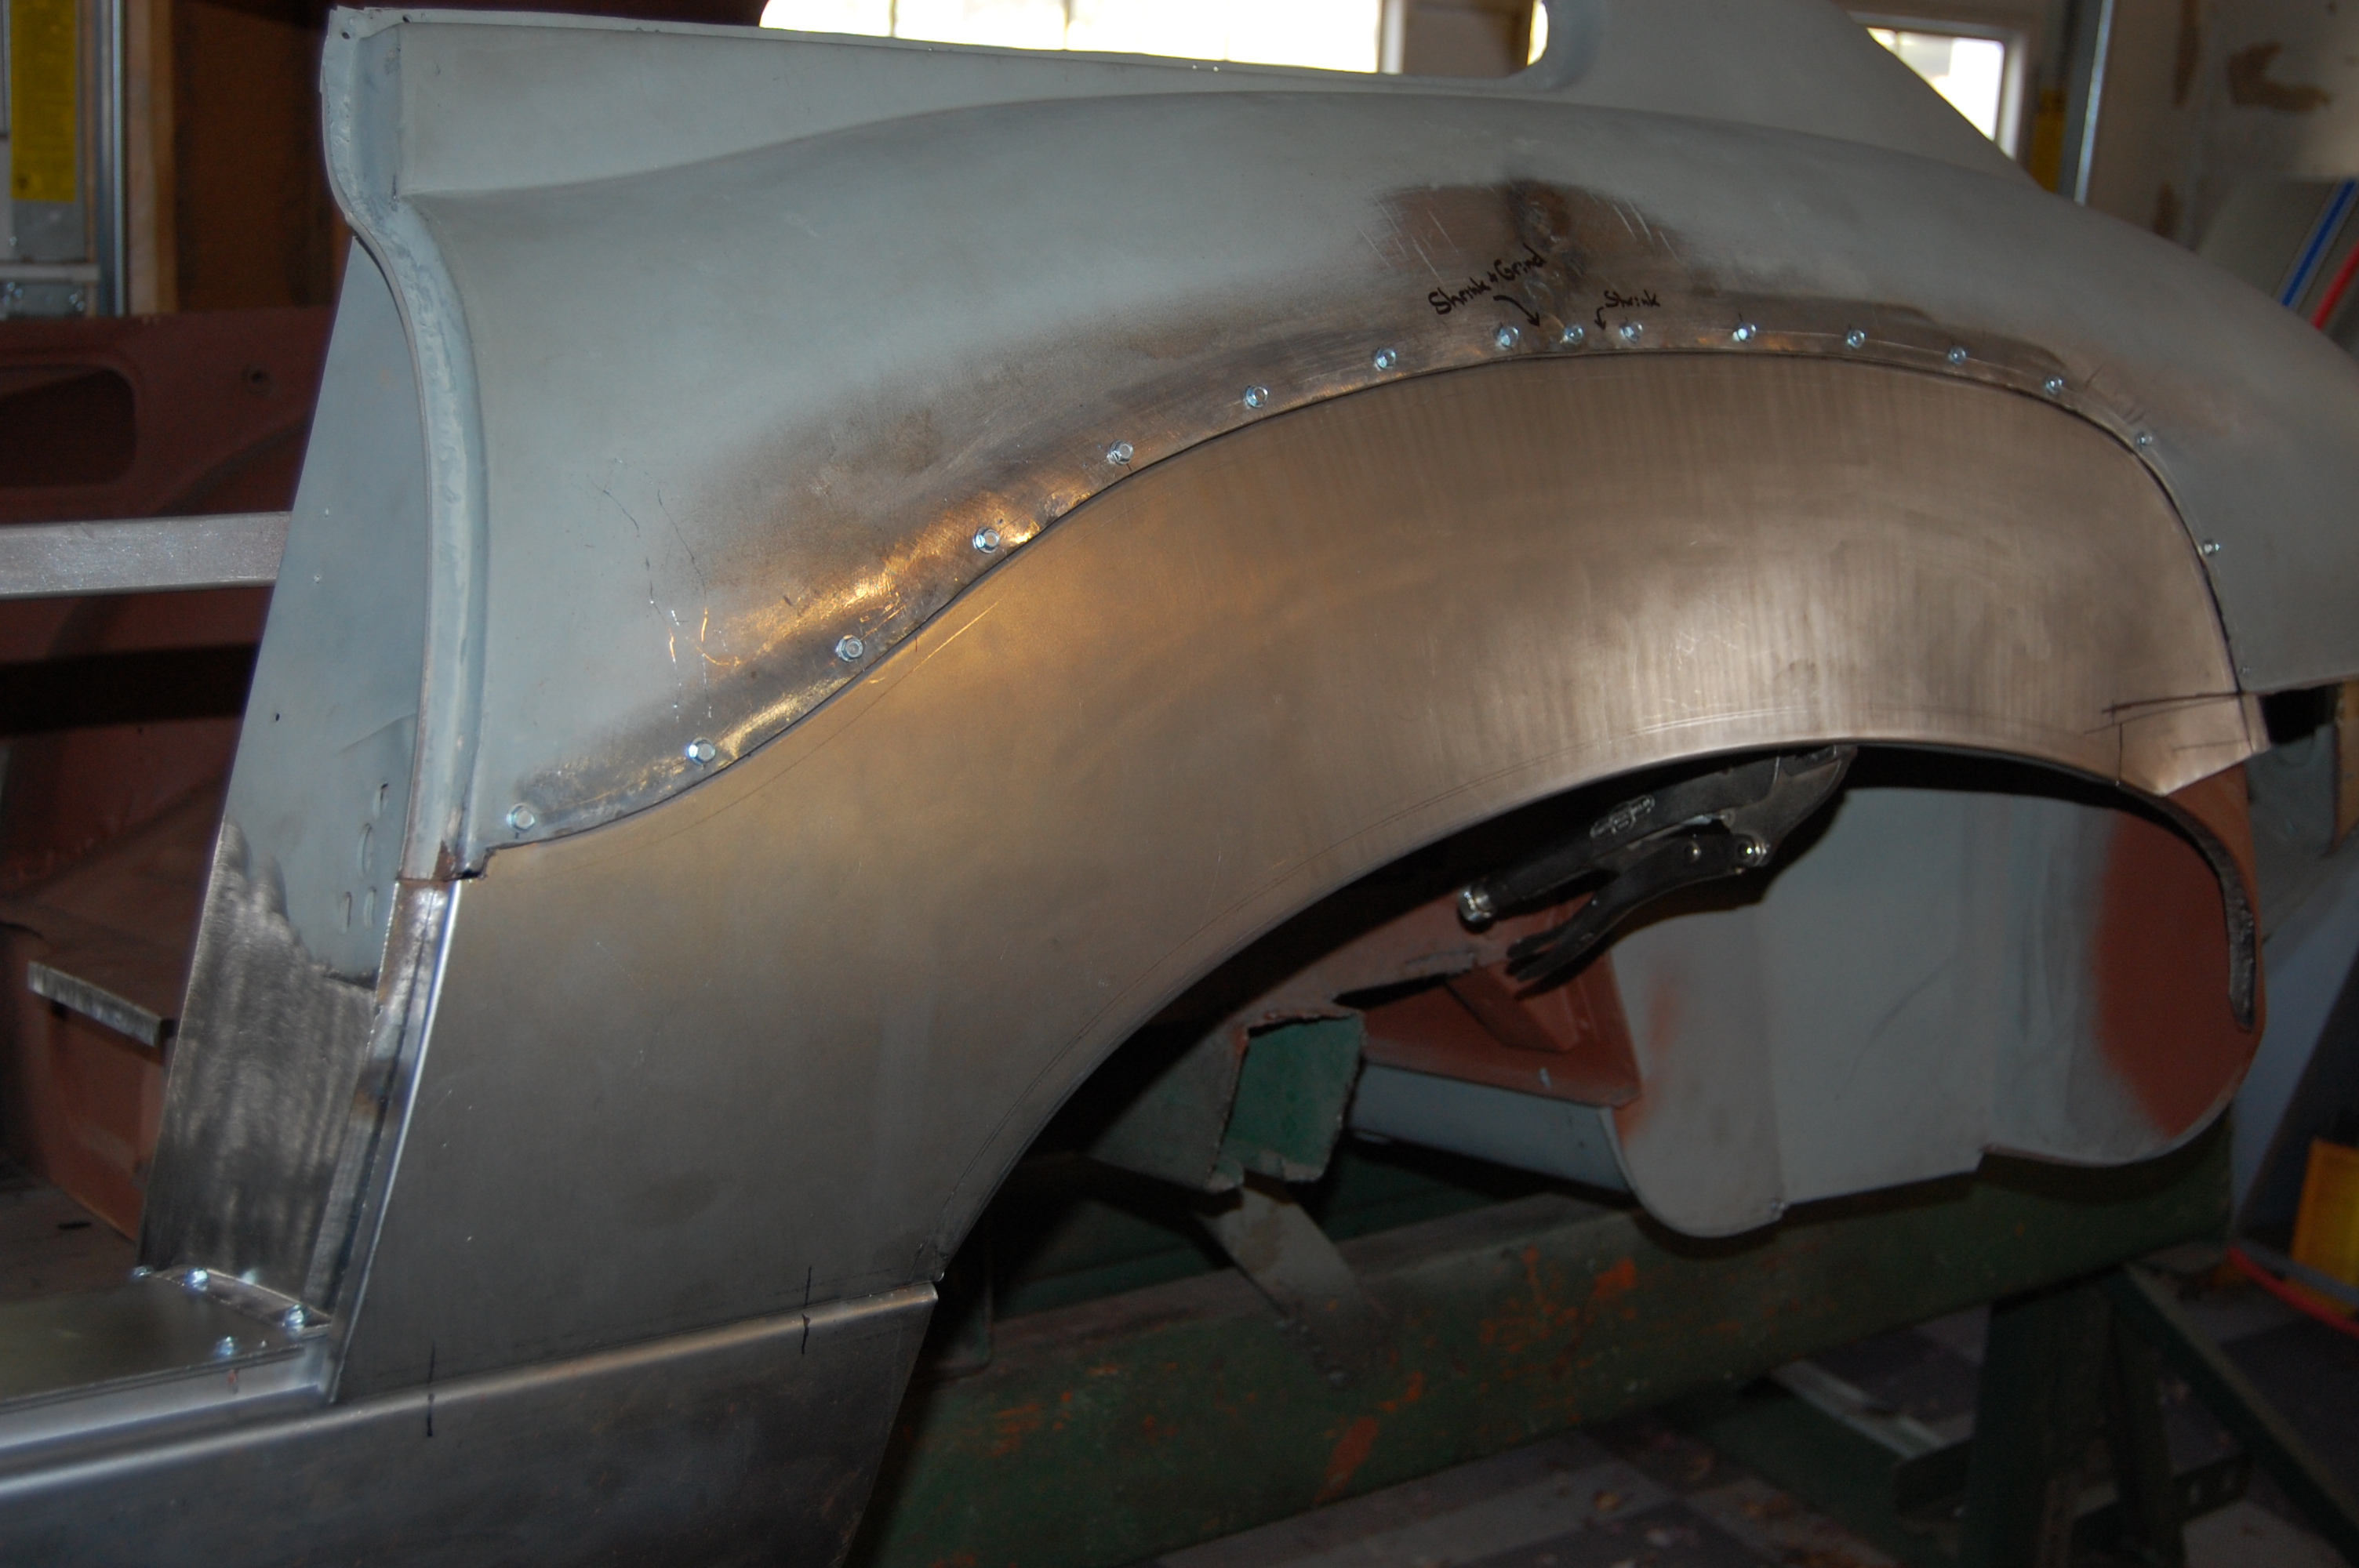
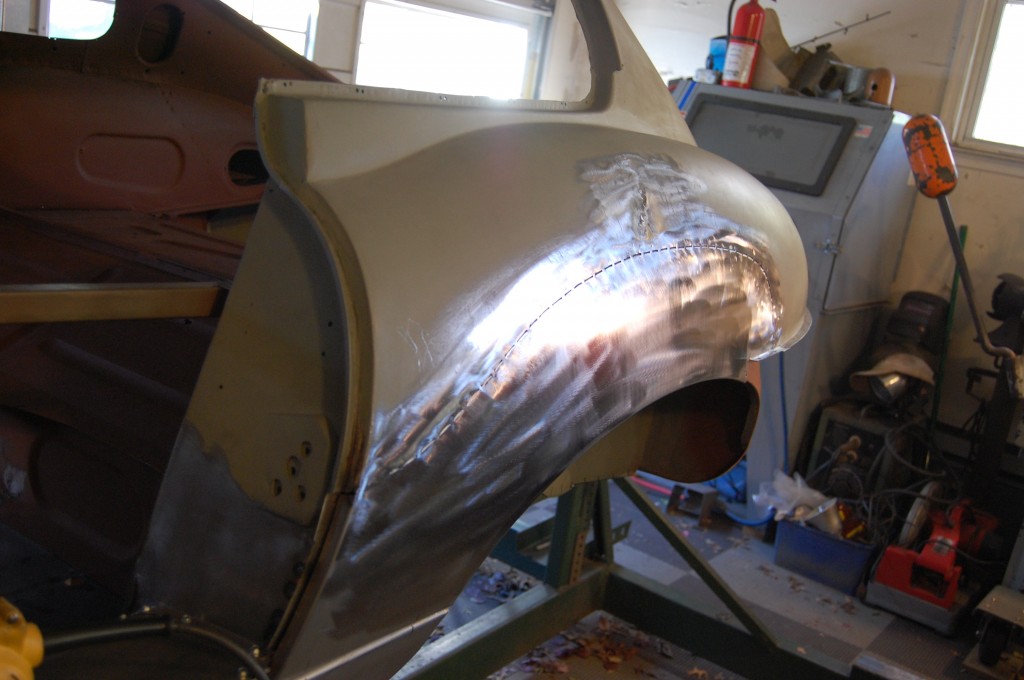
- Next, we are fitting our new patch panel into place. We are going to plug-weld this piece in using a stepped flange up here along the top. In this shot, we are positioning the panel and making sure that we have the proper “bulge” outward – using contour gauges taken from other virgin E-Types. We have already used the dolly and slapper to remove the dent above the welded seam as best we can.
-
- Another shot, taken from an angle that shows more of the “bulge” – you MUST take care to get the bulge back in there!

-
- Now we’ve rolled in our stepped flange, but also turned a 90-degree tab along the entire top edge that will serve as a reinforcement rib to make sure that the bulge and correct contour of the wing STAYS IN PLACE! This is the one photo that I ommitted from the original blog posting of this repair- I had originally intended to keep this feature a closely guarded secret, but I’ve since decided to offer panels fabricated in this way instead. Very few people can make this stuff anyway – I’d rather just share the info and provide the panels to let you do the job right at home.

-
- Everything is prepped now and we are ready to weld in the new piece.

-
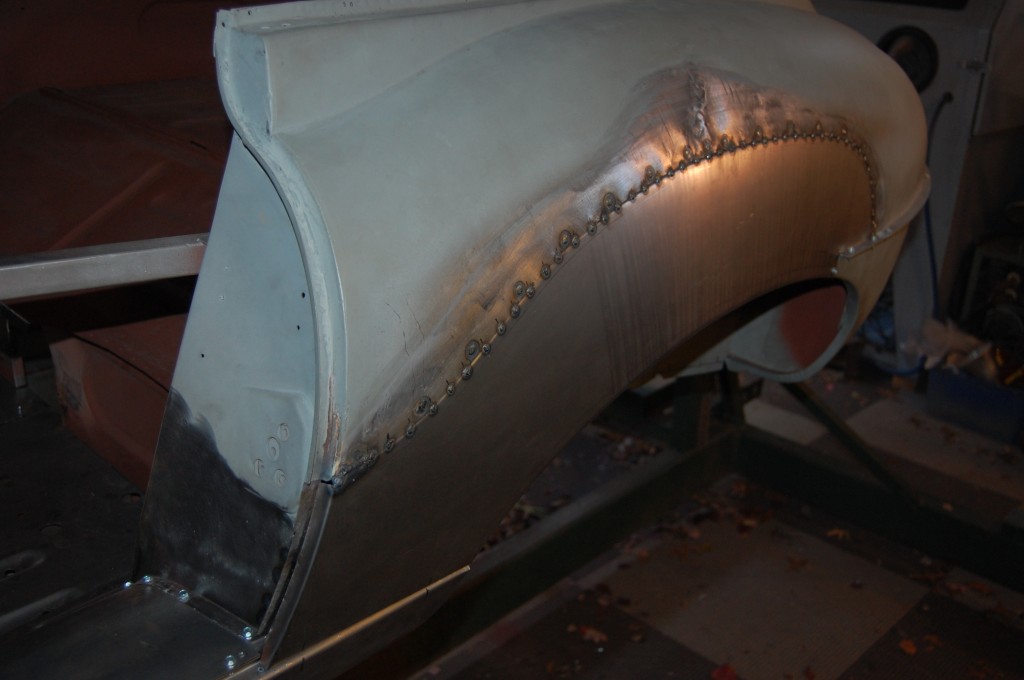
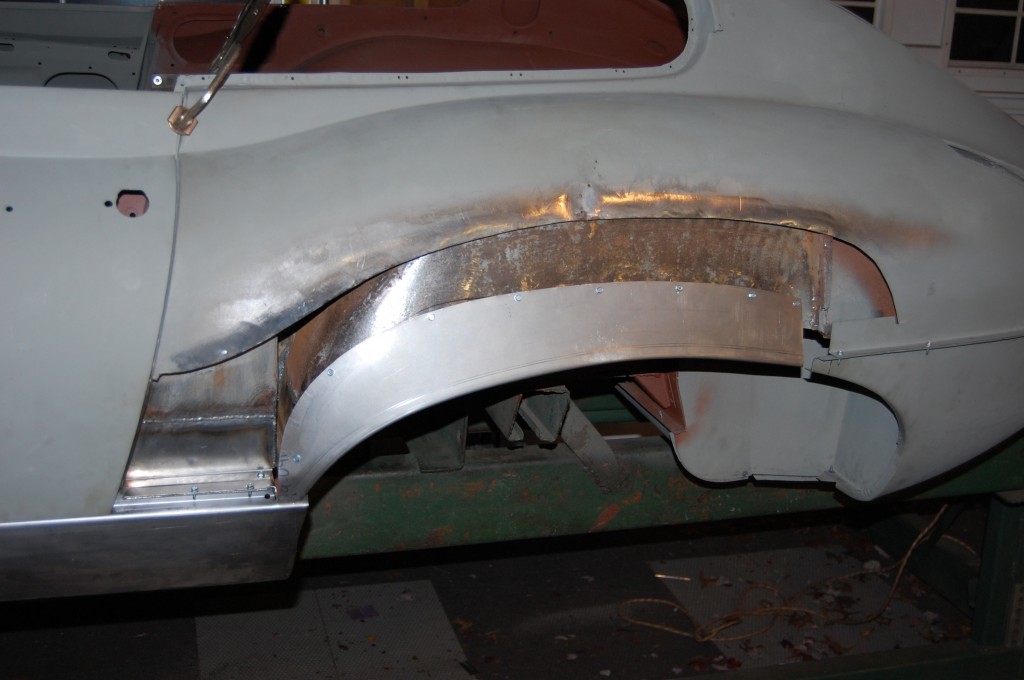
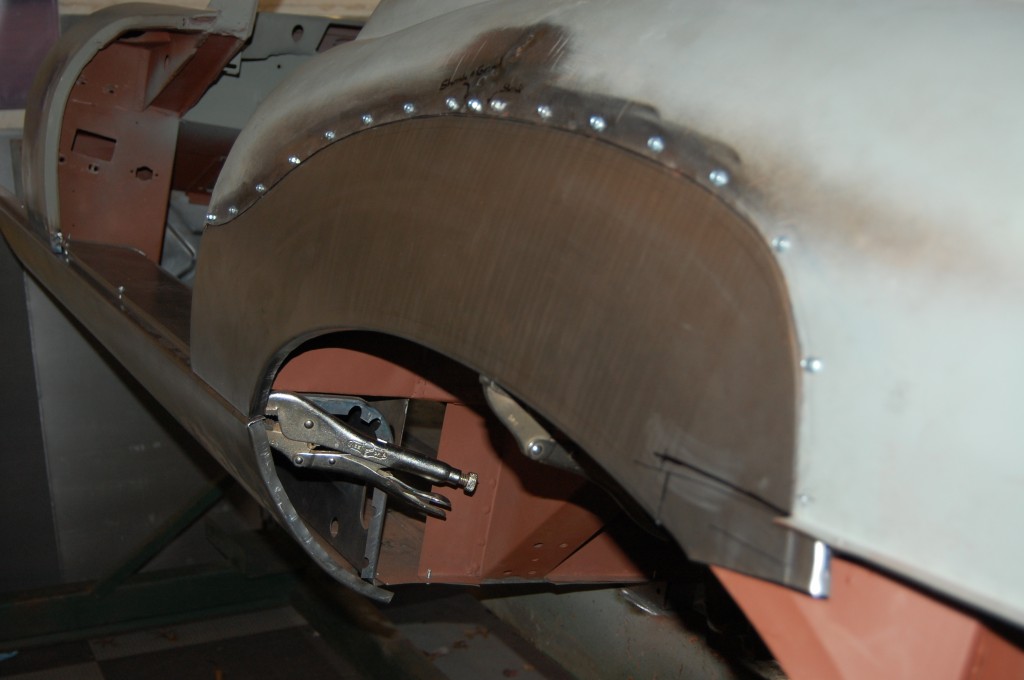
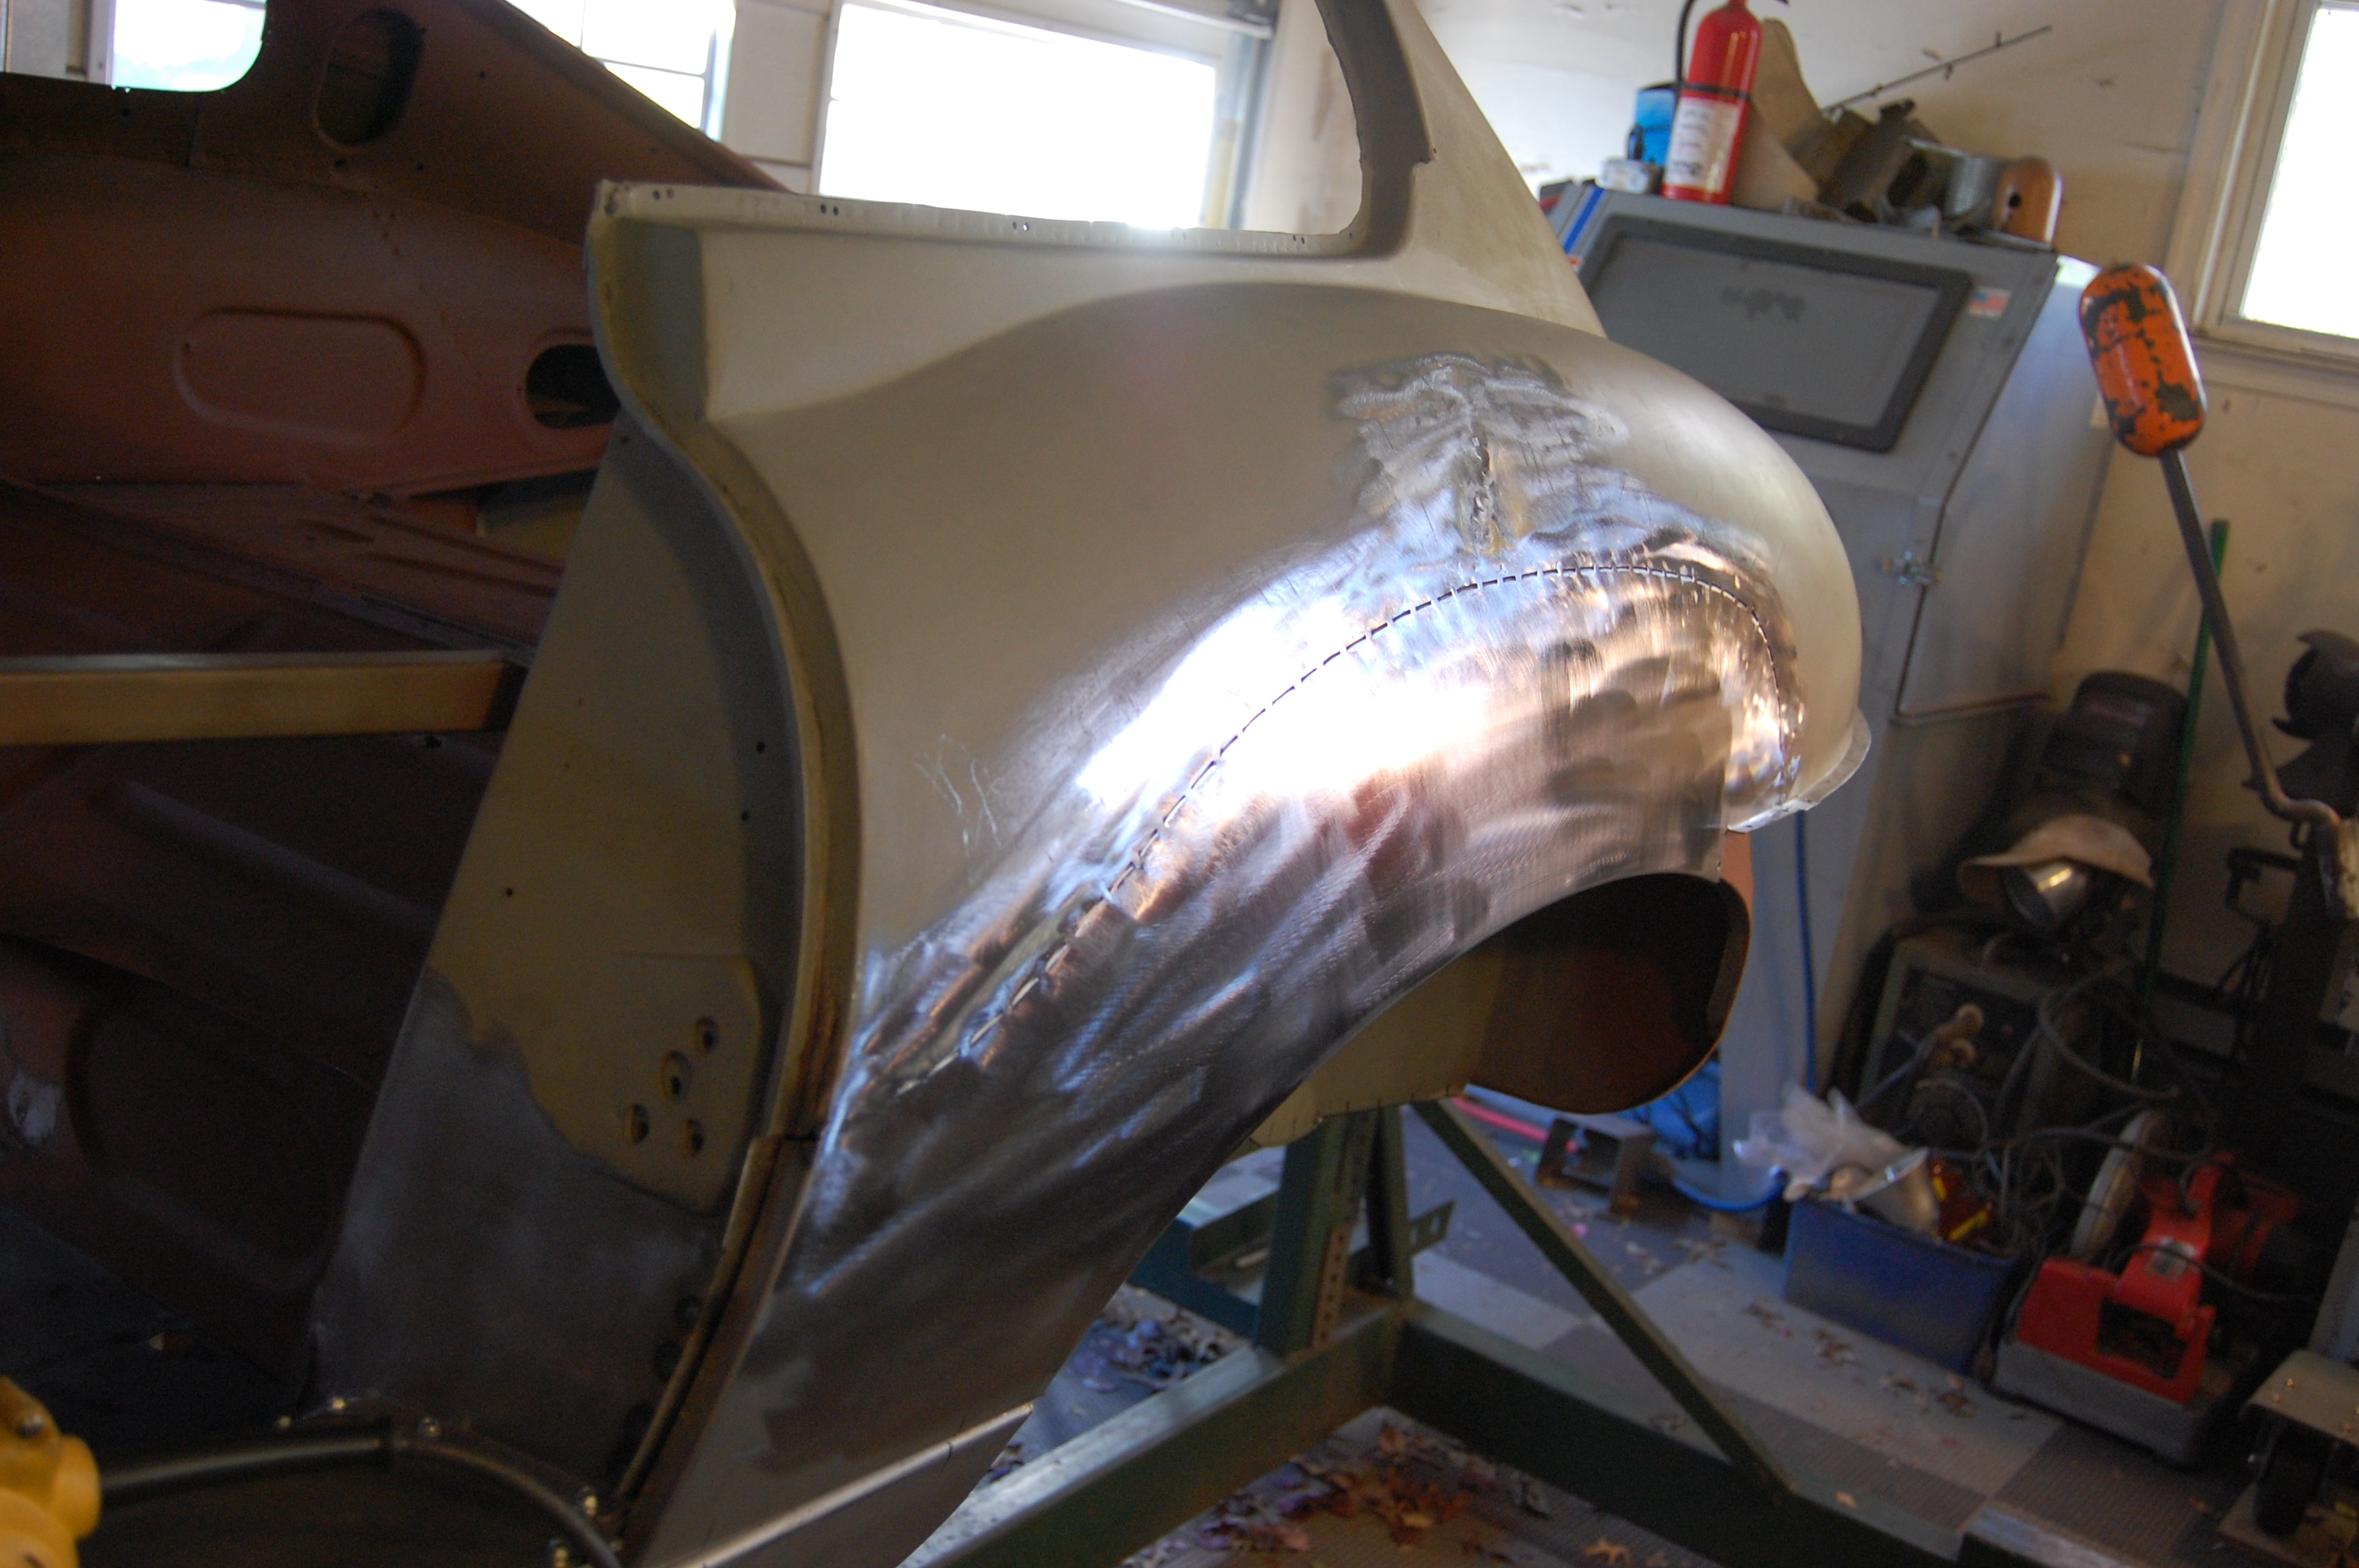
- All welded in with our signature method to keep the shape and prevent distortion – plug-welding, with tacks along the seam itself.

-
- Another shot showing the welding method.

-

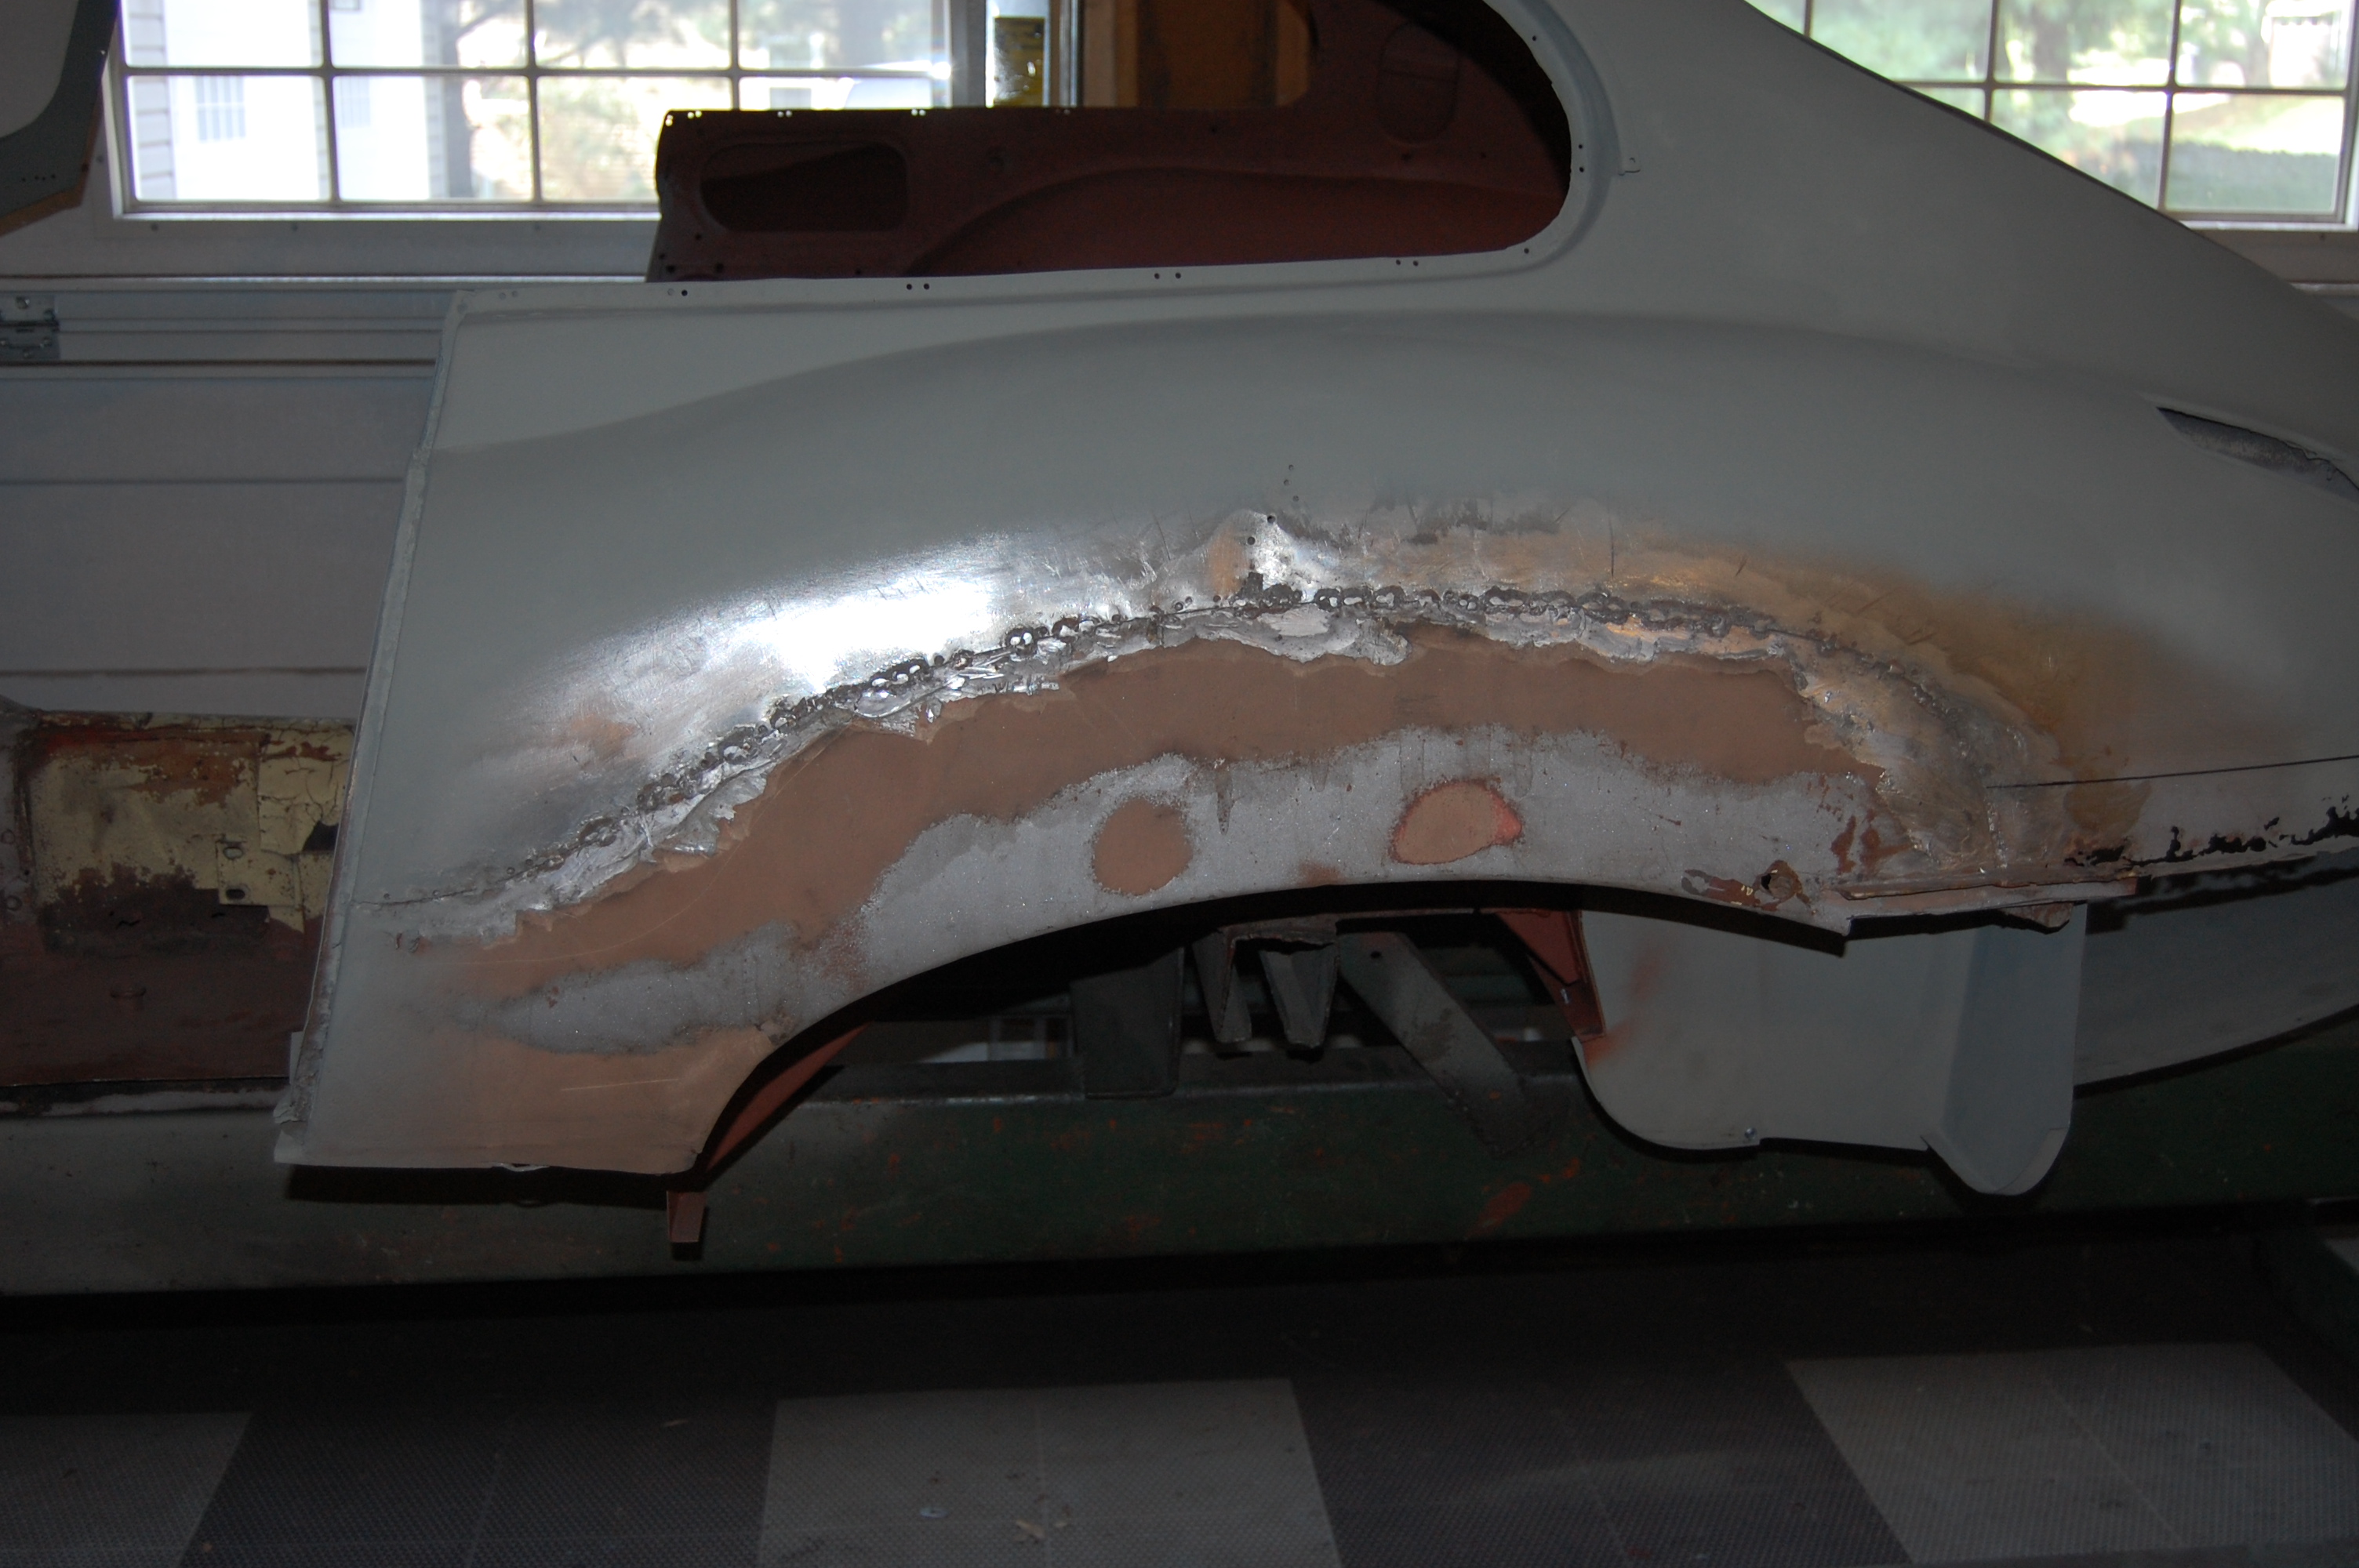
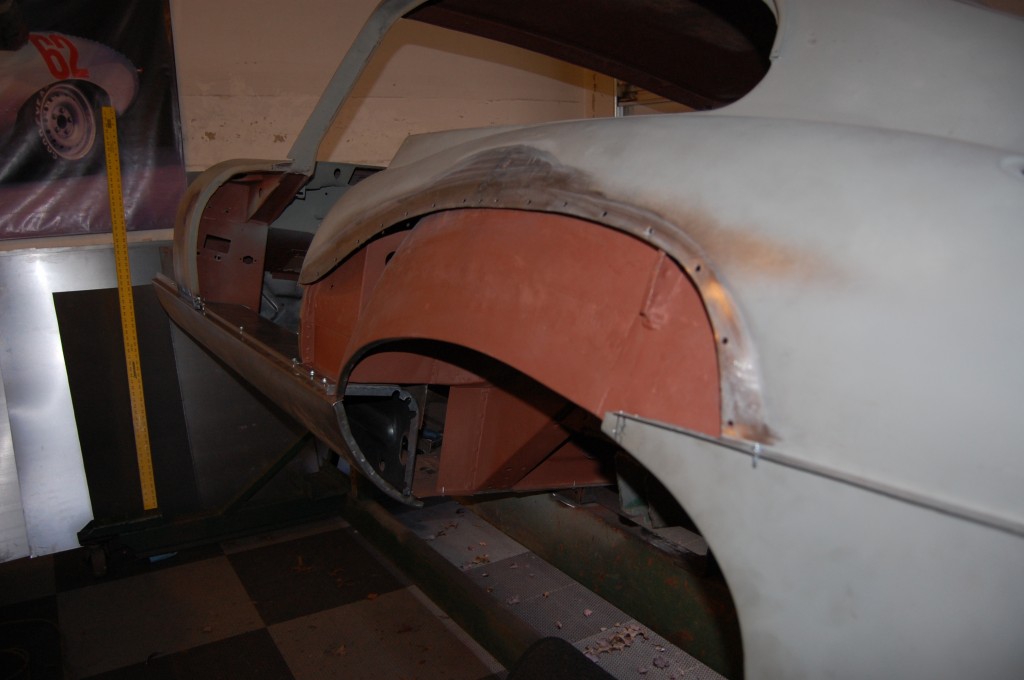
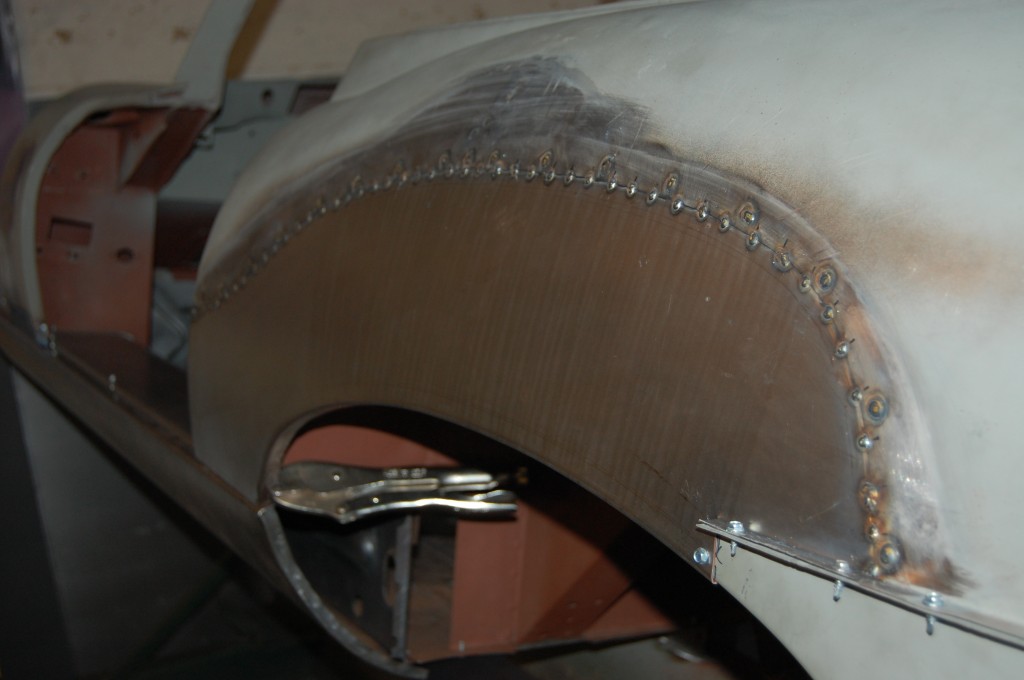
- Welds are now ground down and the entire repair is scuffed and completed. Our dent above the seam came back a bit – I had a feeling it would, but it is shallower than it looks and a little filler will be OK to handle it. What’s the most important part of this photo? Look at that BULGE! I cannot over-emphasize the importance of this – you do NOT want flat rear wings!
-
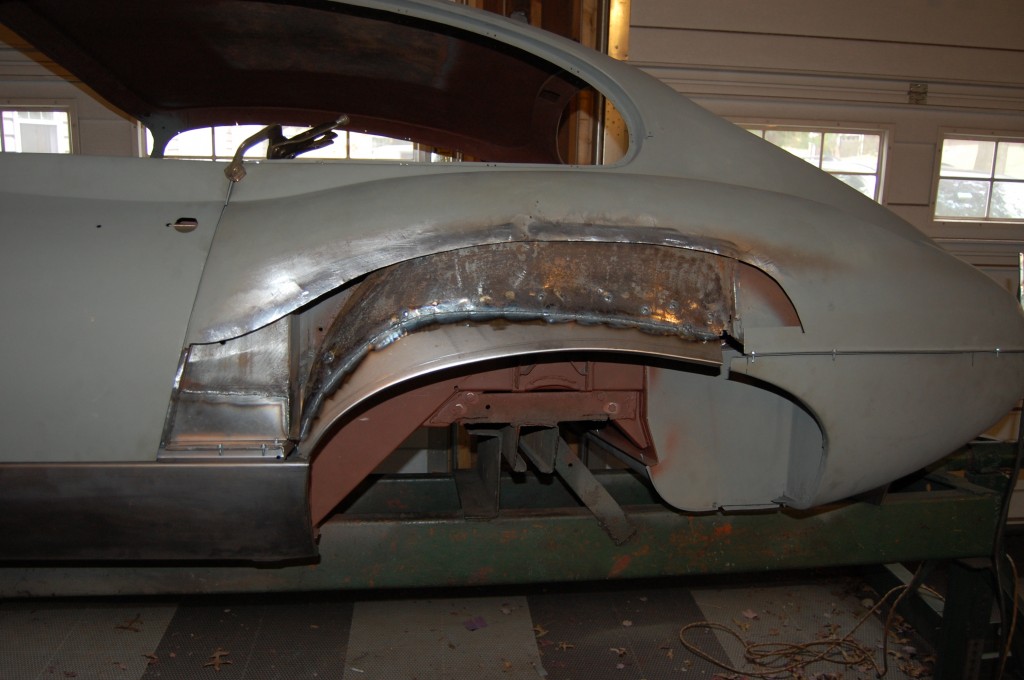
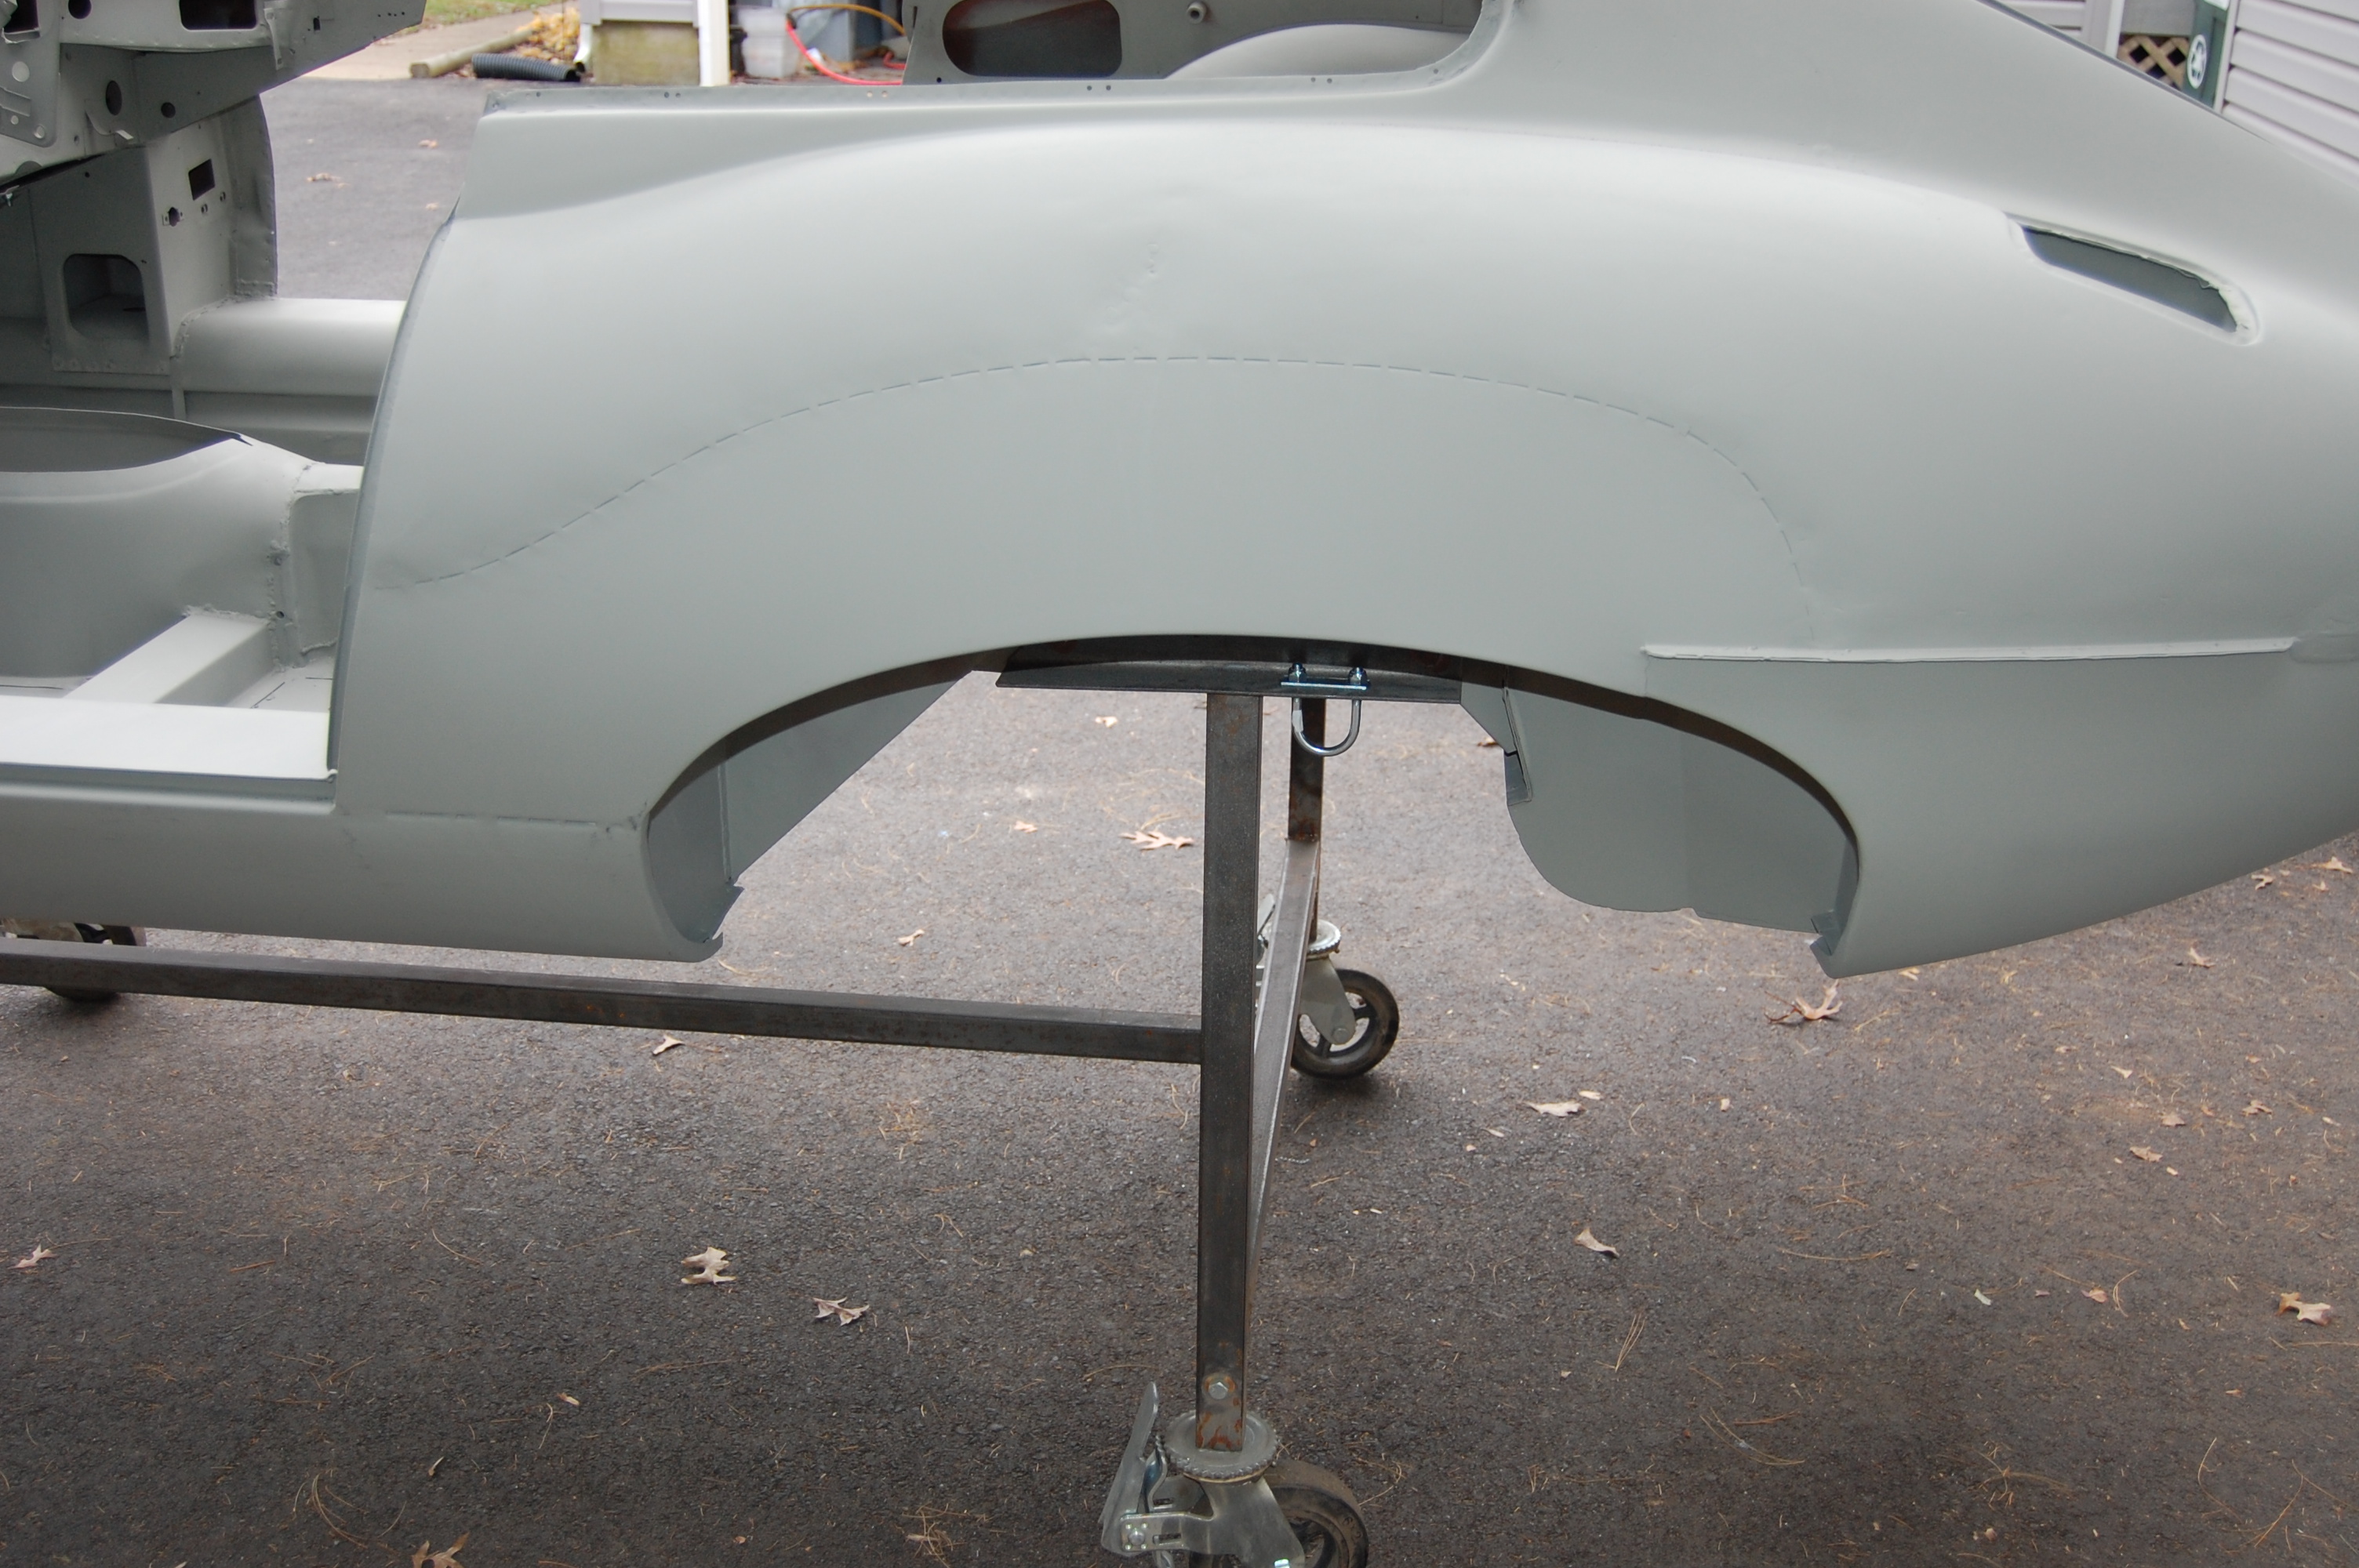
- Another shot that really shows we have the correct shapes in every direction. A thin coat of good filler will smooth everything out – we will NOT have to use filler to “build up” or “shape” the rear wing.
-

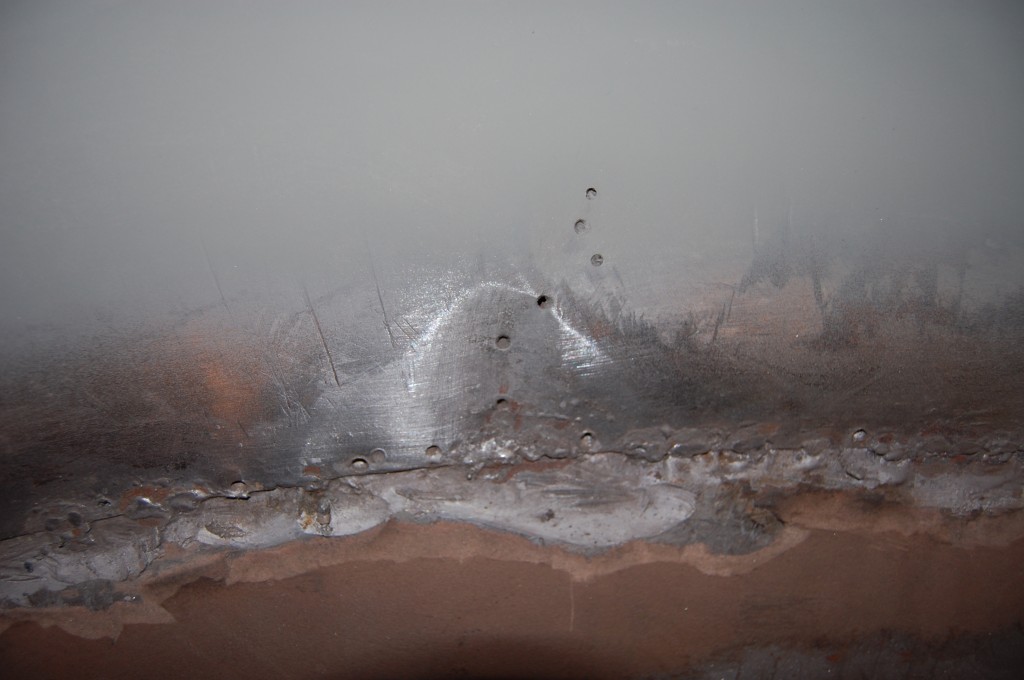
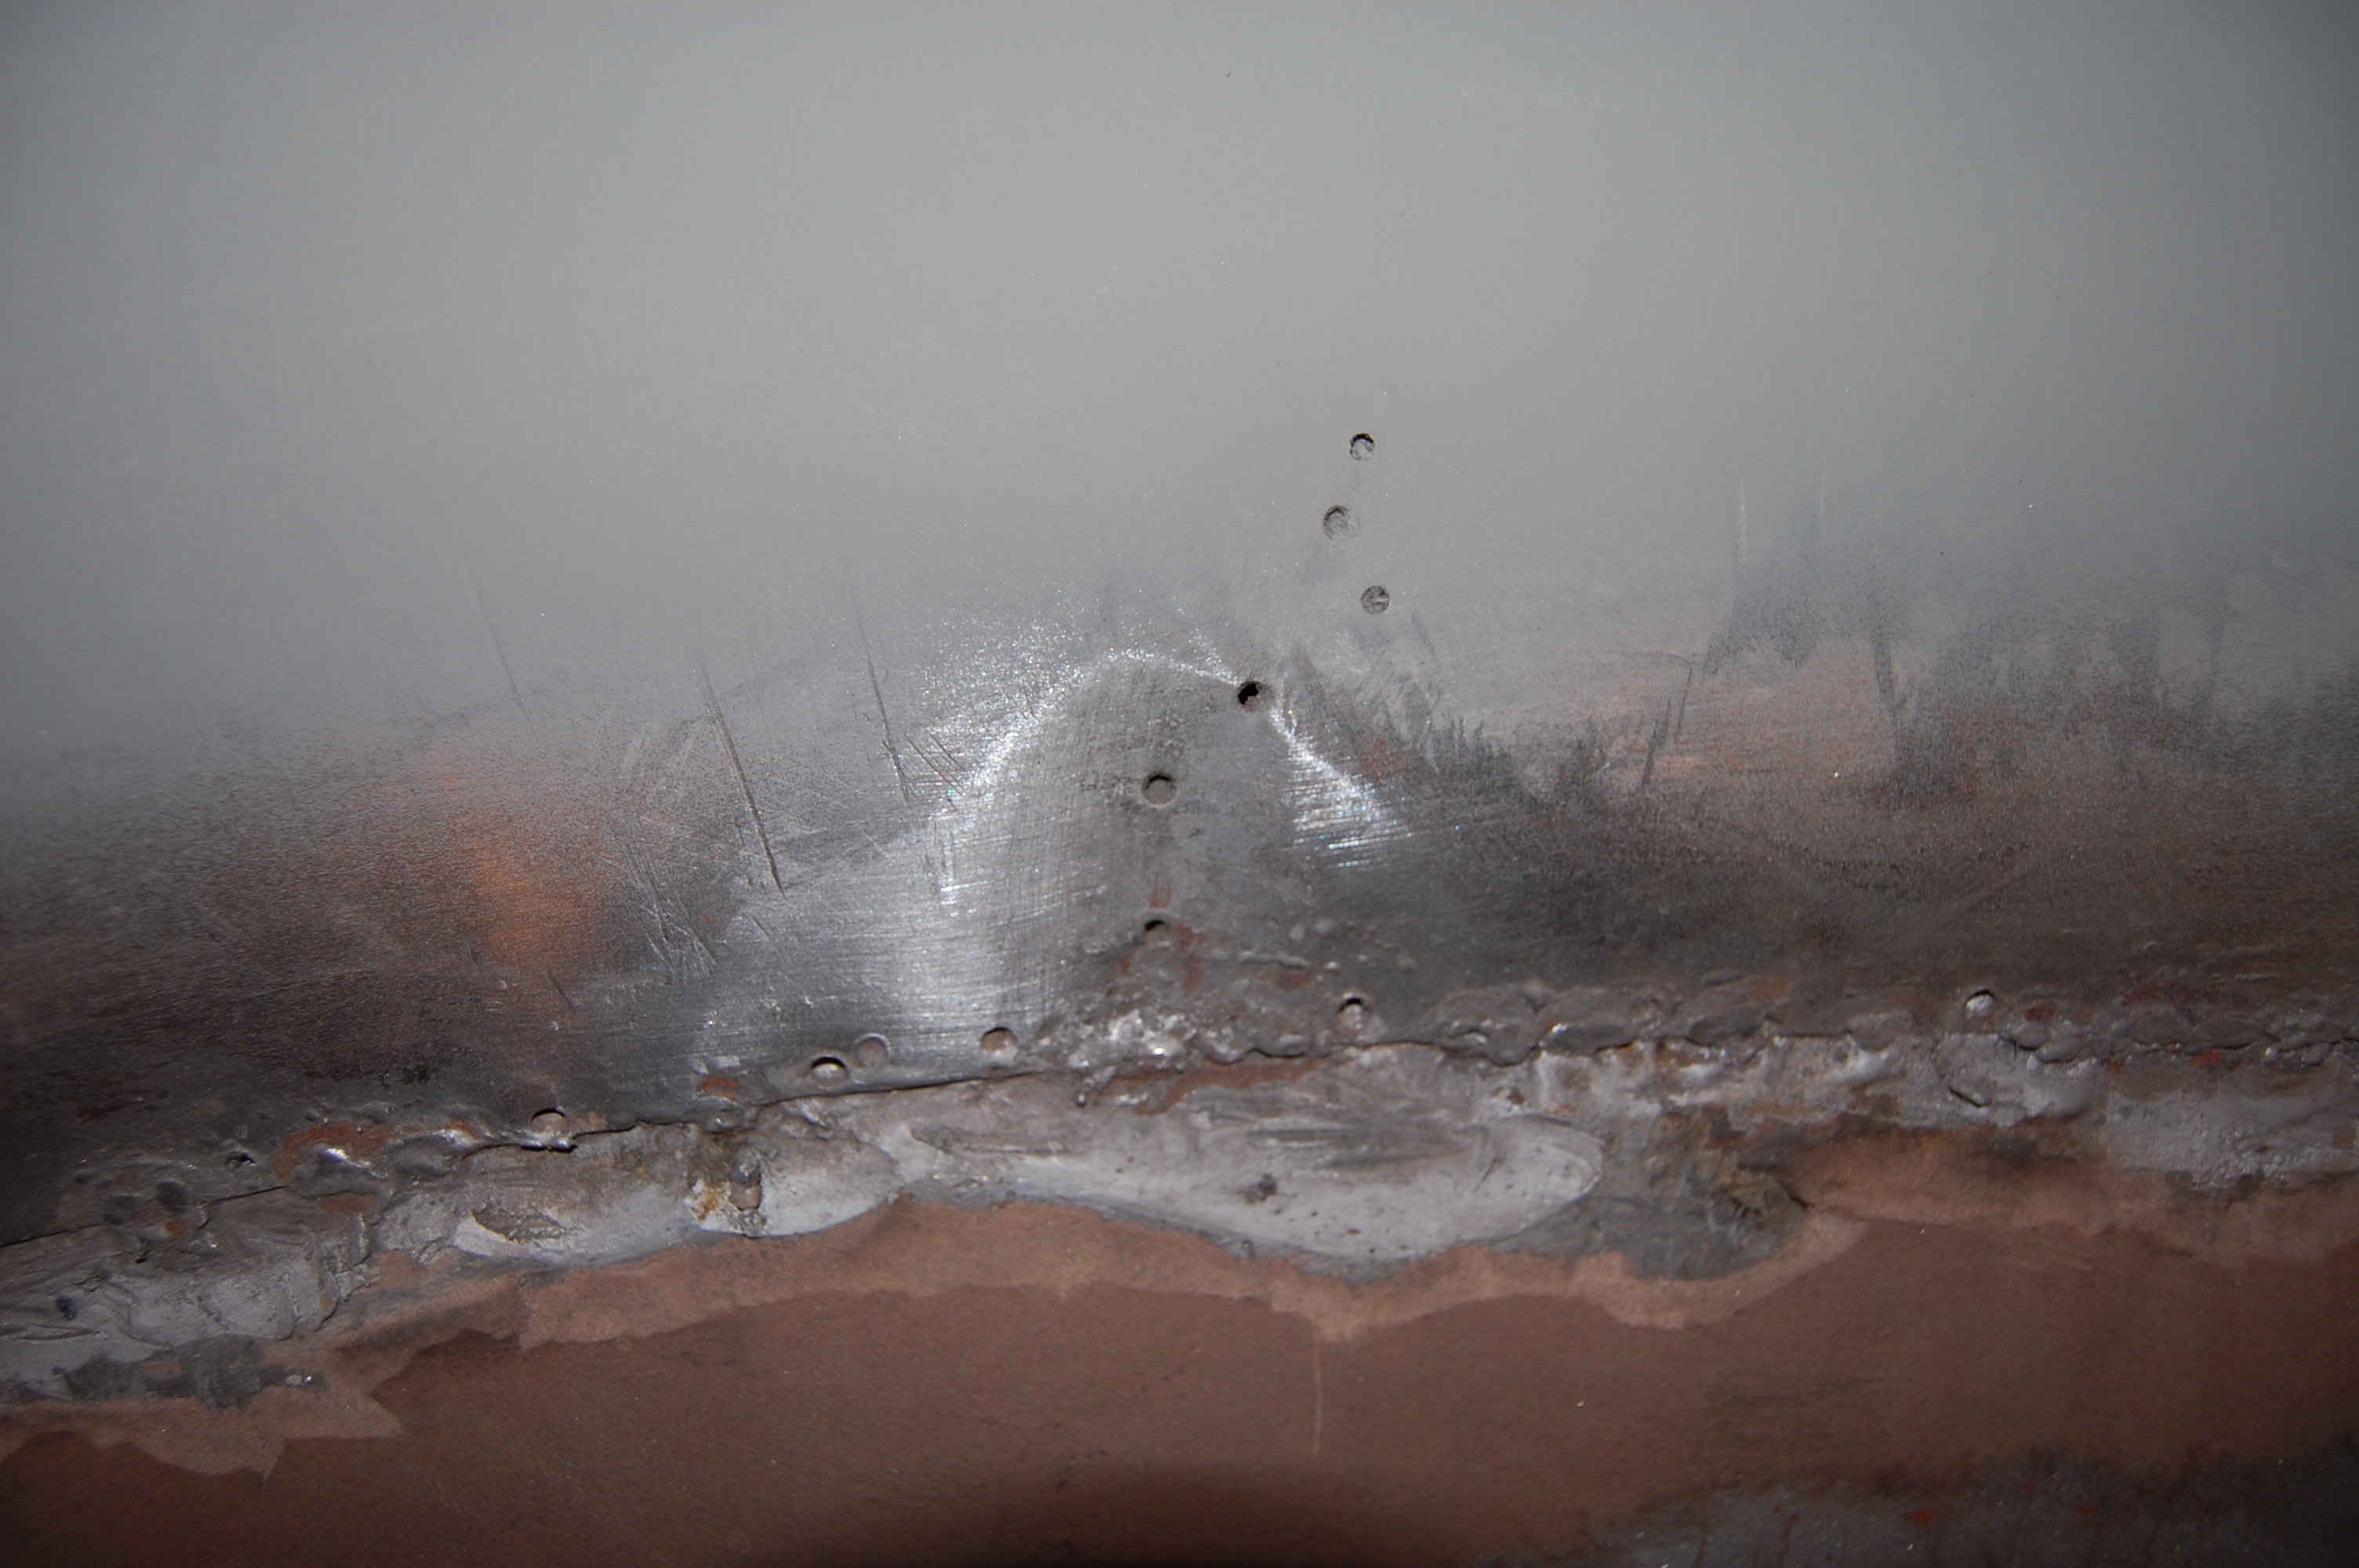
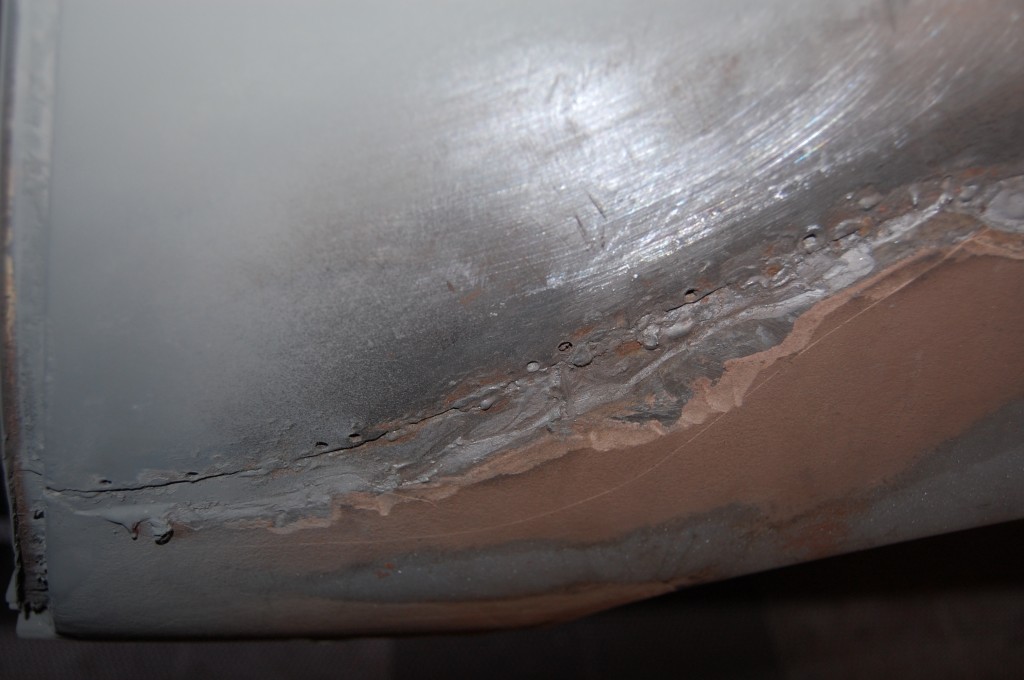
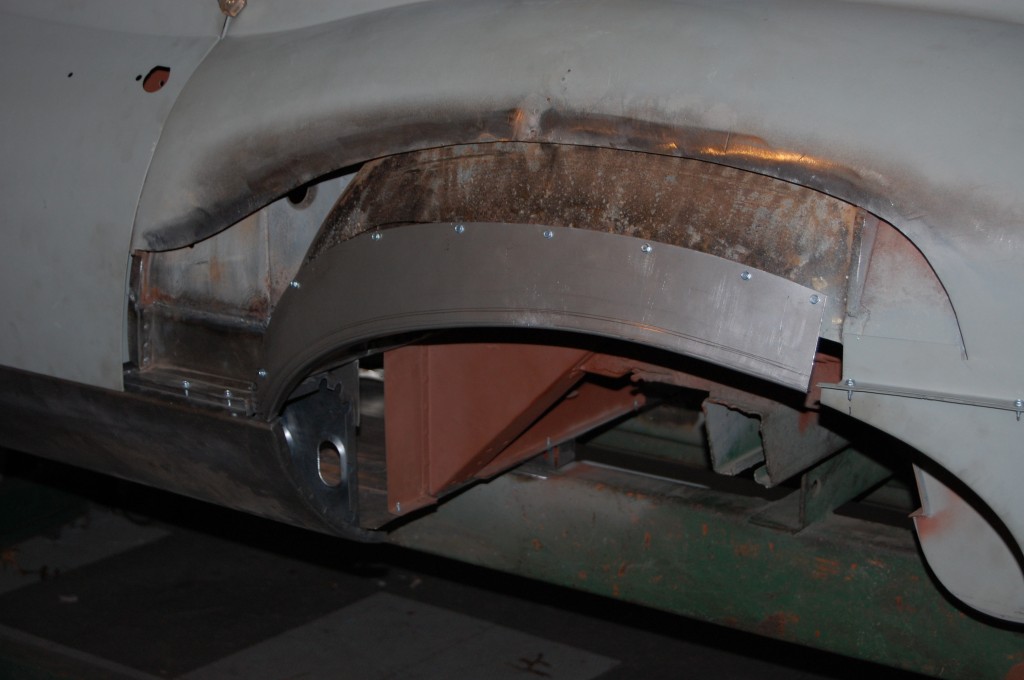
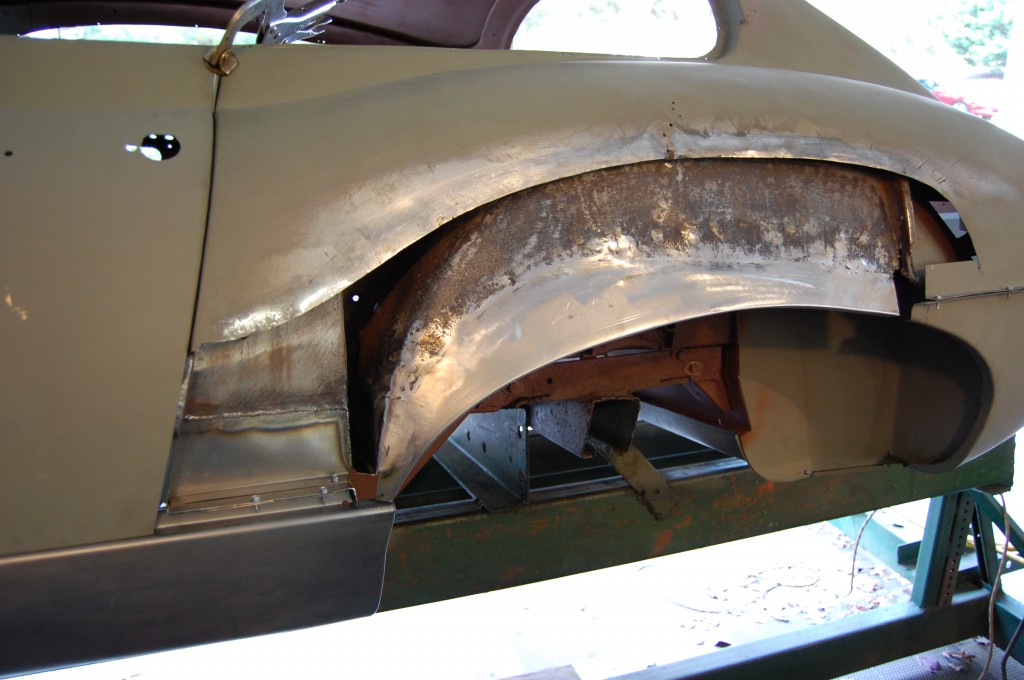
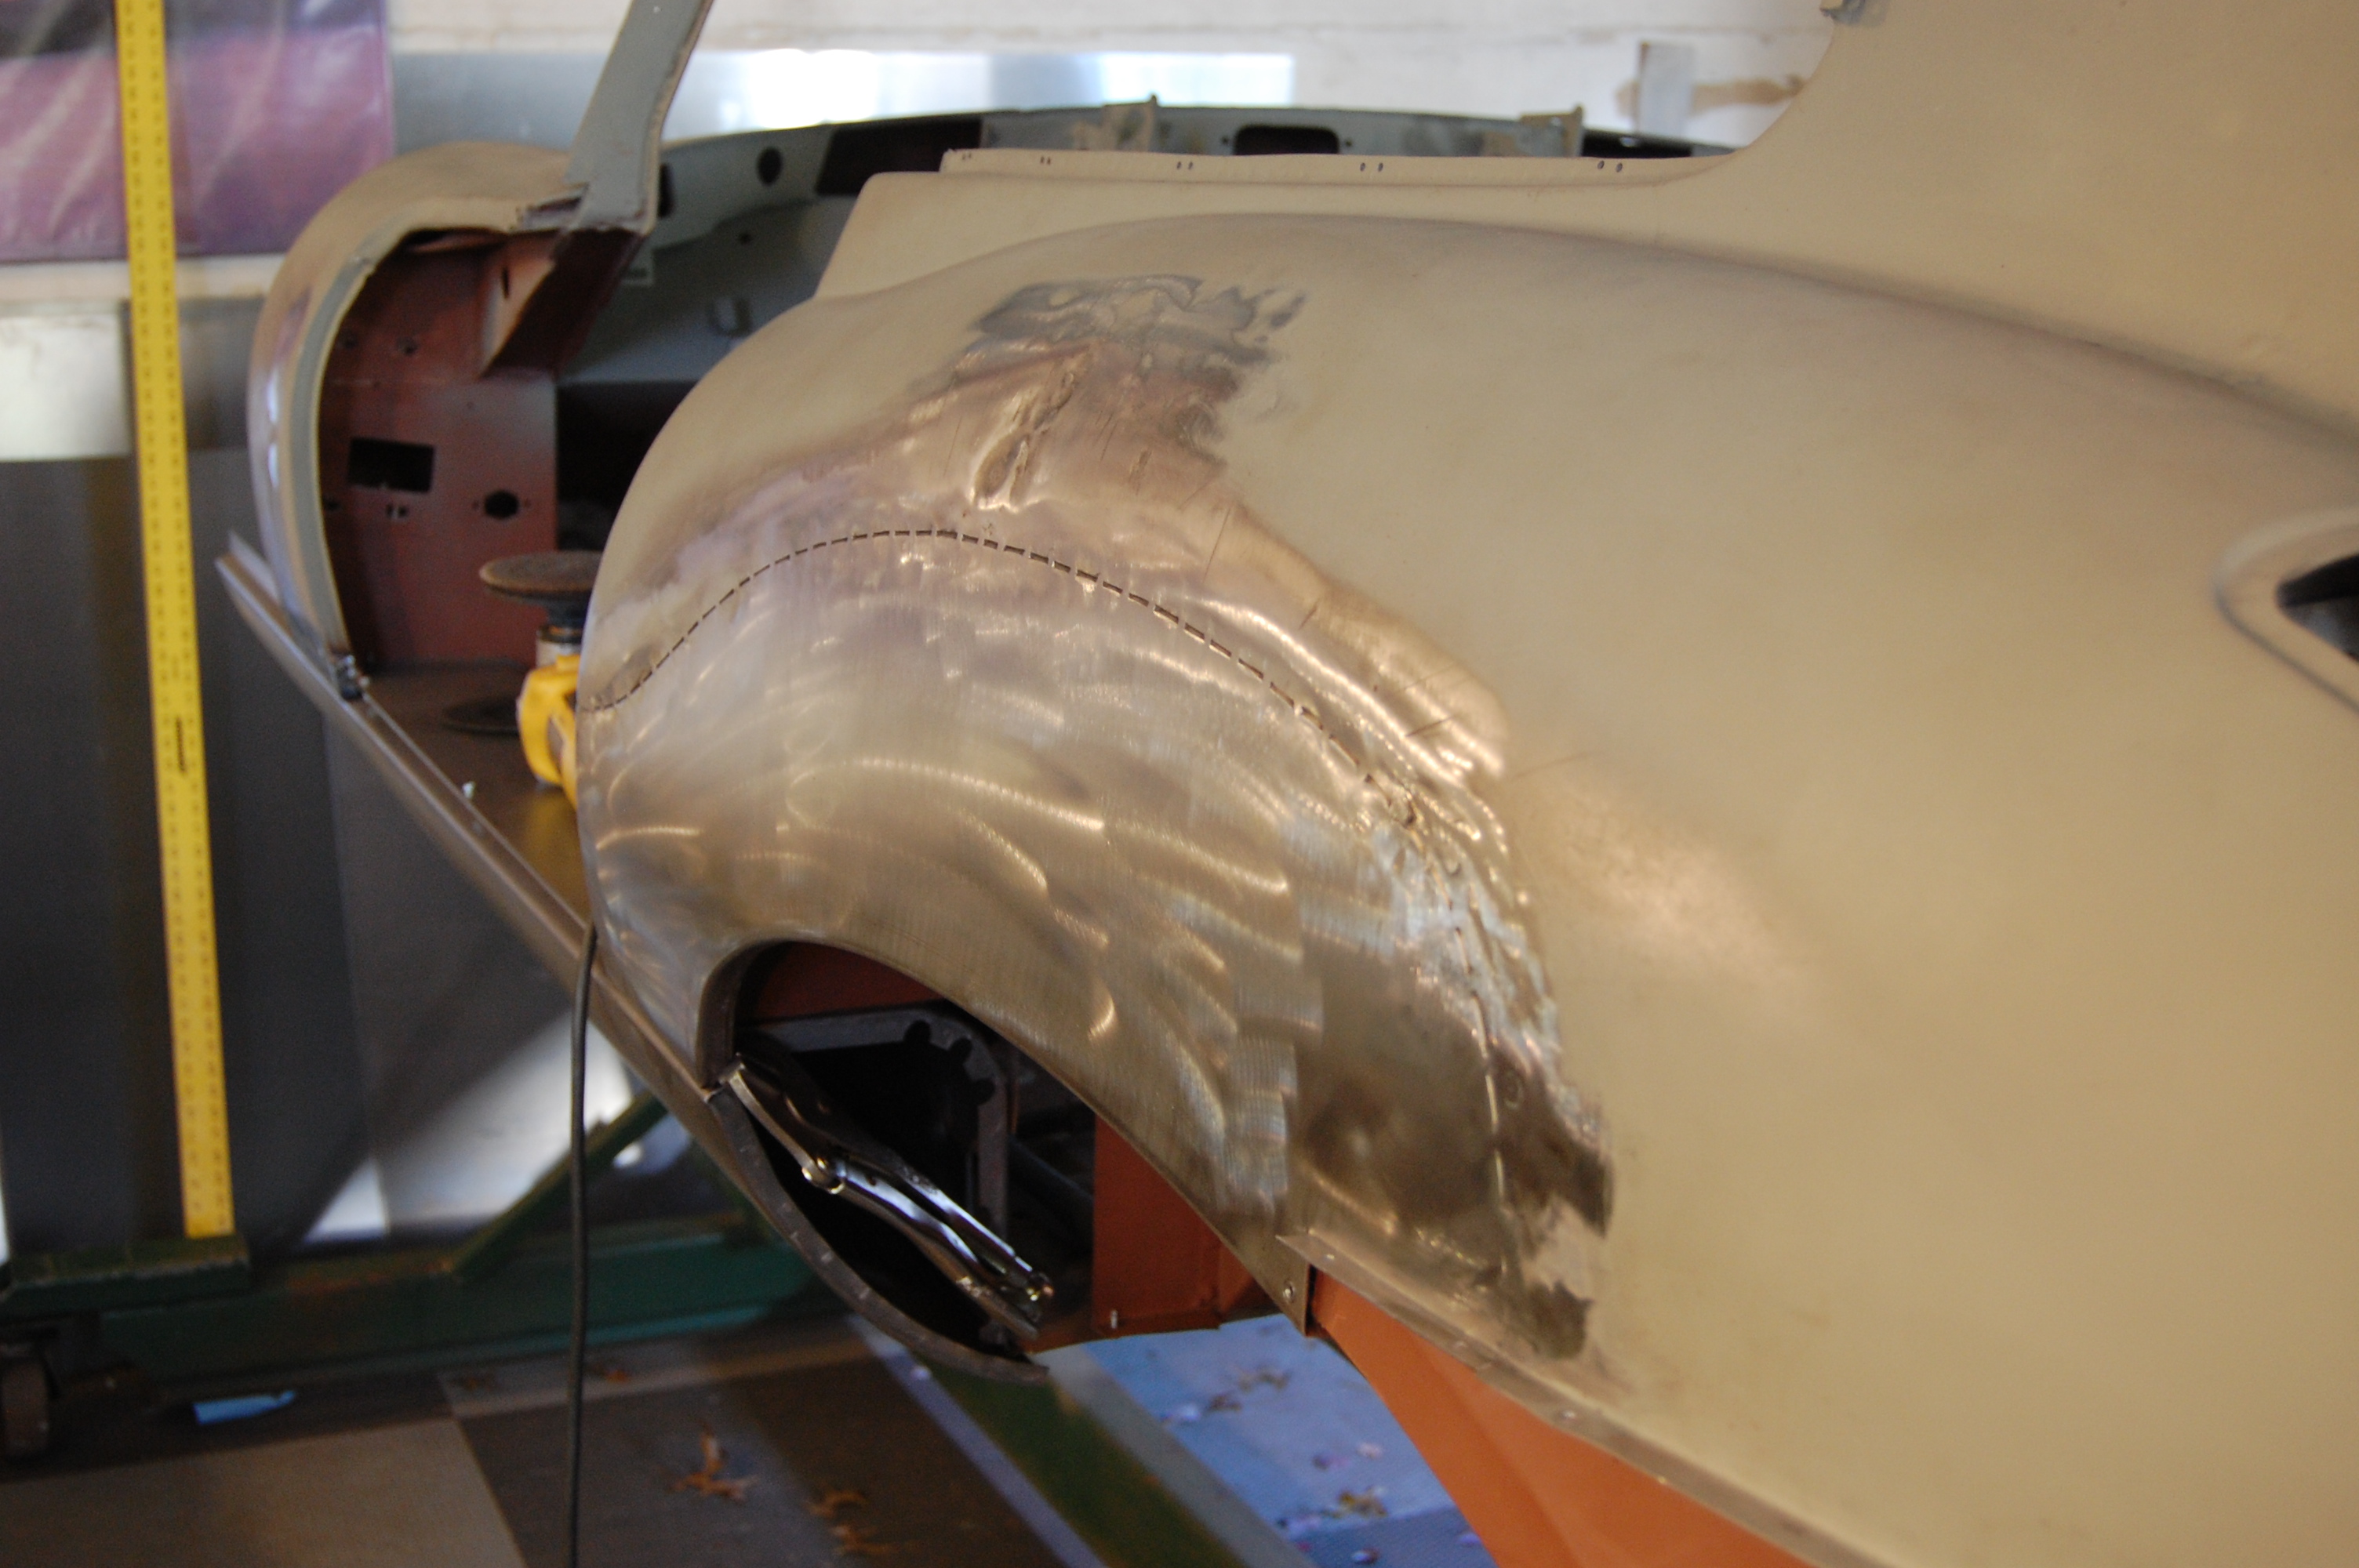
- Here is the completed repair after the entire shell was completed and ready for delivery. You can see some slight surface imperfection here – we’ll need some filler, but it is acceptable, and only for smoothing of the seam itself. By looking at this photo, I am imagining filler in the dent, but really none otherwise above the seam on the original wing that remains. At and just below the seam, we will probably need about 1/16″ – 3/32″, quickly fading down into nothing as we approcah the botom edge of the new repair piece. This car is actually in paint now – no problems with any of the metalwork reported by the painters – of course… Take another look – this photo is nothing but steel and thin self-etching primer!
-
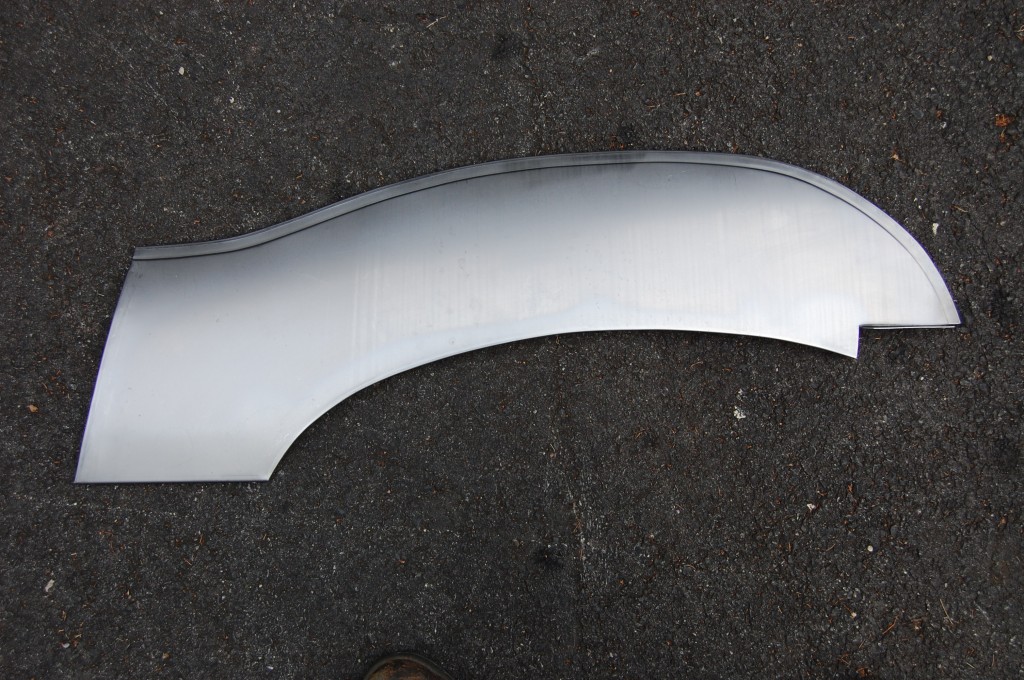
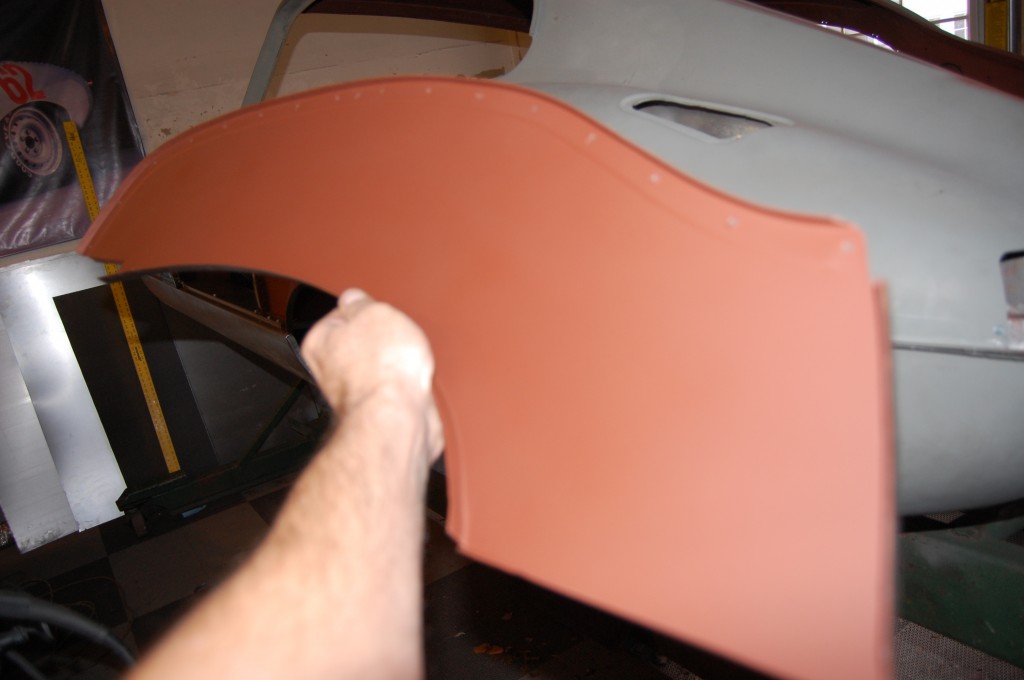
- Here is the panel we used for this repair. This is our new, standard “Stage 2” rear wing repair panel. These are on the shelf, ready to ship – price is $325 each – less than 1/4 of the cost of a new replacement wing!


