In a previous post earlier thia week, you saw us tackle some poorly repaired accident damage in the LH rear wing of the 1968 OTS. Once that was smoothed out, we were able to move on to repairing the rust in the forward, lower section of the wings.
This is a very common area for rust in the roadster rear wings. While roadsters do not rust OVER the wheel like coupes – (since they do NOT have an inner wheel well panel), unfortunately, they do rust here. This is actually not “wing rust” as much as it is an expansion of the rust in the B-post – coming through to the outer surface of the car.
I’ll admit that I have had trouble here in the past… The RIGHT way to do this is to pull the whole wing off, repair it like we do a bonnet center section or front wing, and then weld it back in. This would allow us to get this panel dead smooth again. But that is not really an option – pulling out the whole wing is a BIG, time-consuming deal… It can be repaired in place, but the problem is that you are making this repair directly over another support panel, and so once the piece is welded in, there is really not much room (or ANY!), to slap and smooth the repair and metal finish it.
My most recent solution is to make the repair panel out of thicker, 18-gauge steel, and TIG weld it into place. That option only recently became available to me since we picked up a stronger, more precise roller that will roll this repair in that thickness panel DEAD STRAIGHT! In the past, I thought that overlapping the panel with a stepped flange, and minimal plug welding would minimize the warpage and shrinkage, but it didn’t… Now, by using the thicker panel, and TIG welding the seam every so gently, I think we’ve got it. It still puts some warpage in at the seam, but it’s minimal, and if you keep the seam low enough, you can sneak in there and do some planishing. Plus, the thicker panel resists being bossed around by the heat much better.
I have seen other shops stitch in huge patches here on the internet and just scratch my head over how they can possibly do it without shrinkage and the accompanying warpage. Well, now I know – in the photos, it always looks dead flat even when it’s not, and the grey primer hides all. Ask them to show you photos of how much filler it took to smooth that out… We’re always shooting for NONE!
Take a look – this turned out nicely this time and I think we’re over the hump on this repair – finally!
-

- Here’s what came out of the blasting booth – this was a surprise, I thought these wings were OK…
-
- Both sides, too…

-

- AAAAGGGGHHHH – NOOOOOOOO!!!! This was a thin, 22-gauge patch panel GLUED into place with LEAD body solder!!!

-

- And the other side got the same treatment.

-
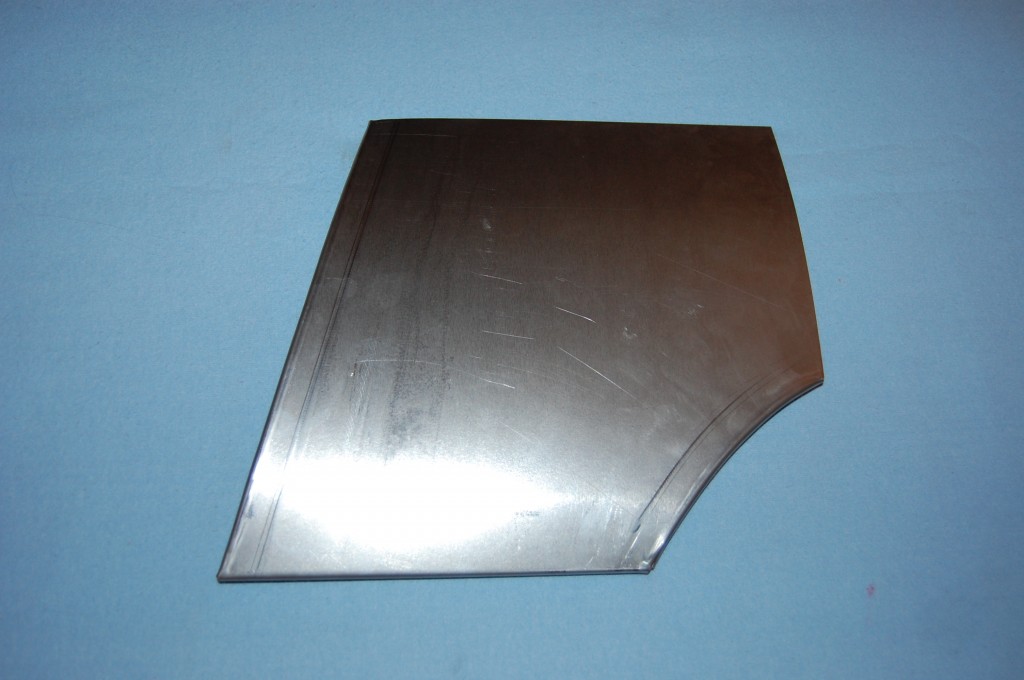
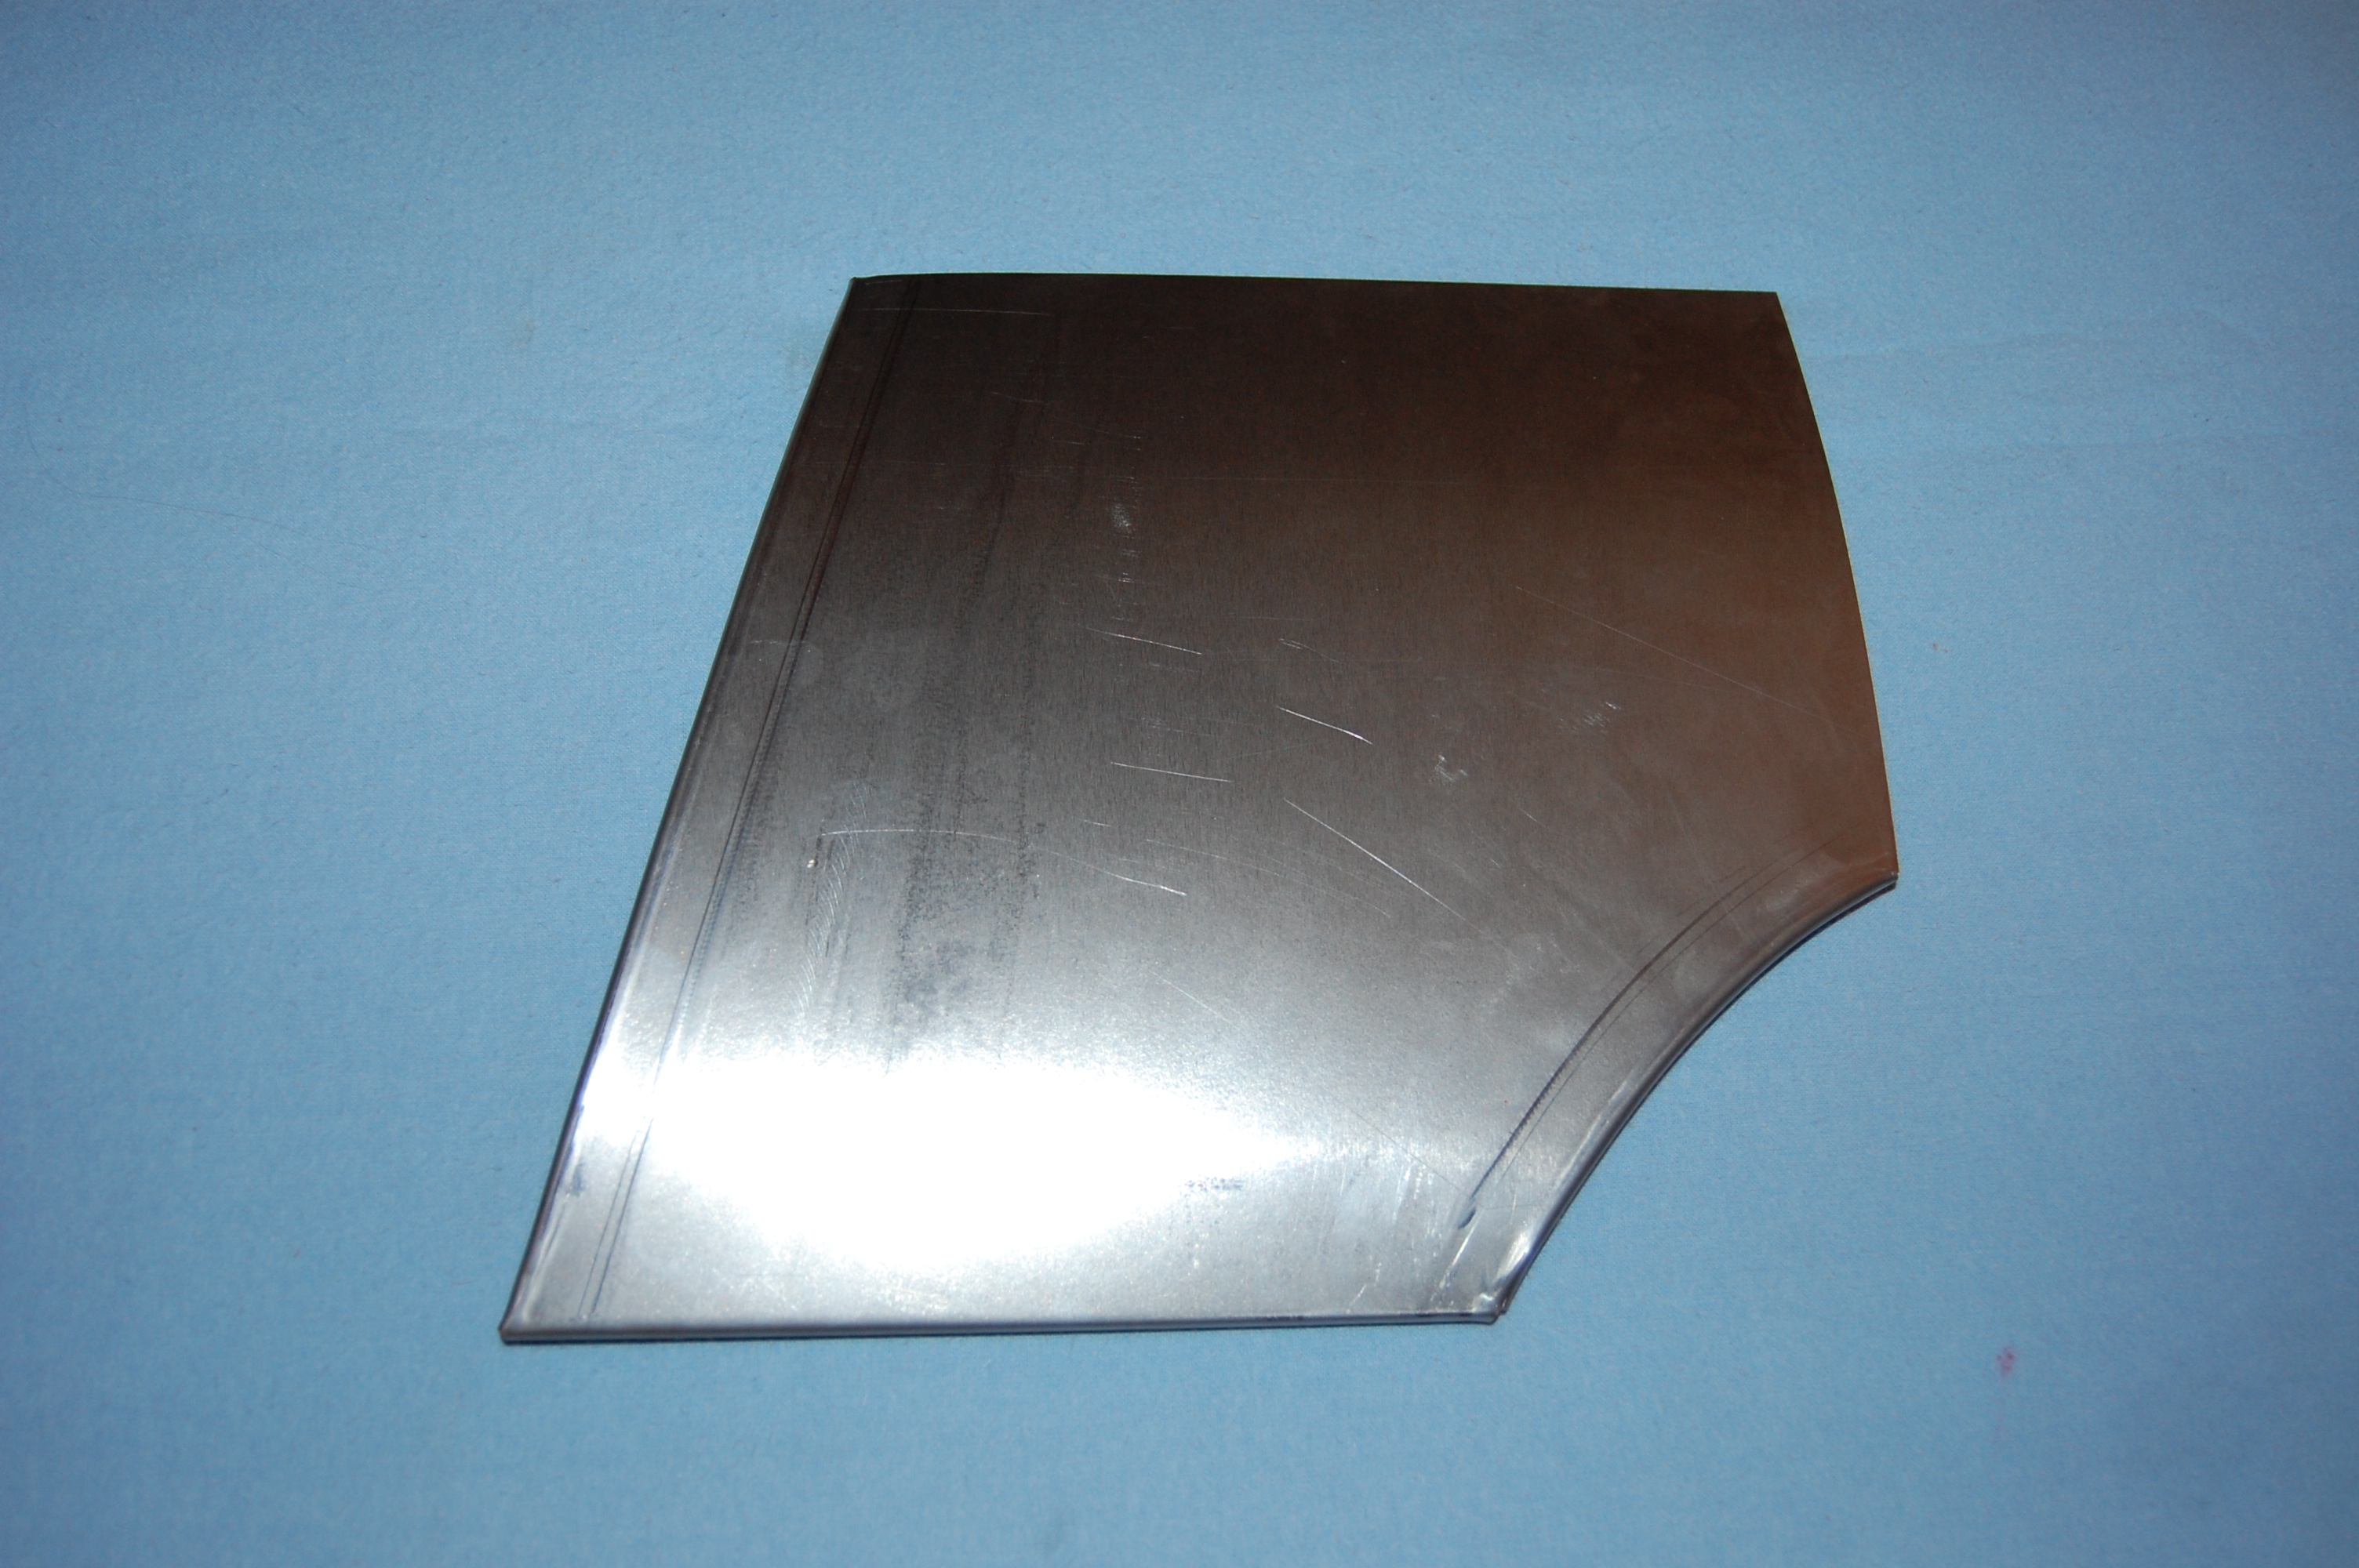
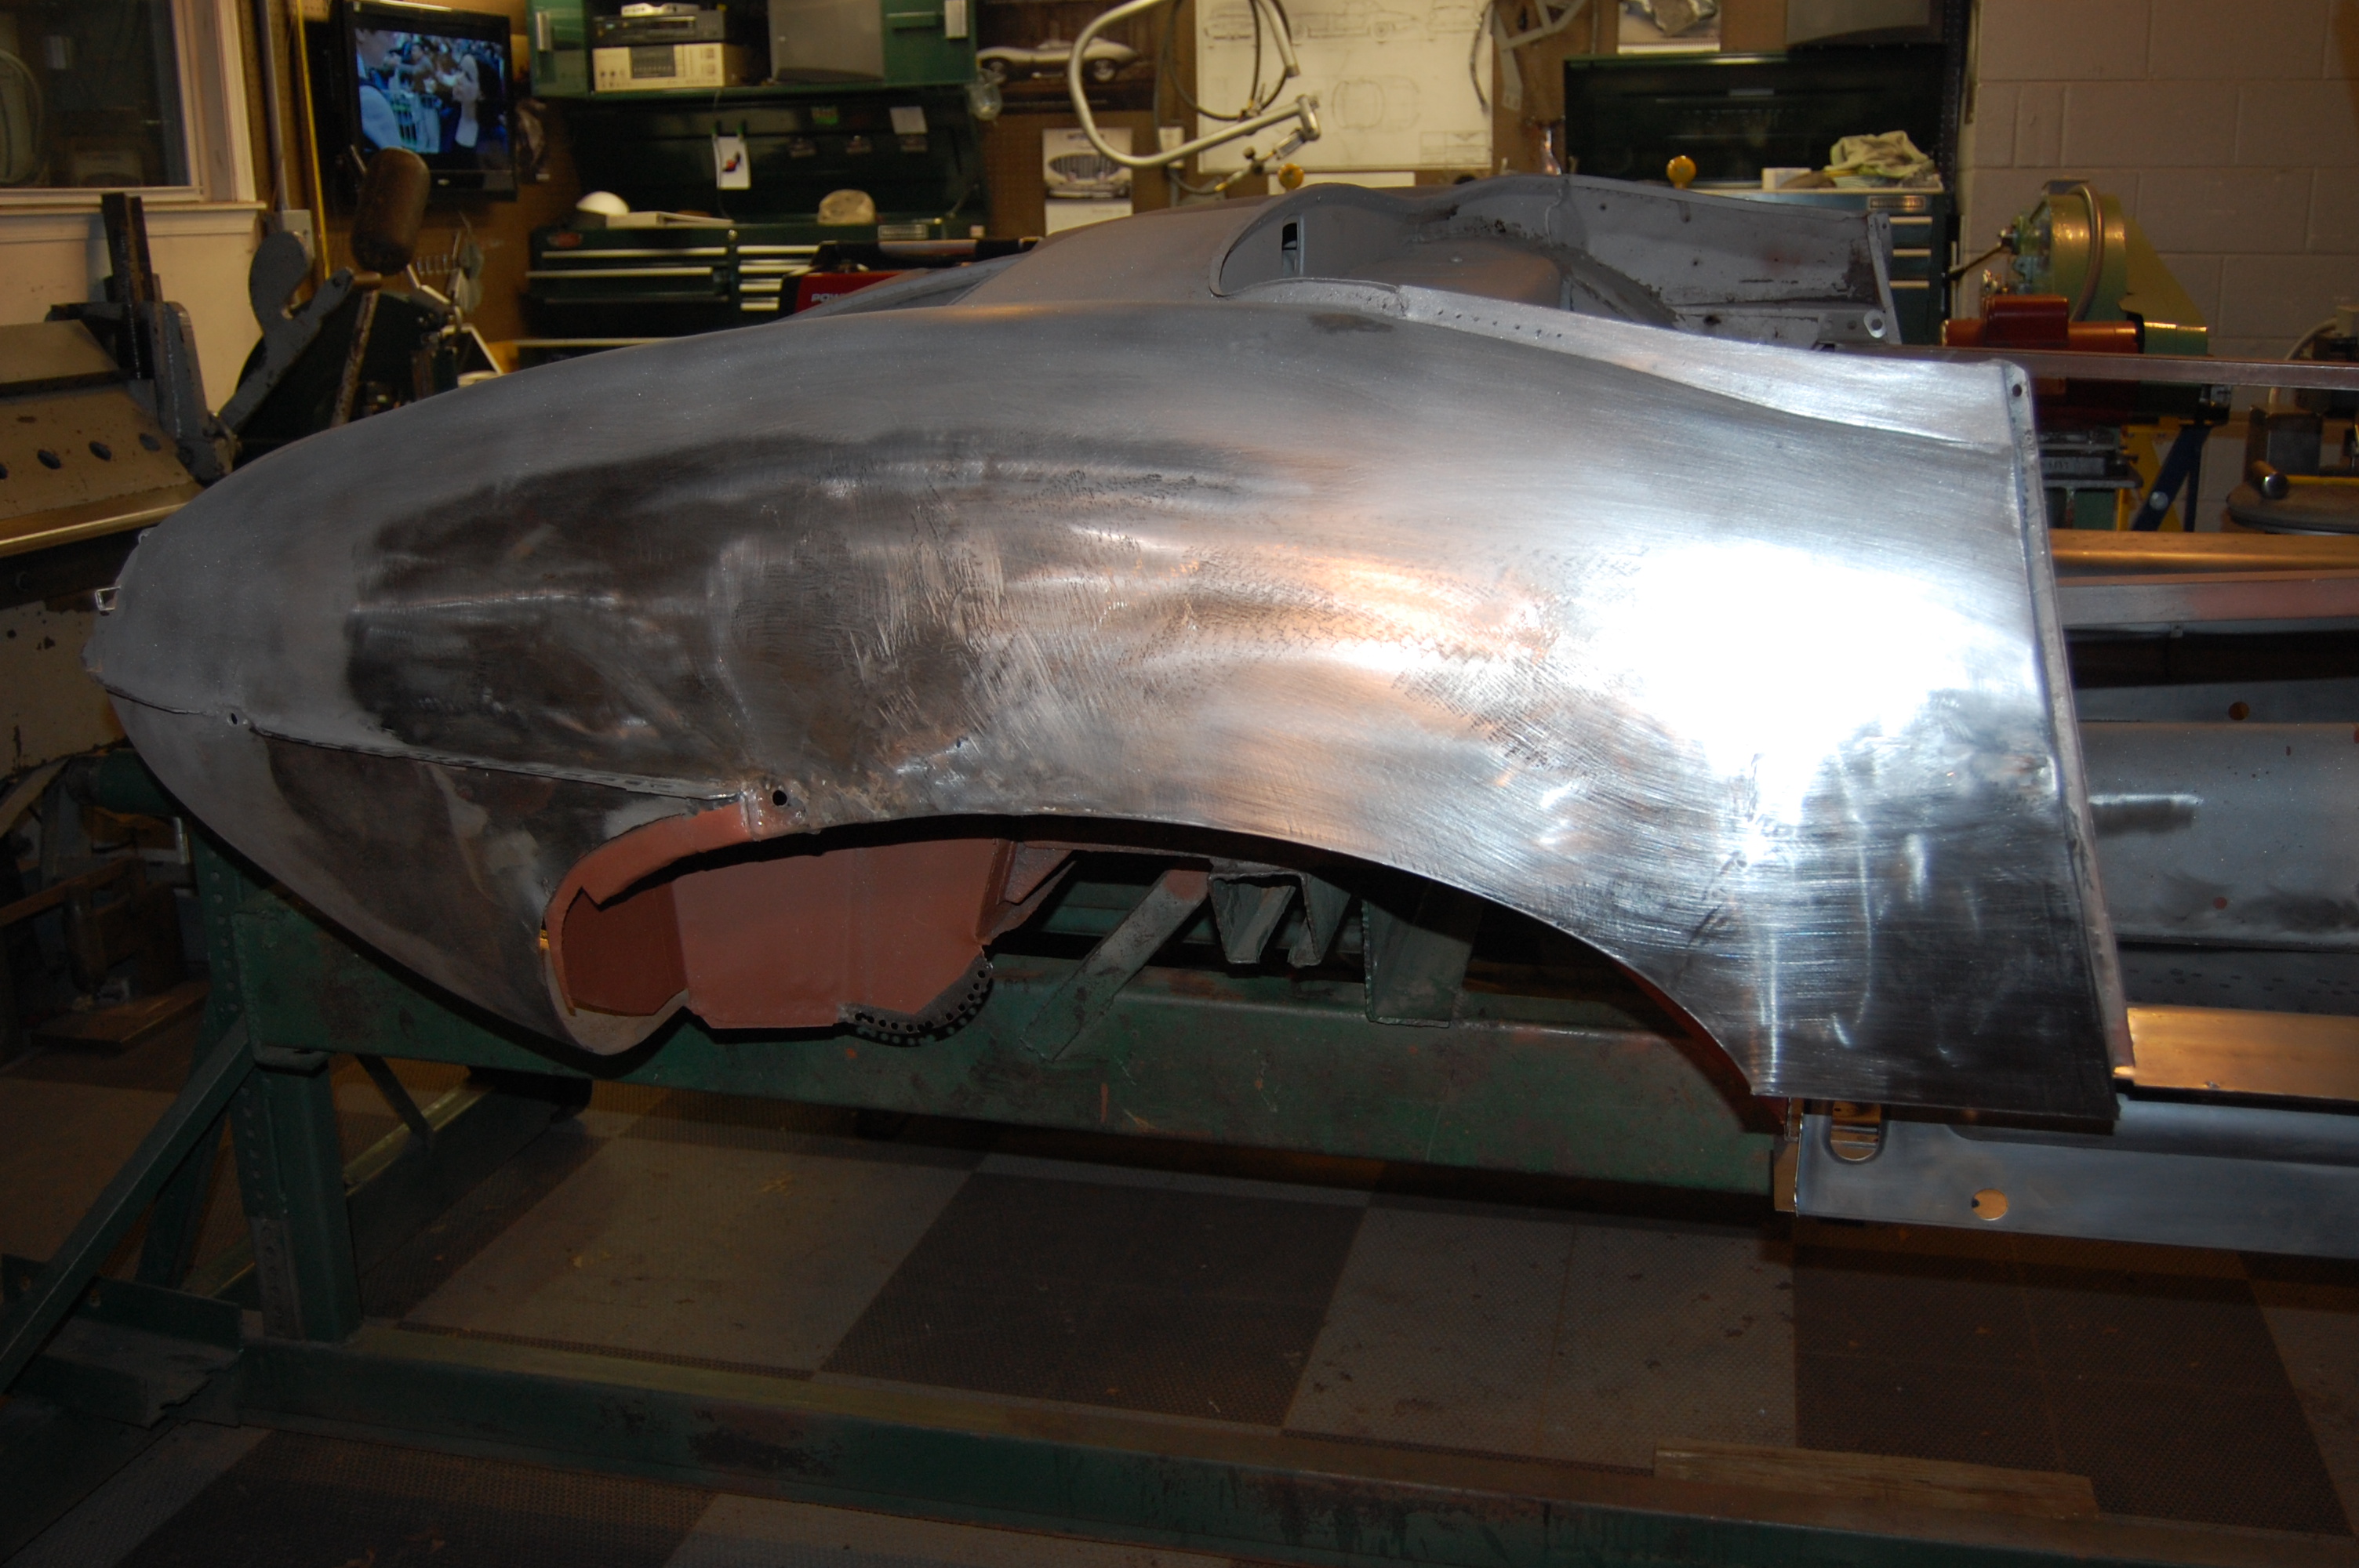
- Here is our new plan – carefully patterned, rolled, and edged repair panel in 18-gauge cold-roll steel. We have these available if you are attempting this repair at home – the panle is approx. 10 inches high and 10 inches wide from the lower corner of the door opening.
-
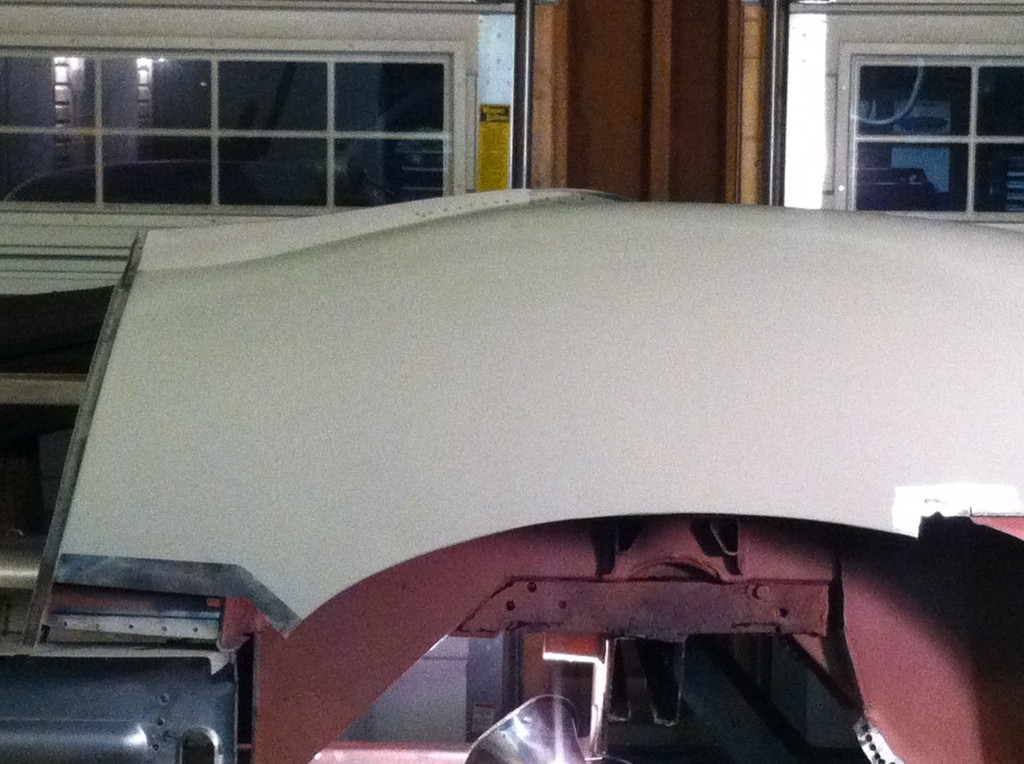
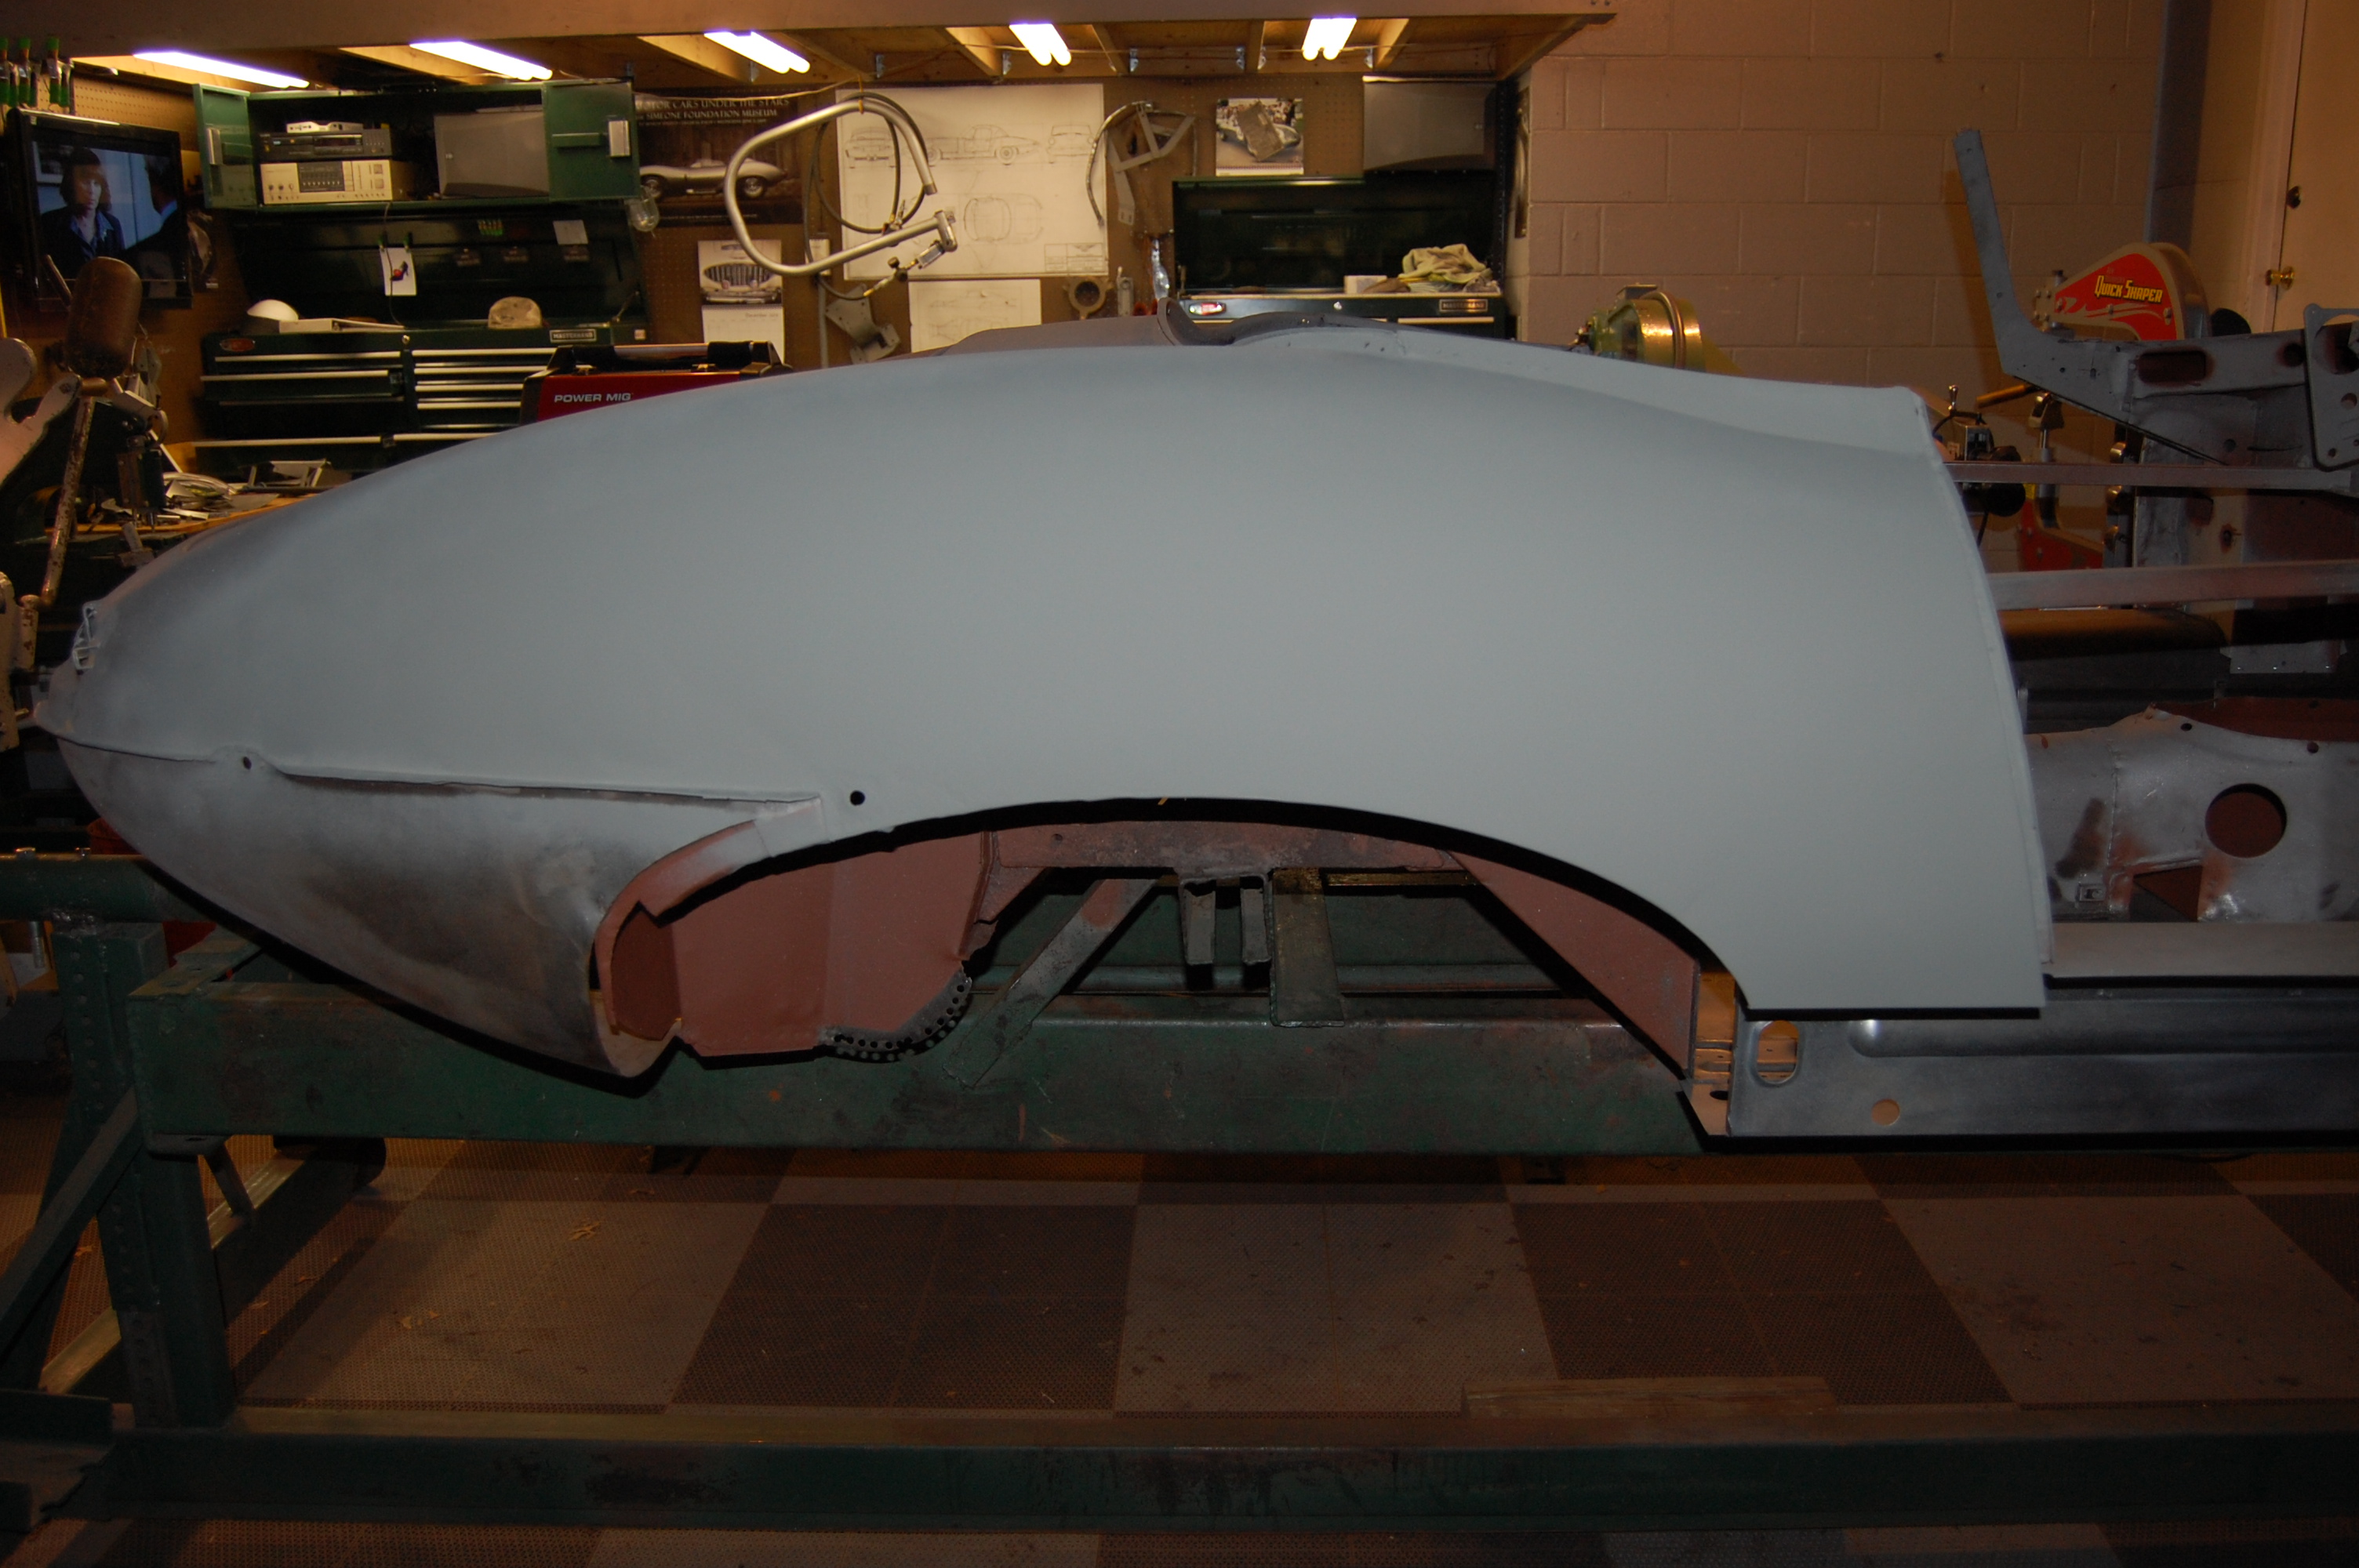
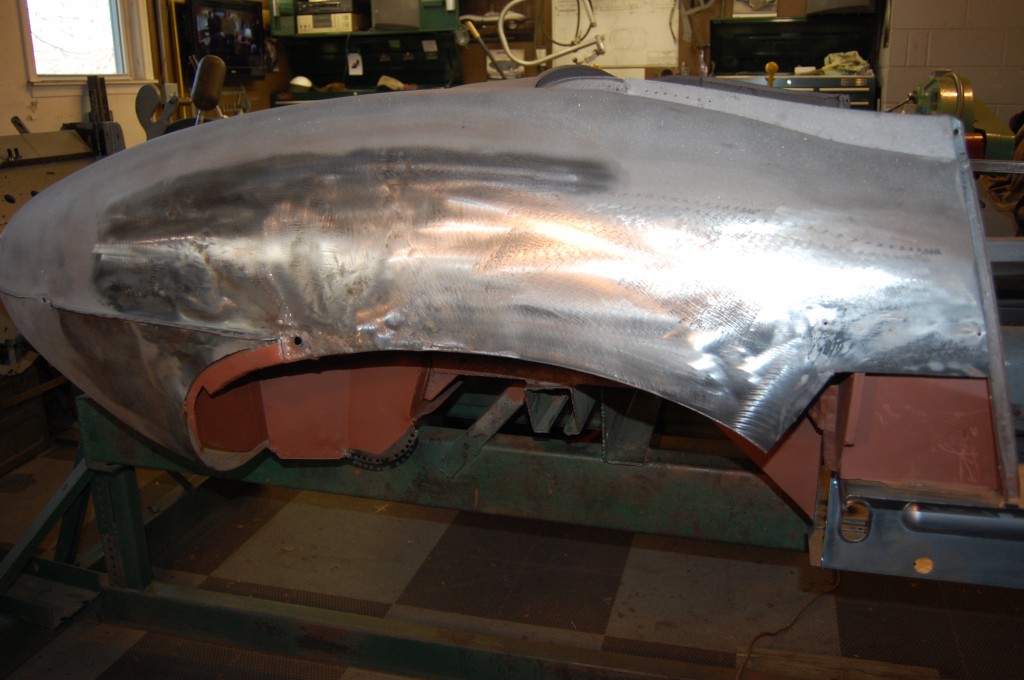
- Here is a shot of the LH wing after we have smoothed and re-shaped the accident damage – see earlier blog entry.
-
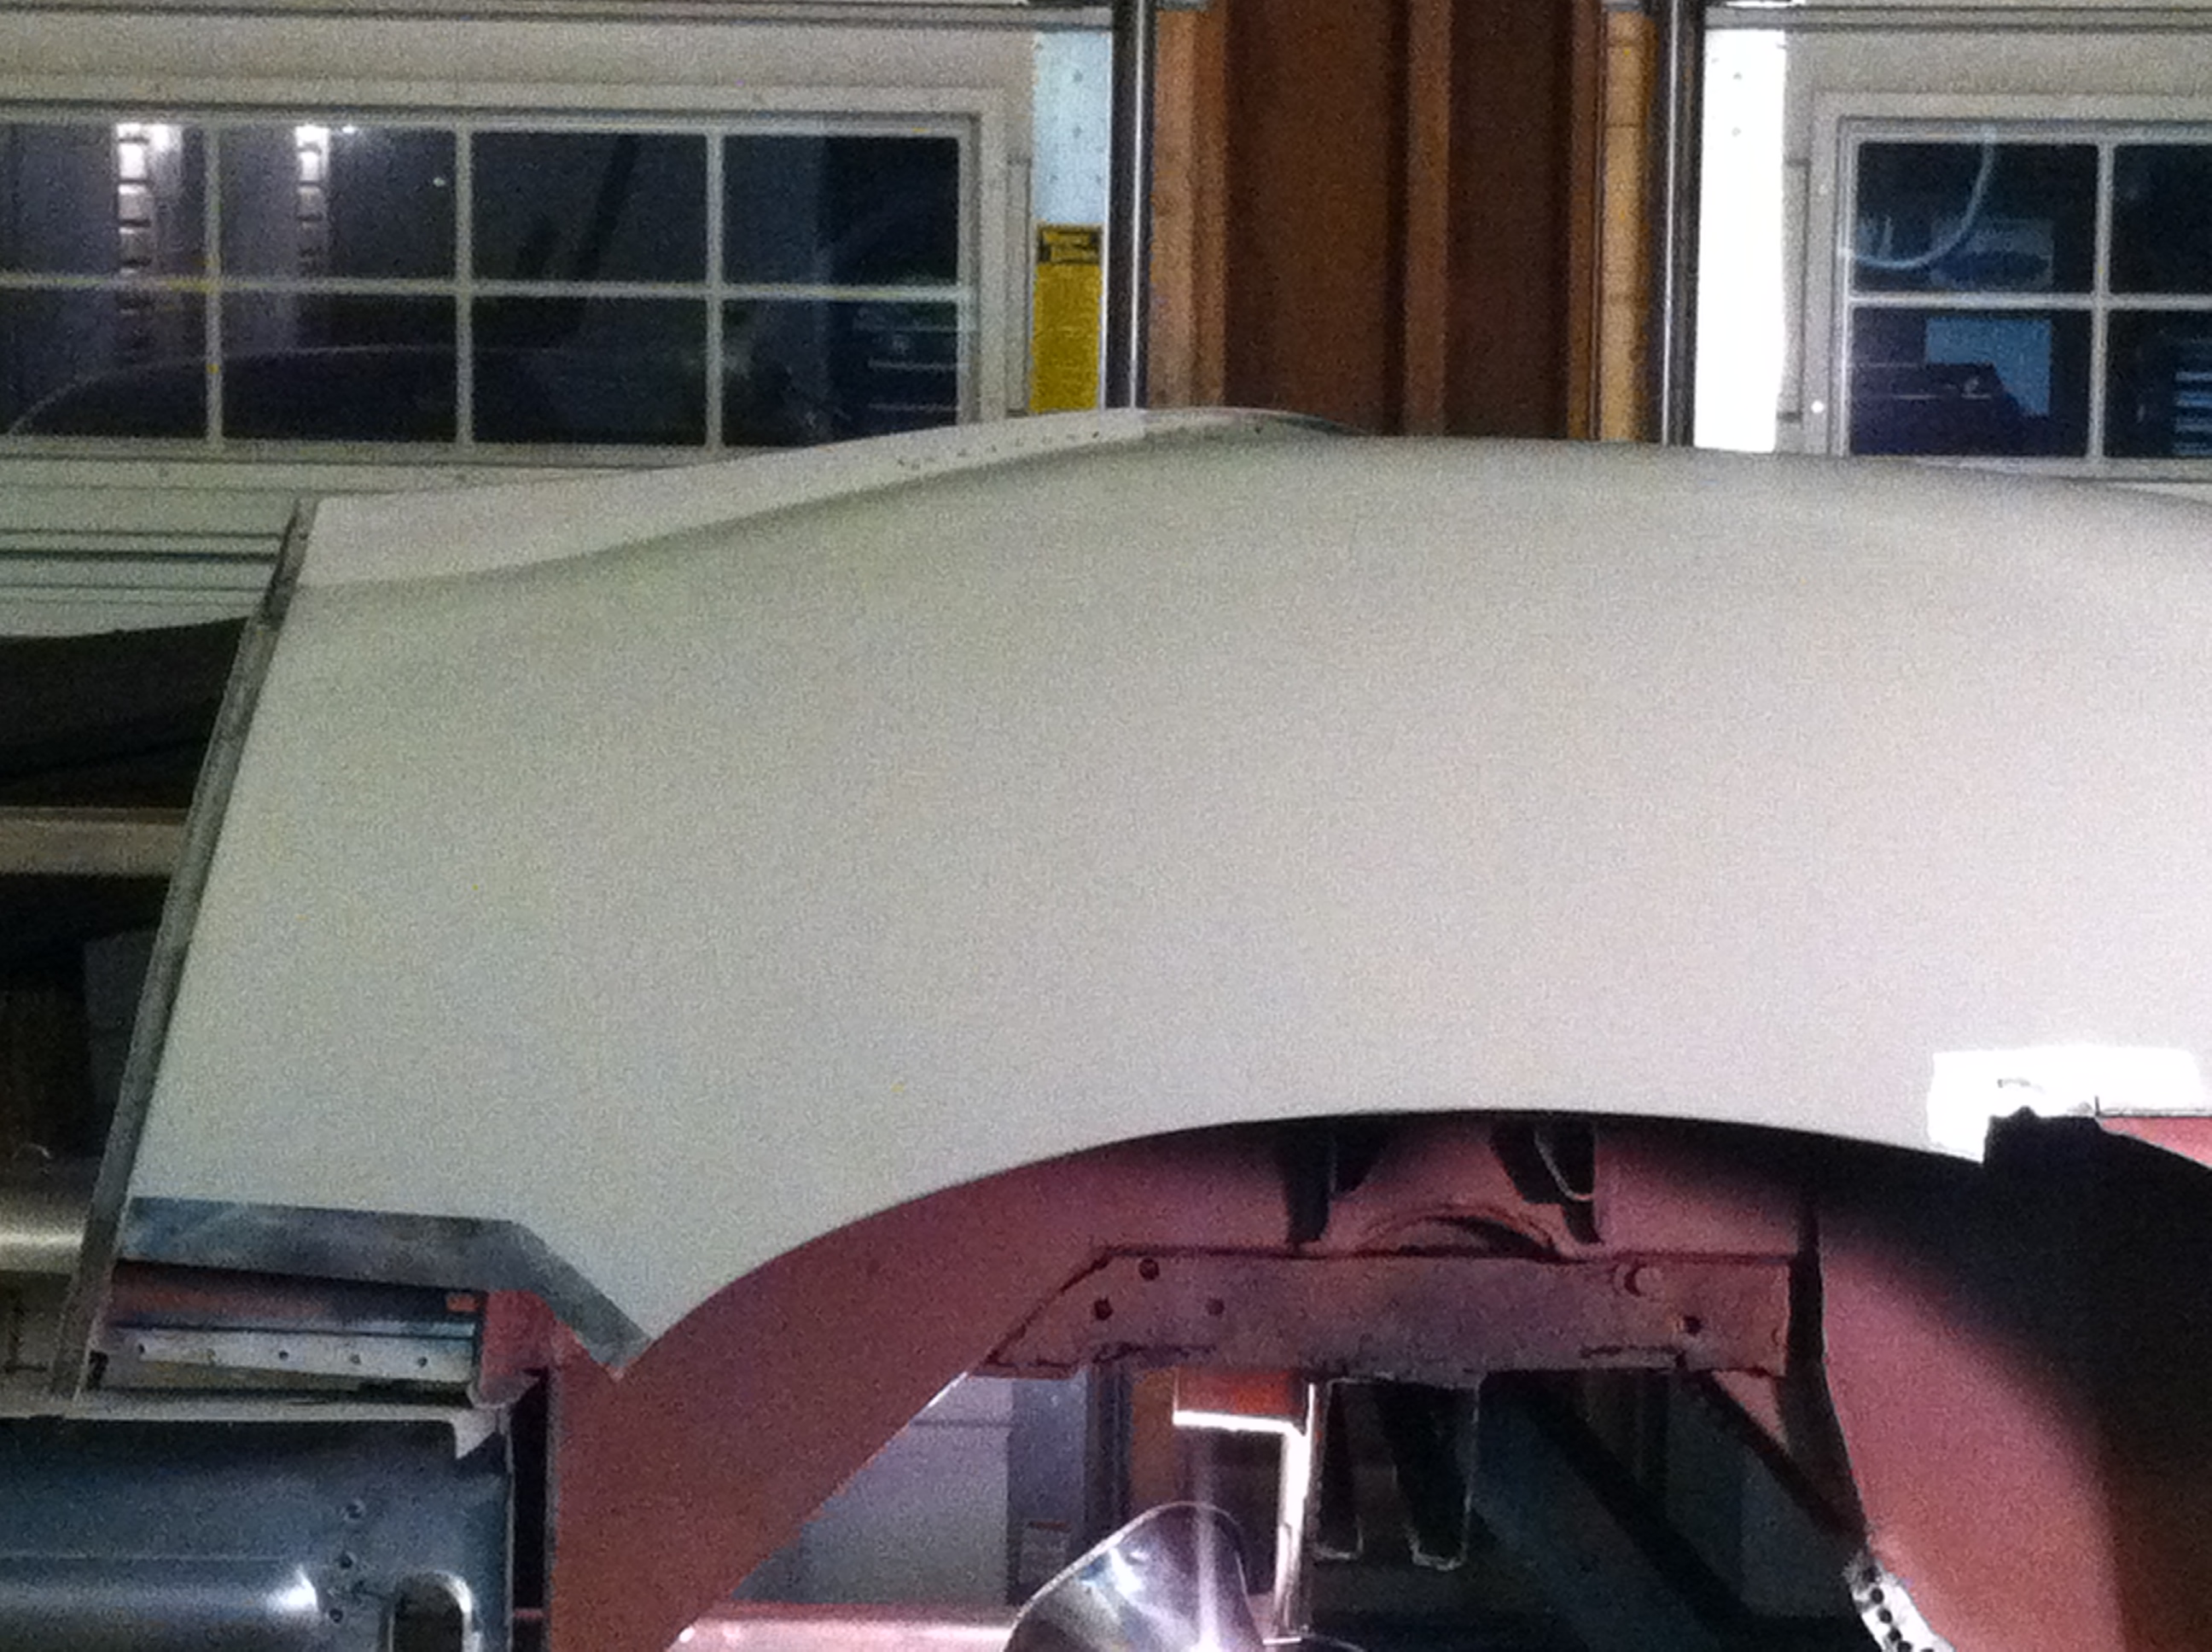
- This was the day that the camera battery was dead, so the photos were few and far between, and taken with my cell phone. This is the panel after the repair section has been trimmed down as small as possible, and then carefully TIG welded into place.

-

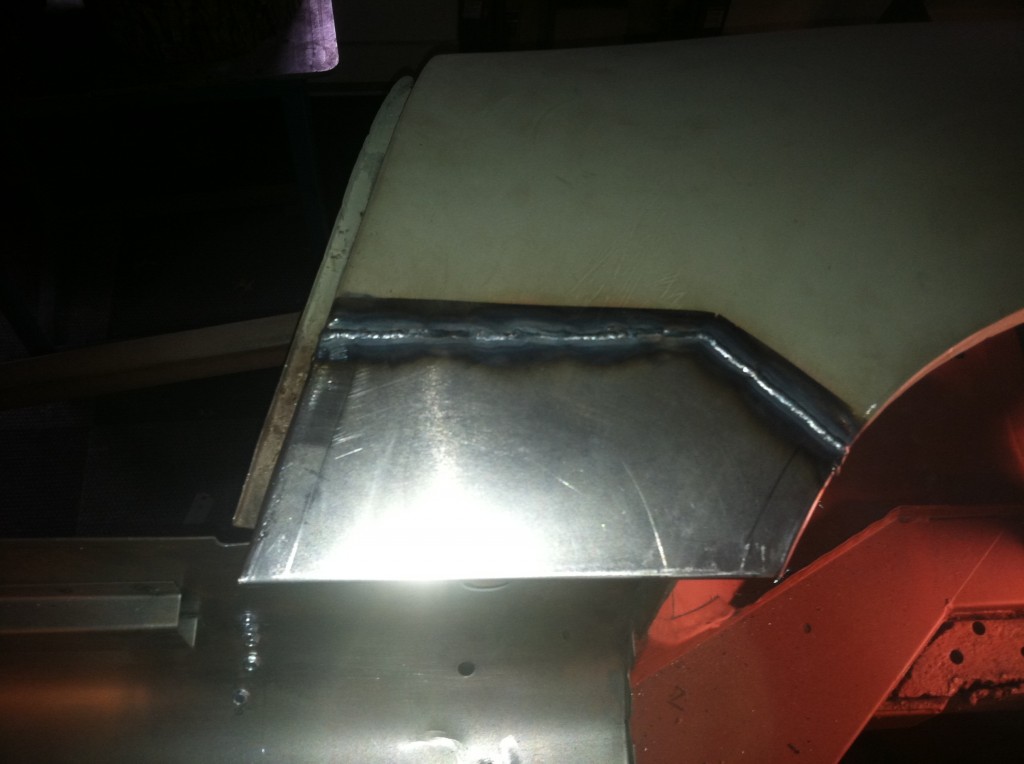
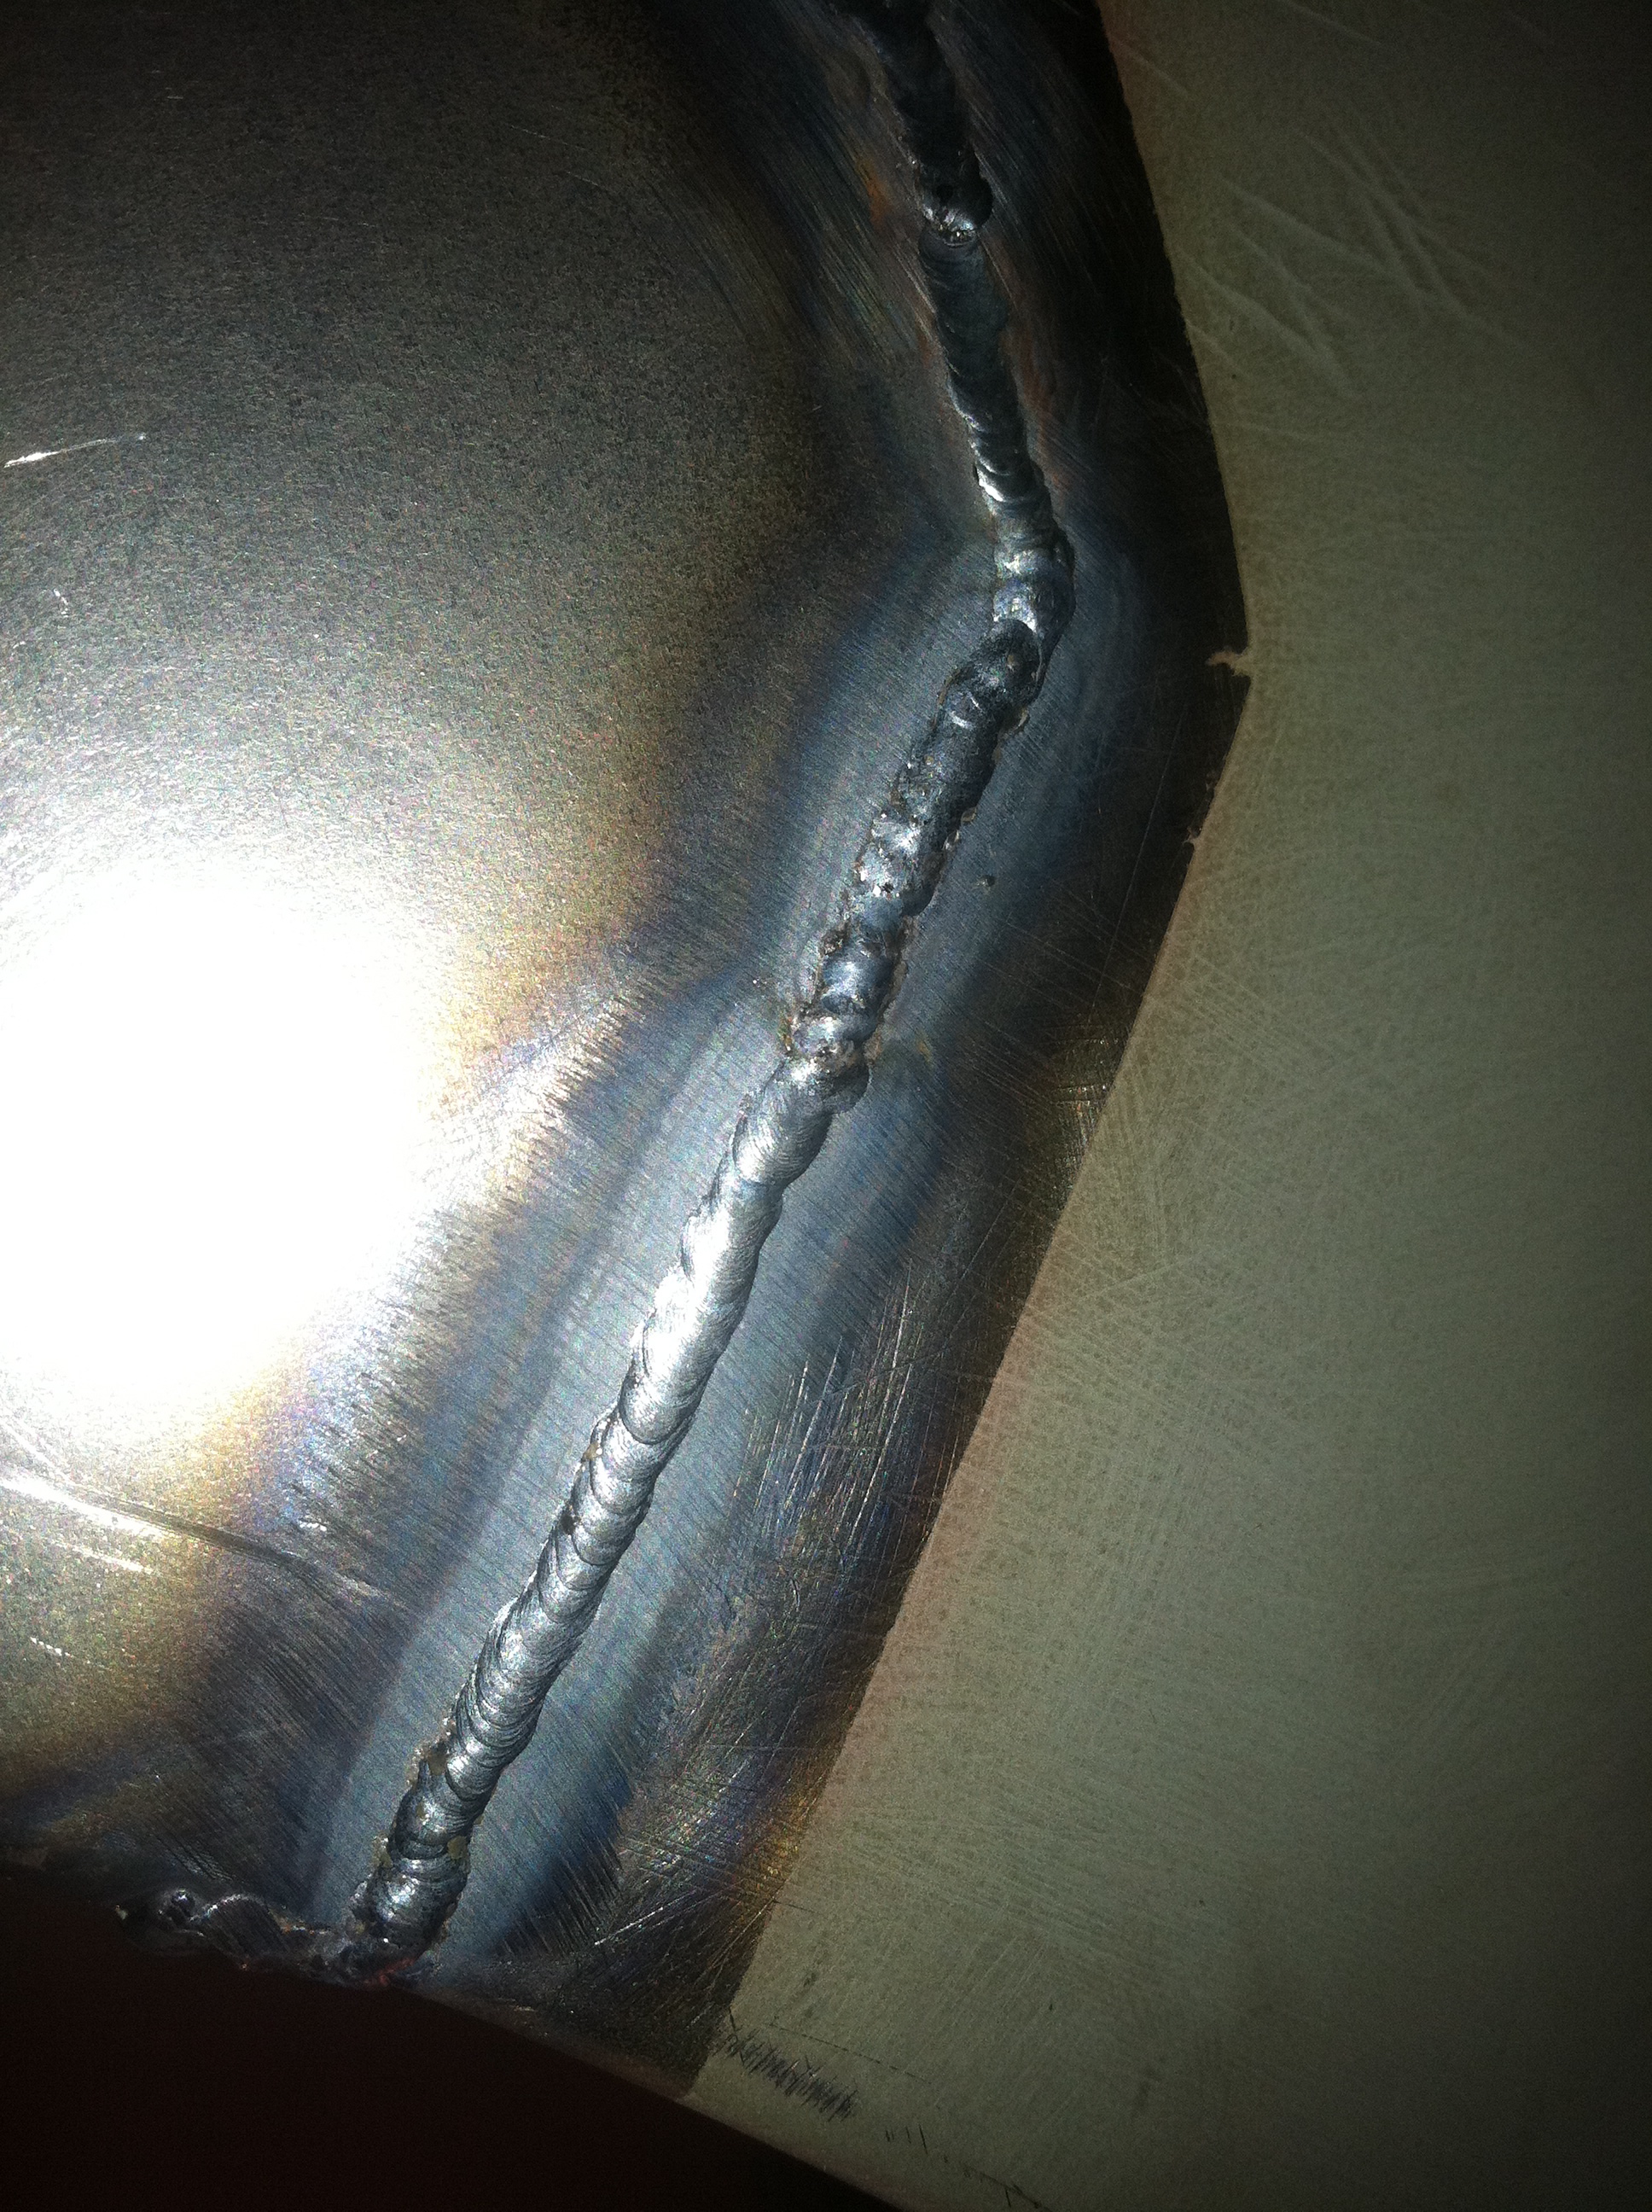
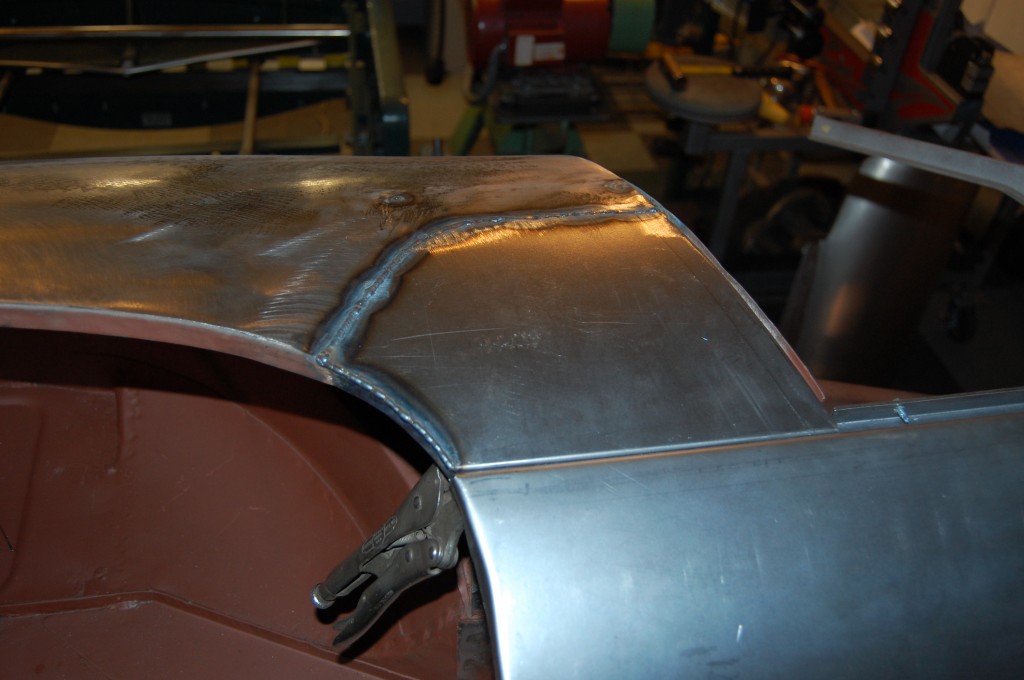
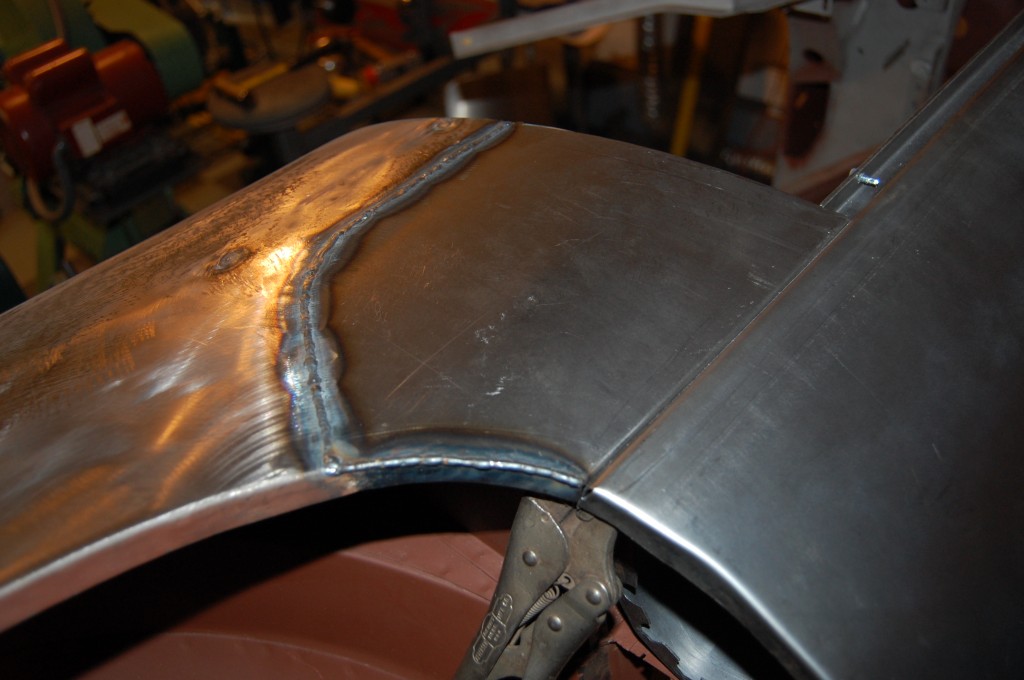
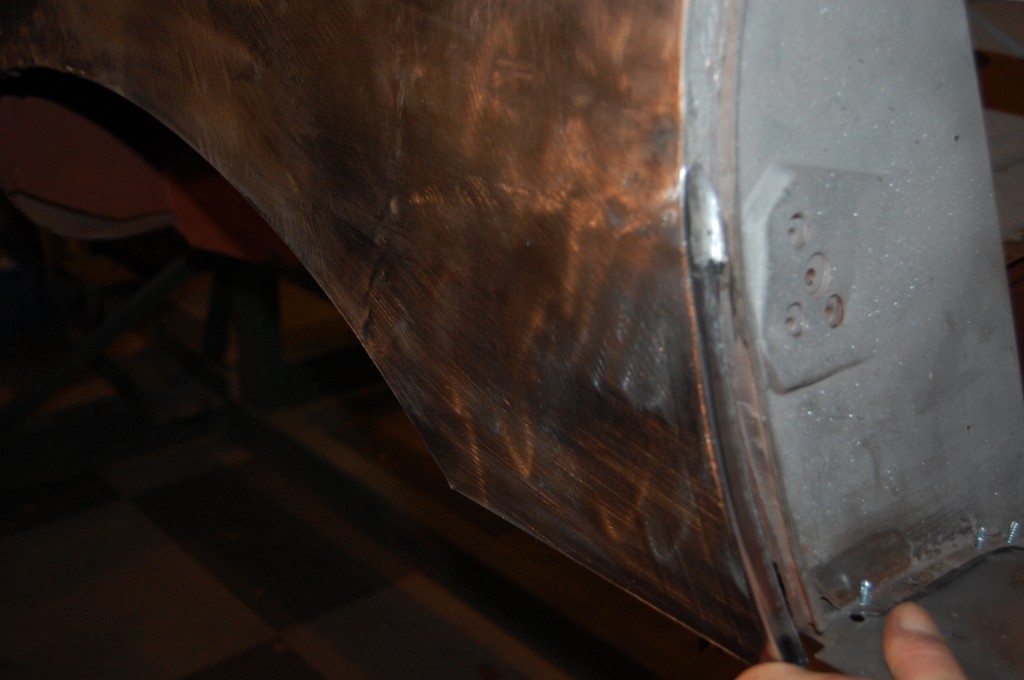
- Here is a close-up of the weld – you are treading a fine line between penetration, not too much back cut, limiting the heat, and not getting any blow through on the thinner, original wing. If you even THINK about attempting this repair with a MIG welder, it is going to be over before it even starts…
-
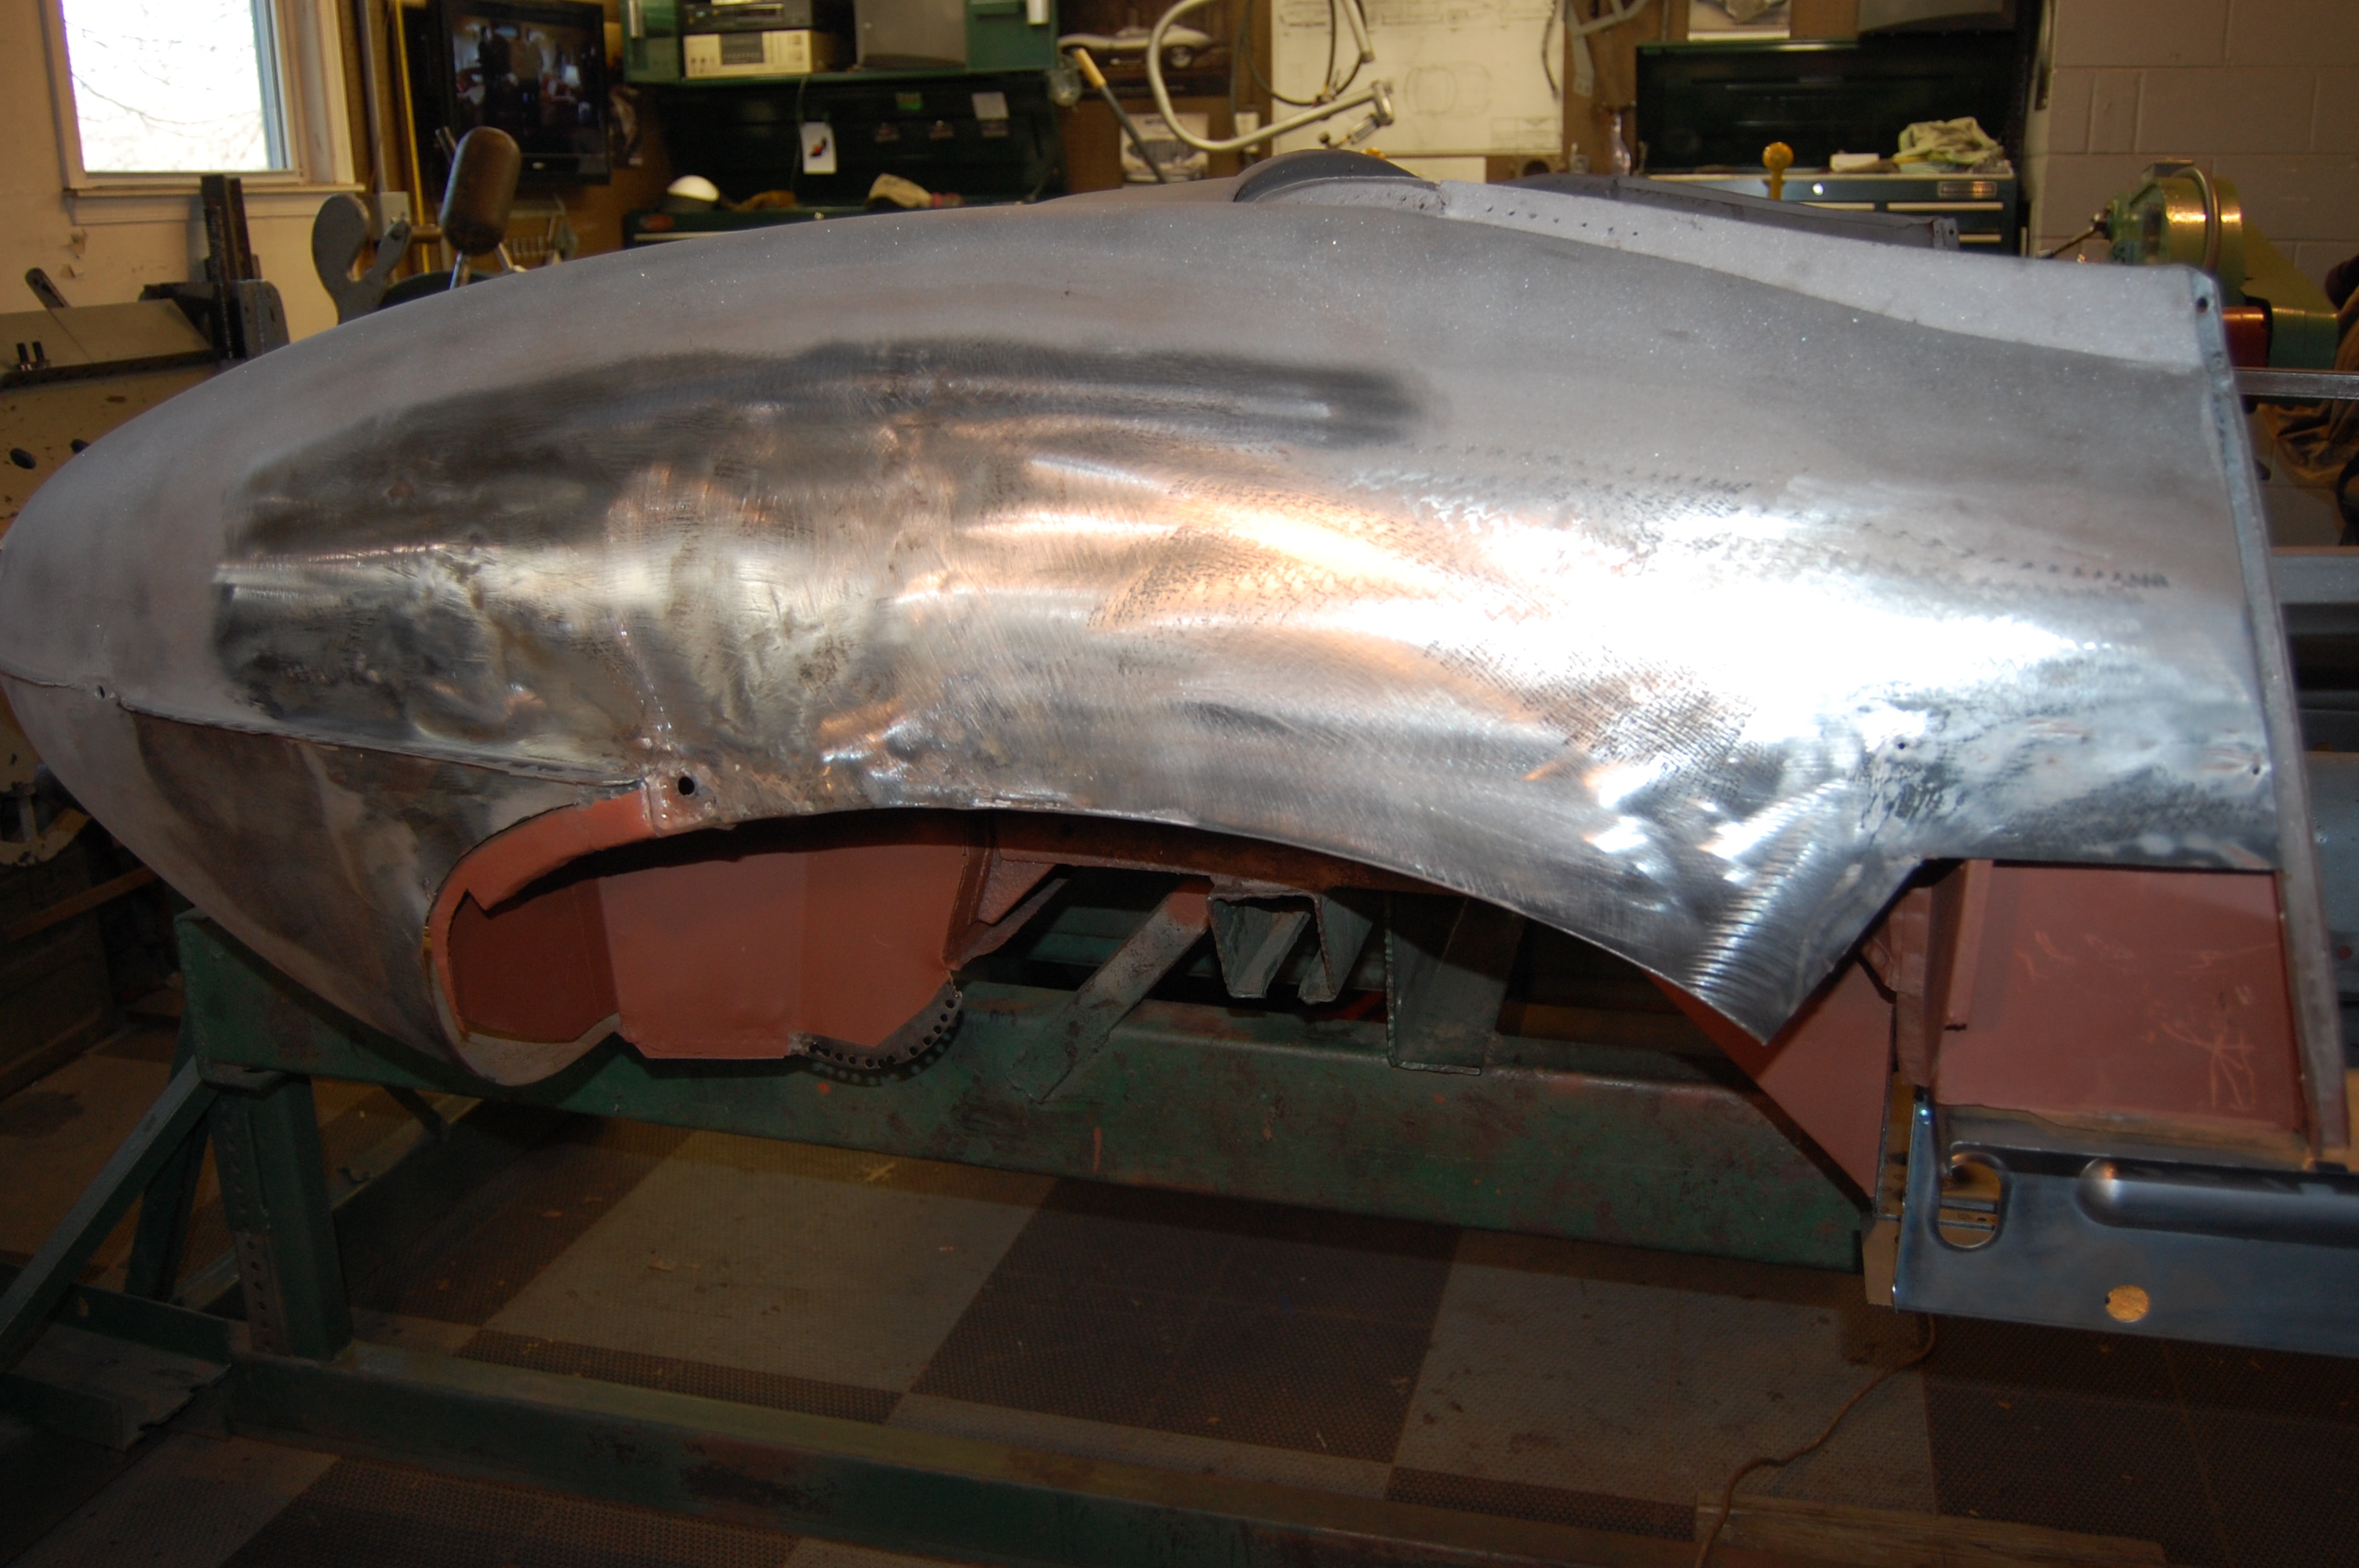
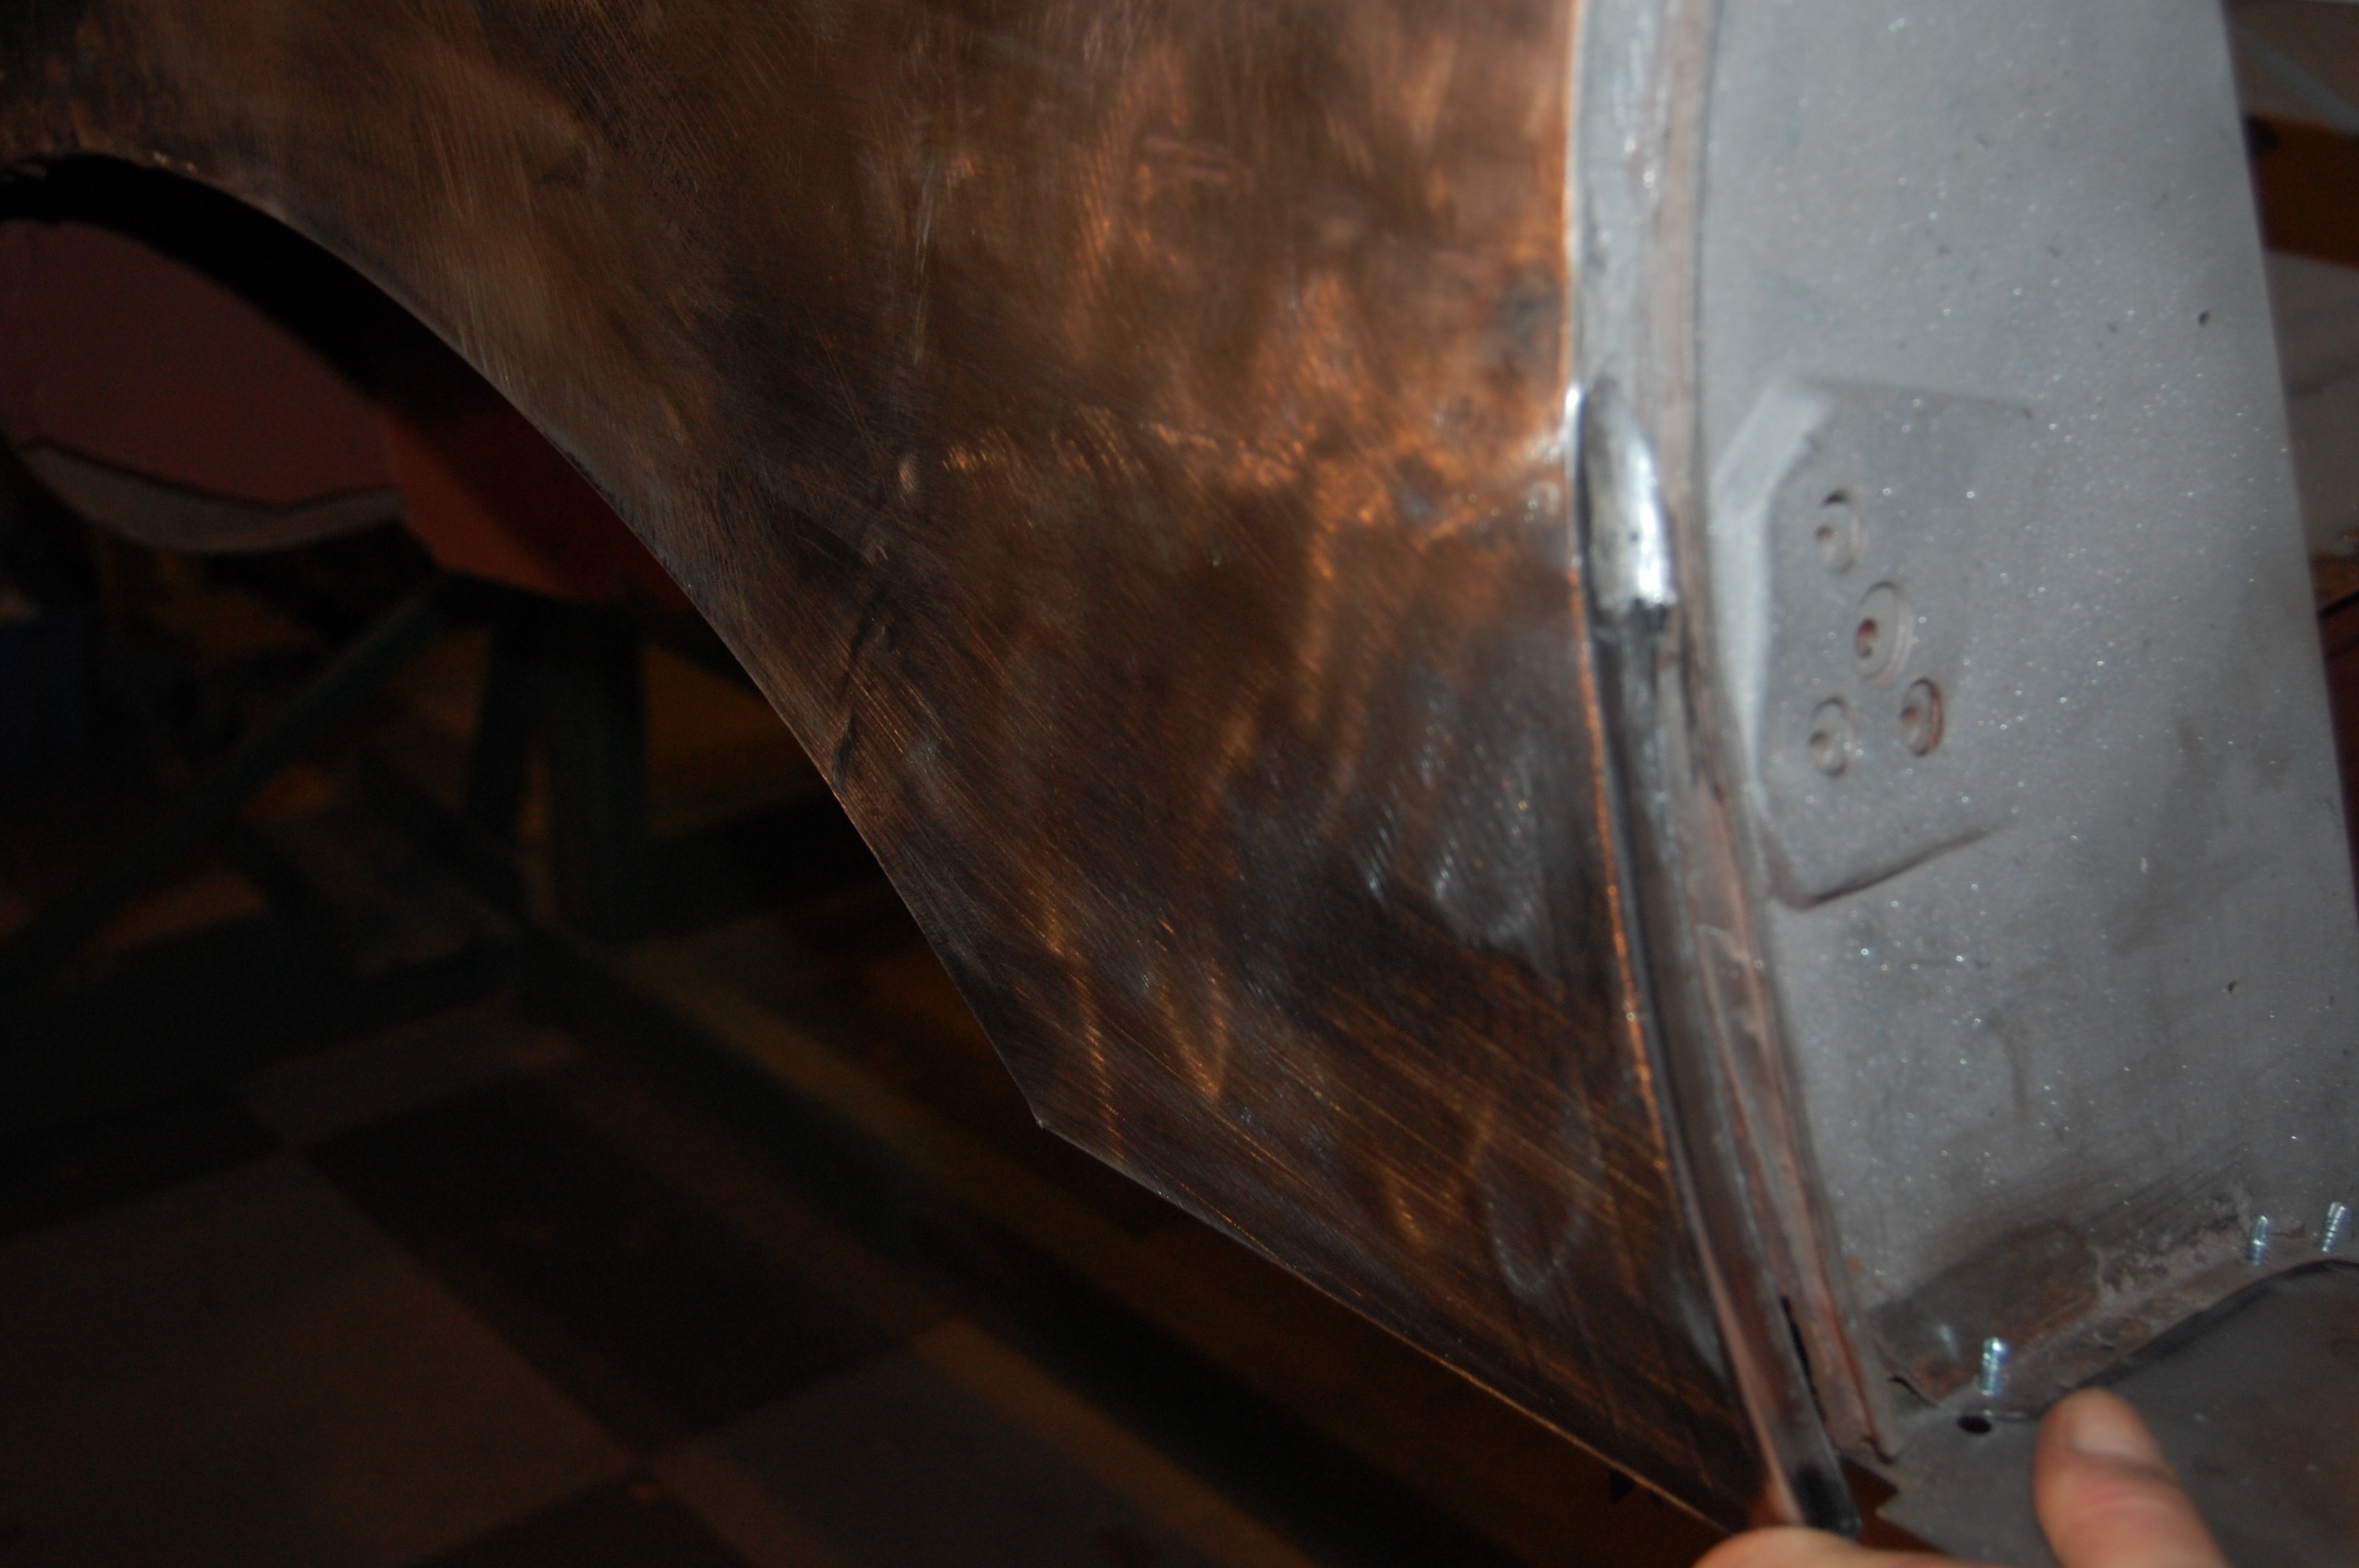
- Here is the completed repair after a little work planishing, slapping, and shrinking the weld.

-
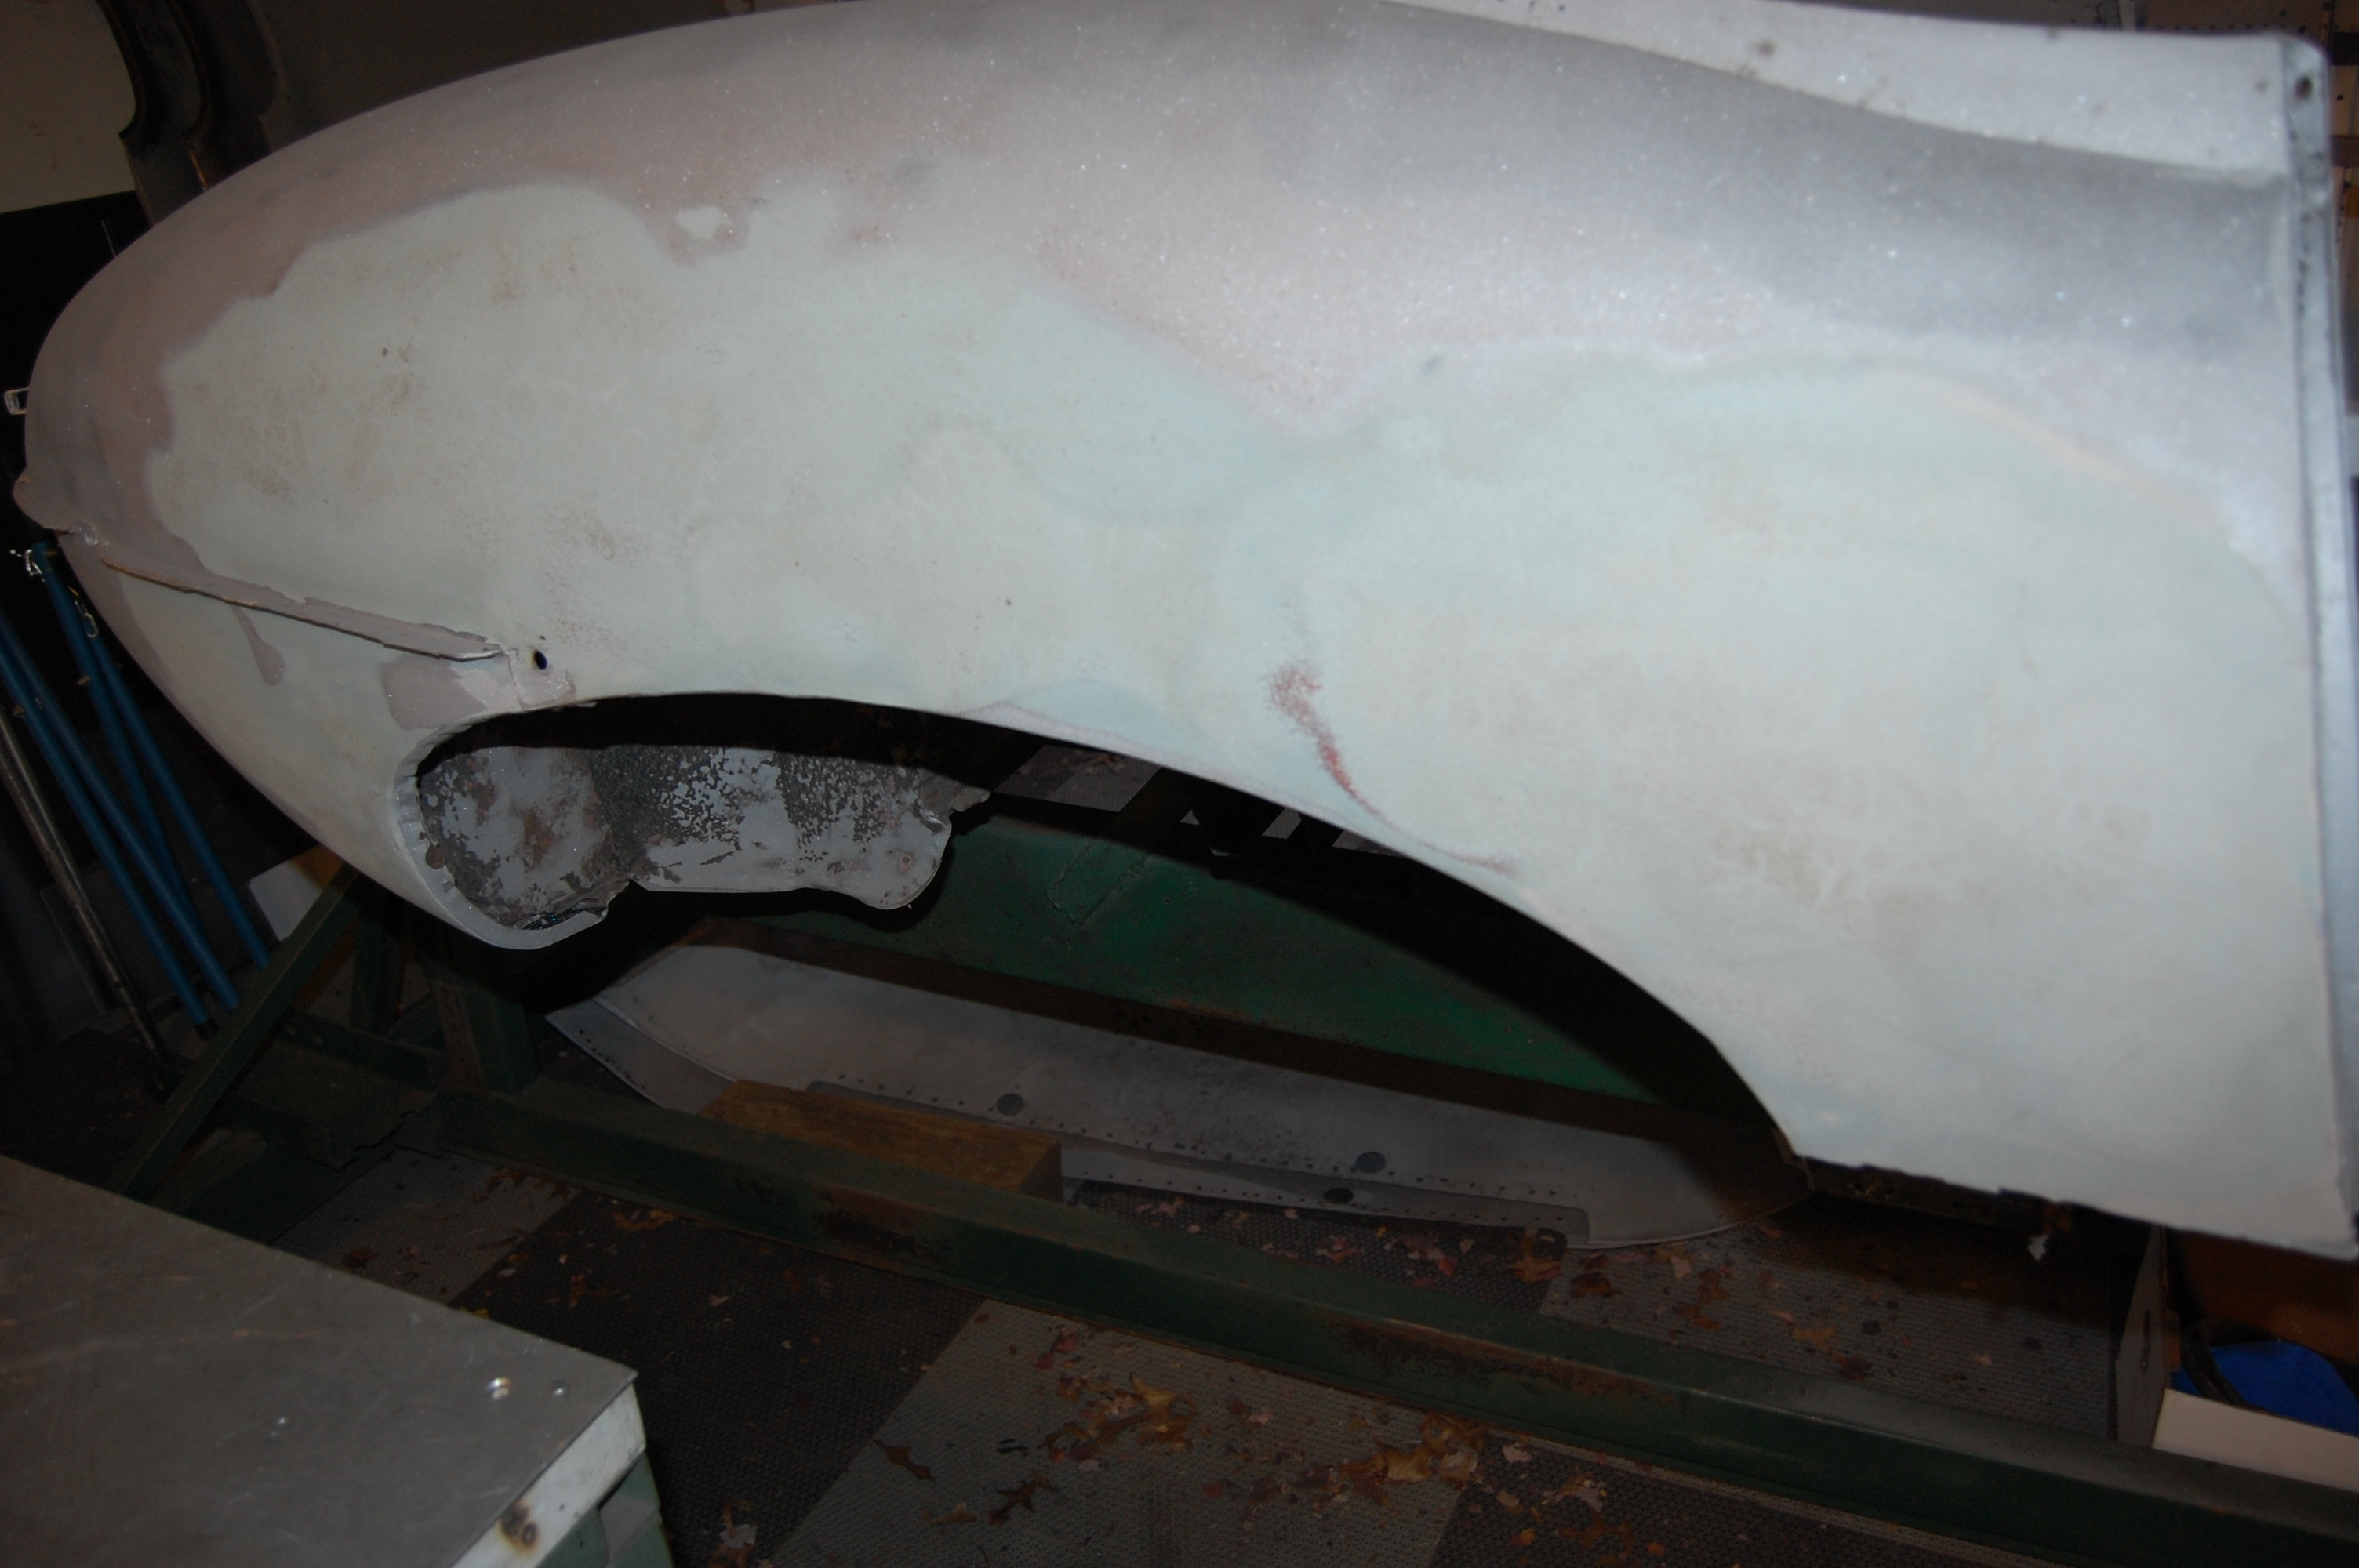
- Here’s the starting point on the other side. This patch will need to be larger. What’s strange here is that sometime before the lead-glue patch, there was ANOTHER patch in place over the original wing. If you look closely, you can see two holes from rivets I asume, and a few spots where we carefully ground off globs of braze. This is all about 2 inches above the cut. Weird…
-
- In this shot, we’ve spent a couple hours smoothing accident damage in the rear section of the wing. It looked like a couple of wrinkles shooting outward and up from the very tip of the bumper – she must have been tapped right there.
-

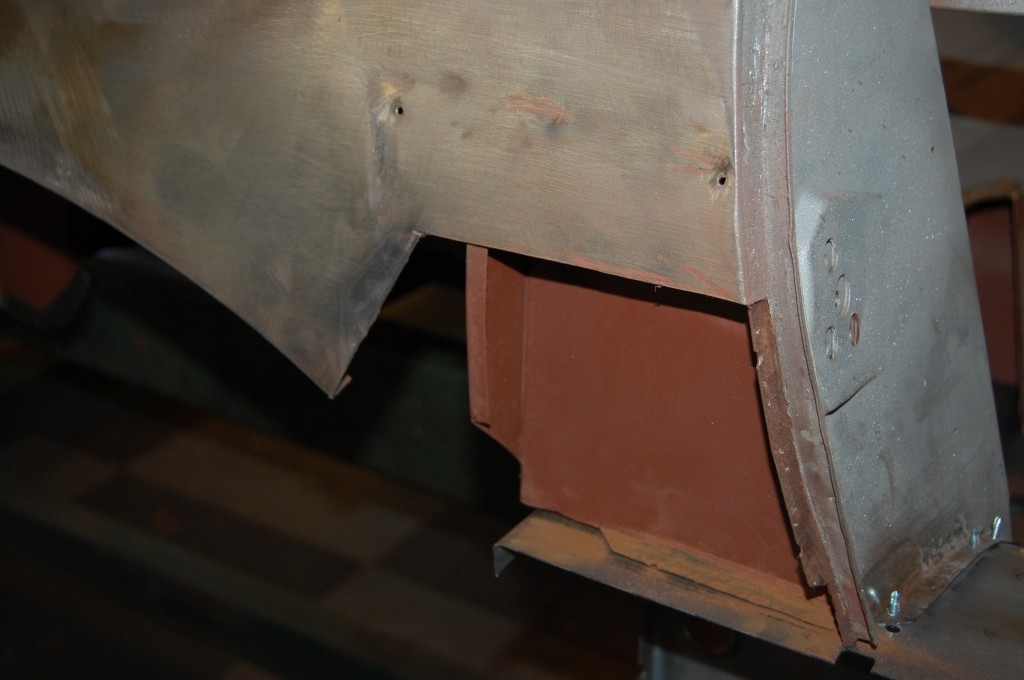
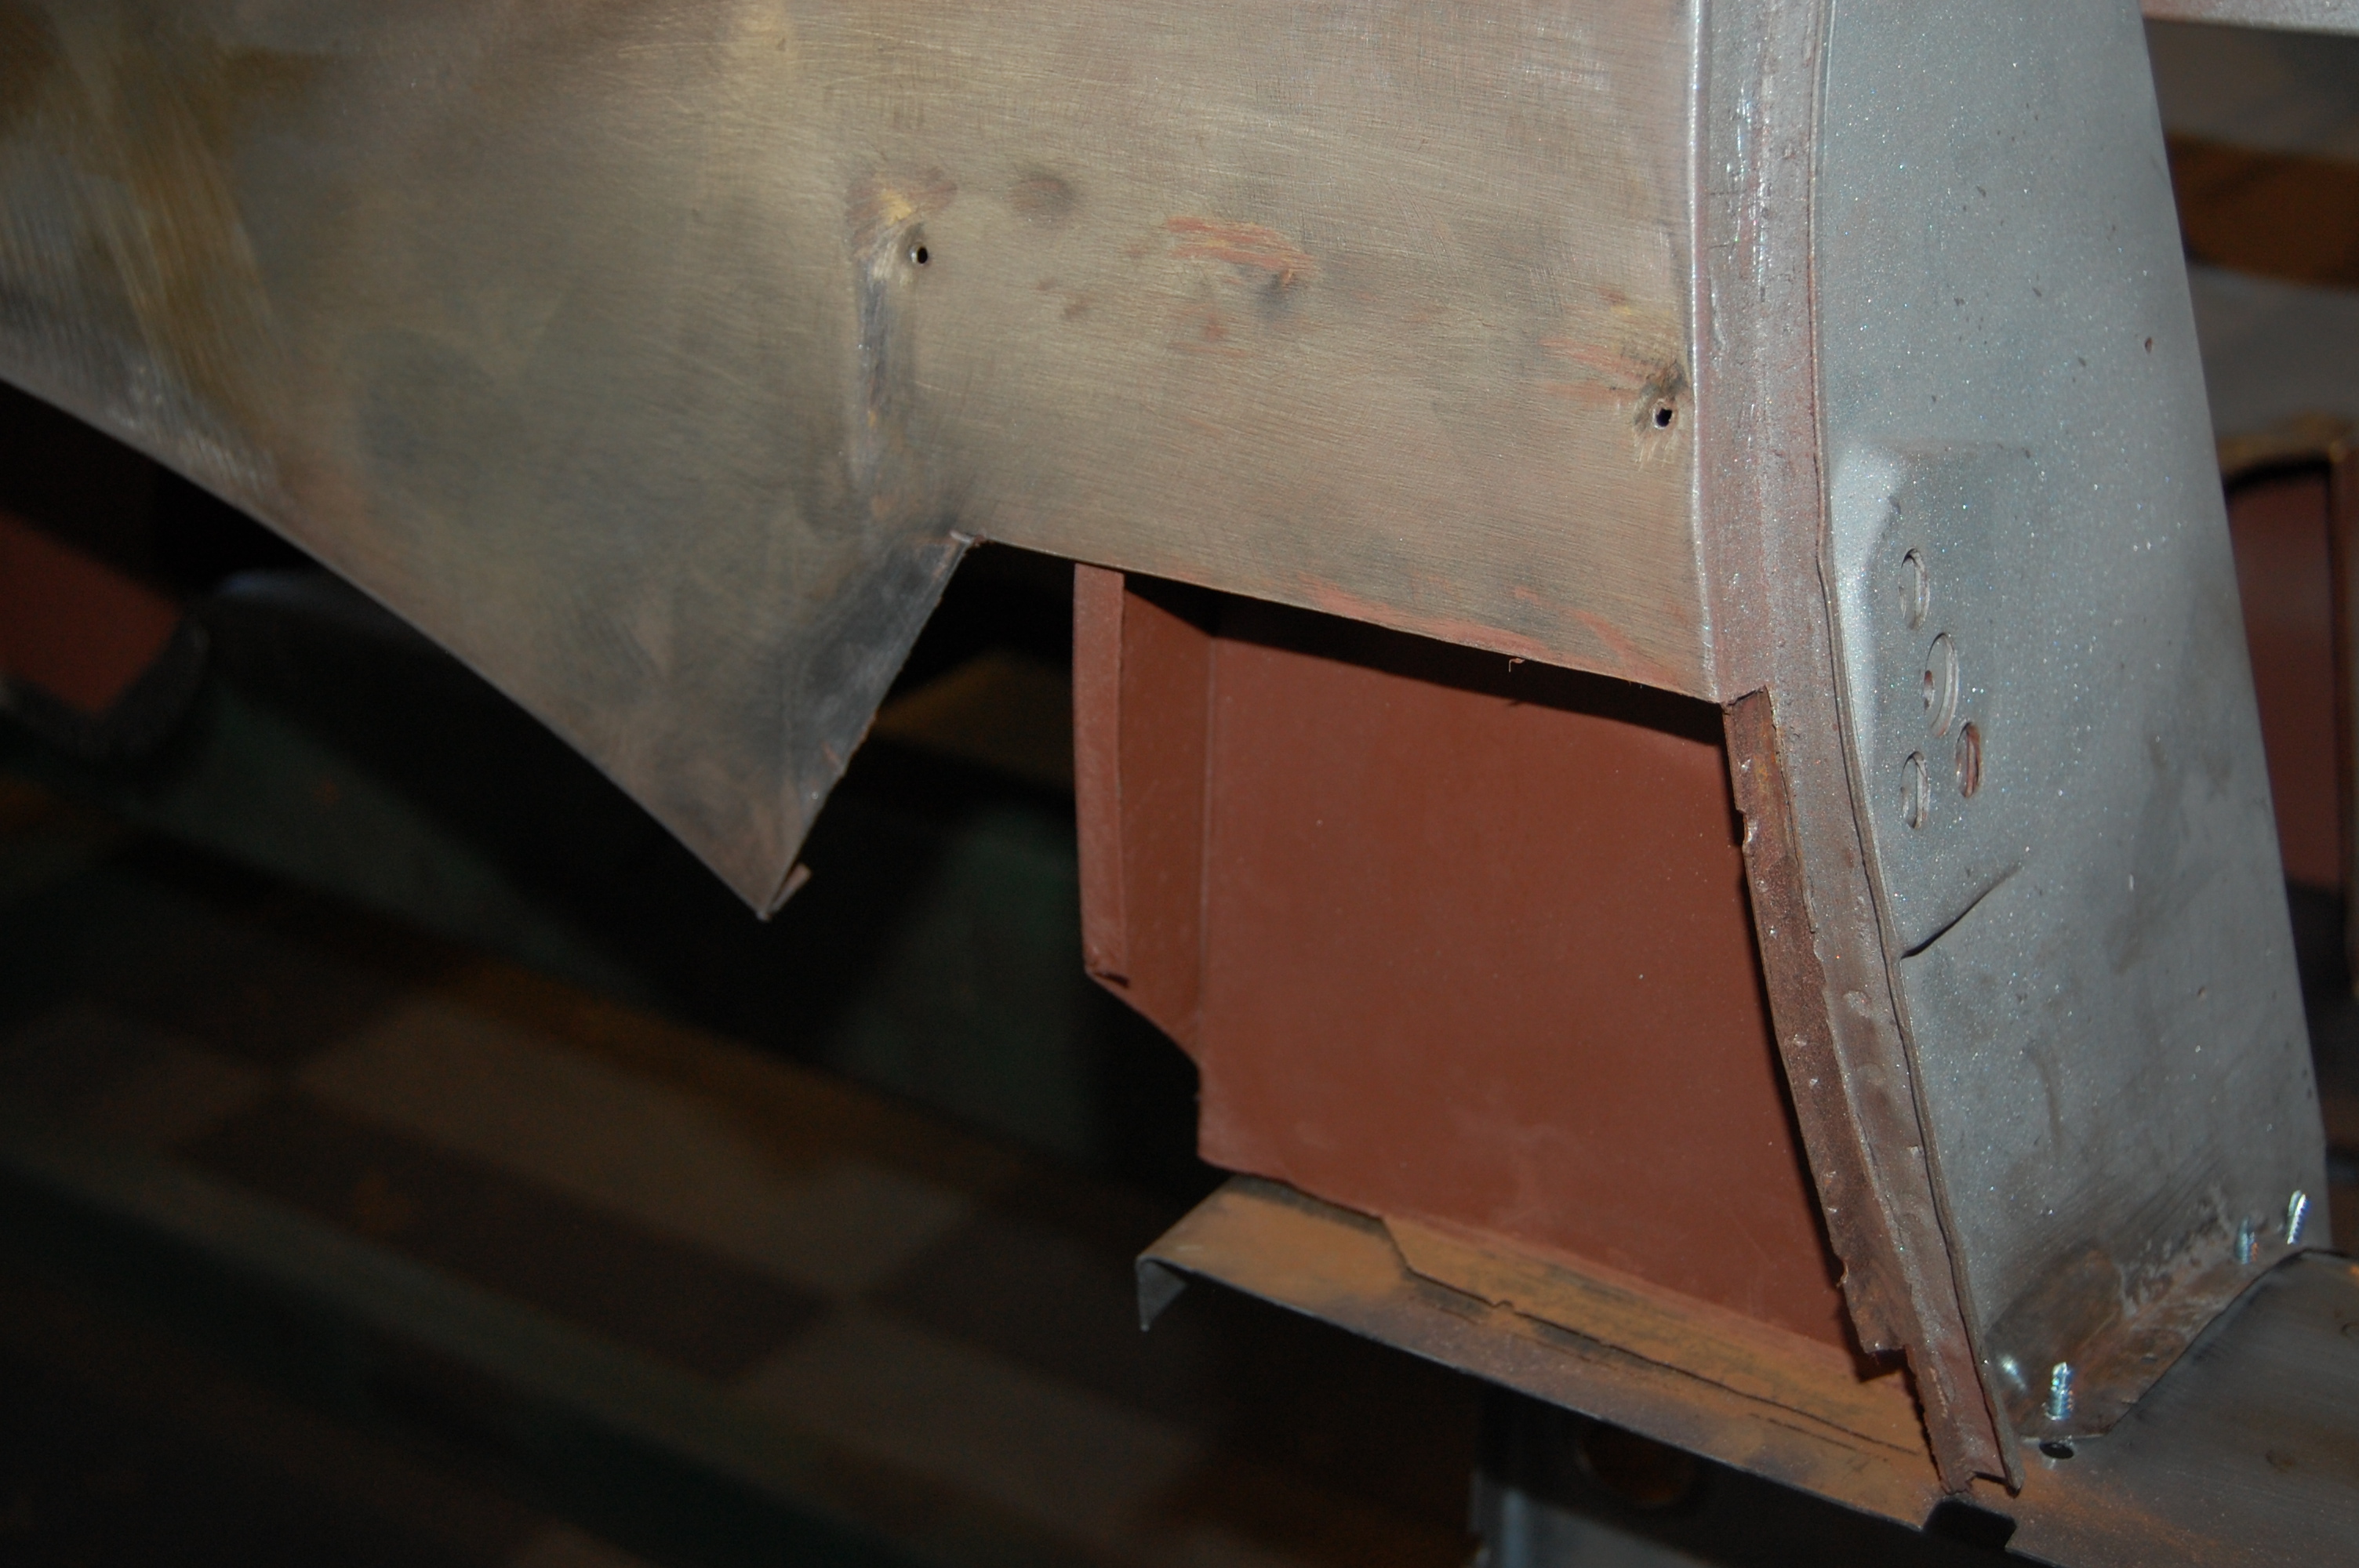
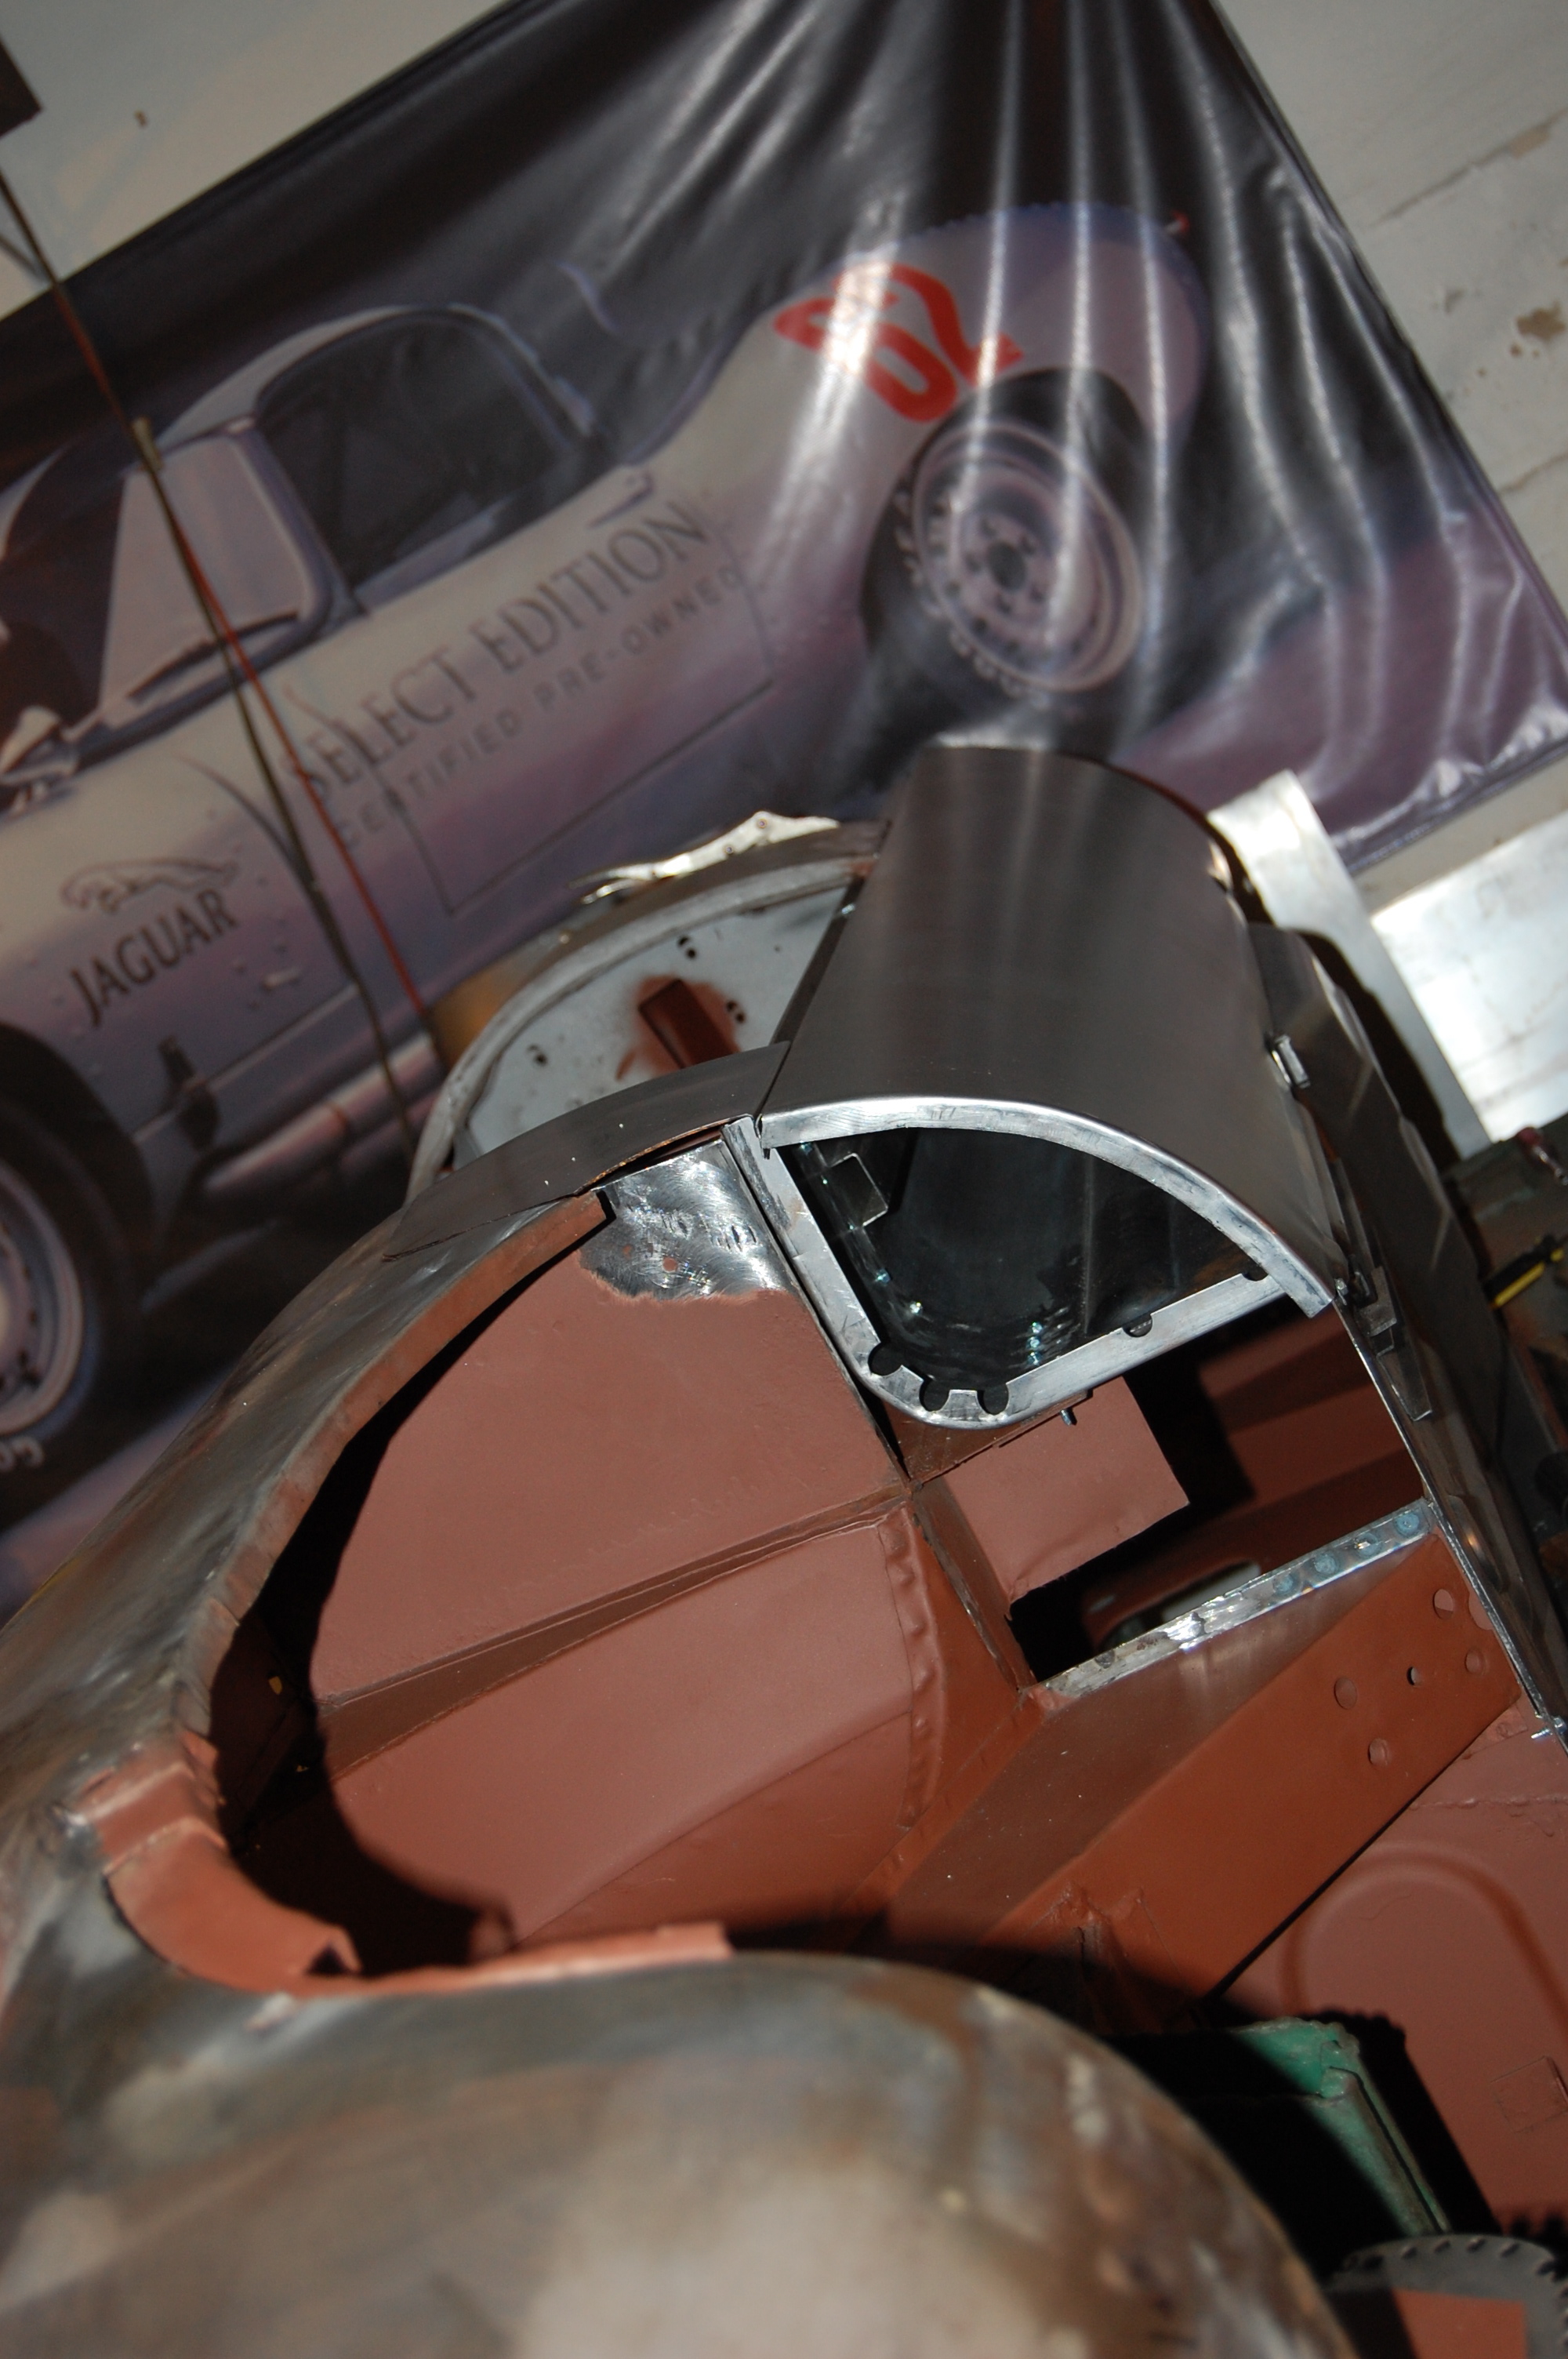
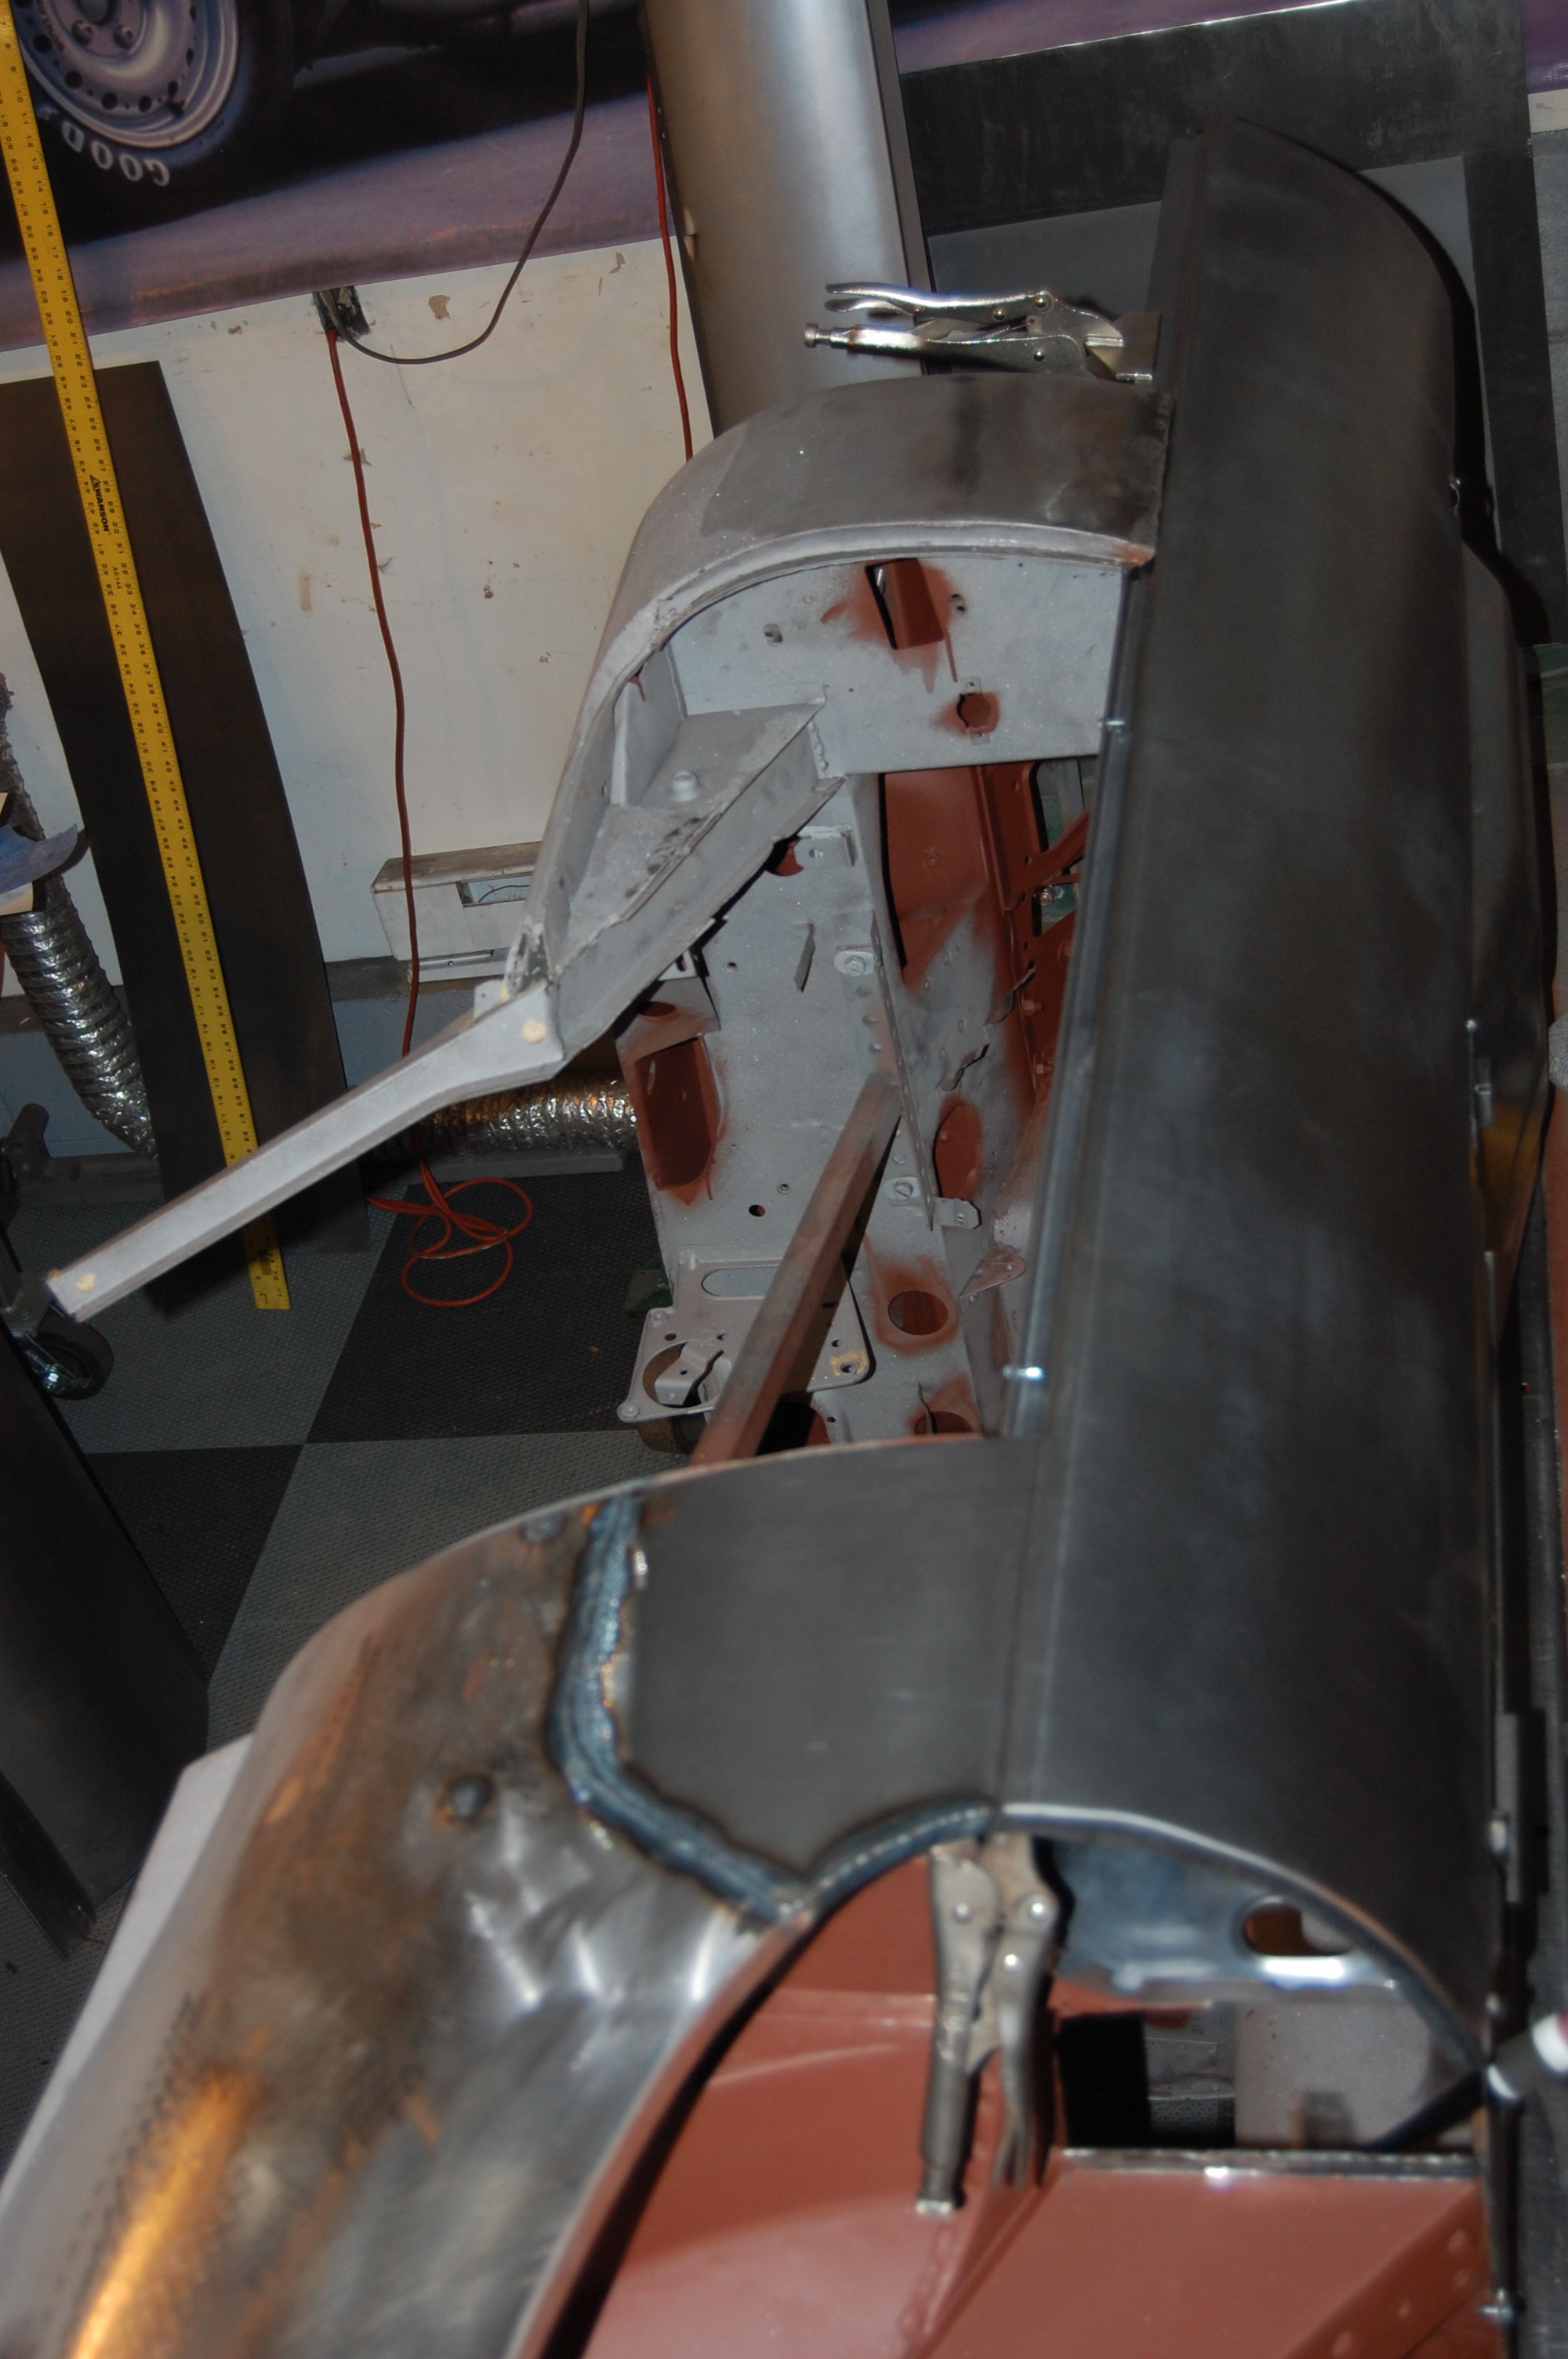
- Next, we need to temporarily fit the outer sill in order to determine where our wing patch needs to be positioned. Also note a small patch in the rear wall of the B-post, which we stitched in while the wing was open and this areas was more accesible.
-
- Here is our patch being fitted against both the sill and the wing. You can’t take too much time with a good fit on the butt-welded seam at the top of the patch – it will all pay off later.

-
- OK – we’re welded in now.

-
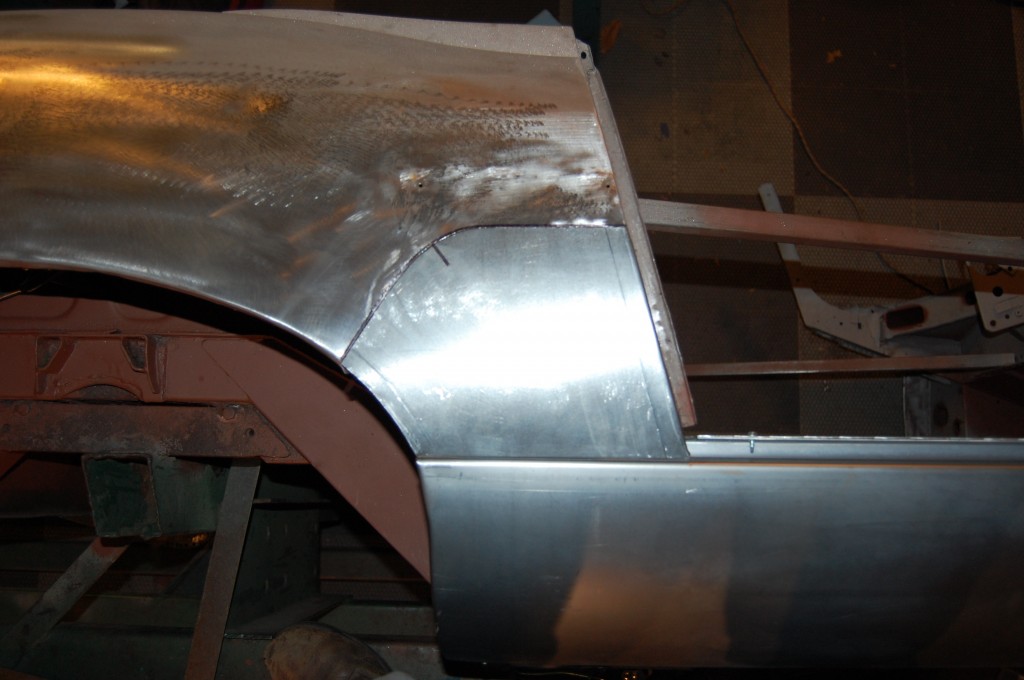
- I ran into a little trouble with that wheel opening flange, so I eventually cut it off and just welded in a new piece to make sure it was a perfect flowing fit with the original flange.

-

- If you turn your head sideways, she’s starting to look like something!
-
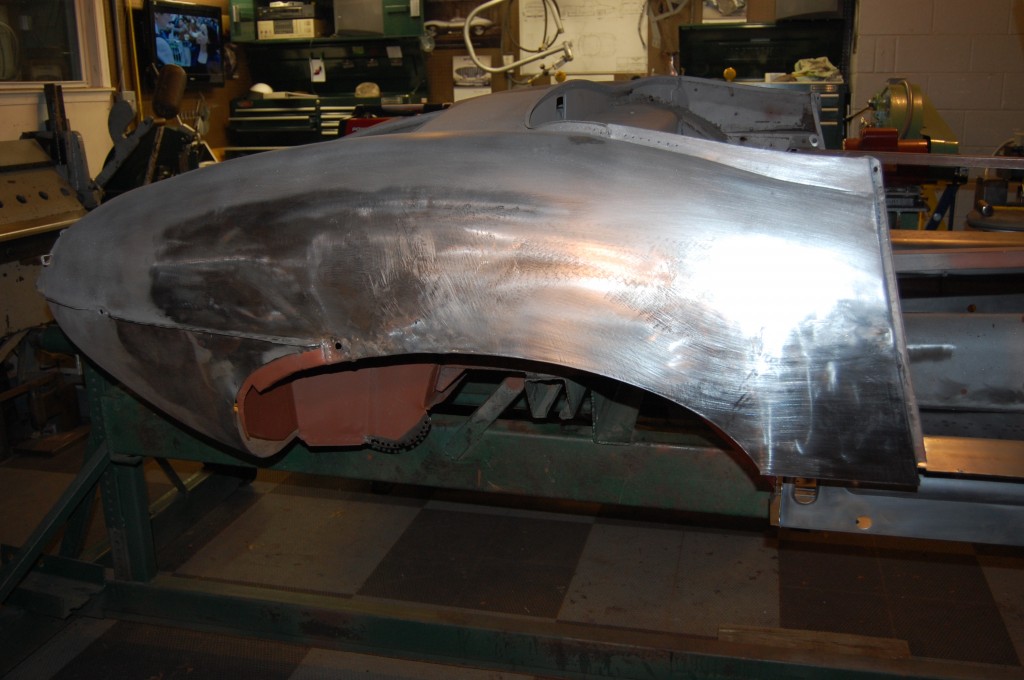
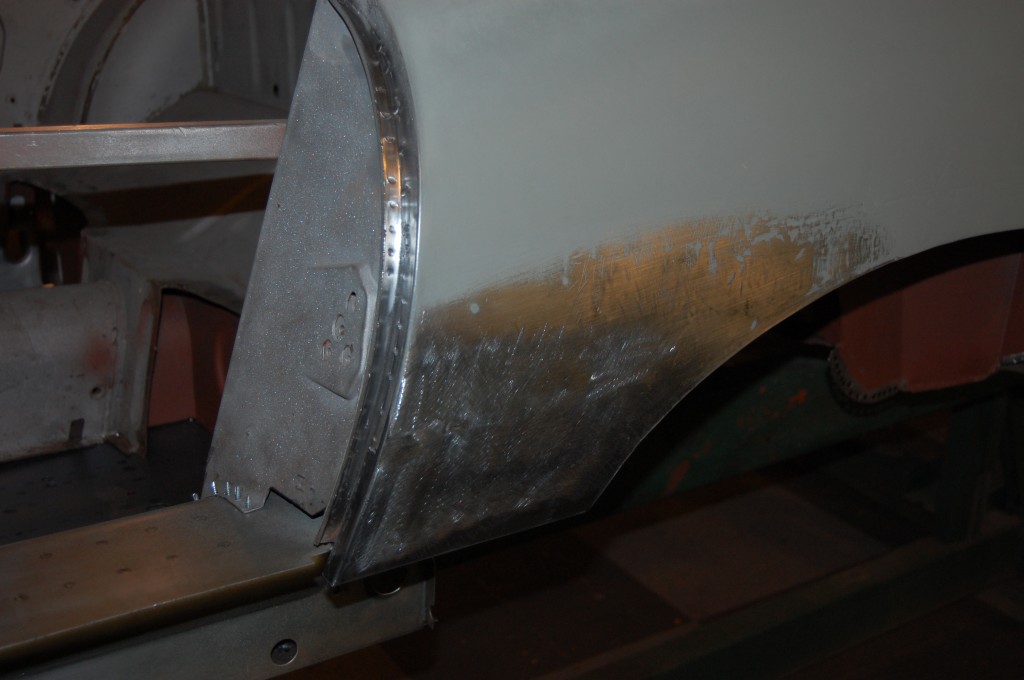
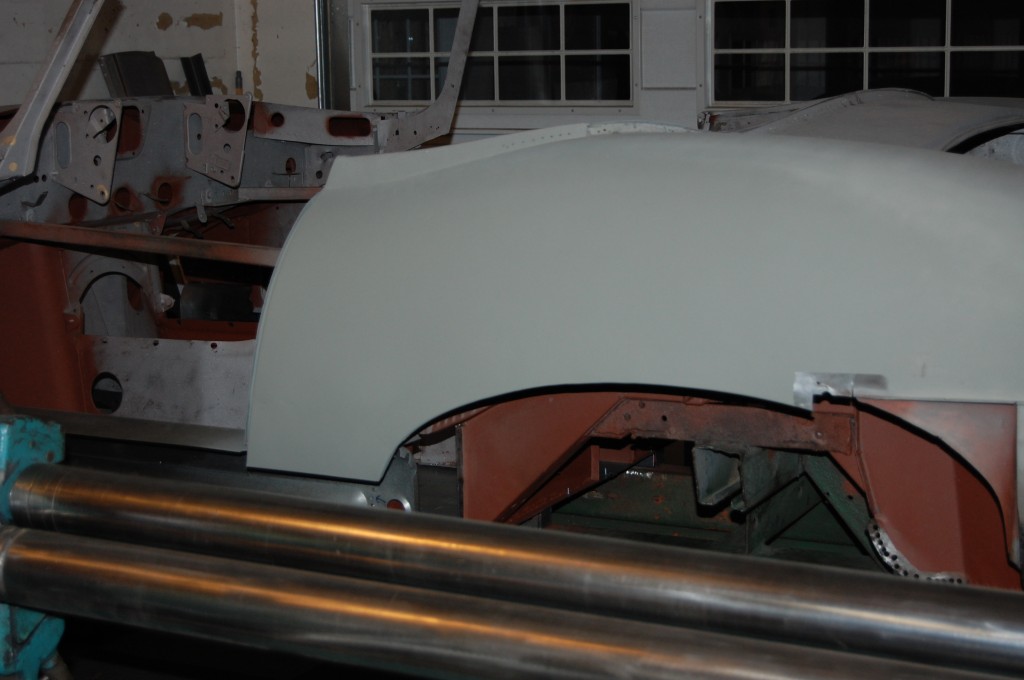
- Finished off and ready for primer – this side also should get away with no filler and just the high-build primer, block sanded.
-
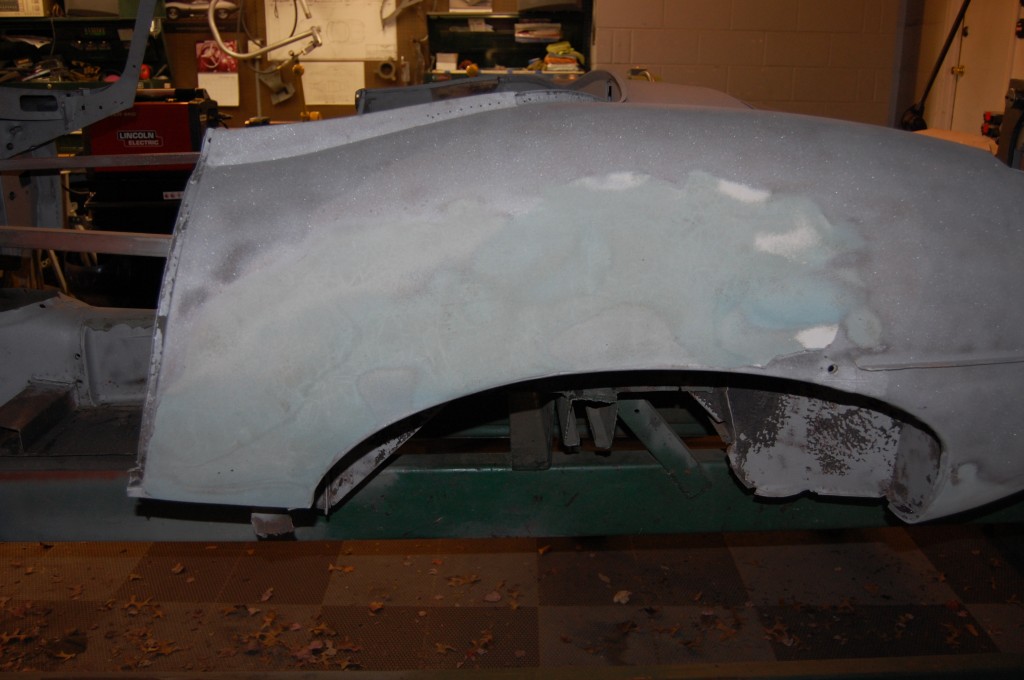
- It’s tough to show the surface of the metal in the photos – this is very close to dead on – maybe .030 off in some spots…
-
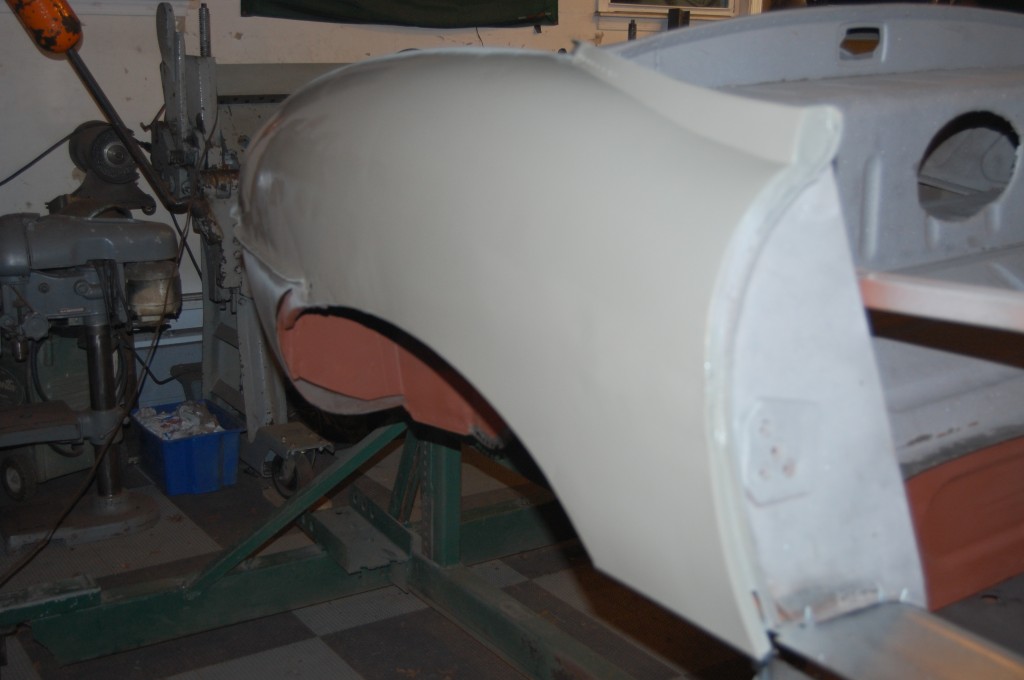
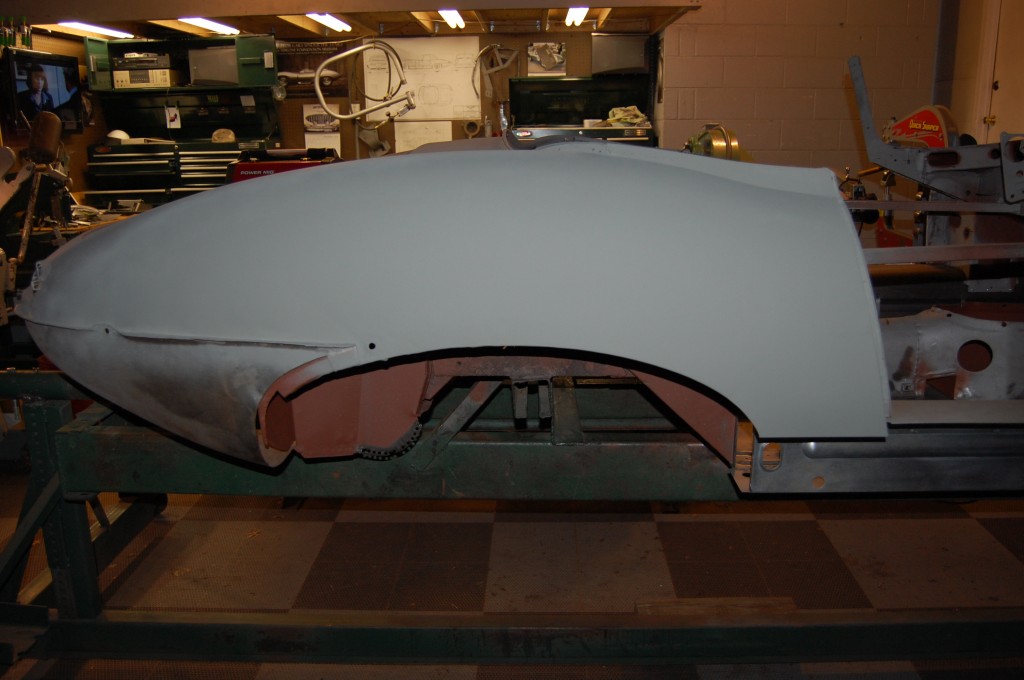
- Primed – now we can get back to the floor work!

-
- Finished!

-
- Times Two!