This final entry in the “Jaguar E-TYpe Rear Wing Repair” Series is less about showing you HOW to do the job, and more of a look at what we can do here to provide a custom panel for your particular problems.
If you look through these photos of one customer’s problems, you can see that this E-Type Coupe has a combination of rust, poor past repairs, and badly hammered out accident damage. When all of this combines together like this, you often come to a point where you just have to bite the bullet and replace the whole wing – BUT WAIT!
The “whole wing” is BIG – and it is actually pretty rare that you really have damage and rust all the way from the front to the back. Actually, that back third is a tricky curve, has the whole fuel box and lid assembly in it on the LH side, and is almost always OK. So take some photos and email us, and we’ll see what we can do!
-
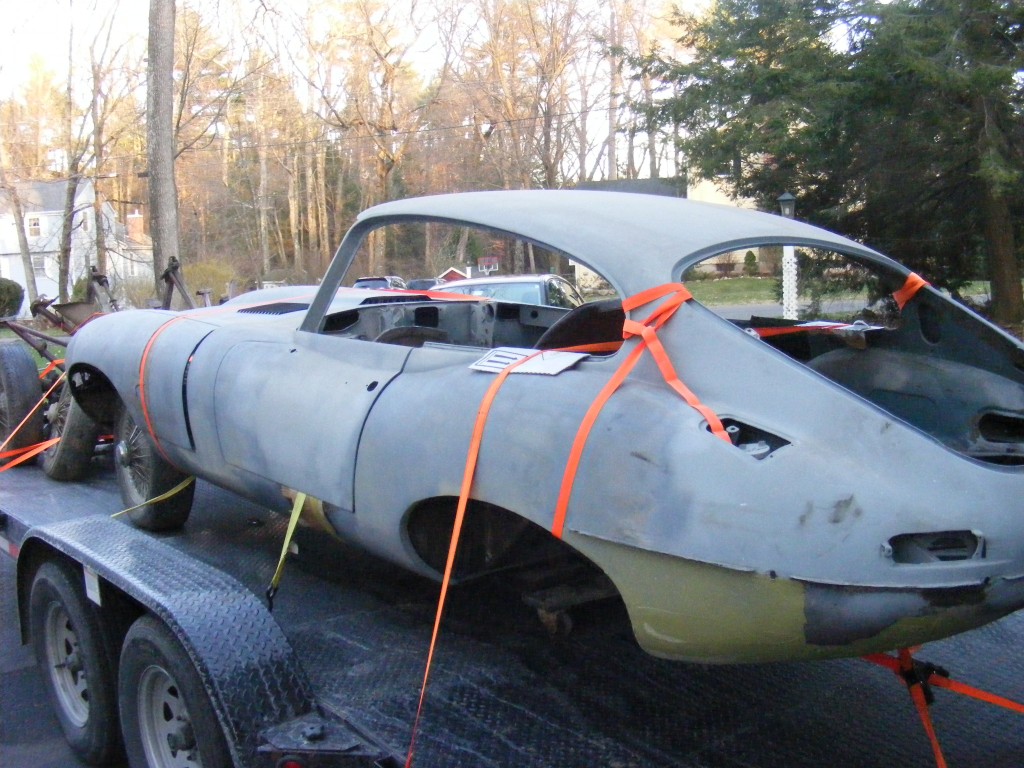
- This is a shot of ourcustomer’s E-Type on the day he brought her home. Looks like a pretty straight and solid shell!

-
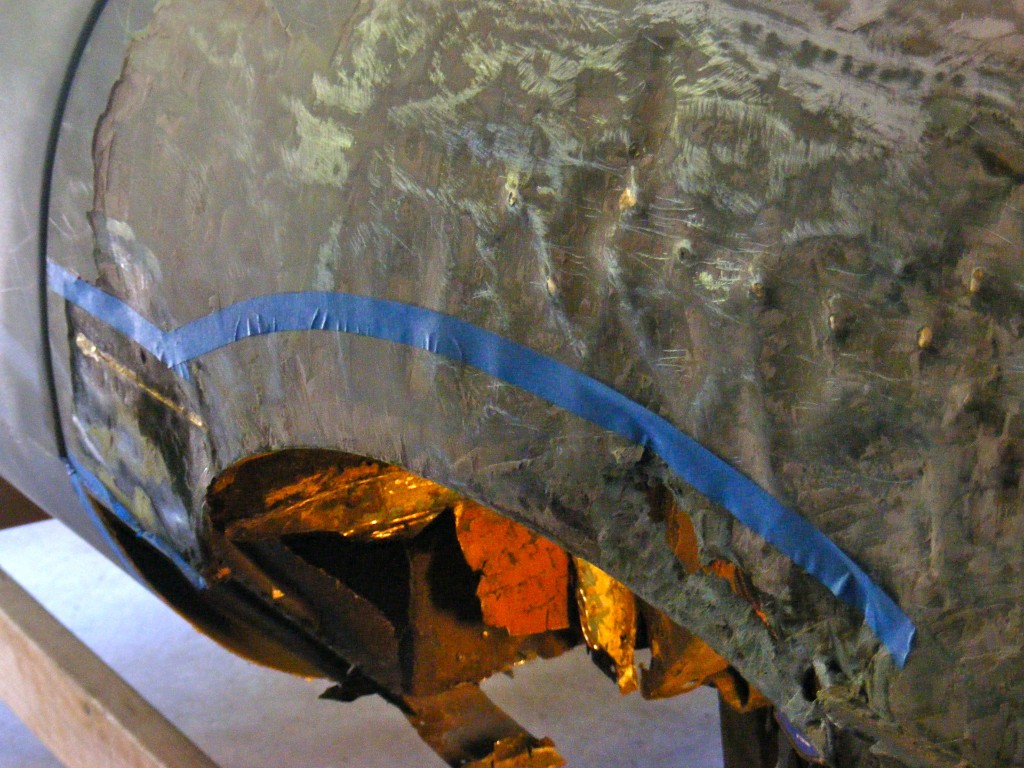
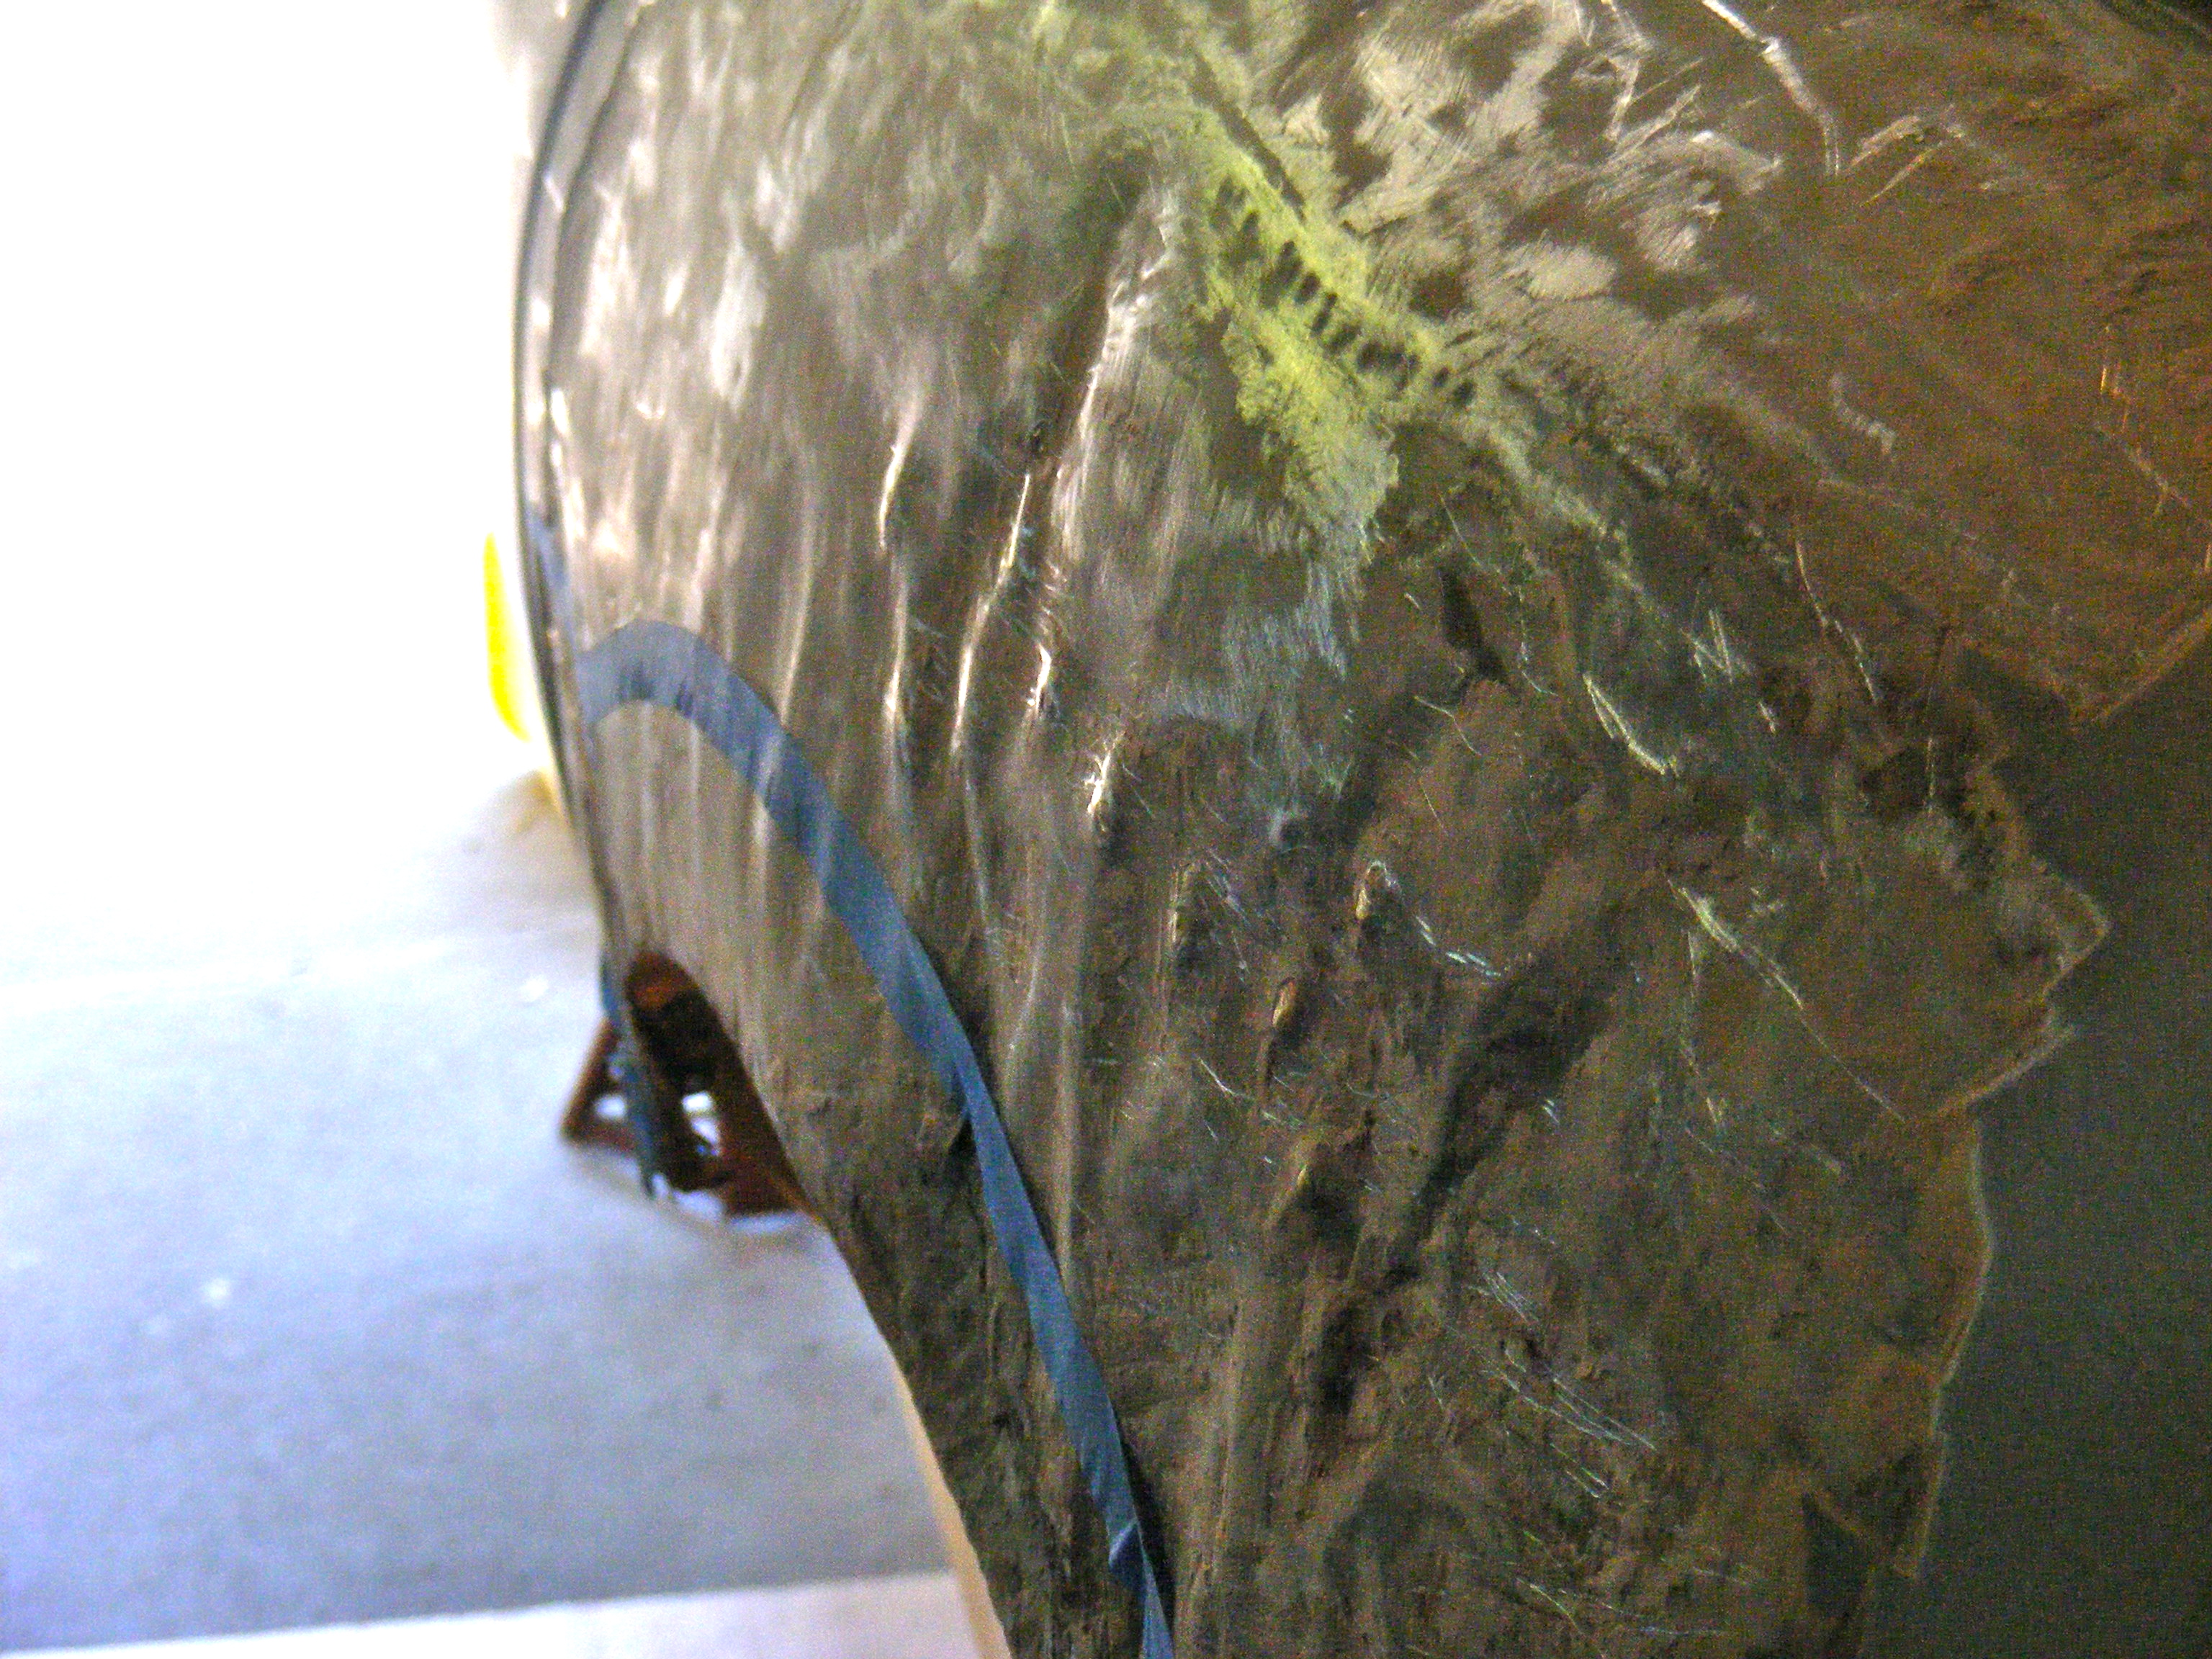
- NOT QUITE – YIKES! This is what the customer found after stripping down the primer and filler from this shell that was “ready for paint”… Look at the mess down in the end of the sill!

-

- In addition to the usual rust problems, this shell had obviously been hit in the wing, and really crudely hammered out – stretching the metal and making things virtually impossible to fix now…
-
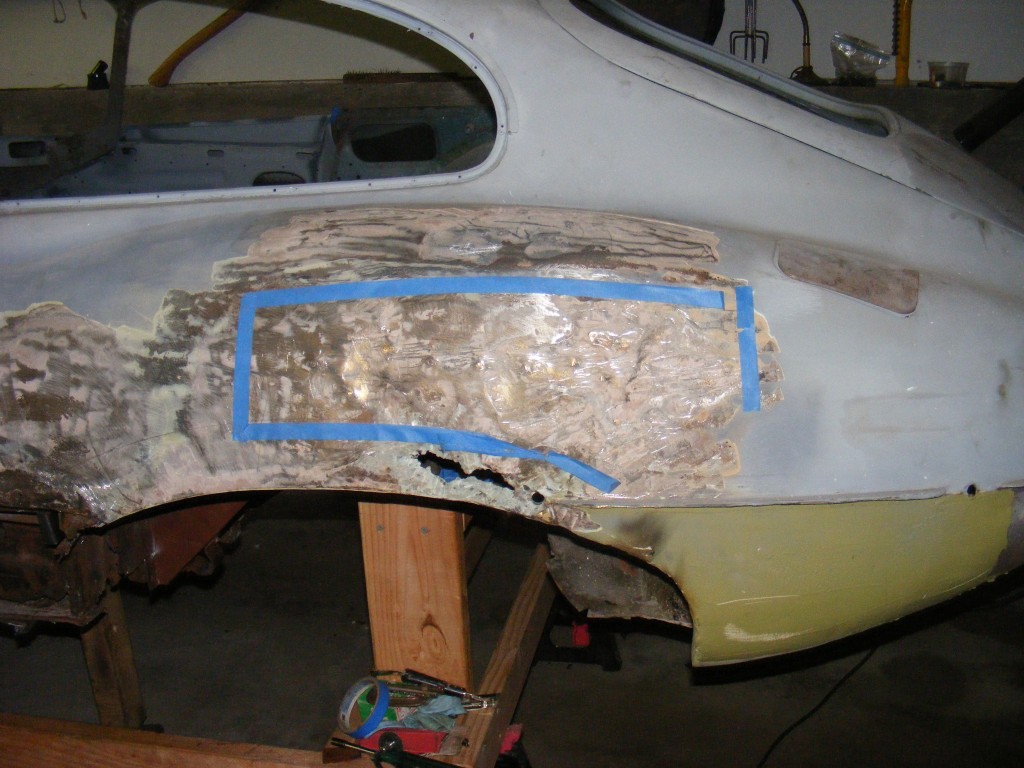
- These photos were sent in by the customer, originally asking if we could make a patch for the outlined area, to be added in on top of our standard Stage 1 patch. I informed them that all of those welded seams were sure to spell disaster in the wing, but maybe I had a better idea…

-
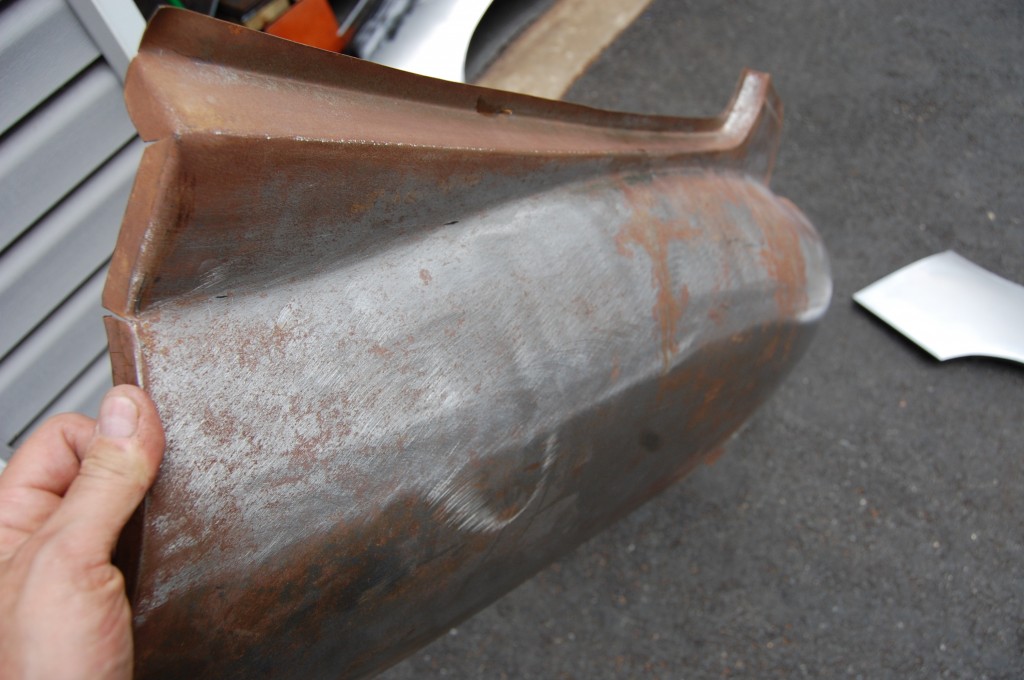
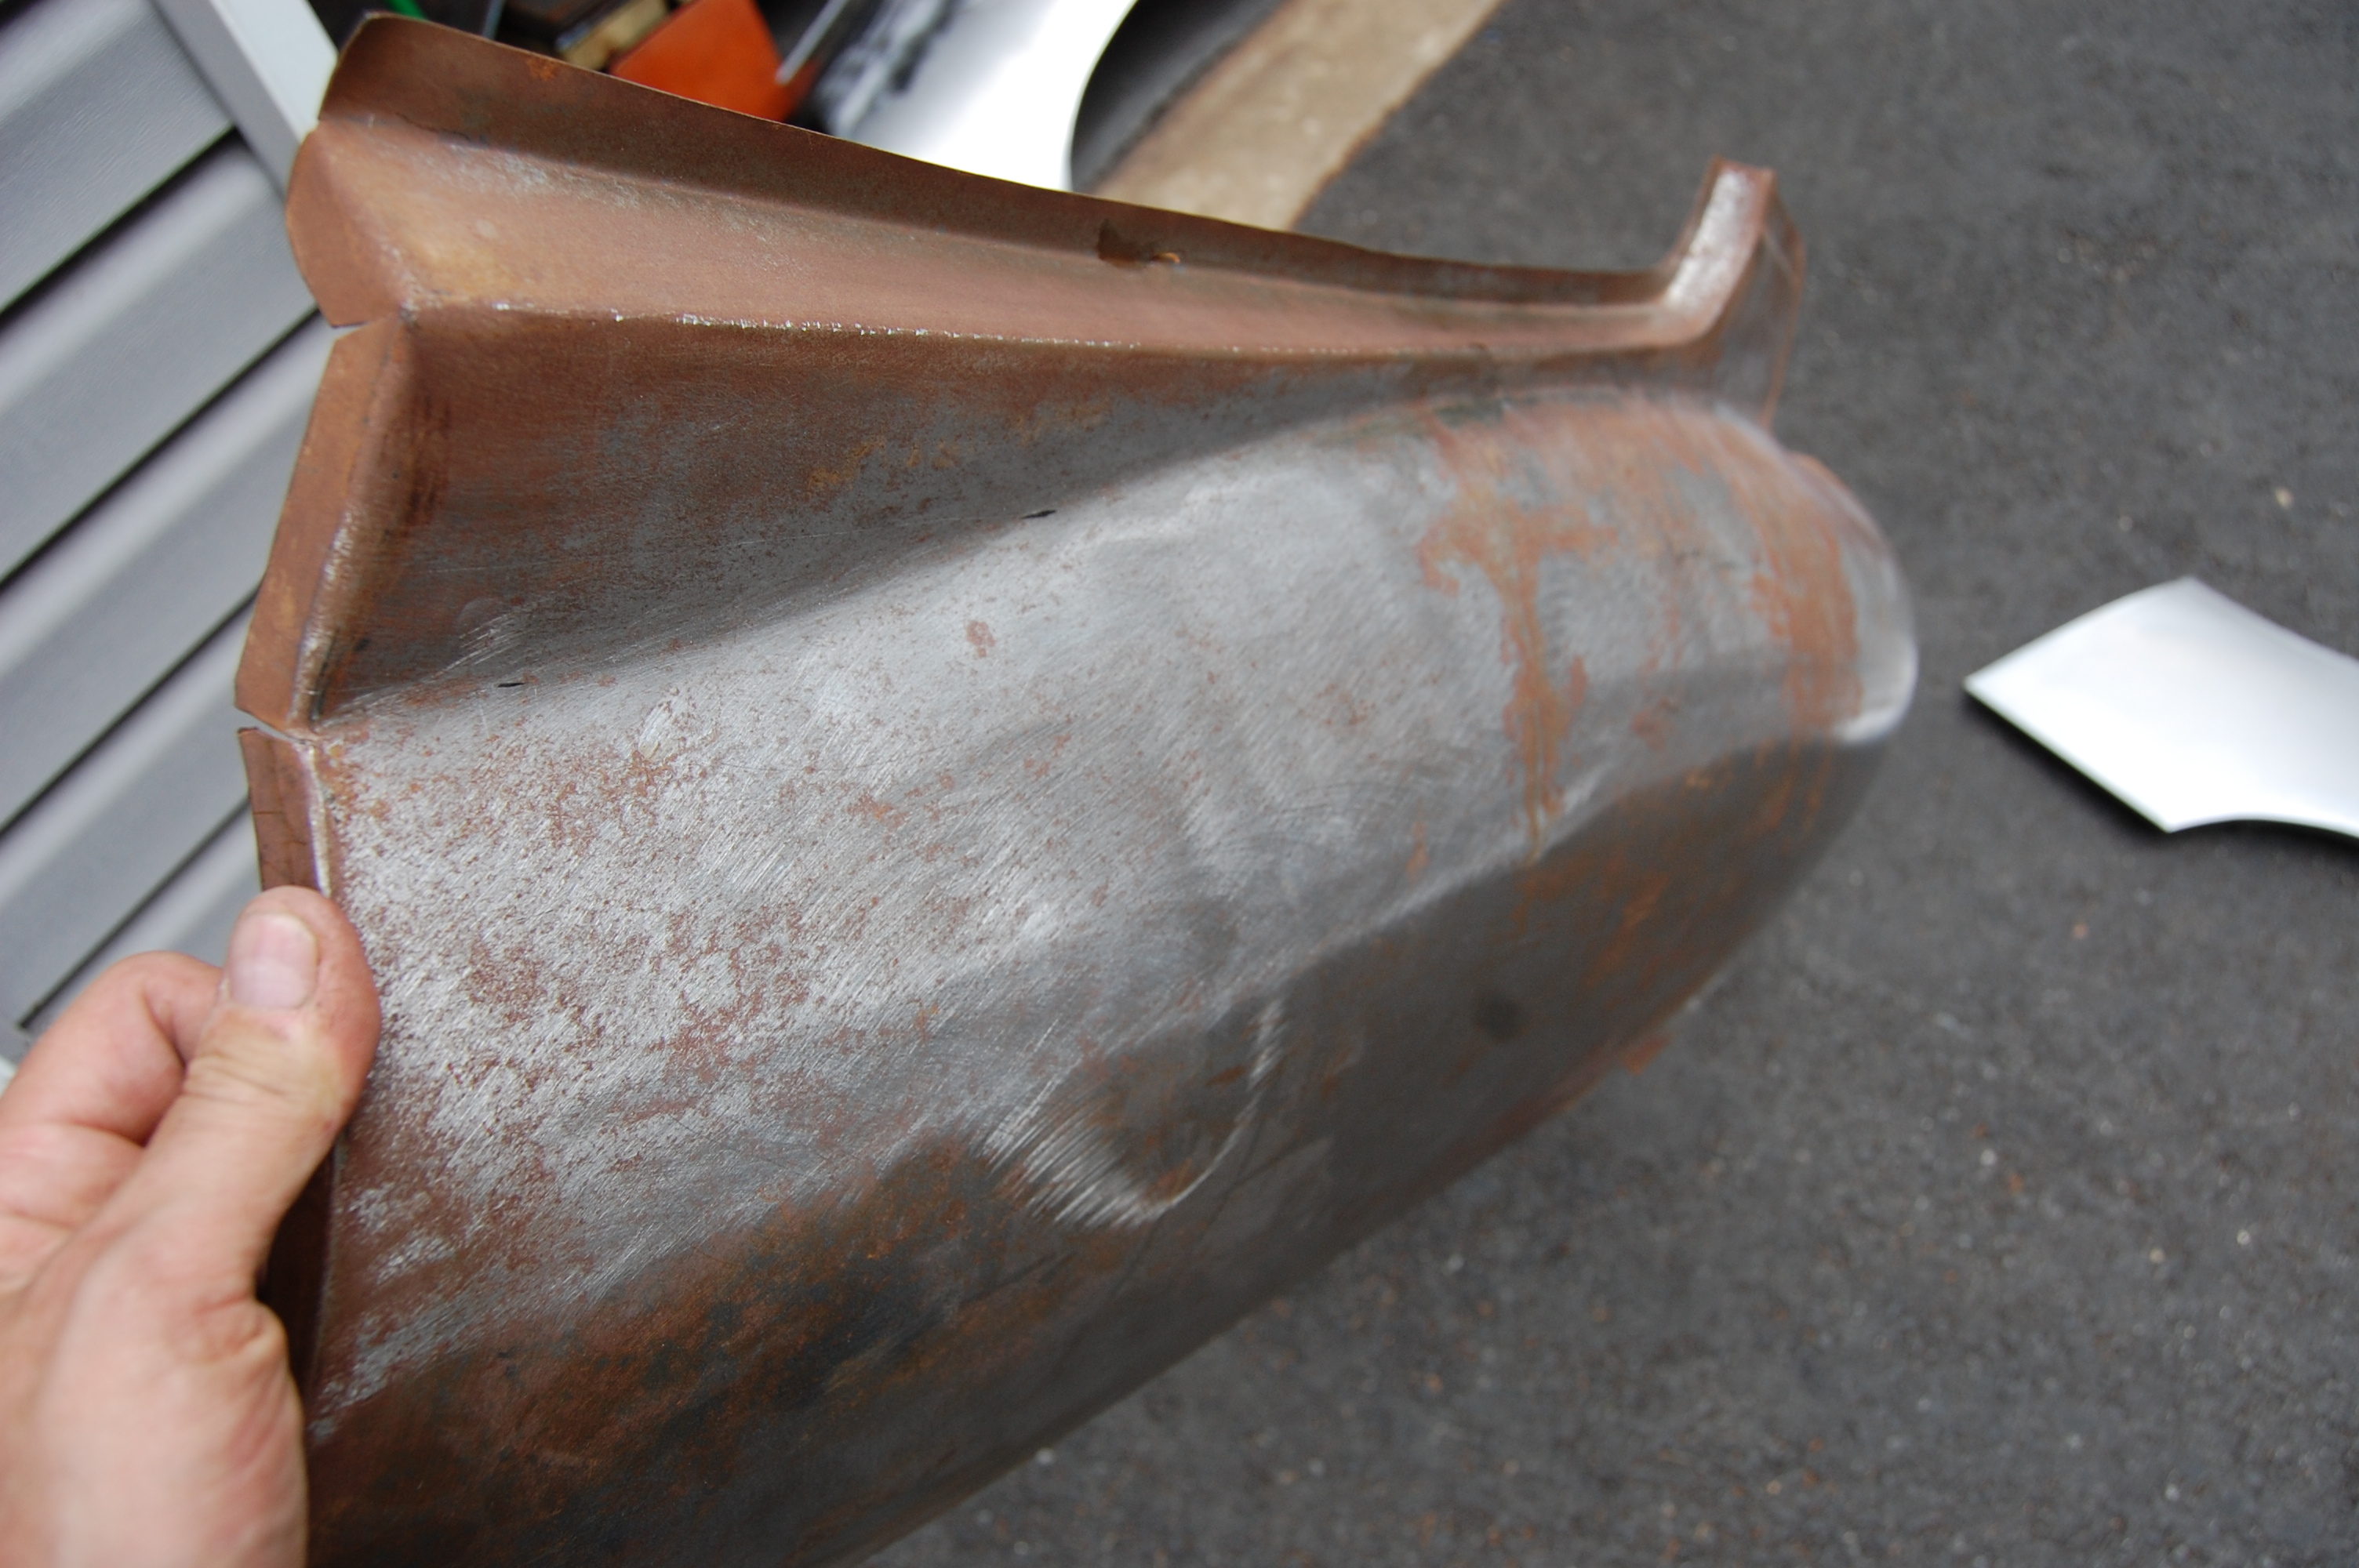
- This is one of the NOS (New, Old Stock) original Jaguar rear wings that came with our coupe project car from Canada. If this is as correct as I think it might be, we could probably use this to make a good flexible shape pattern. Hmmm….
-

- Note the welded seam on the back side – this is how the original cars were made. So we should not feel too bad about taking the same approach to reproduce a large section of the wing here. Don’t let the surface rust from 40 years on the shelf fool you, these wings turned out to be factory originals that were PERFECT!
-
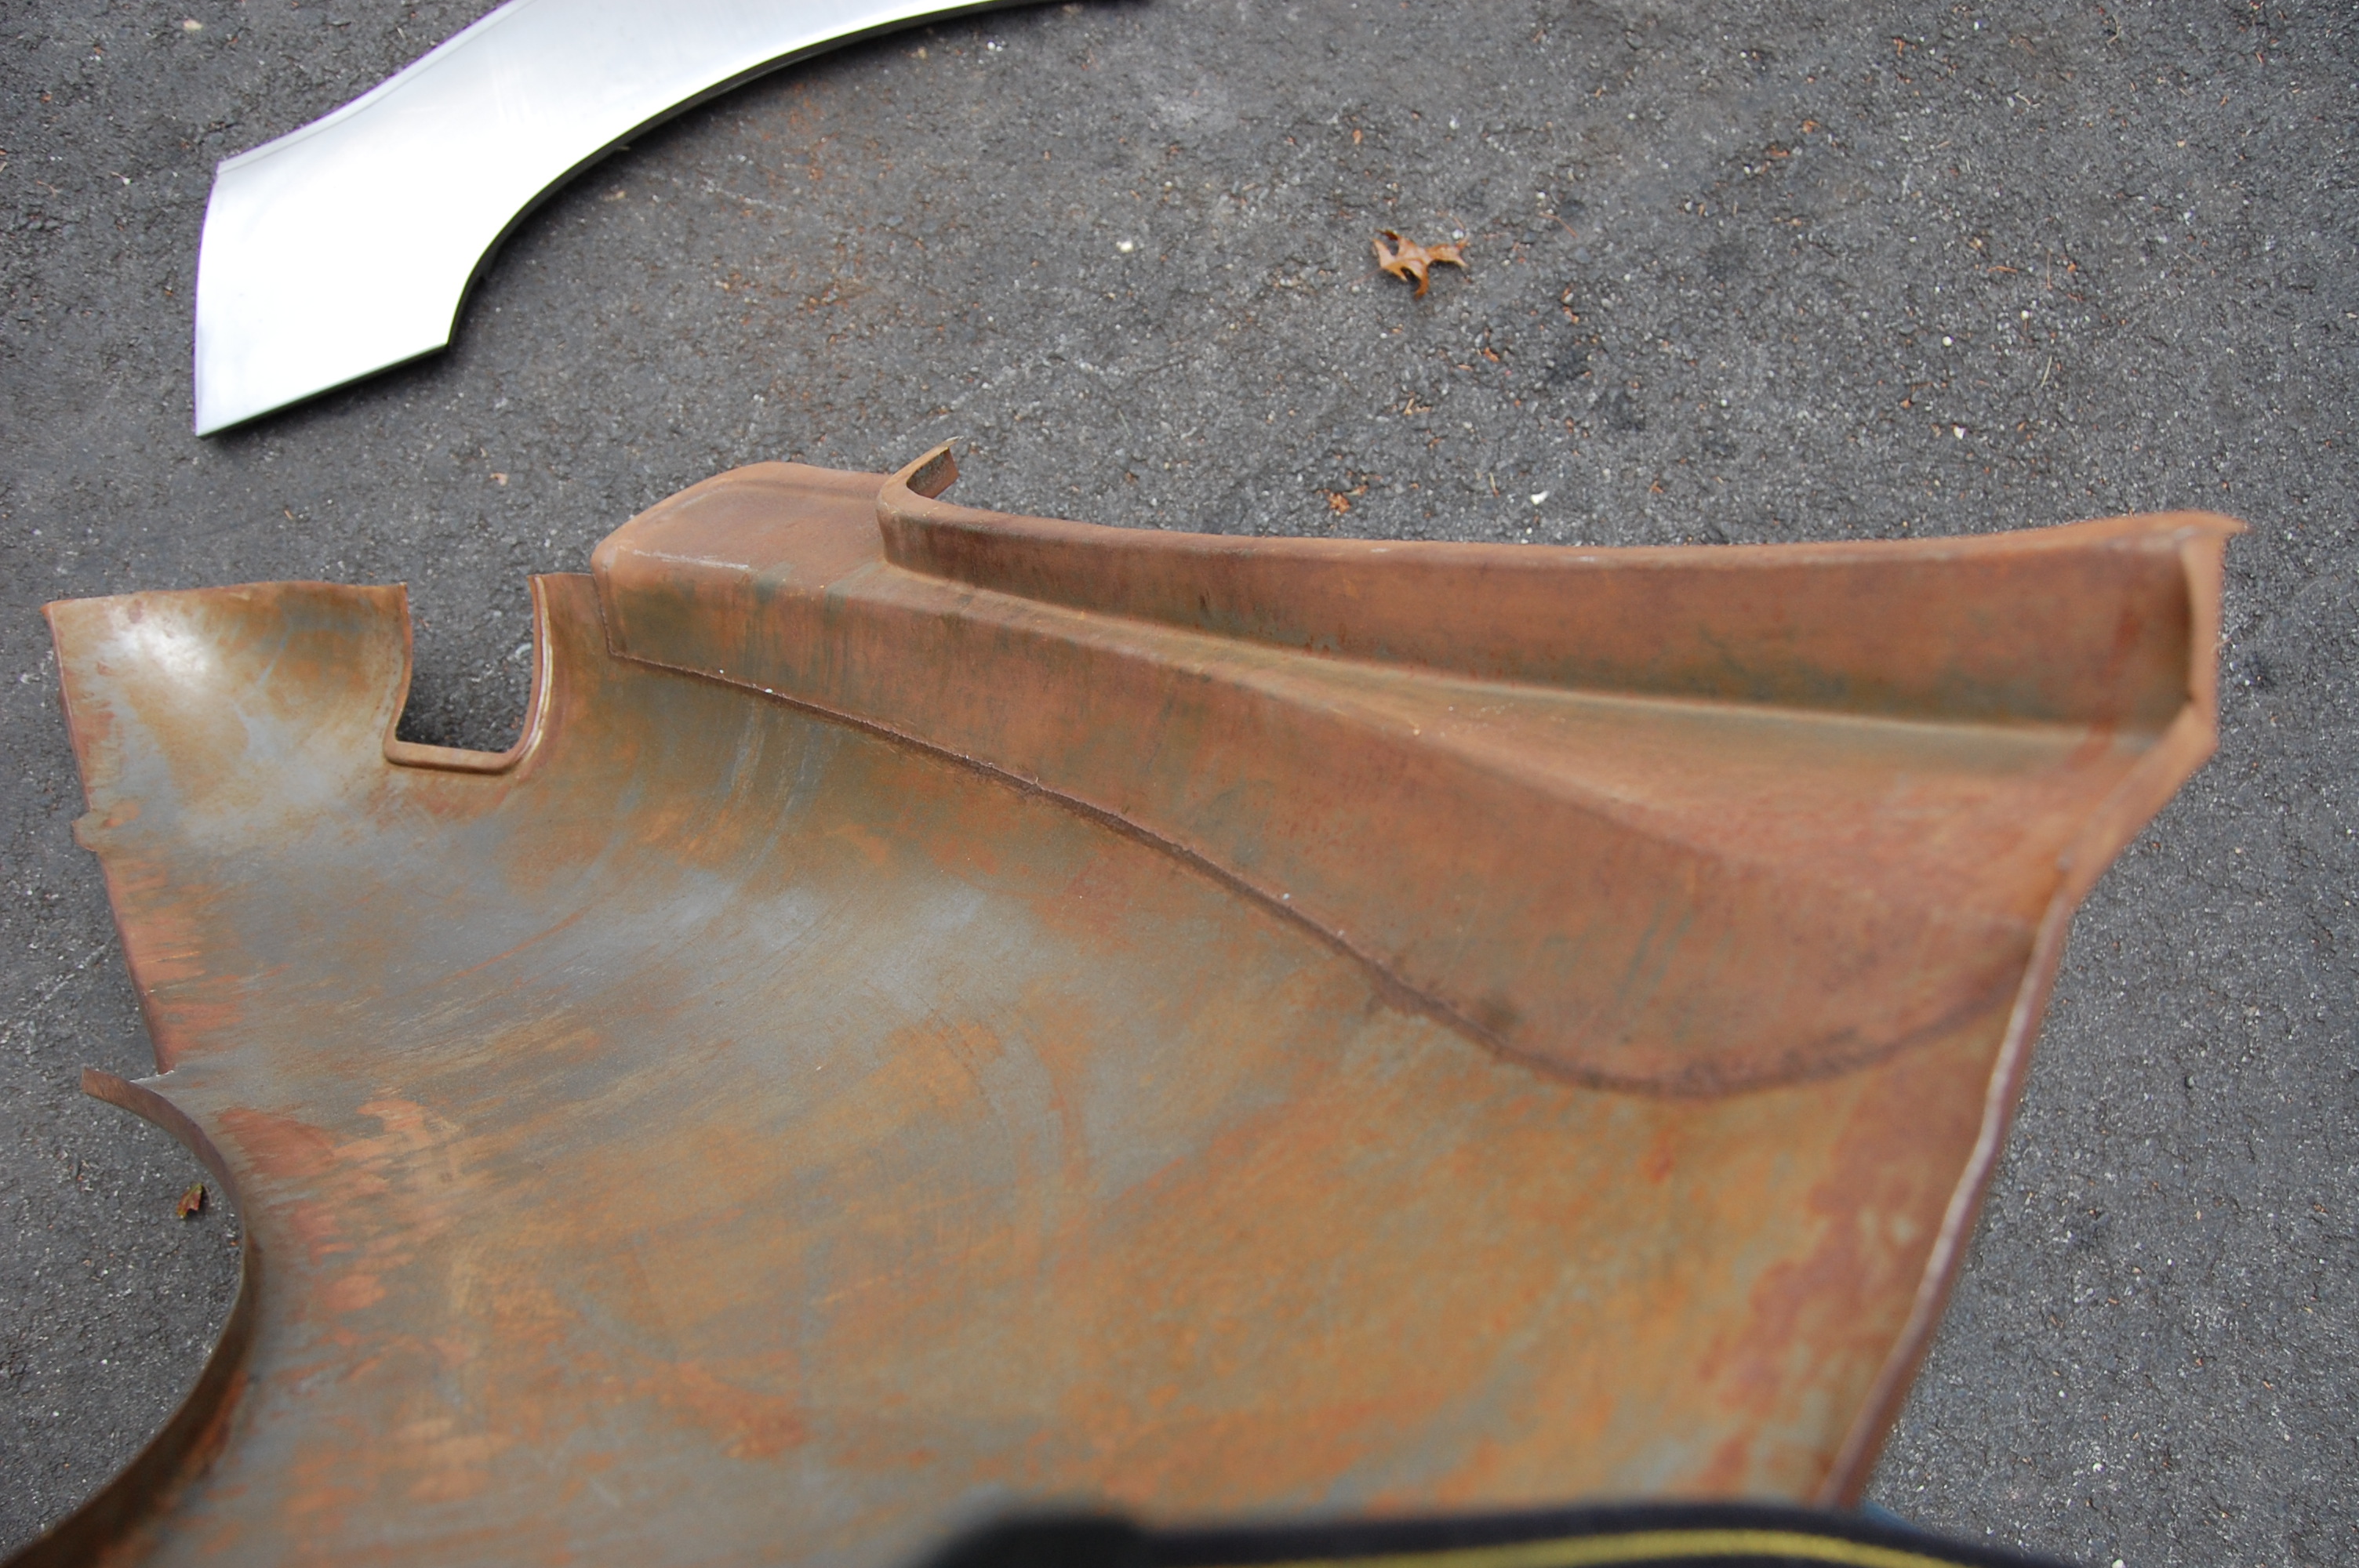
- After about an hour checking this over with a tape measure and contour gauges, comparing it to several original shells here, I was able to determine that it IS a factory piece, and so it was OK to pull a flxible shape pattern from it.
-
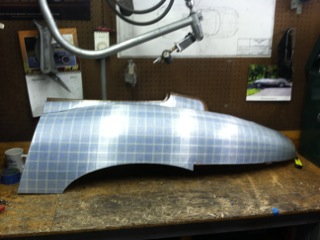
- Here is the FSP after it was pulled off.
-
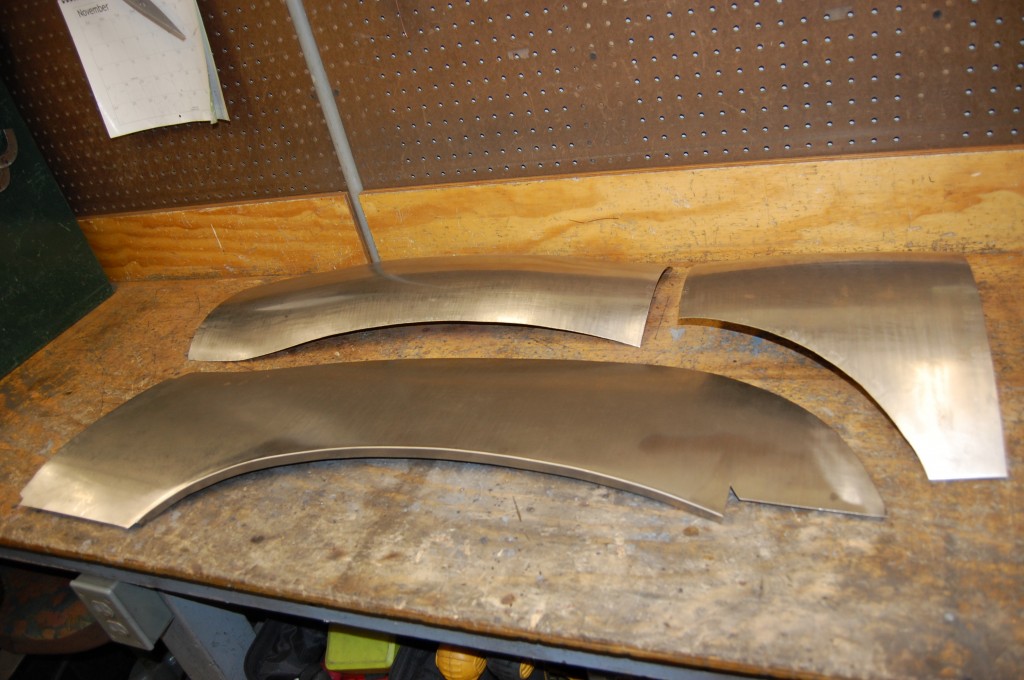
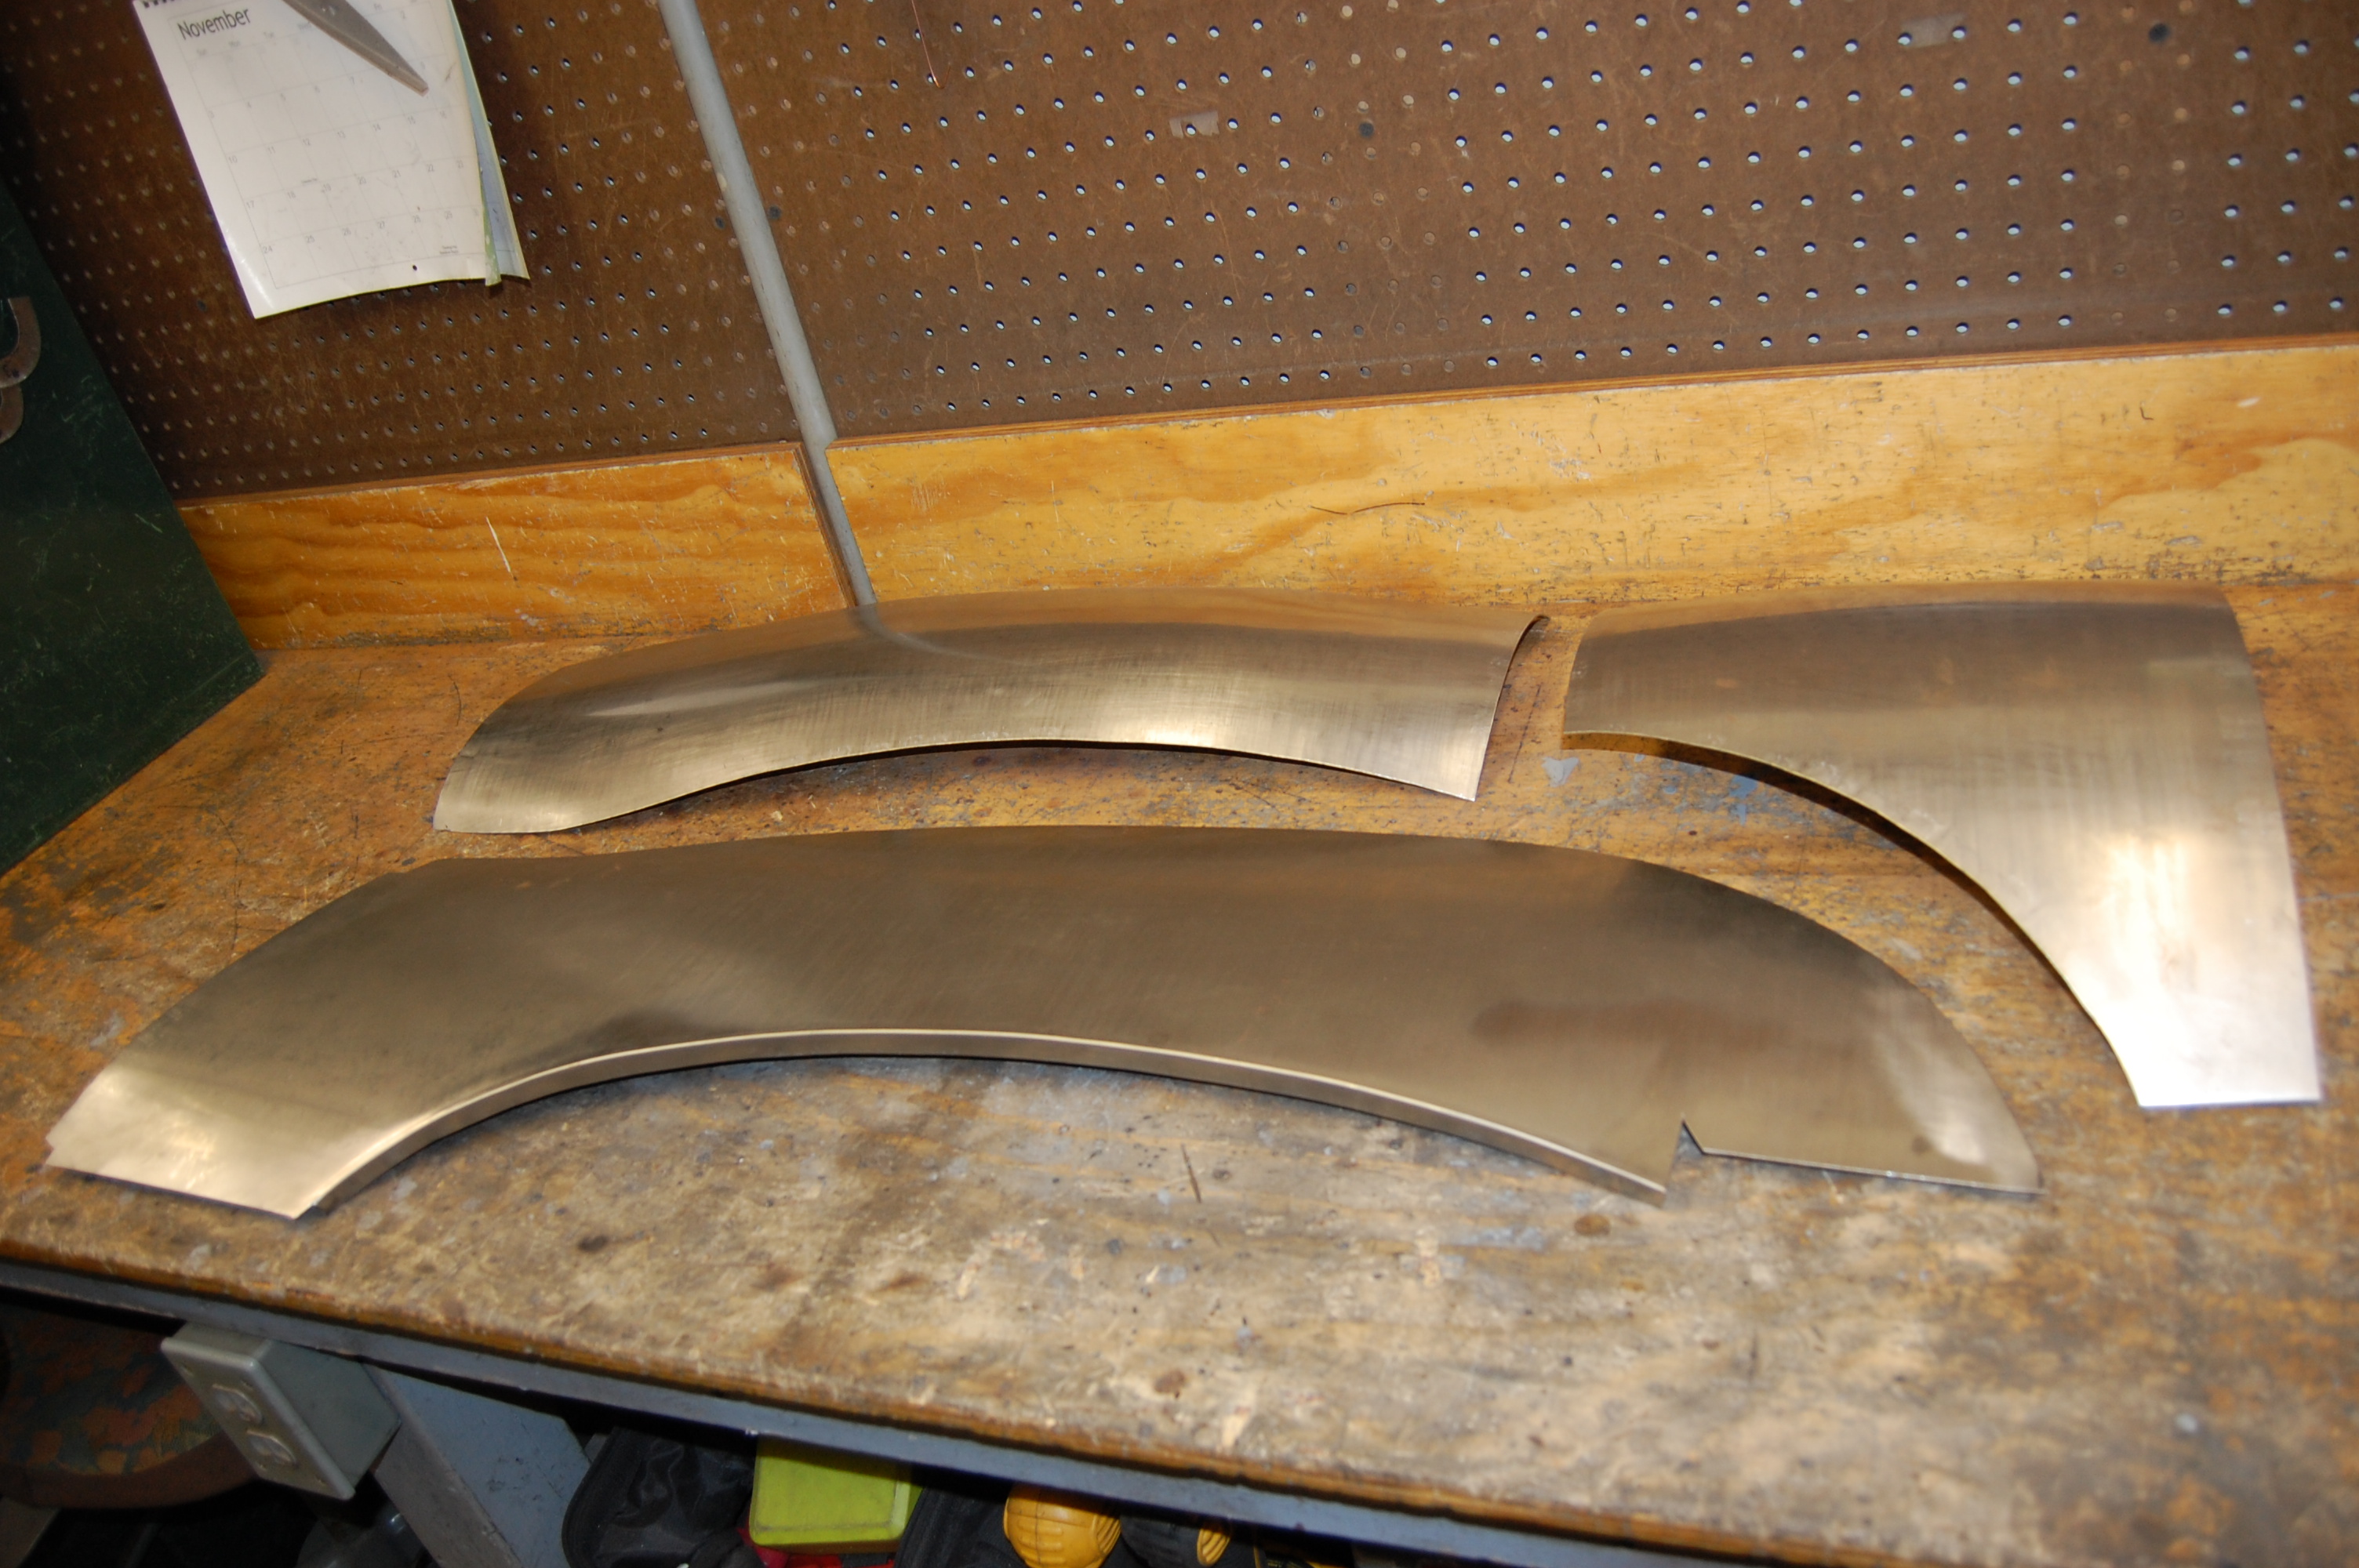
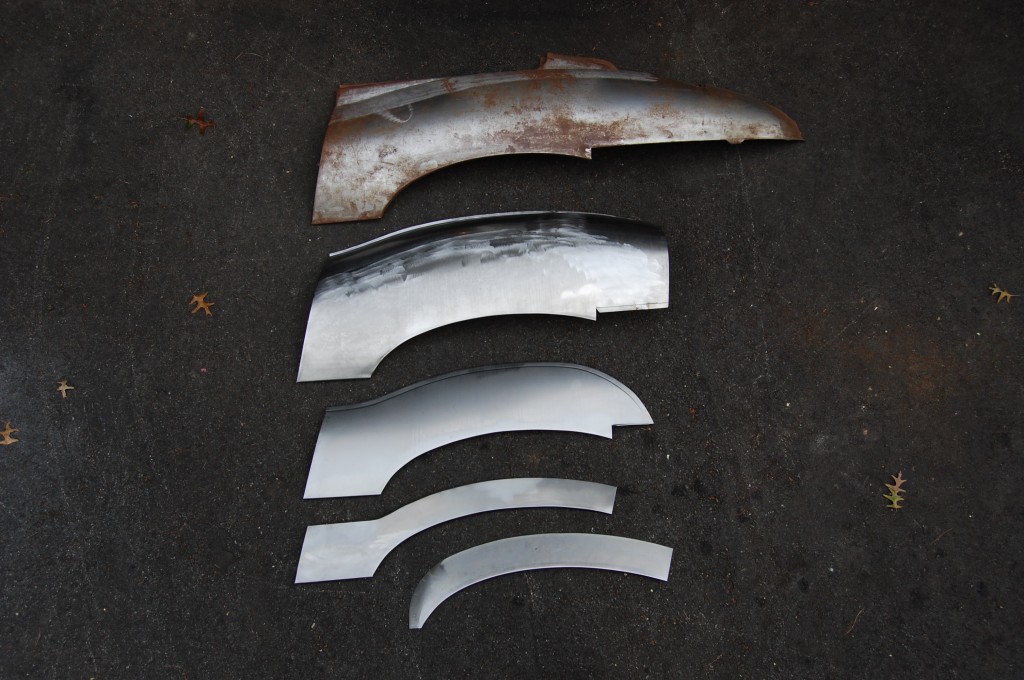
- Next, came the mind-bending task of figuring out what the best way was to cut up the FSP if order to reproduct the wing with pieces made on the English wheel. This exercise also allowed us to figure out what the best size and shape was for the Stage 2 repair panel. In this photo, we have already formed the sections on the English wheel, and are ready to begin welding them together.
-

- First, we welded the two top pieces together at the short seam where they meat each other. This is the same approach used to make the new front ends for center sections earlier this year.
-
- After that seam is welded and dressed down, we then tacked the top assembly onto the large bottom piece – basically an unfinished Stage 2 piece.

-
- Another shot showing the tacks welded into place. This looks easy here – it’s not. First, you have to shape the pieces so that the FSP’s fit the panels REAL CLOSE – if they don’t, these edges will not line up, and you will not get the final overall shape that you need. next, you have to meticulously line up the edges before welding each and every tack!

-
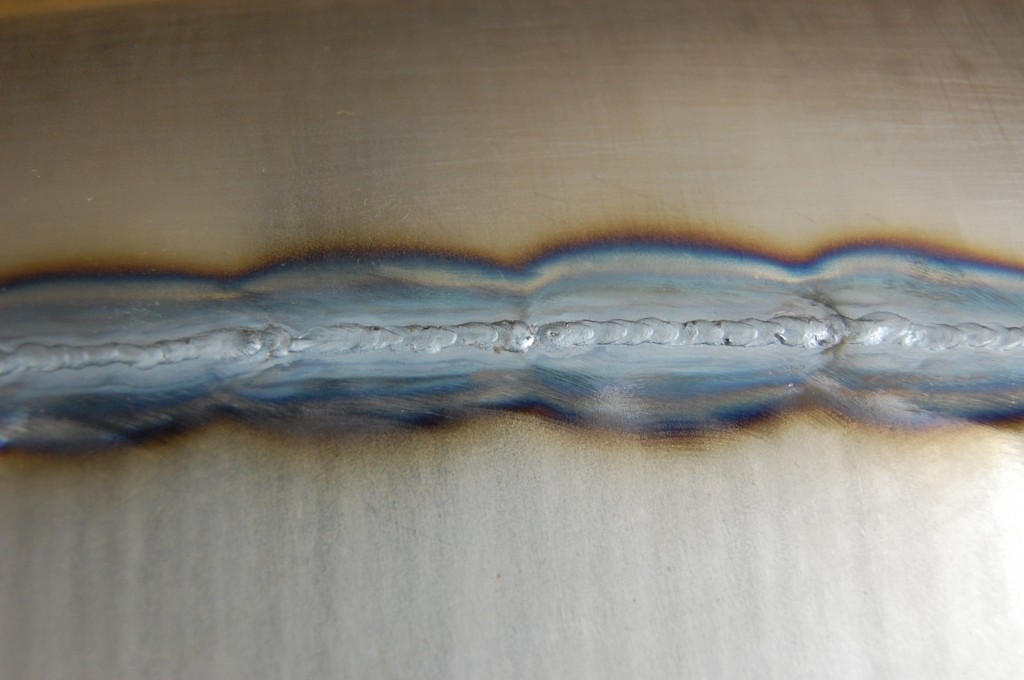
- Next, we grind down the tacks, and then weld up the complete seam with the TIG.
-
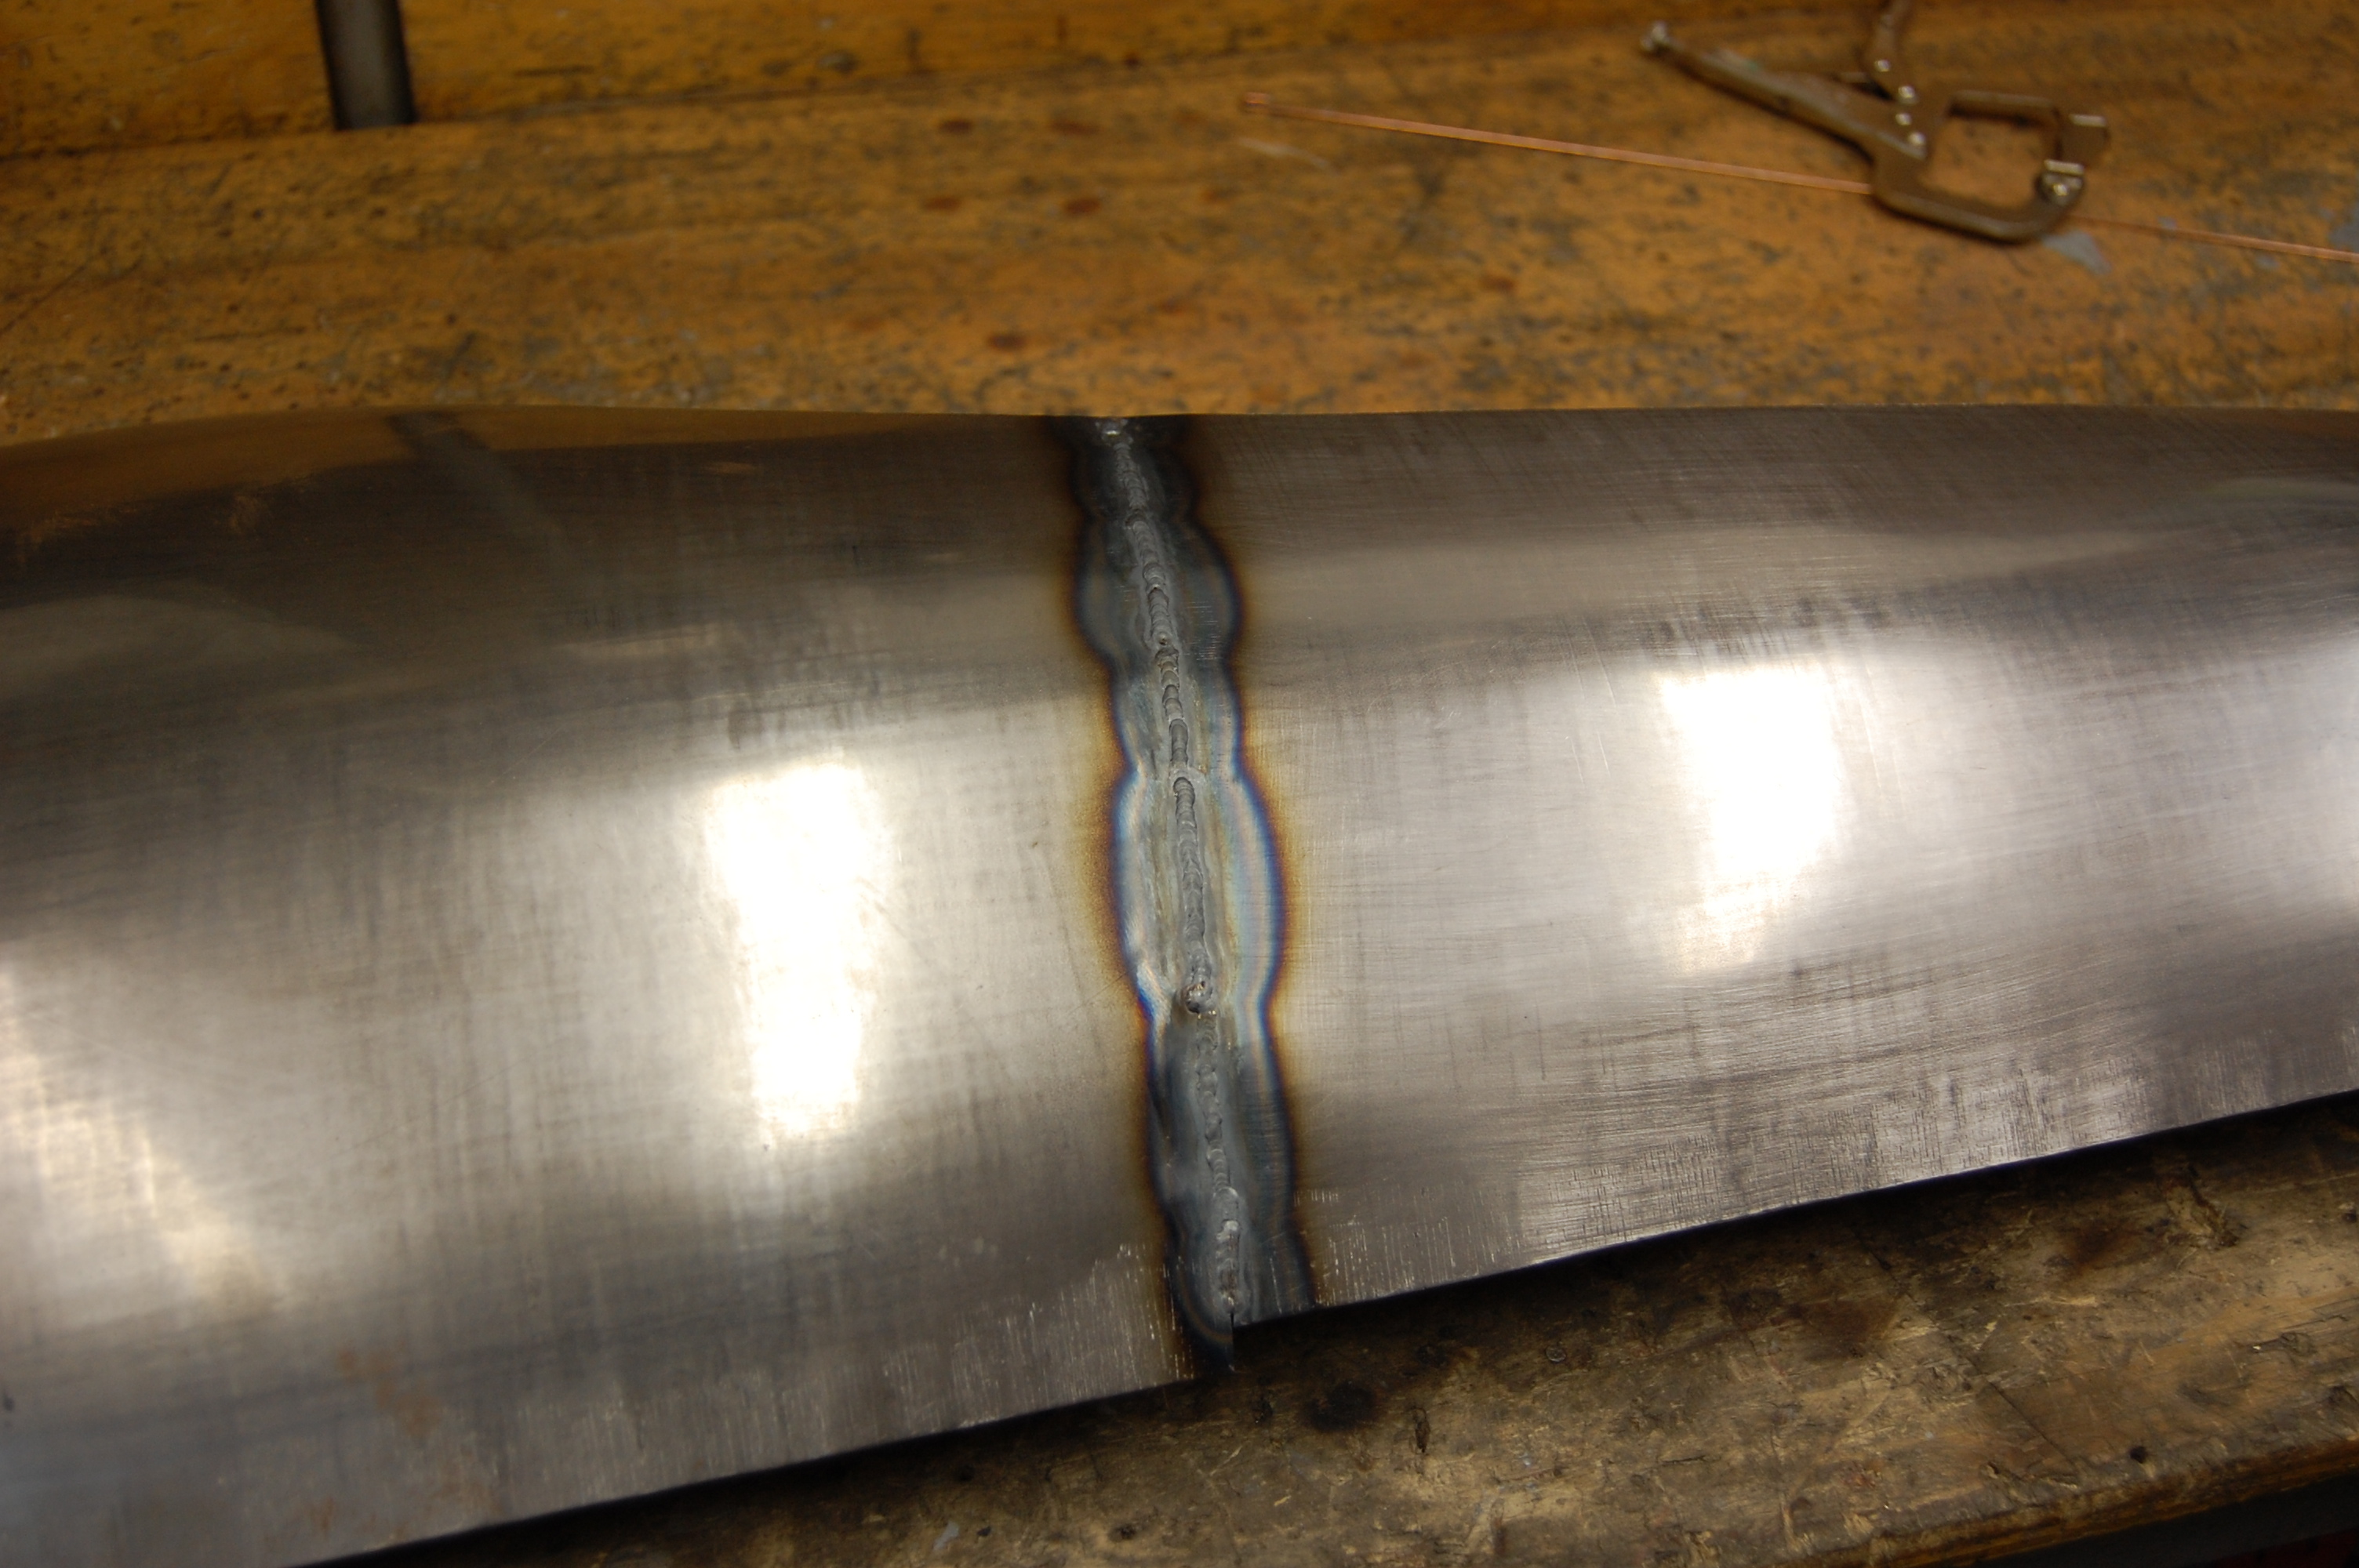
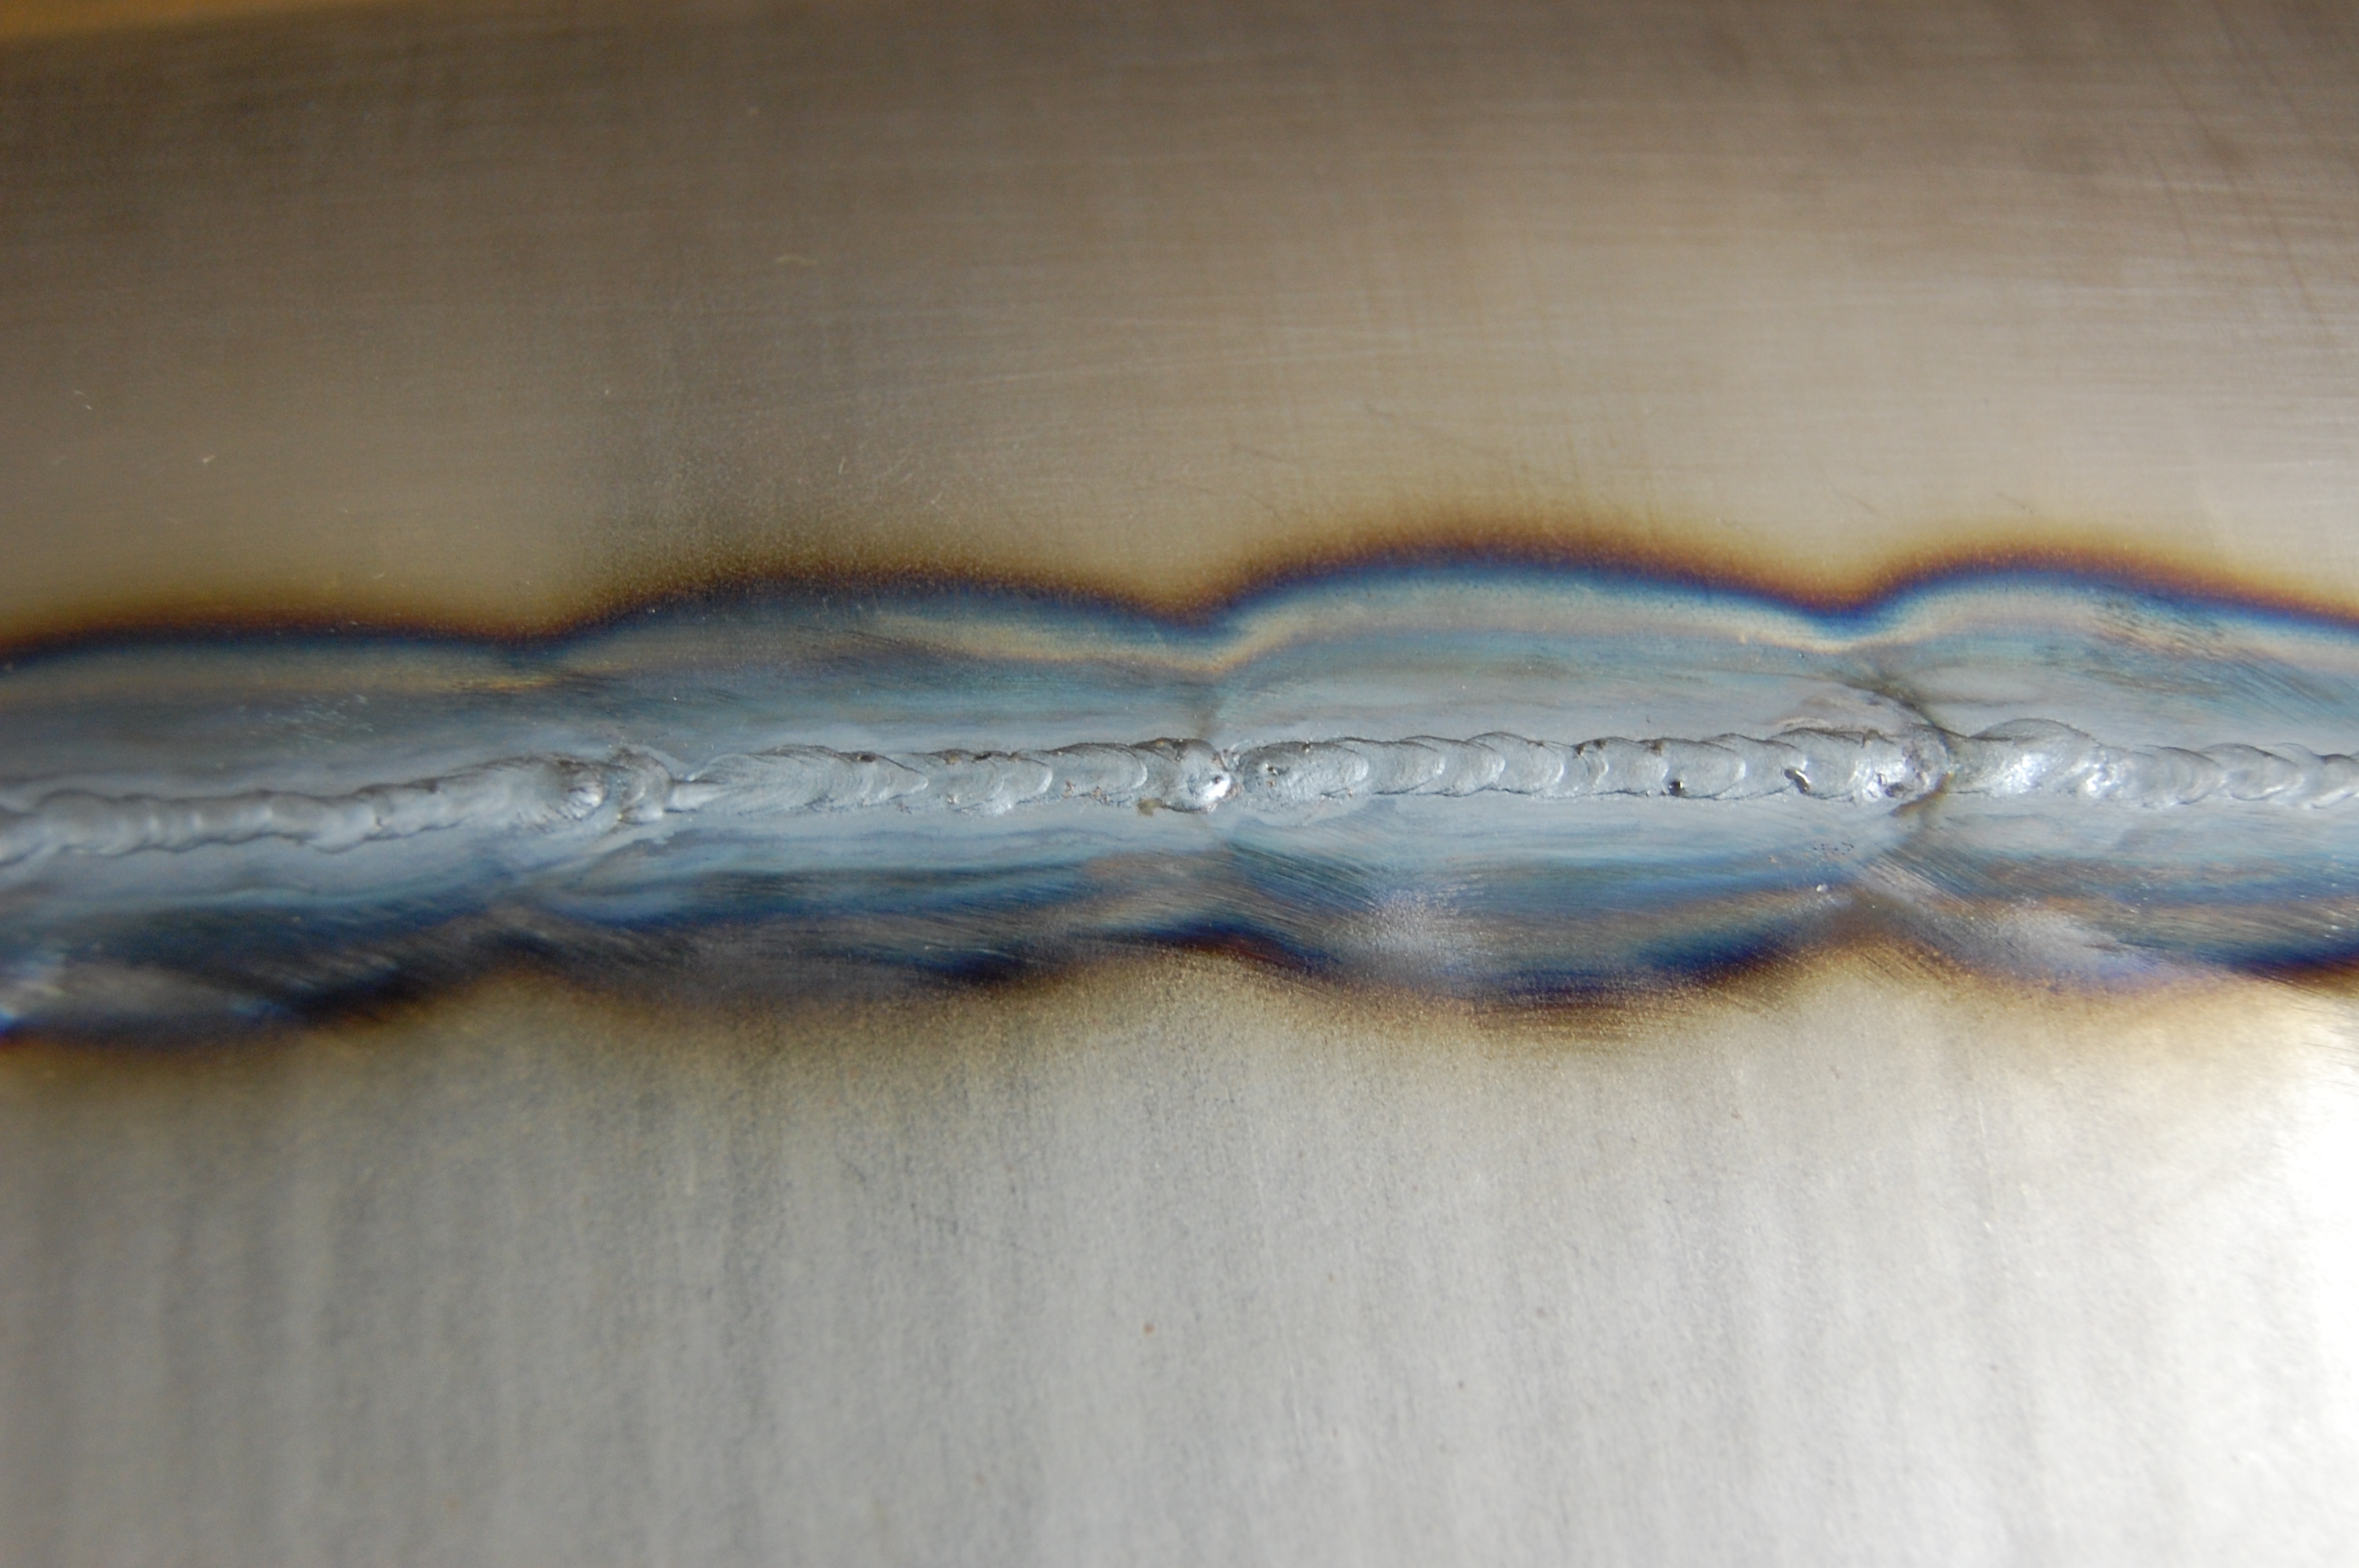
- Here is a shot of that. Note that our TIG has kept the hat down to the bare minimum, while giving us a weld with FULL penetration, and minimal excess material. In order to accomplish the same thing with a MIG, you would have to pour on WAY more heat, and would end up with a rather large bead of weld to be ground off – and the distortion would be mind-blowing – it basically can’t be done.

-

- Another shot of the completed TIG weld. Now, we DO have a bead of weld to grind off, and we DO have a minimal amount of distortion due to shrinkage. So we will first grind down the weld, and then planish the weld to stretch it – using either a planishing hammer or an English wheel – in this case, we used the wheel.
-

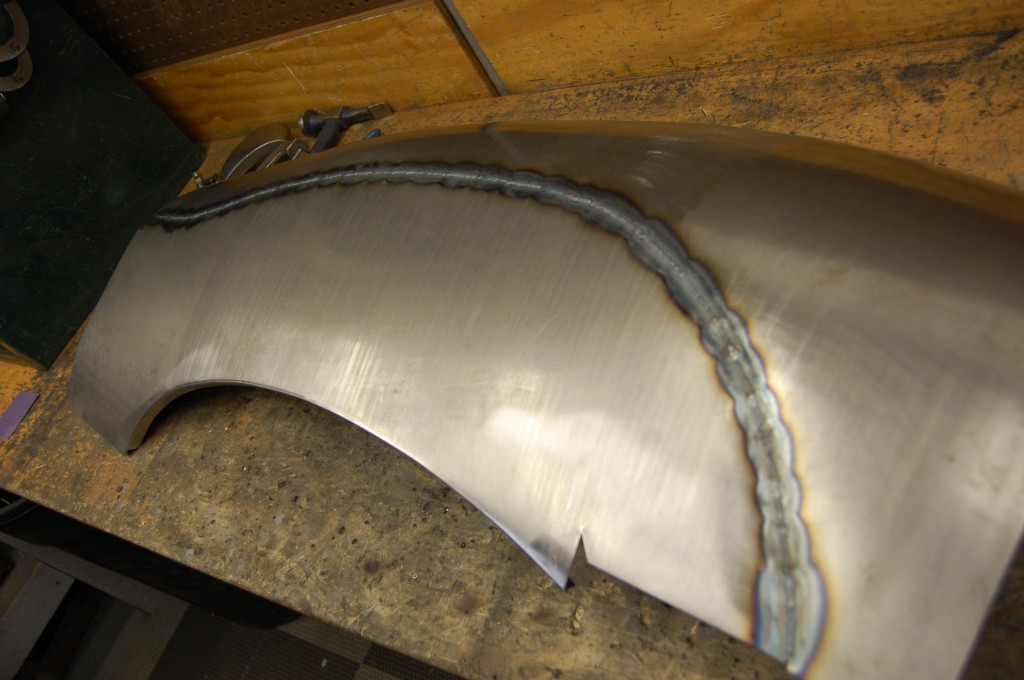
- We’re starting to get somewhere! Next, it is time to complete the edges…
-

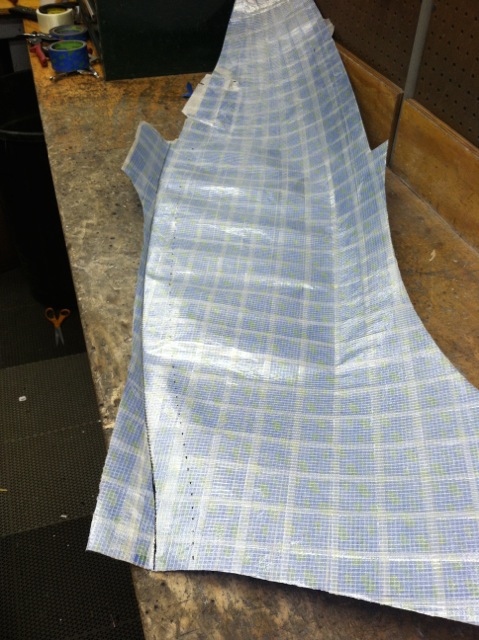
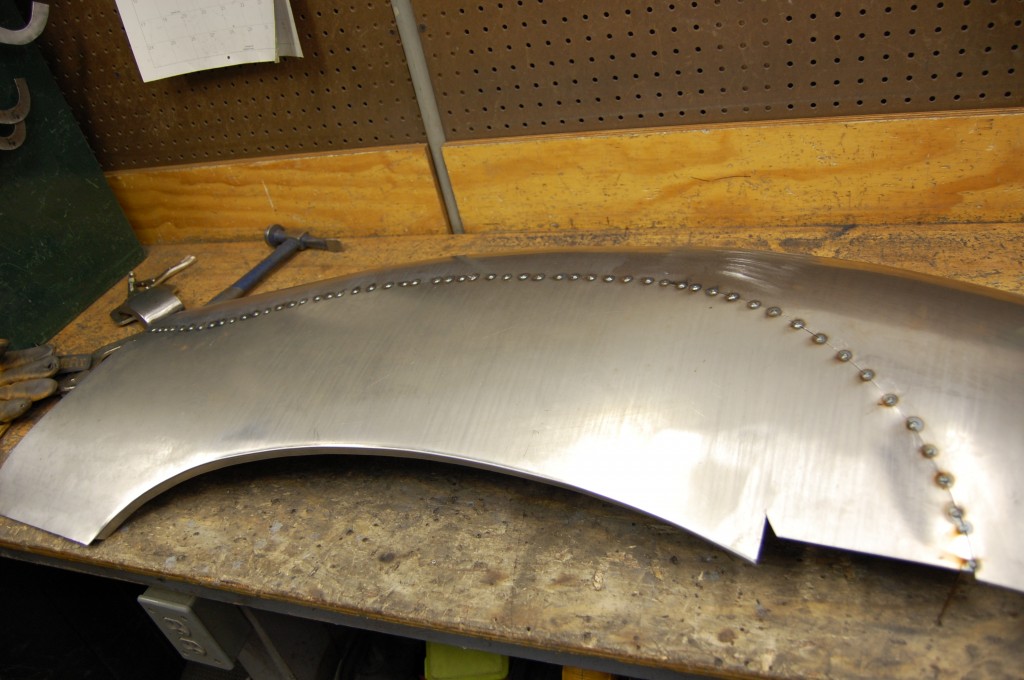
- In order to get the EXACT placement of the edges correct, we carefully tape the sections of the FSP back together, mark the edges, and use the bead roller (plus alot of other stuff…) to turn the edges down.
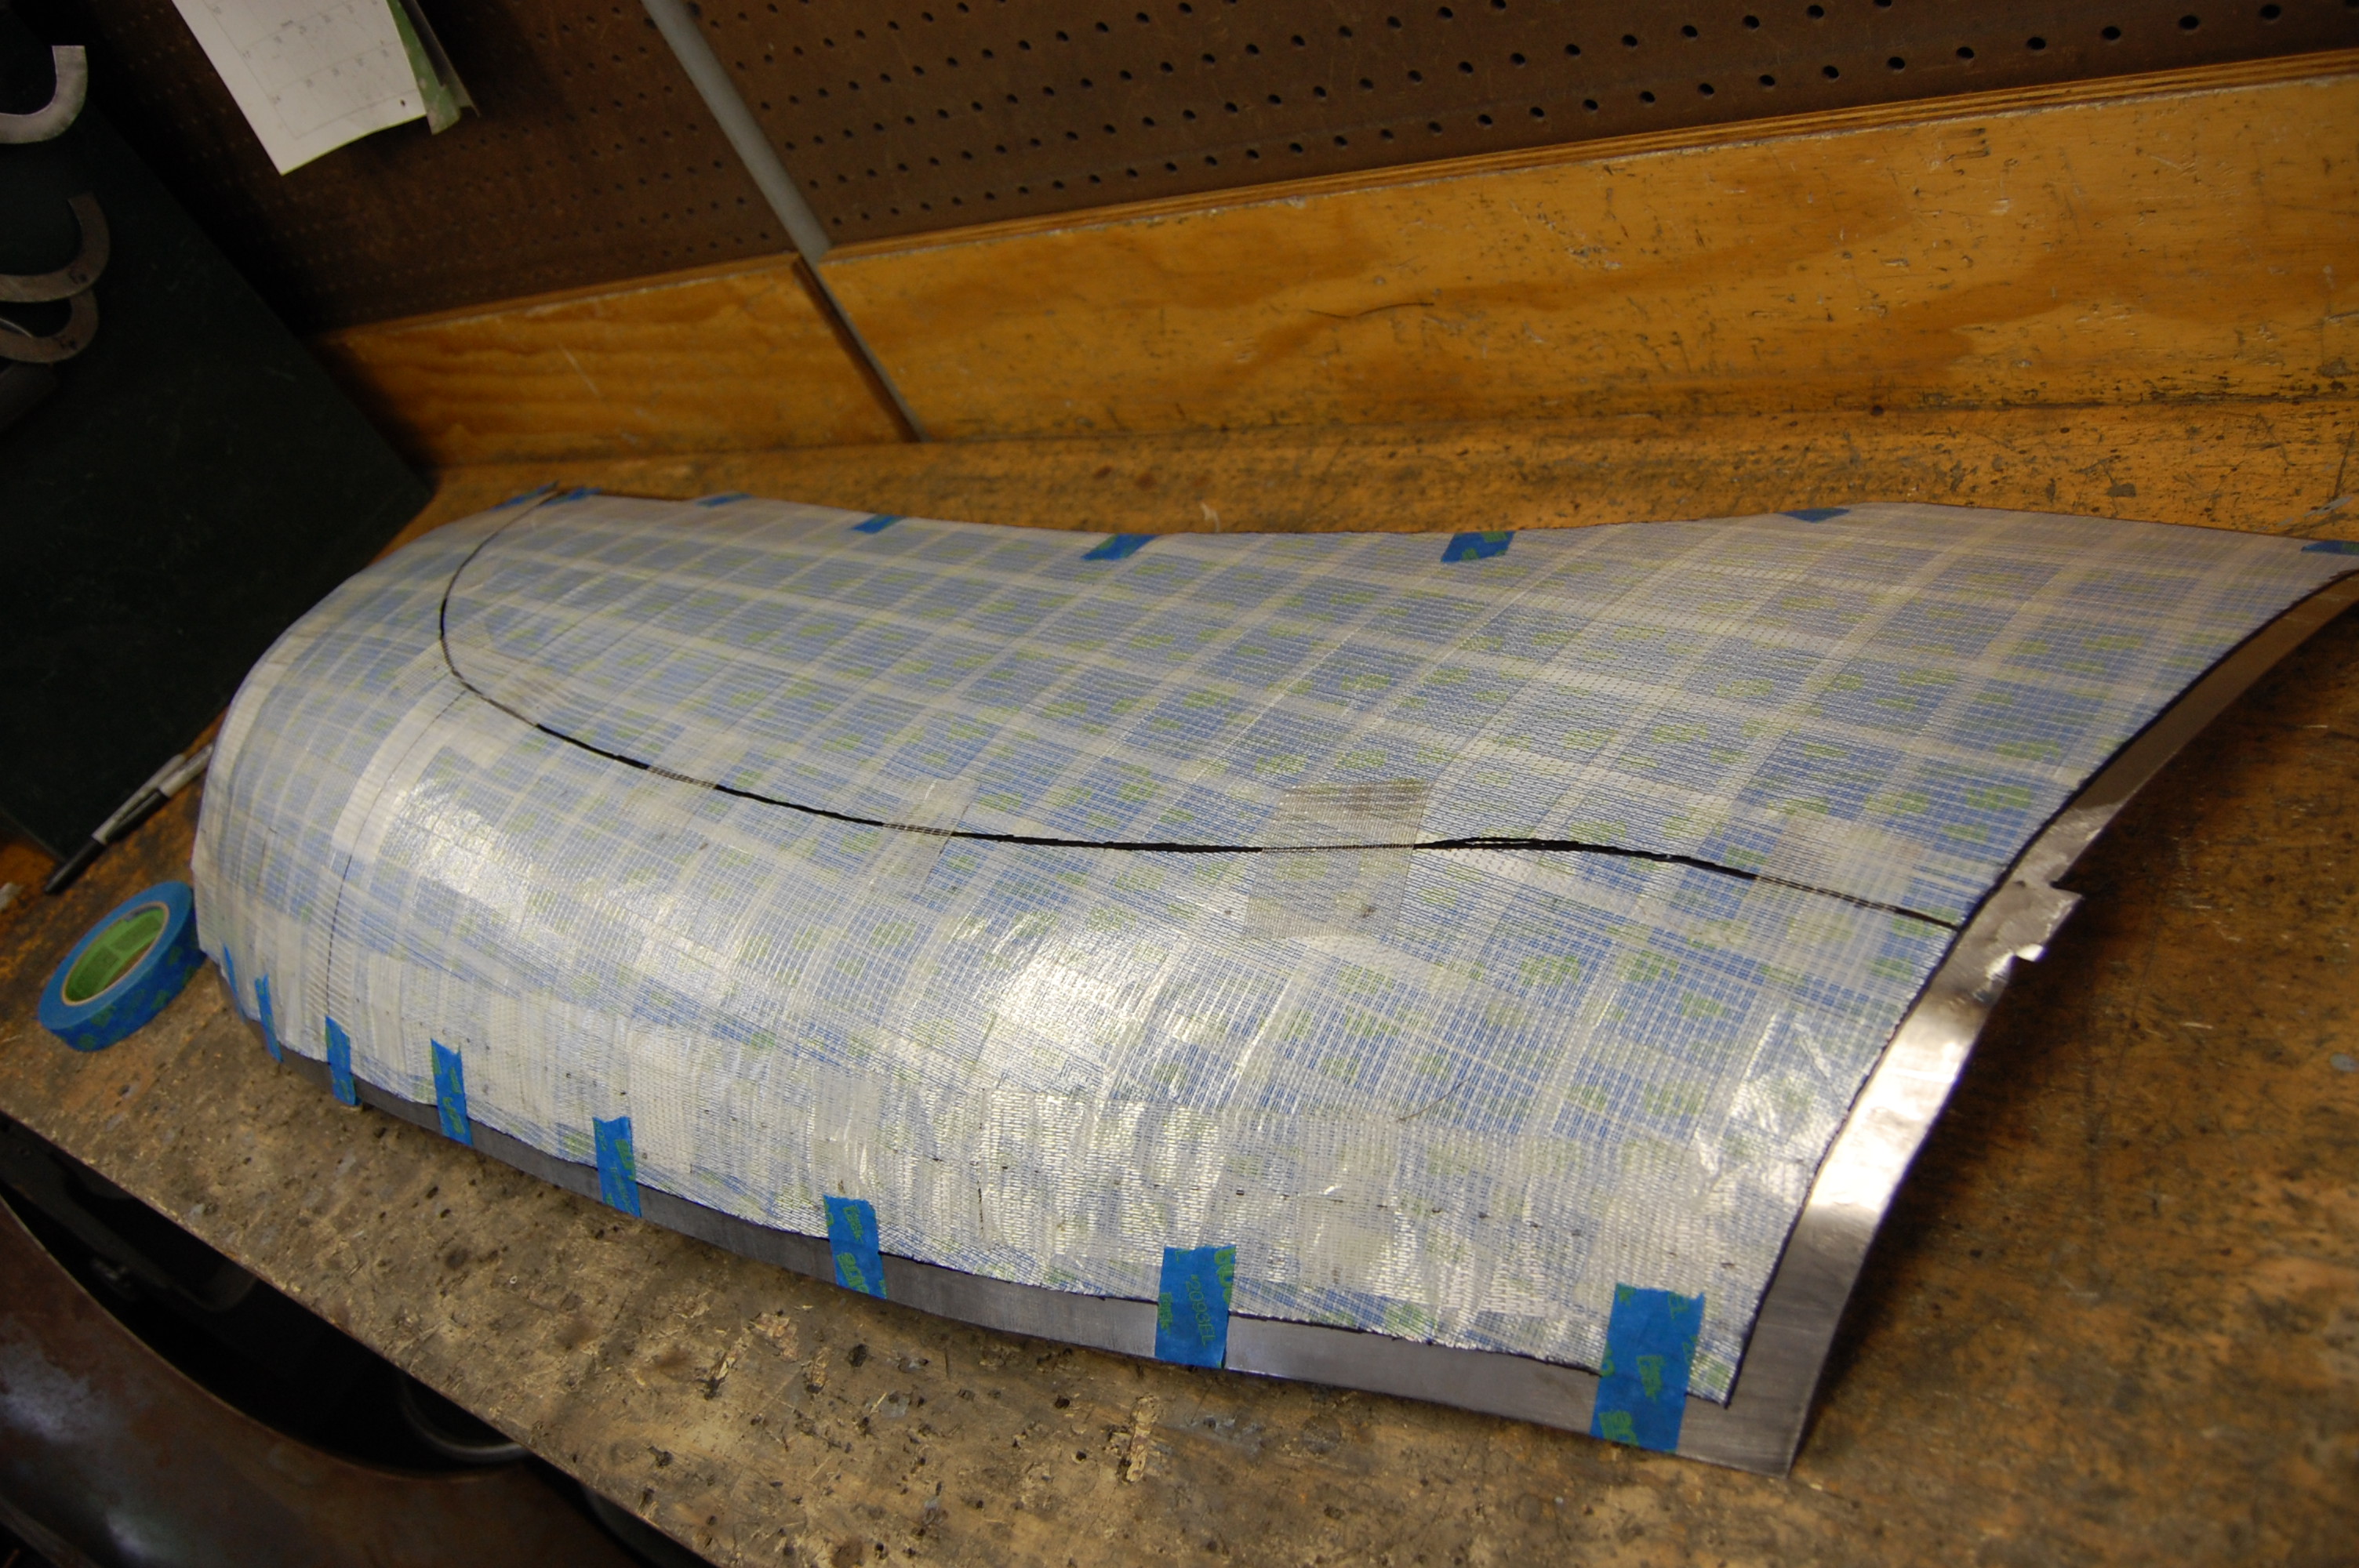
-
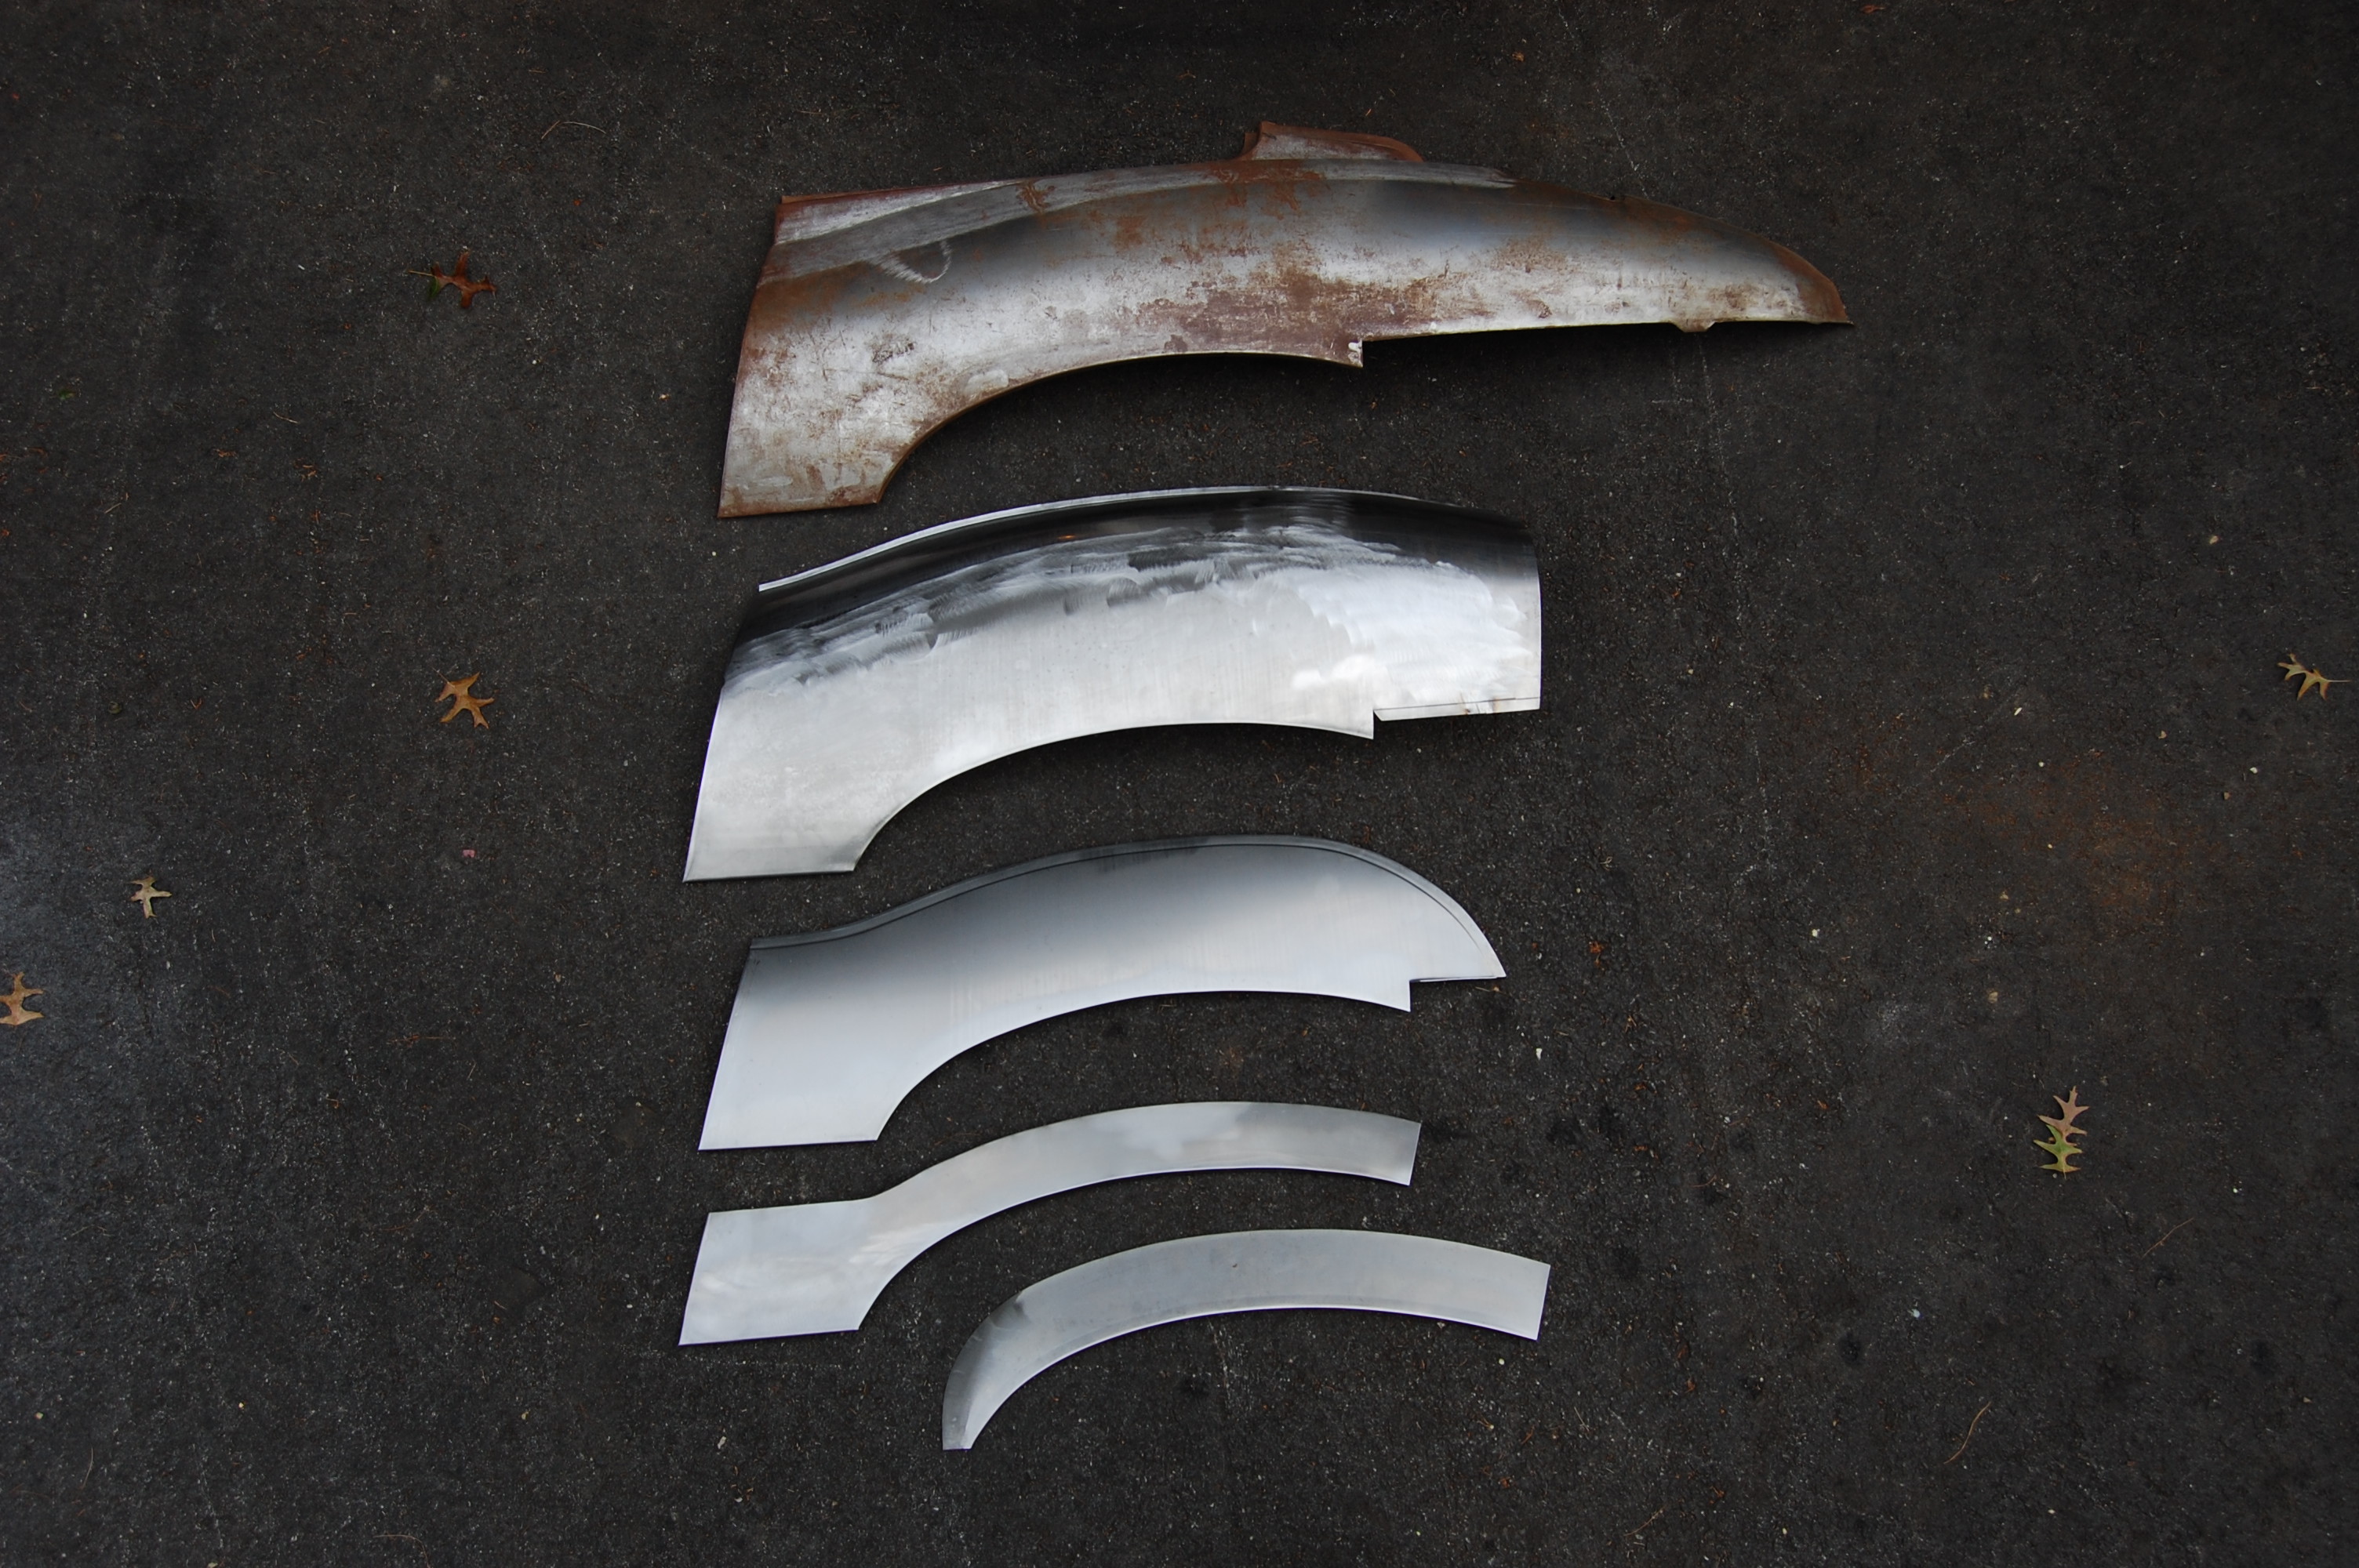
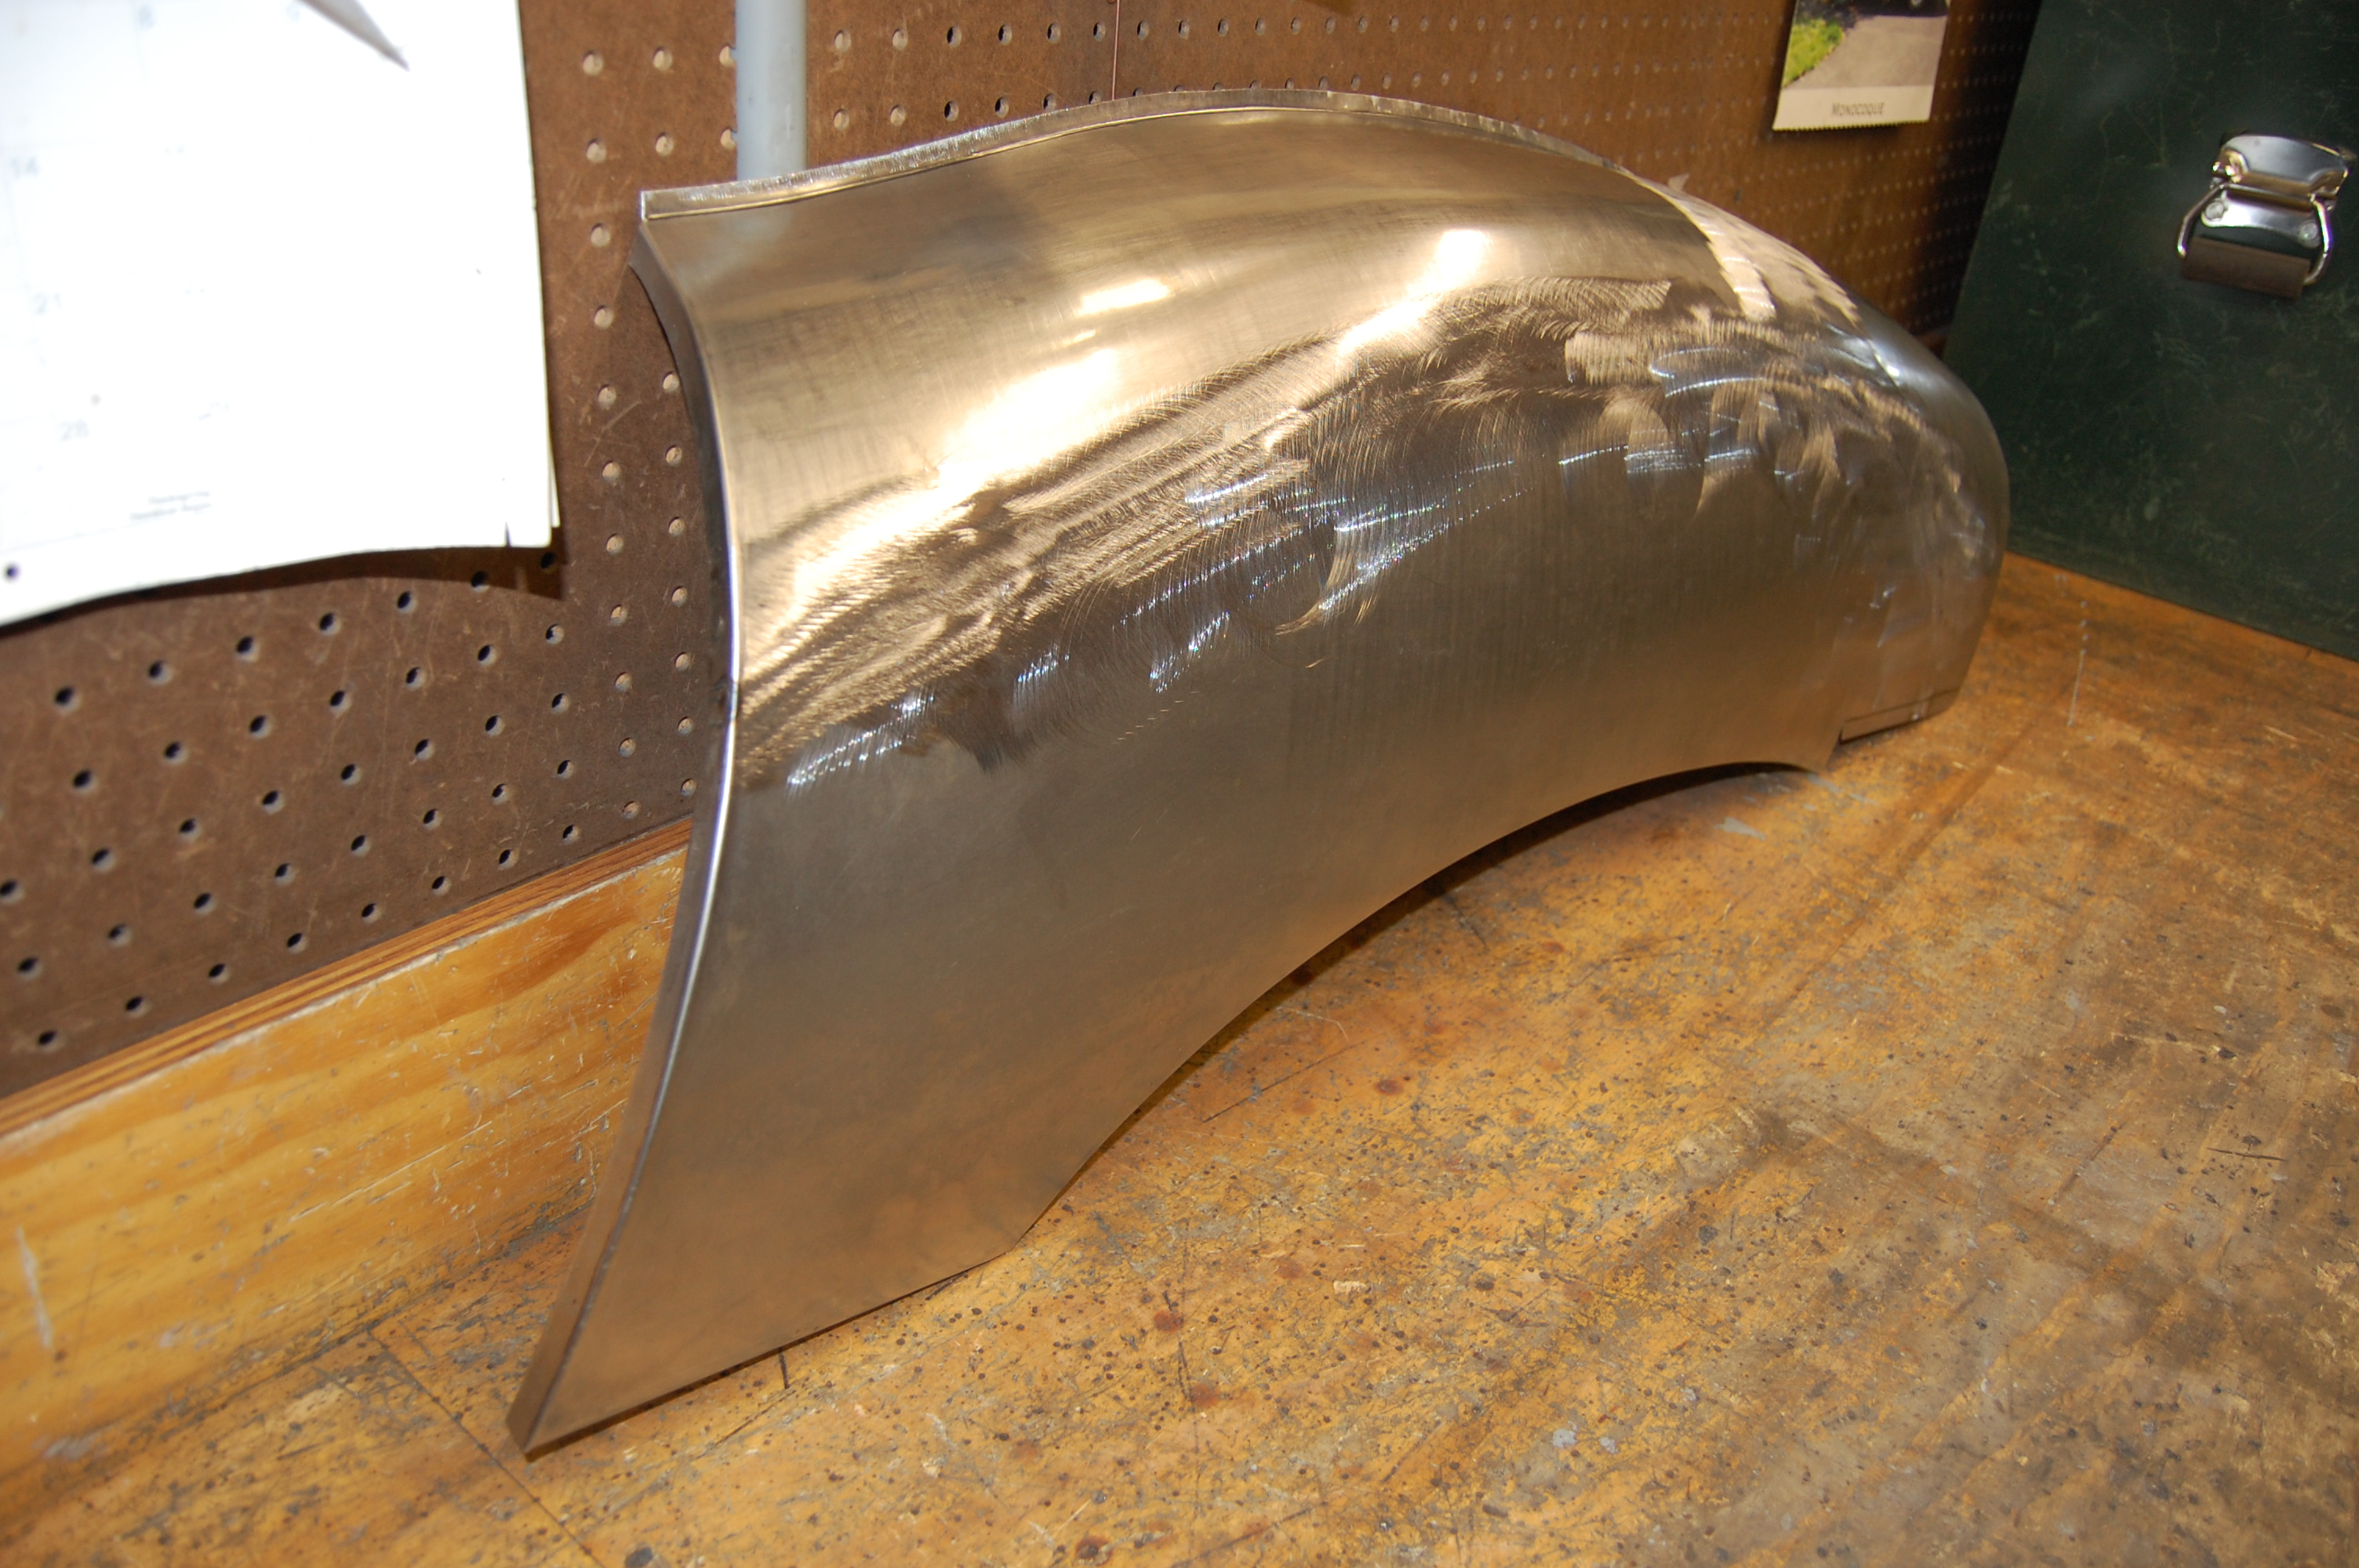
- OH YEAH, BABY! Get some of that! This will cover the ENTIRE area of the customer’c damaged wing!
-
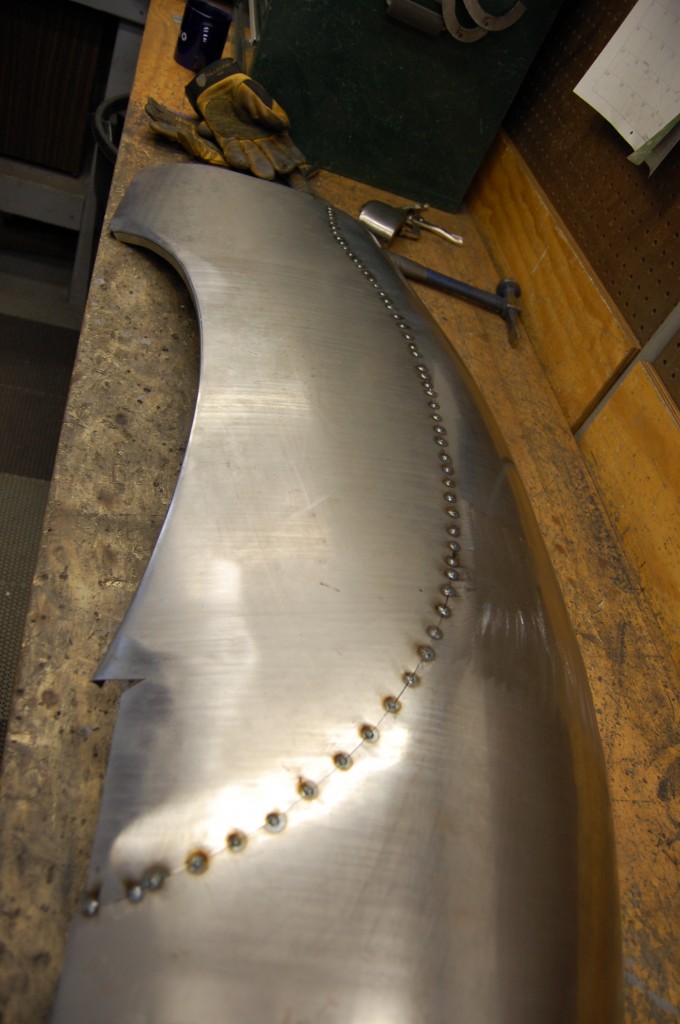
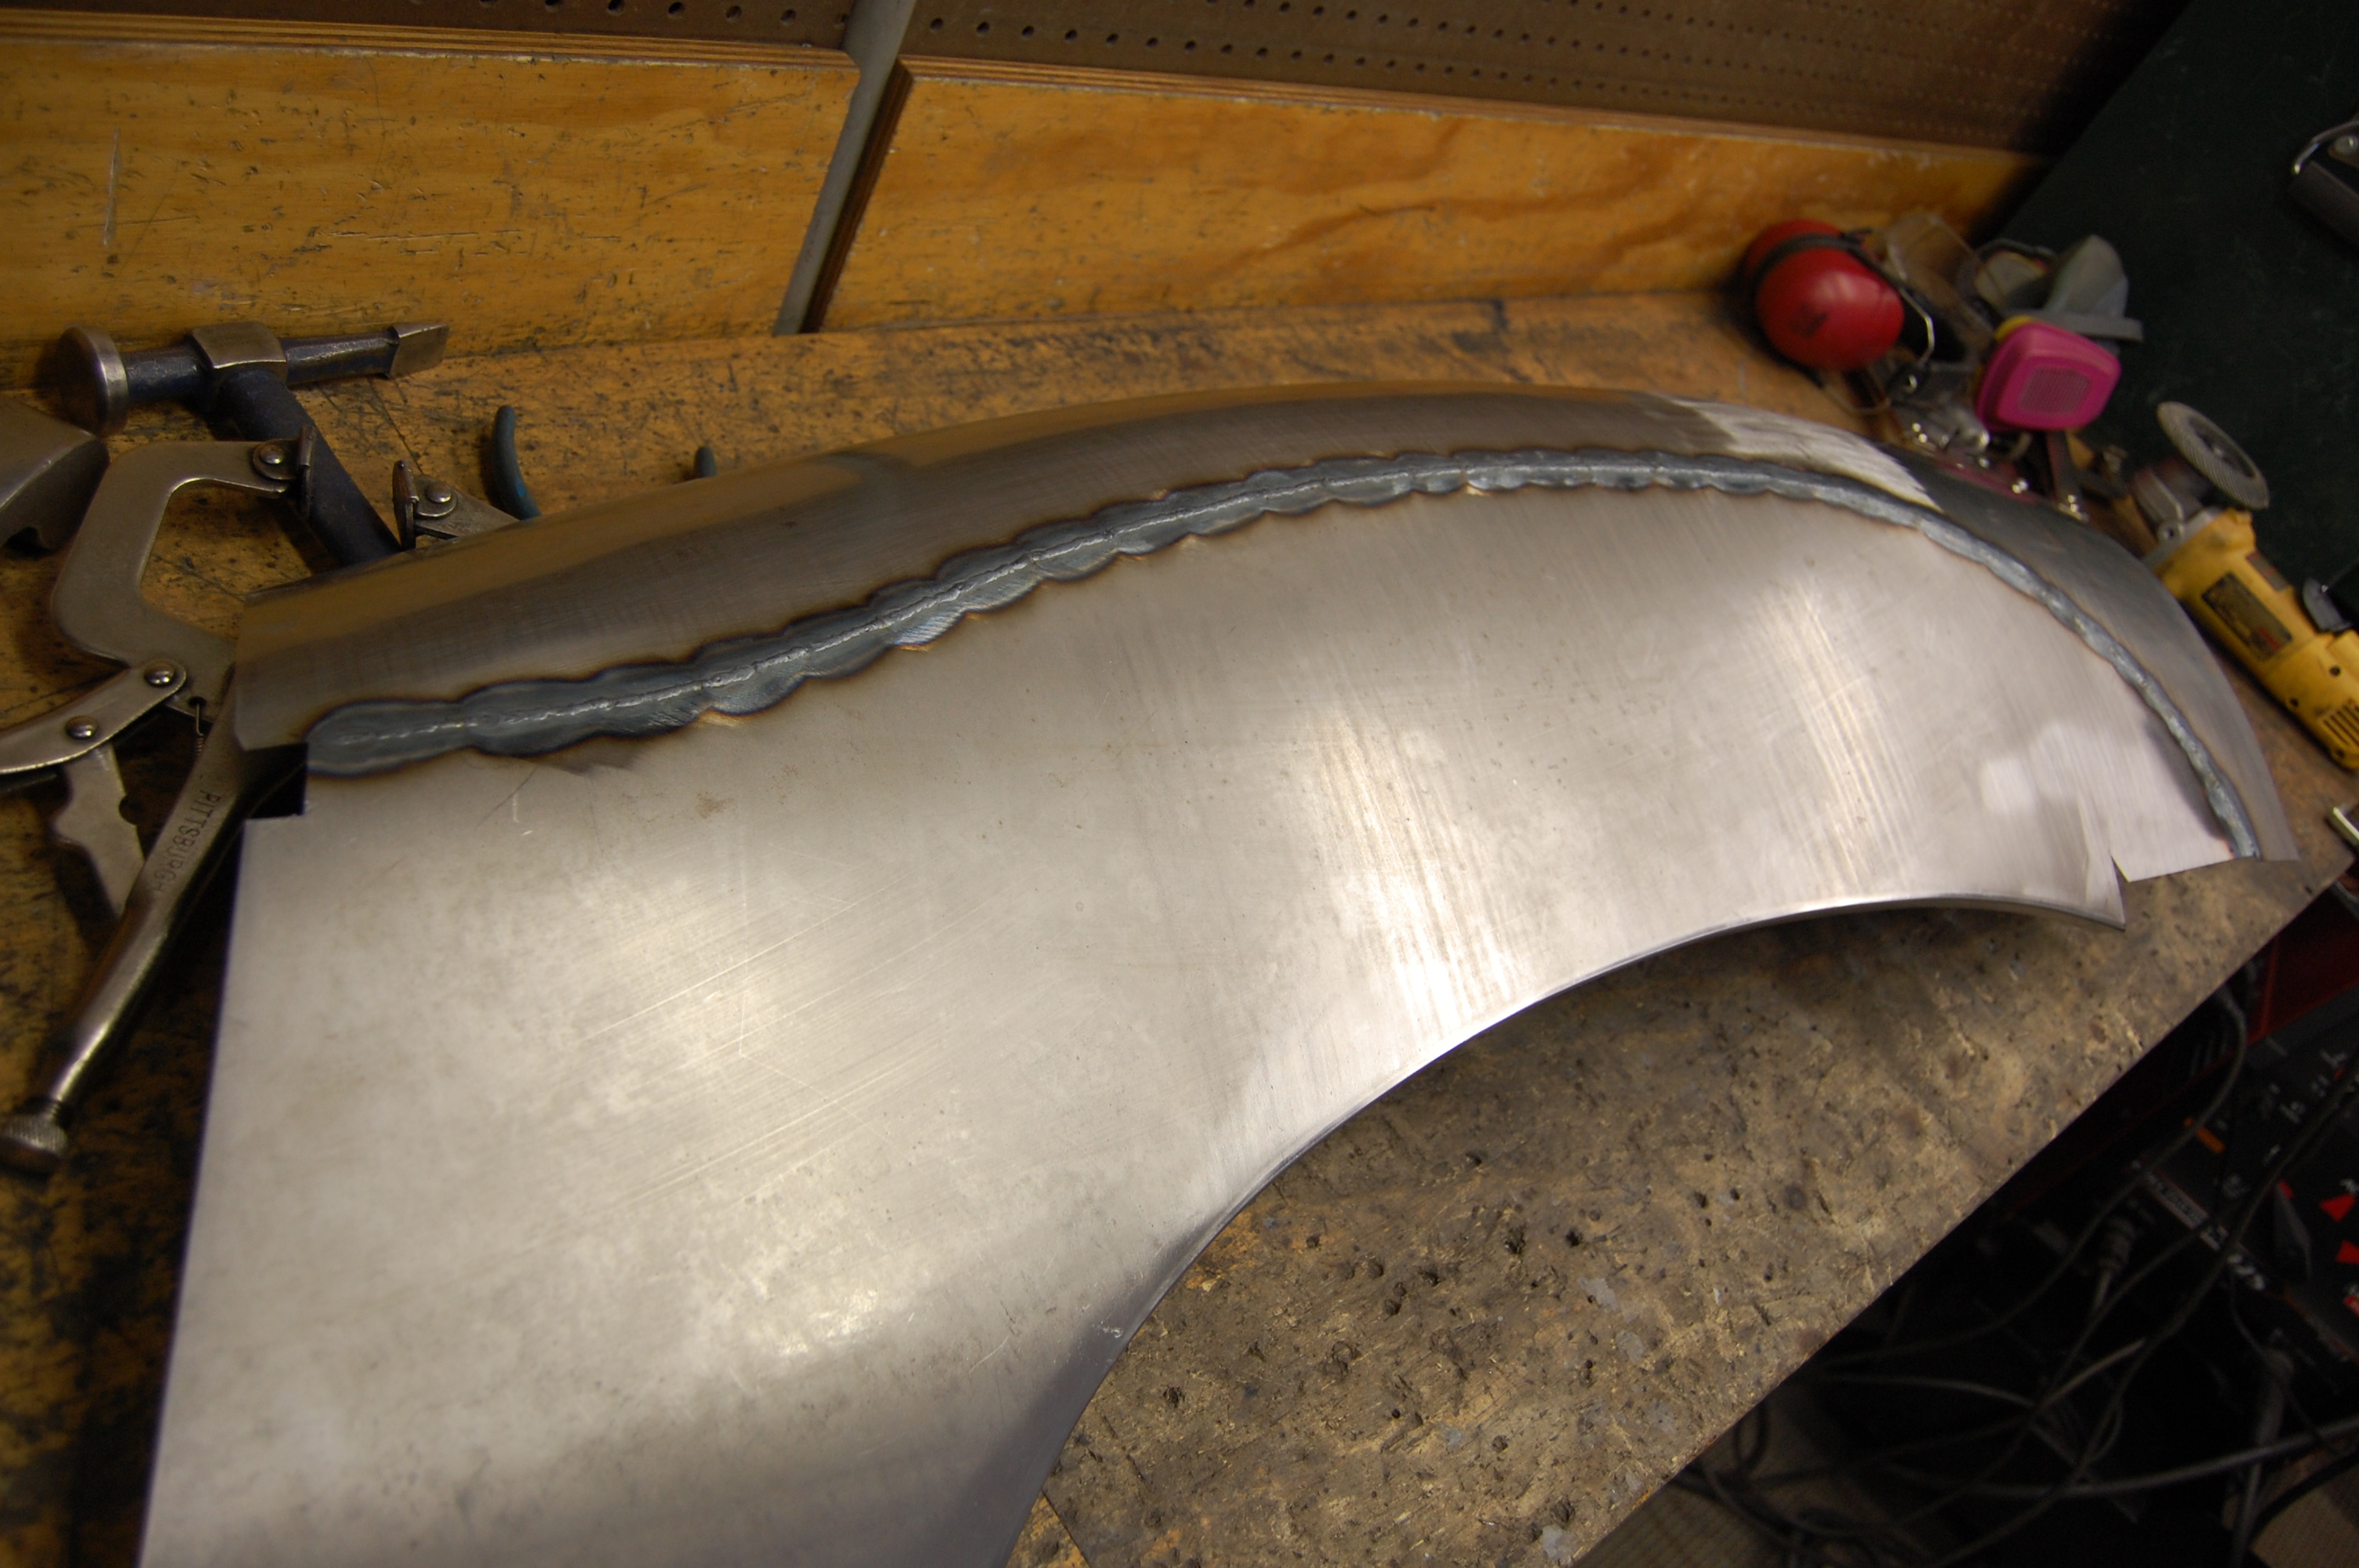
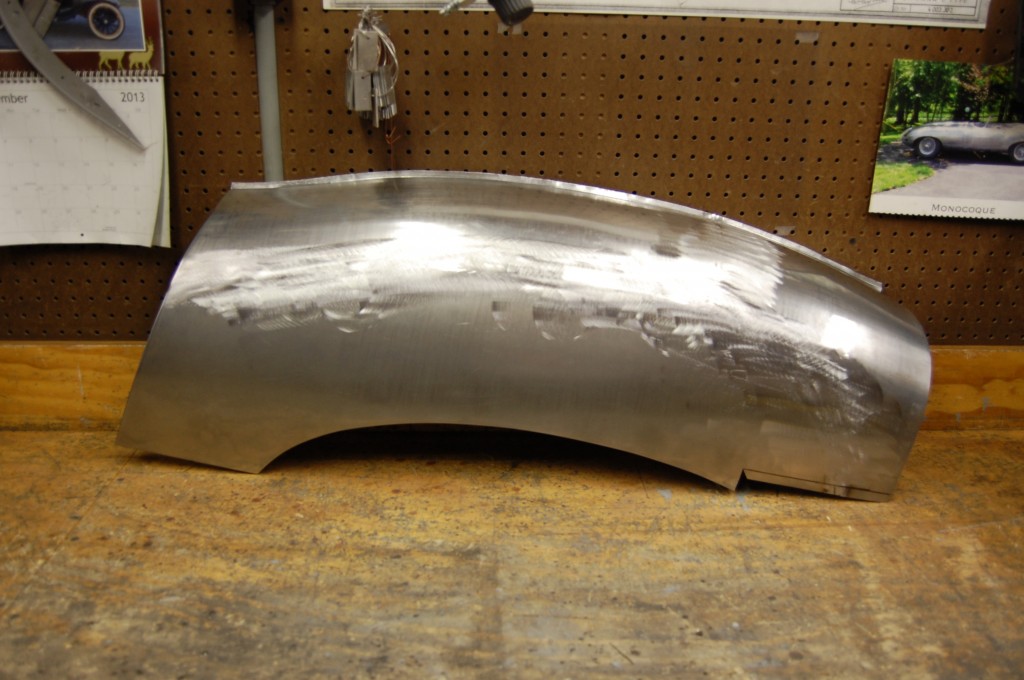
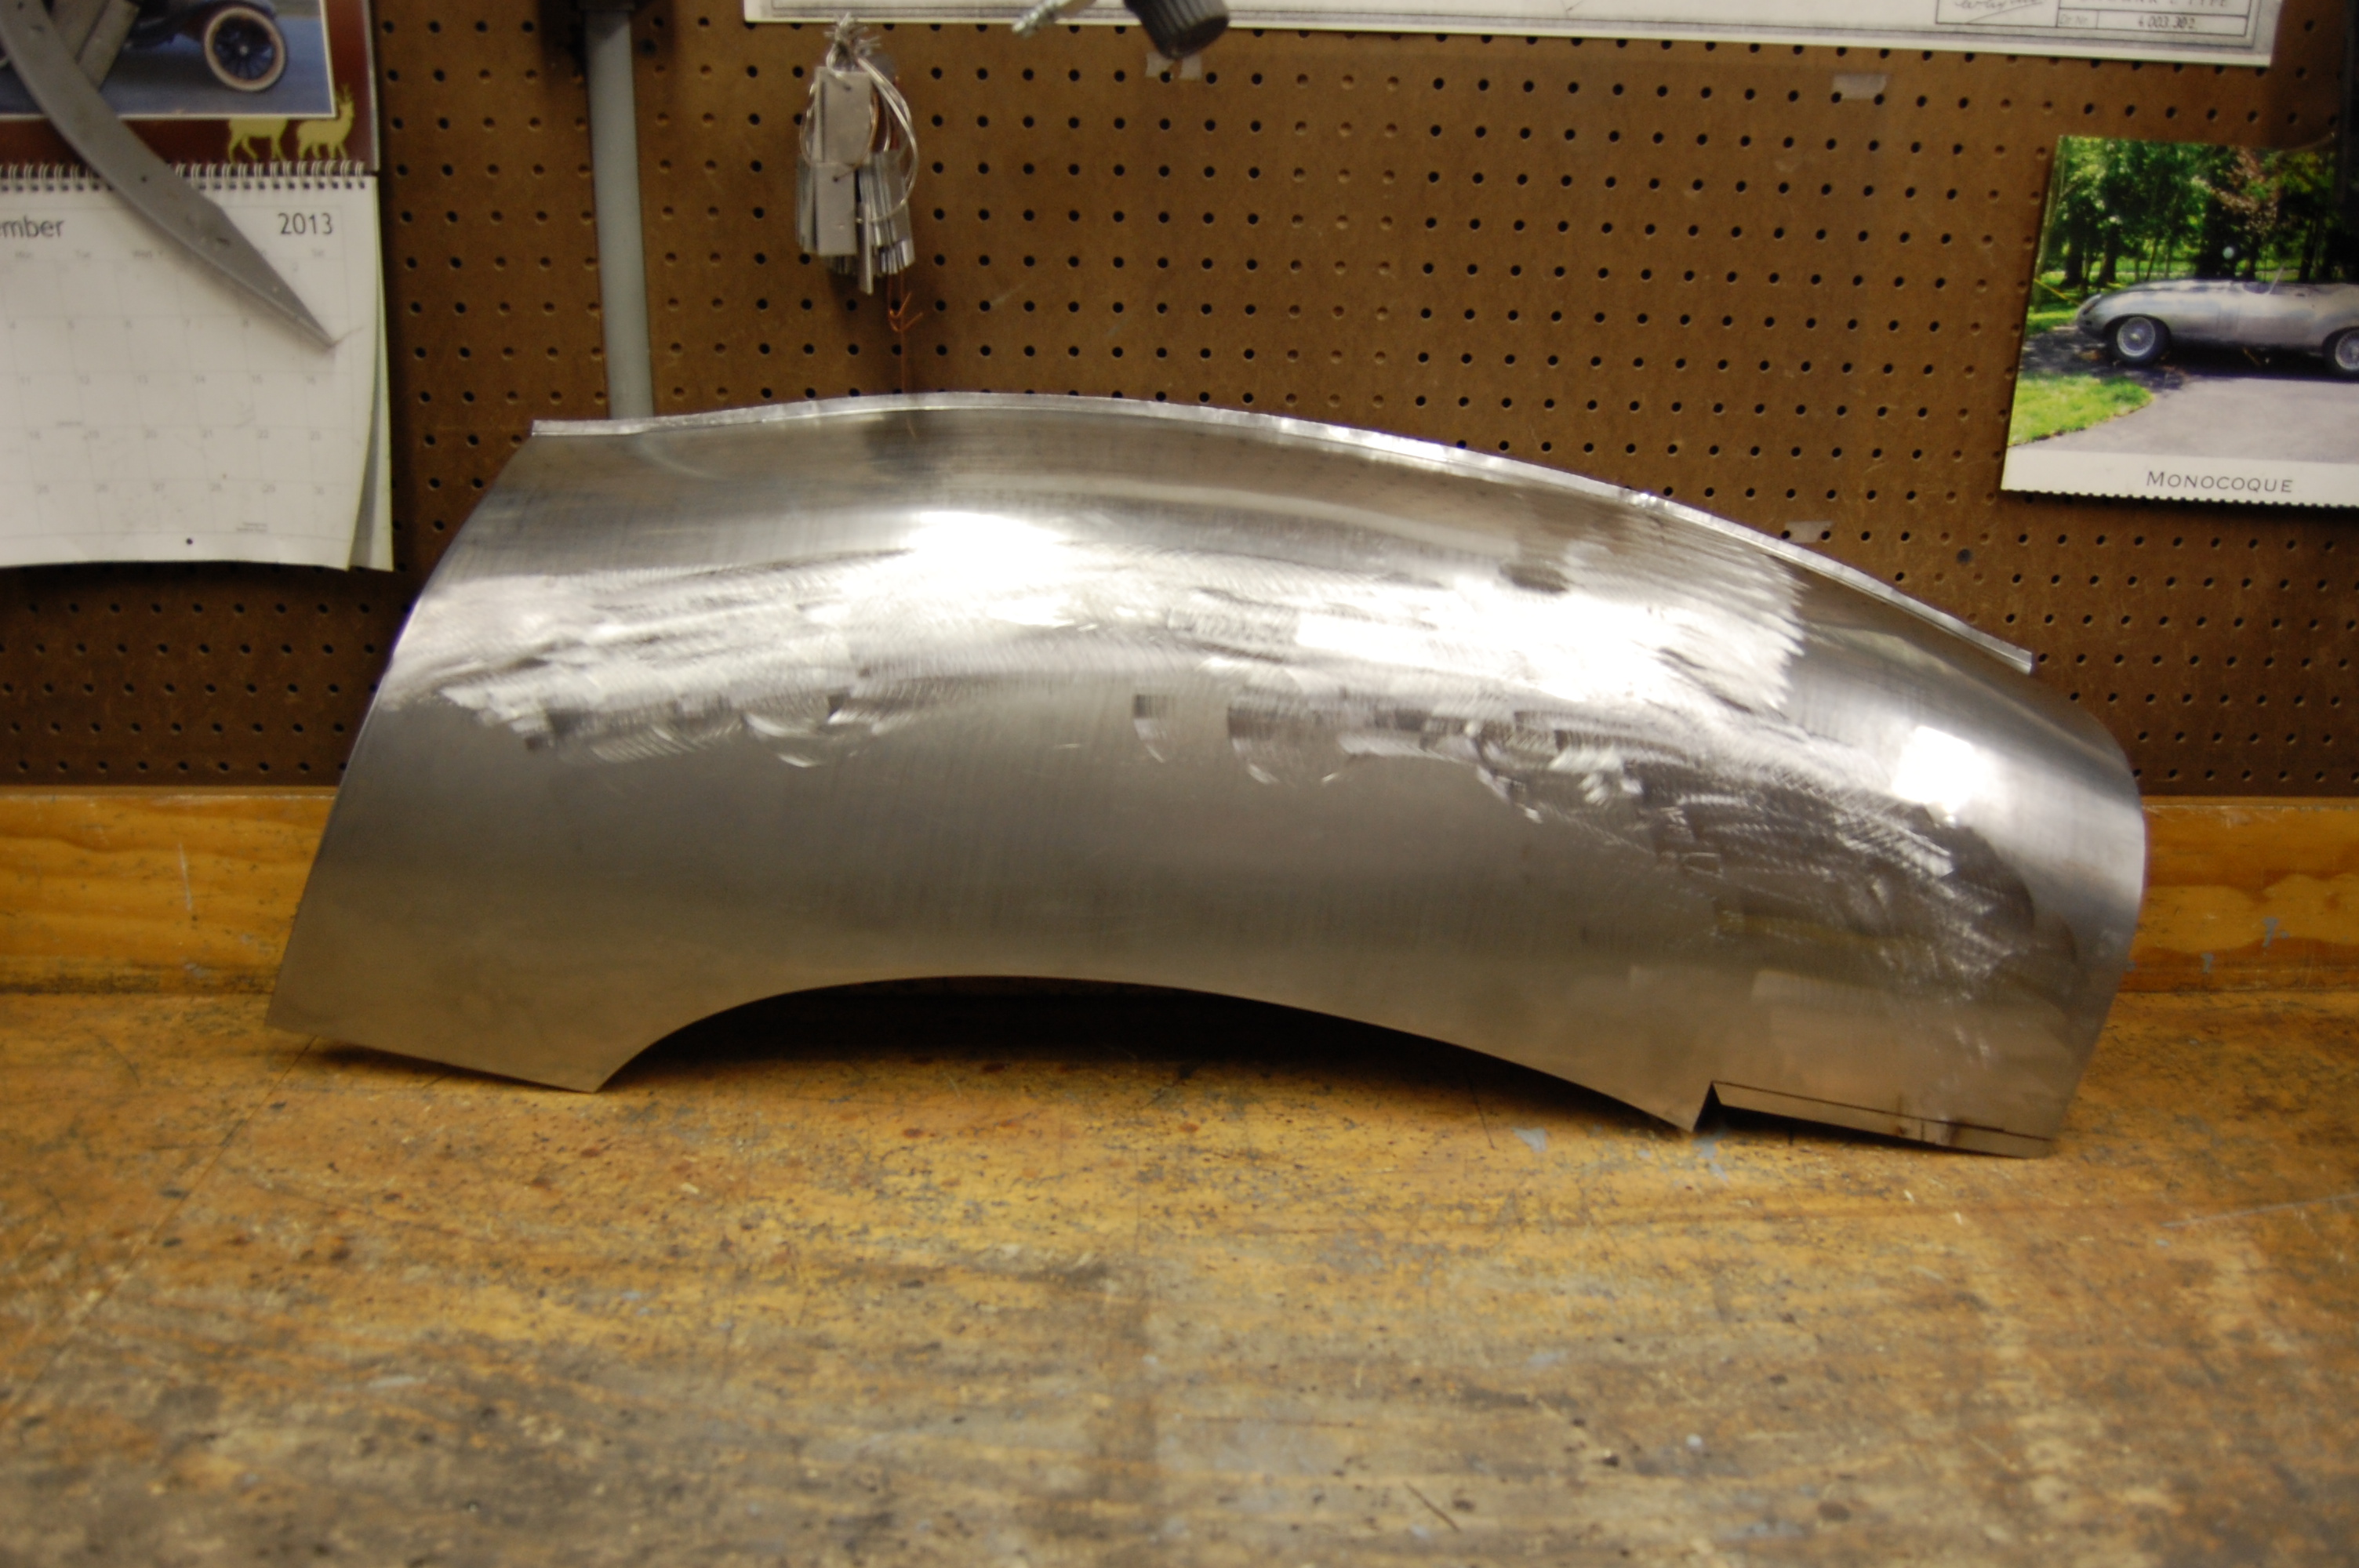
- That top edge is turned up for temporary strength, but it’s location is EXACTLY where the factory crease is located. My recommendation to the customer is to weld this piece in as close to the factort crease as possible – with plug welding and a stepped flange. Same goes for the back edge, which will come in just in front of the fuel door.
-

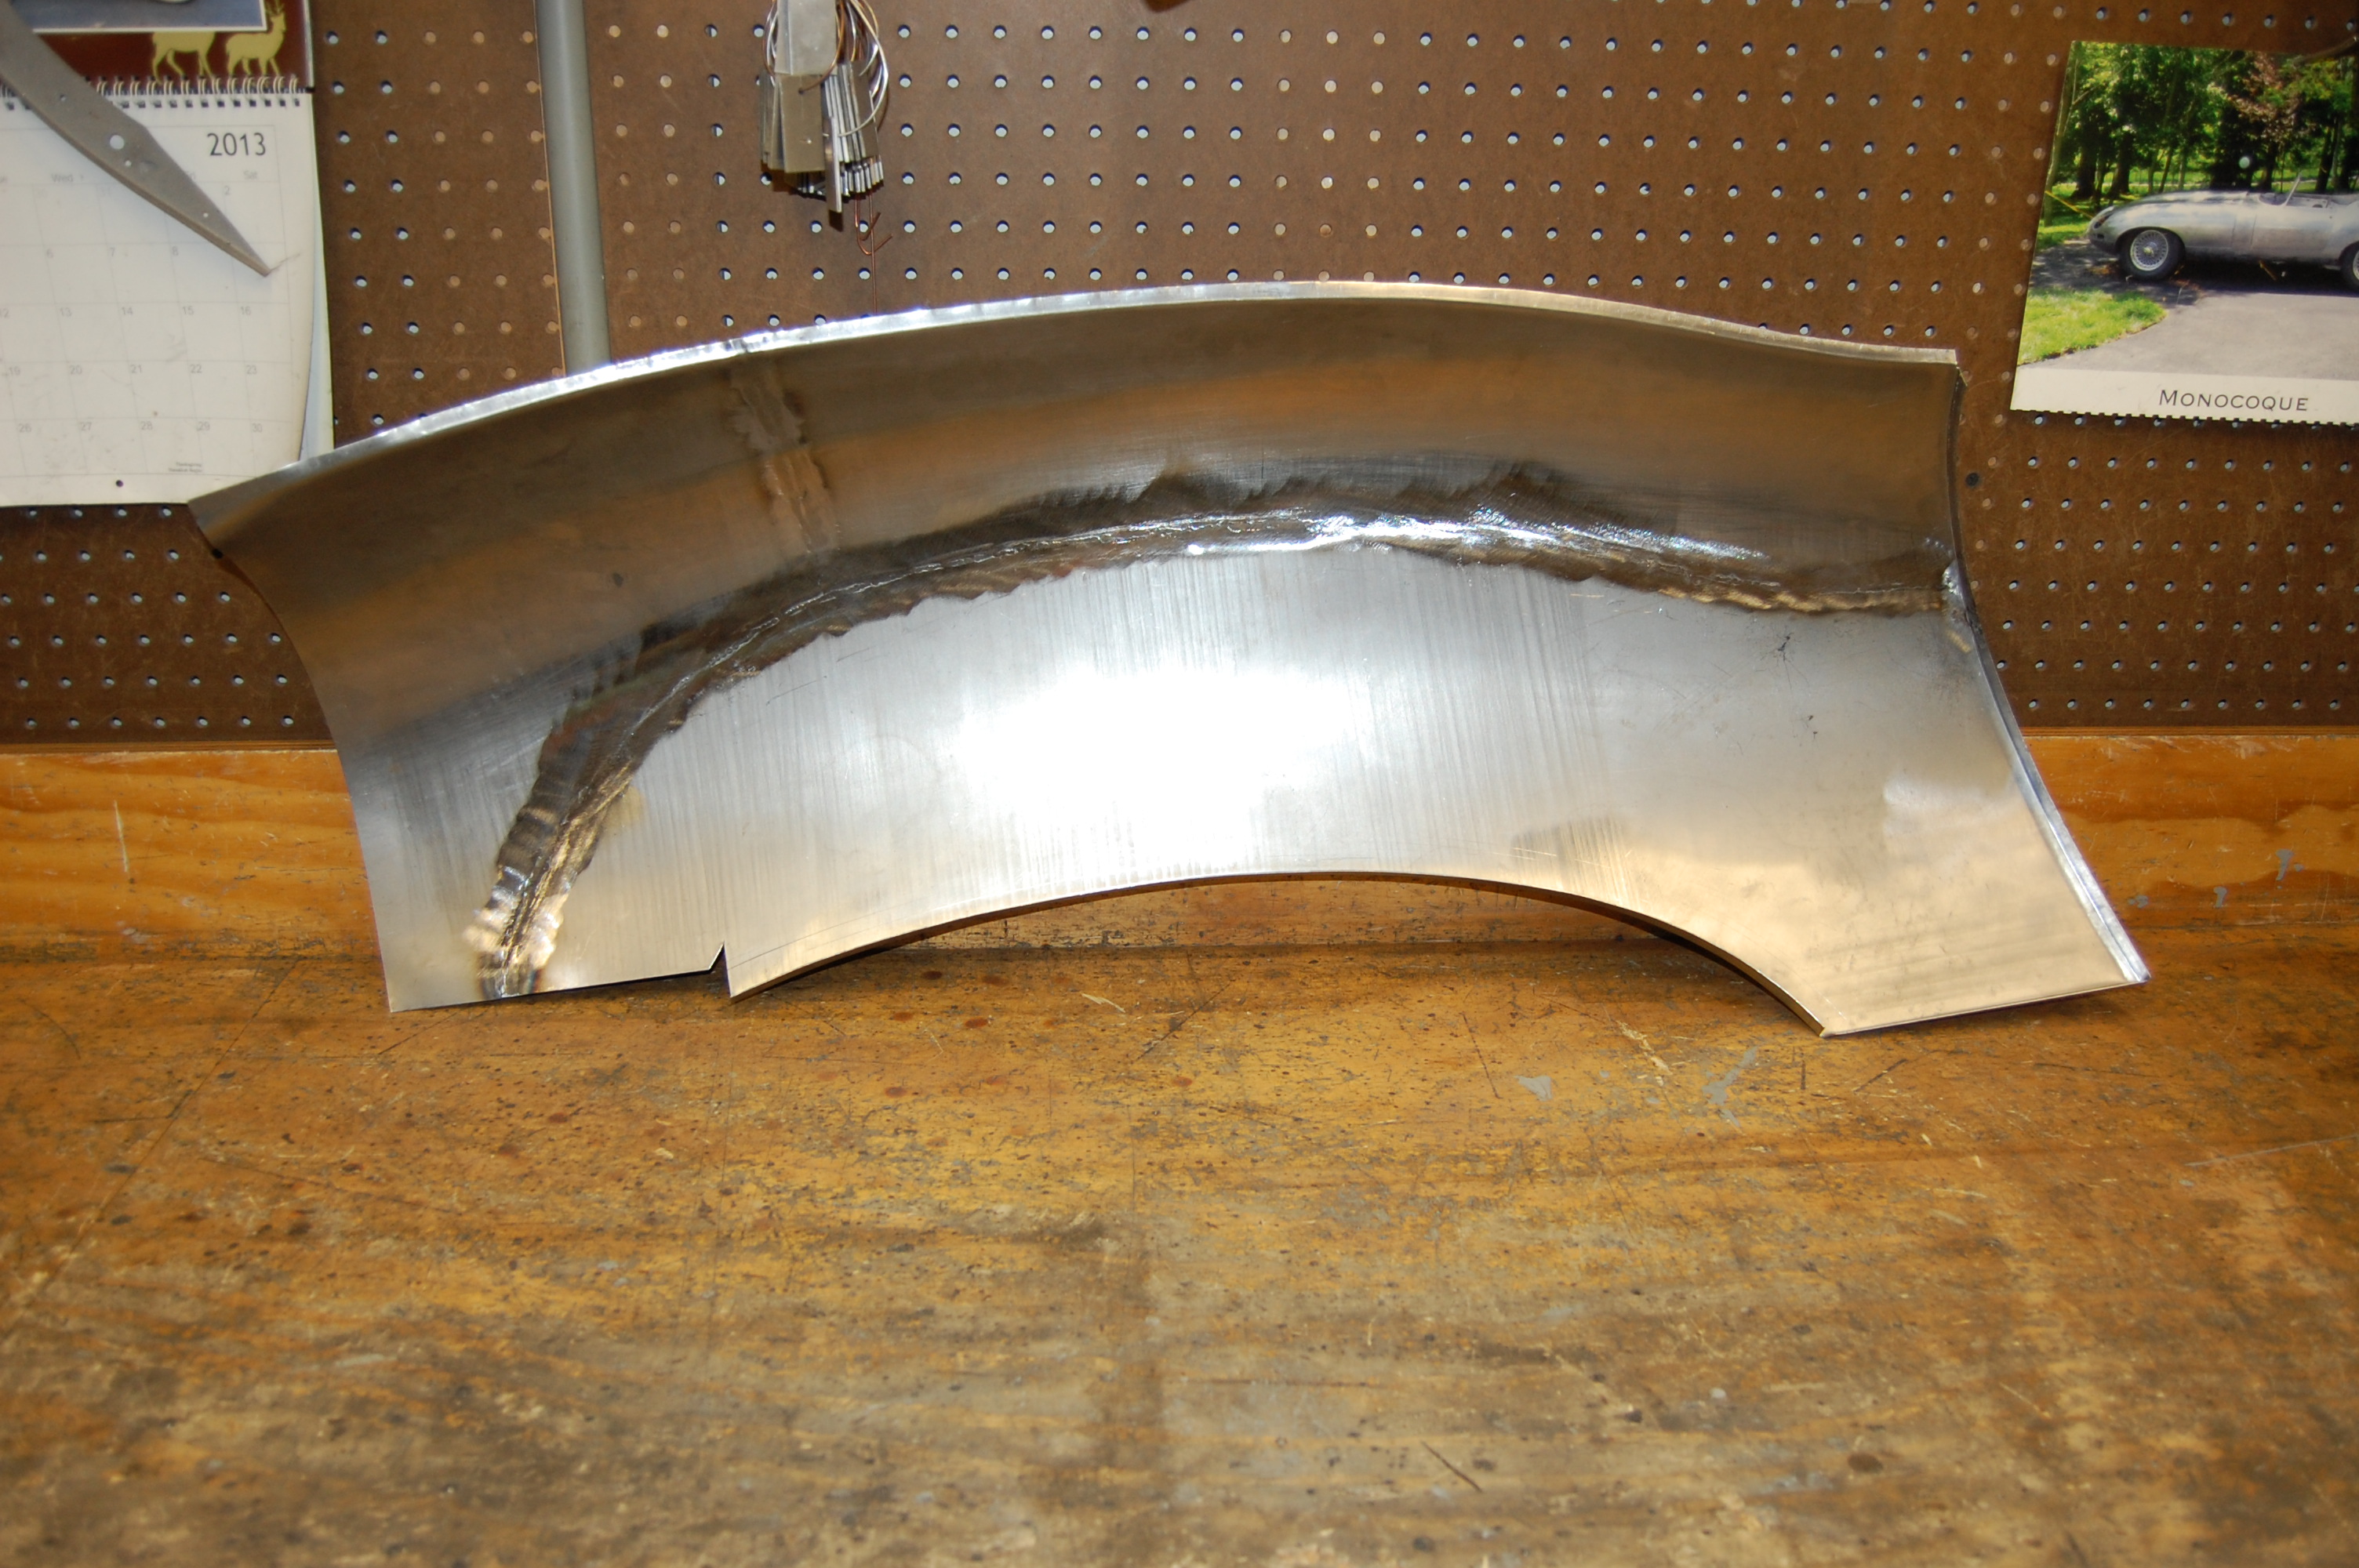
- Here is a shot of the back side, showing our weld seams – much like the factory piece, but just in different locations…
-
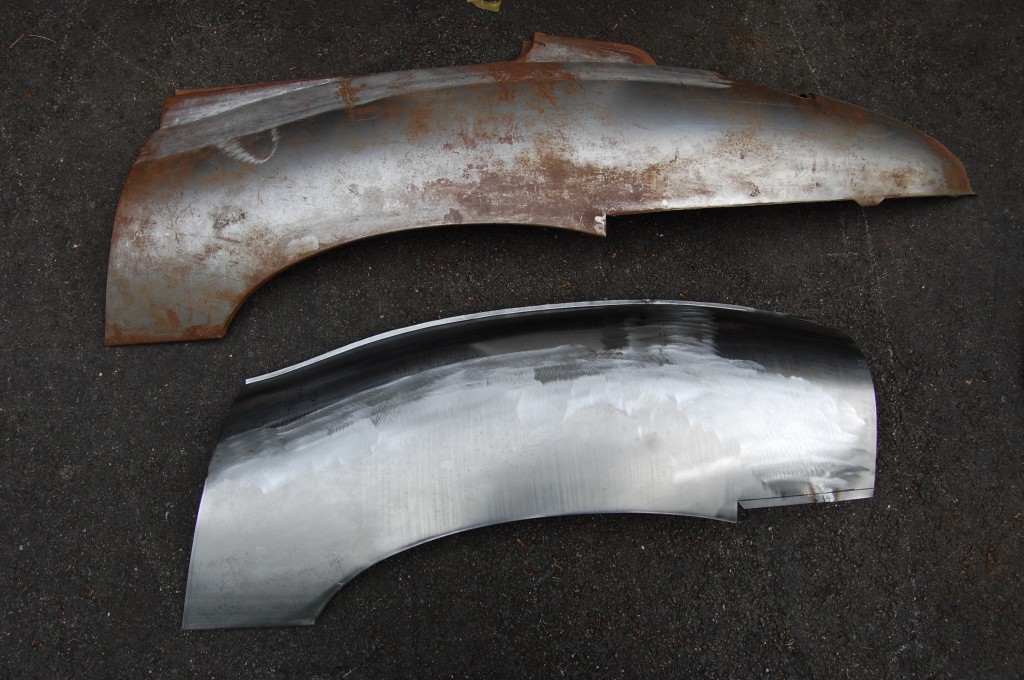
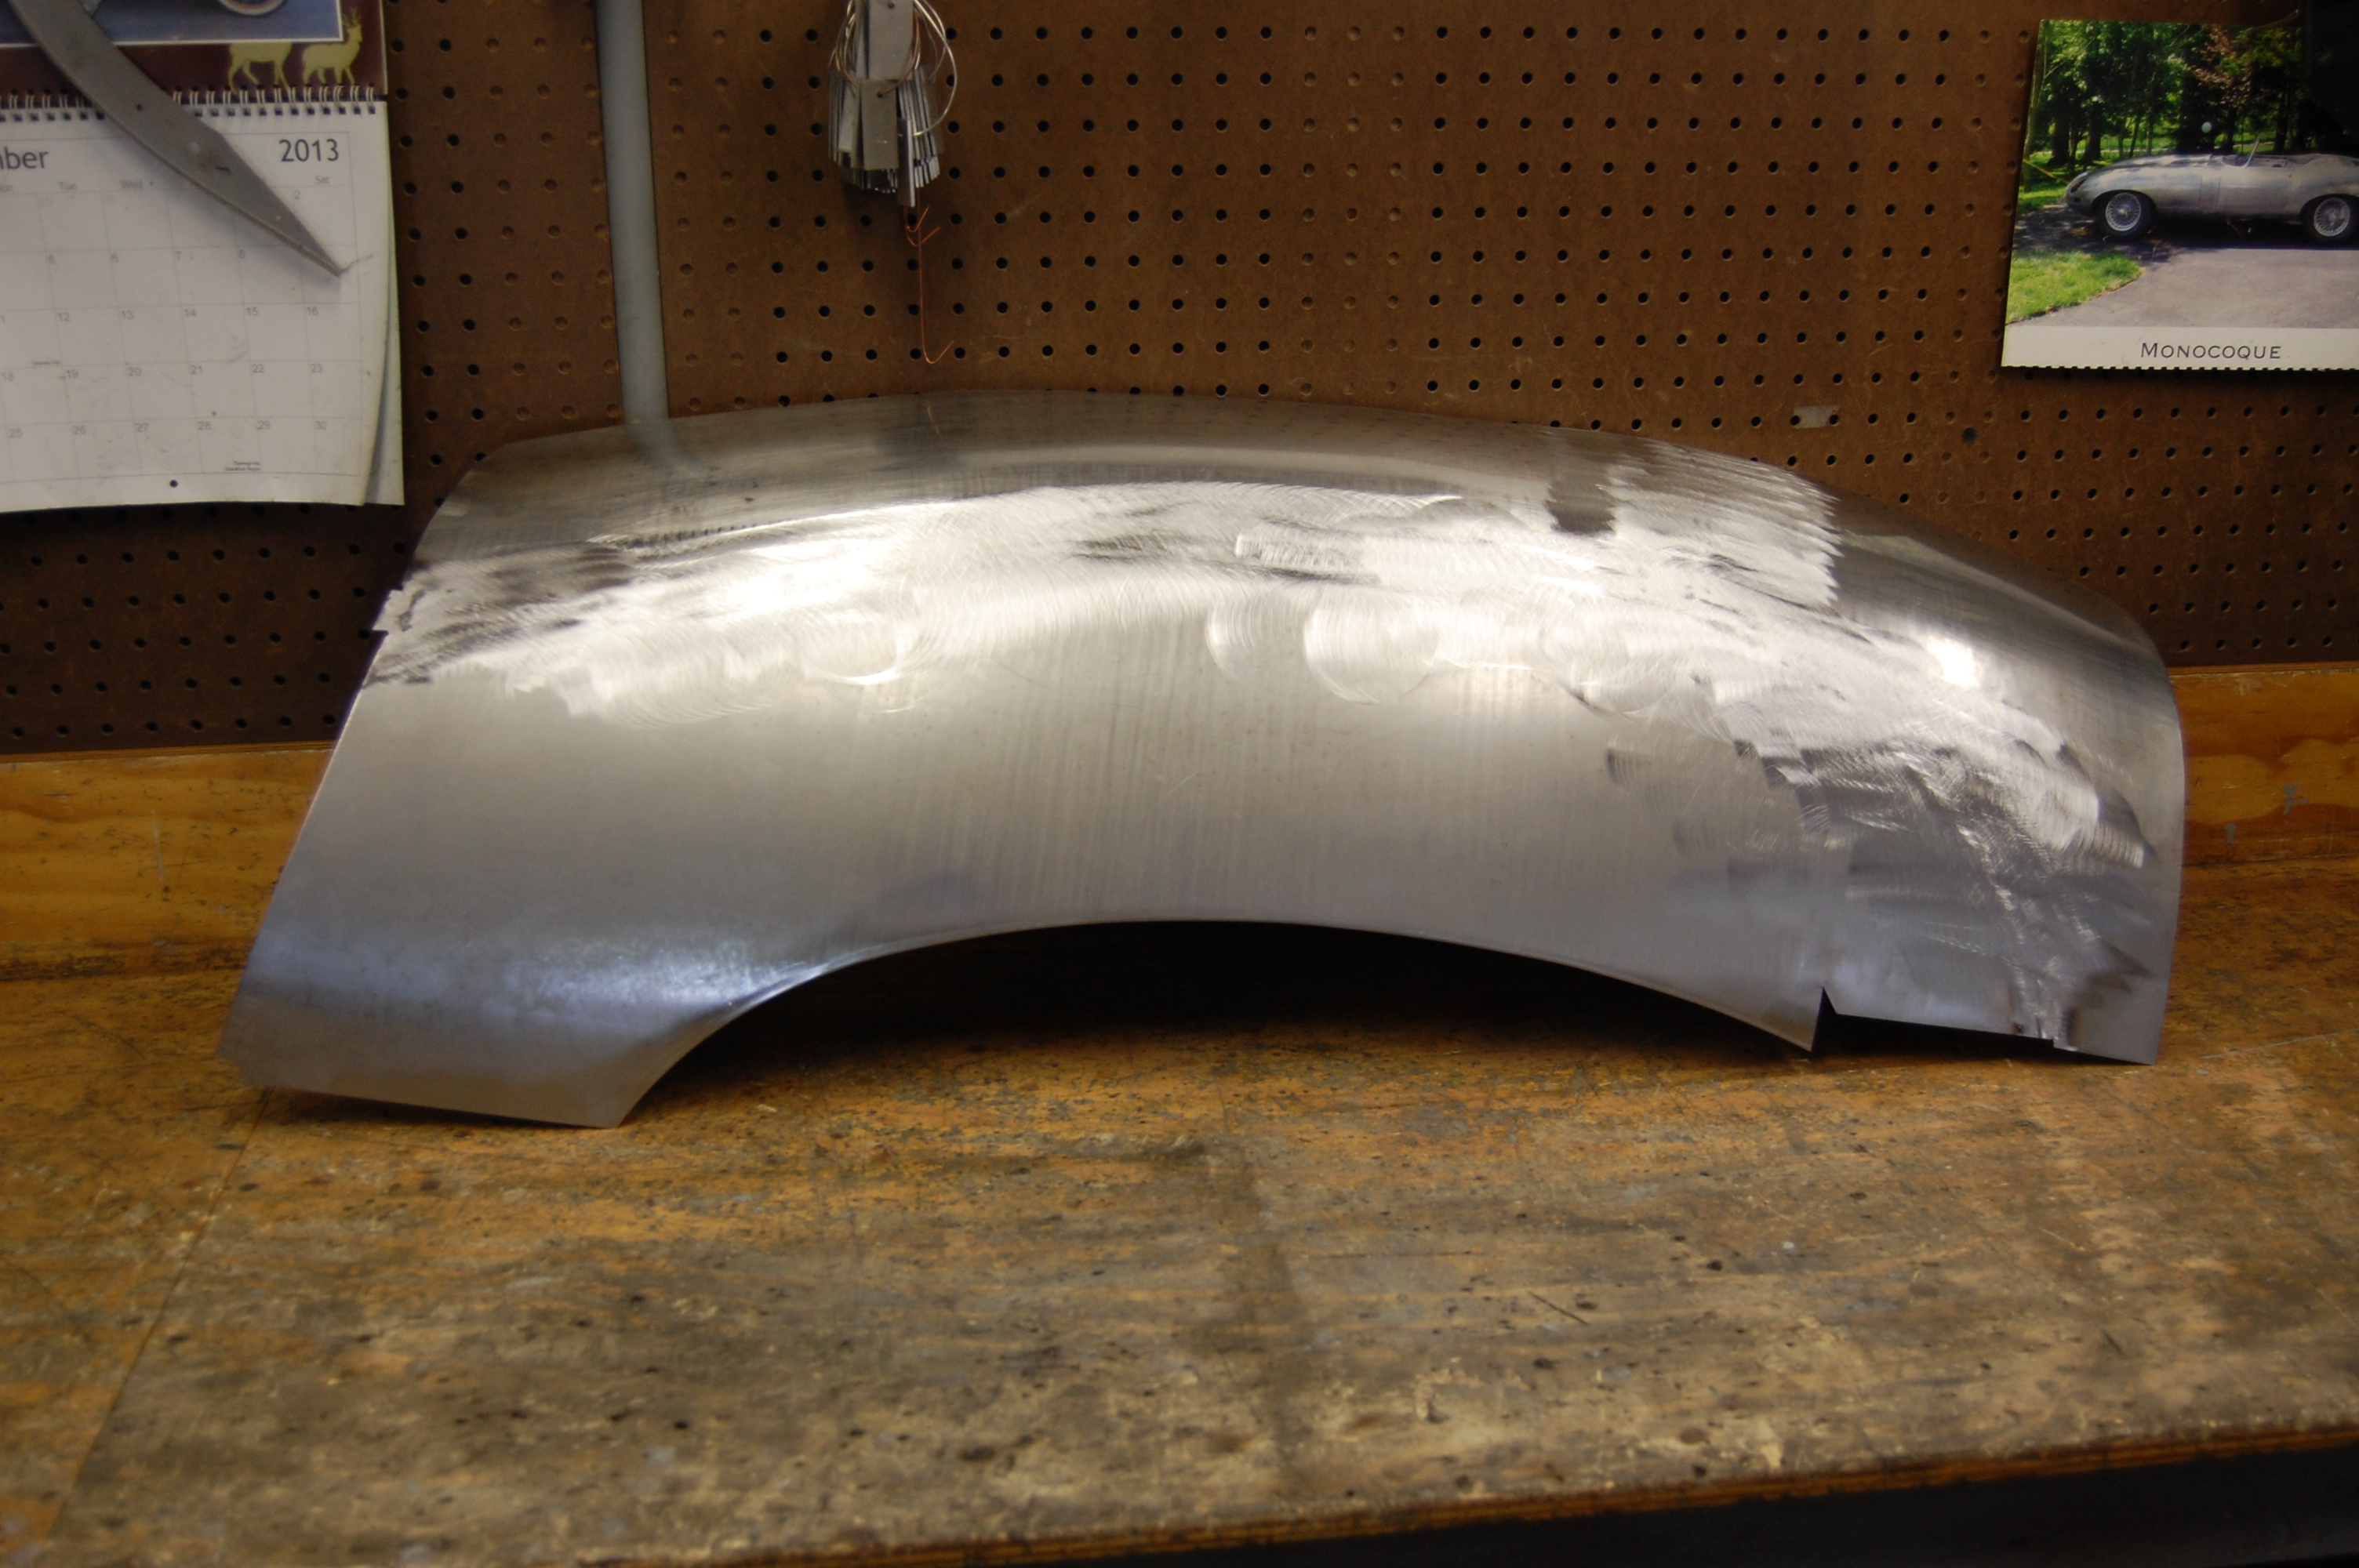
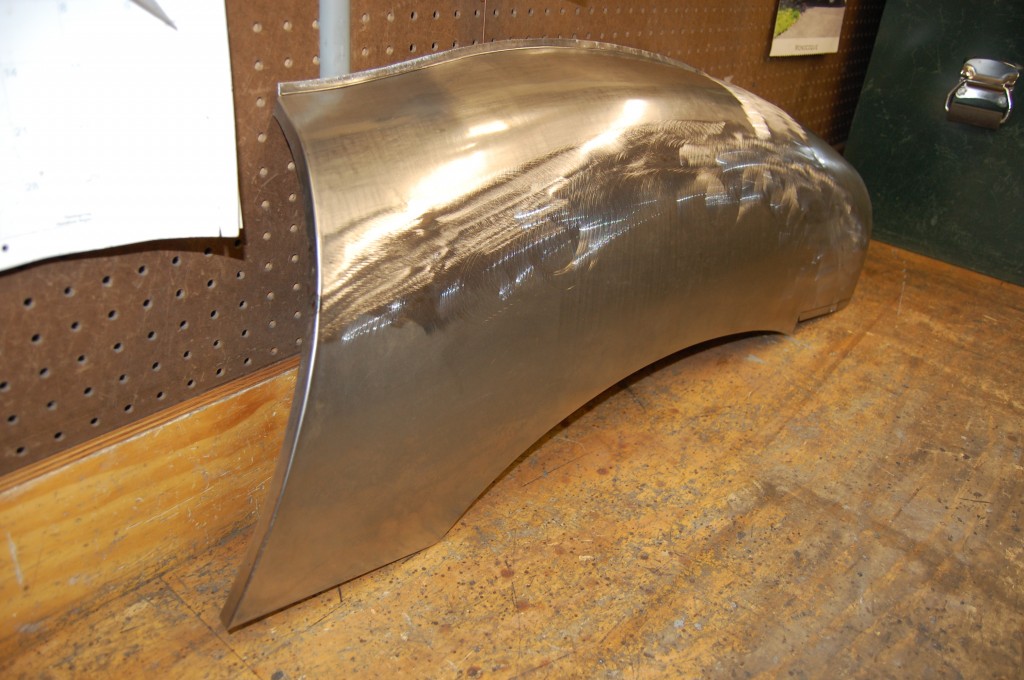
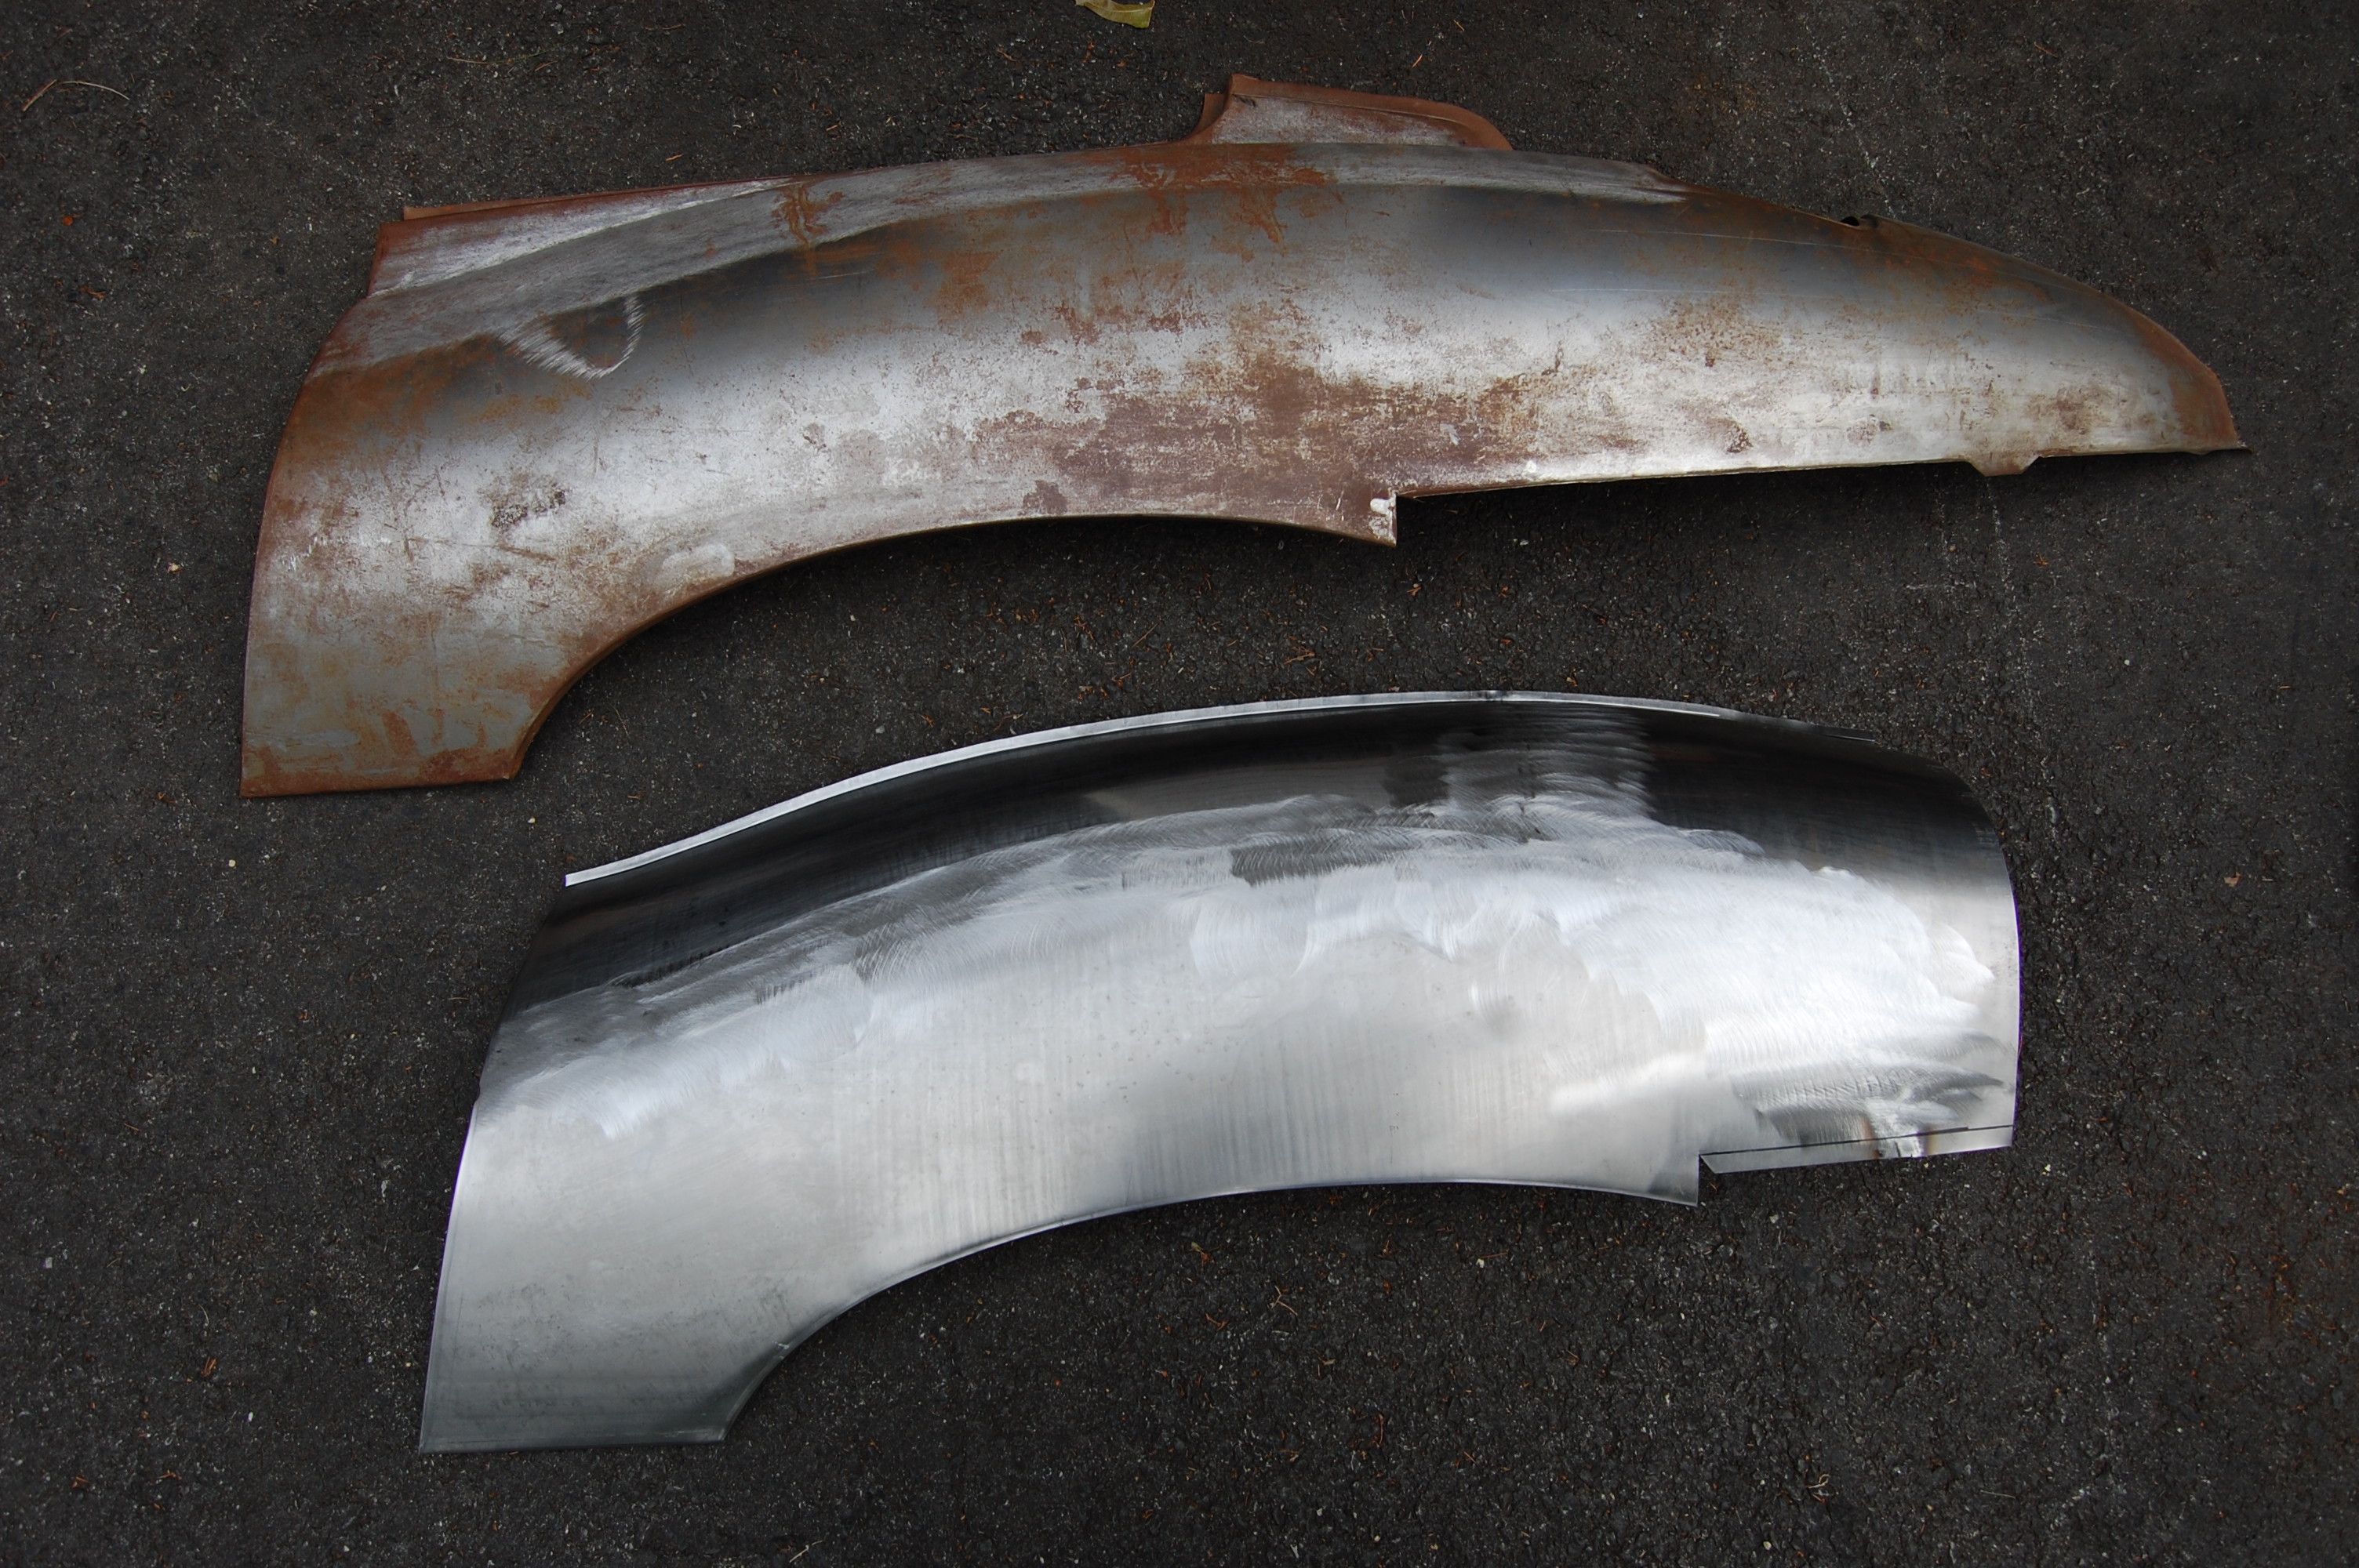
- Here is a shot of our new wing section next to the factory Jaguar replacement wing – it’s probably about 3/4 of the piece! I did not turn up the flange under the bumper blade, because I know from experience that this is tough to line up, and a 1/16″ adjustment can make a big difference. So the customer can get this lined up on their car. and turn that in last. Besides, their rear seam is going to be coming into that section – somewhere…
-
- Well, that’s it for the “Jaguar E-Type Rear WIng Repair” series! After several years, I think we have finally conquered this difficult area! And you can too! Just take a good look at the photo above – I think it’s pretty safe to say that wahatever the extent of the damage is on your E-Type, Monocoque metalworks has the RIGHT panel to fix the problem! Call Us!