Long-term followers of my blog will know that the repair that I hate the most is patching the rear wings of E-Type Coupes and 2+2’s above the rear wheel arch. The big problem here is warpage of the rear wing when welding in the patch. If the wing were off the car – like the front wings, I can weld in a patch, planish, shrink, etc. – and make the panel as smooth as a baby’s bottom before bolting it back into the bonnet. But on the rear wings, as you are welding in the repair, you are also closing off access to the rear of the panel – AAAGGGHHHH!
I have devised several ingenious solutions to this problem over the years, and I’m ready to offer repair pieces for this area in one of three “Stages” for your E-Type.
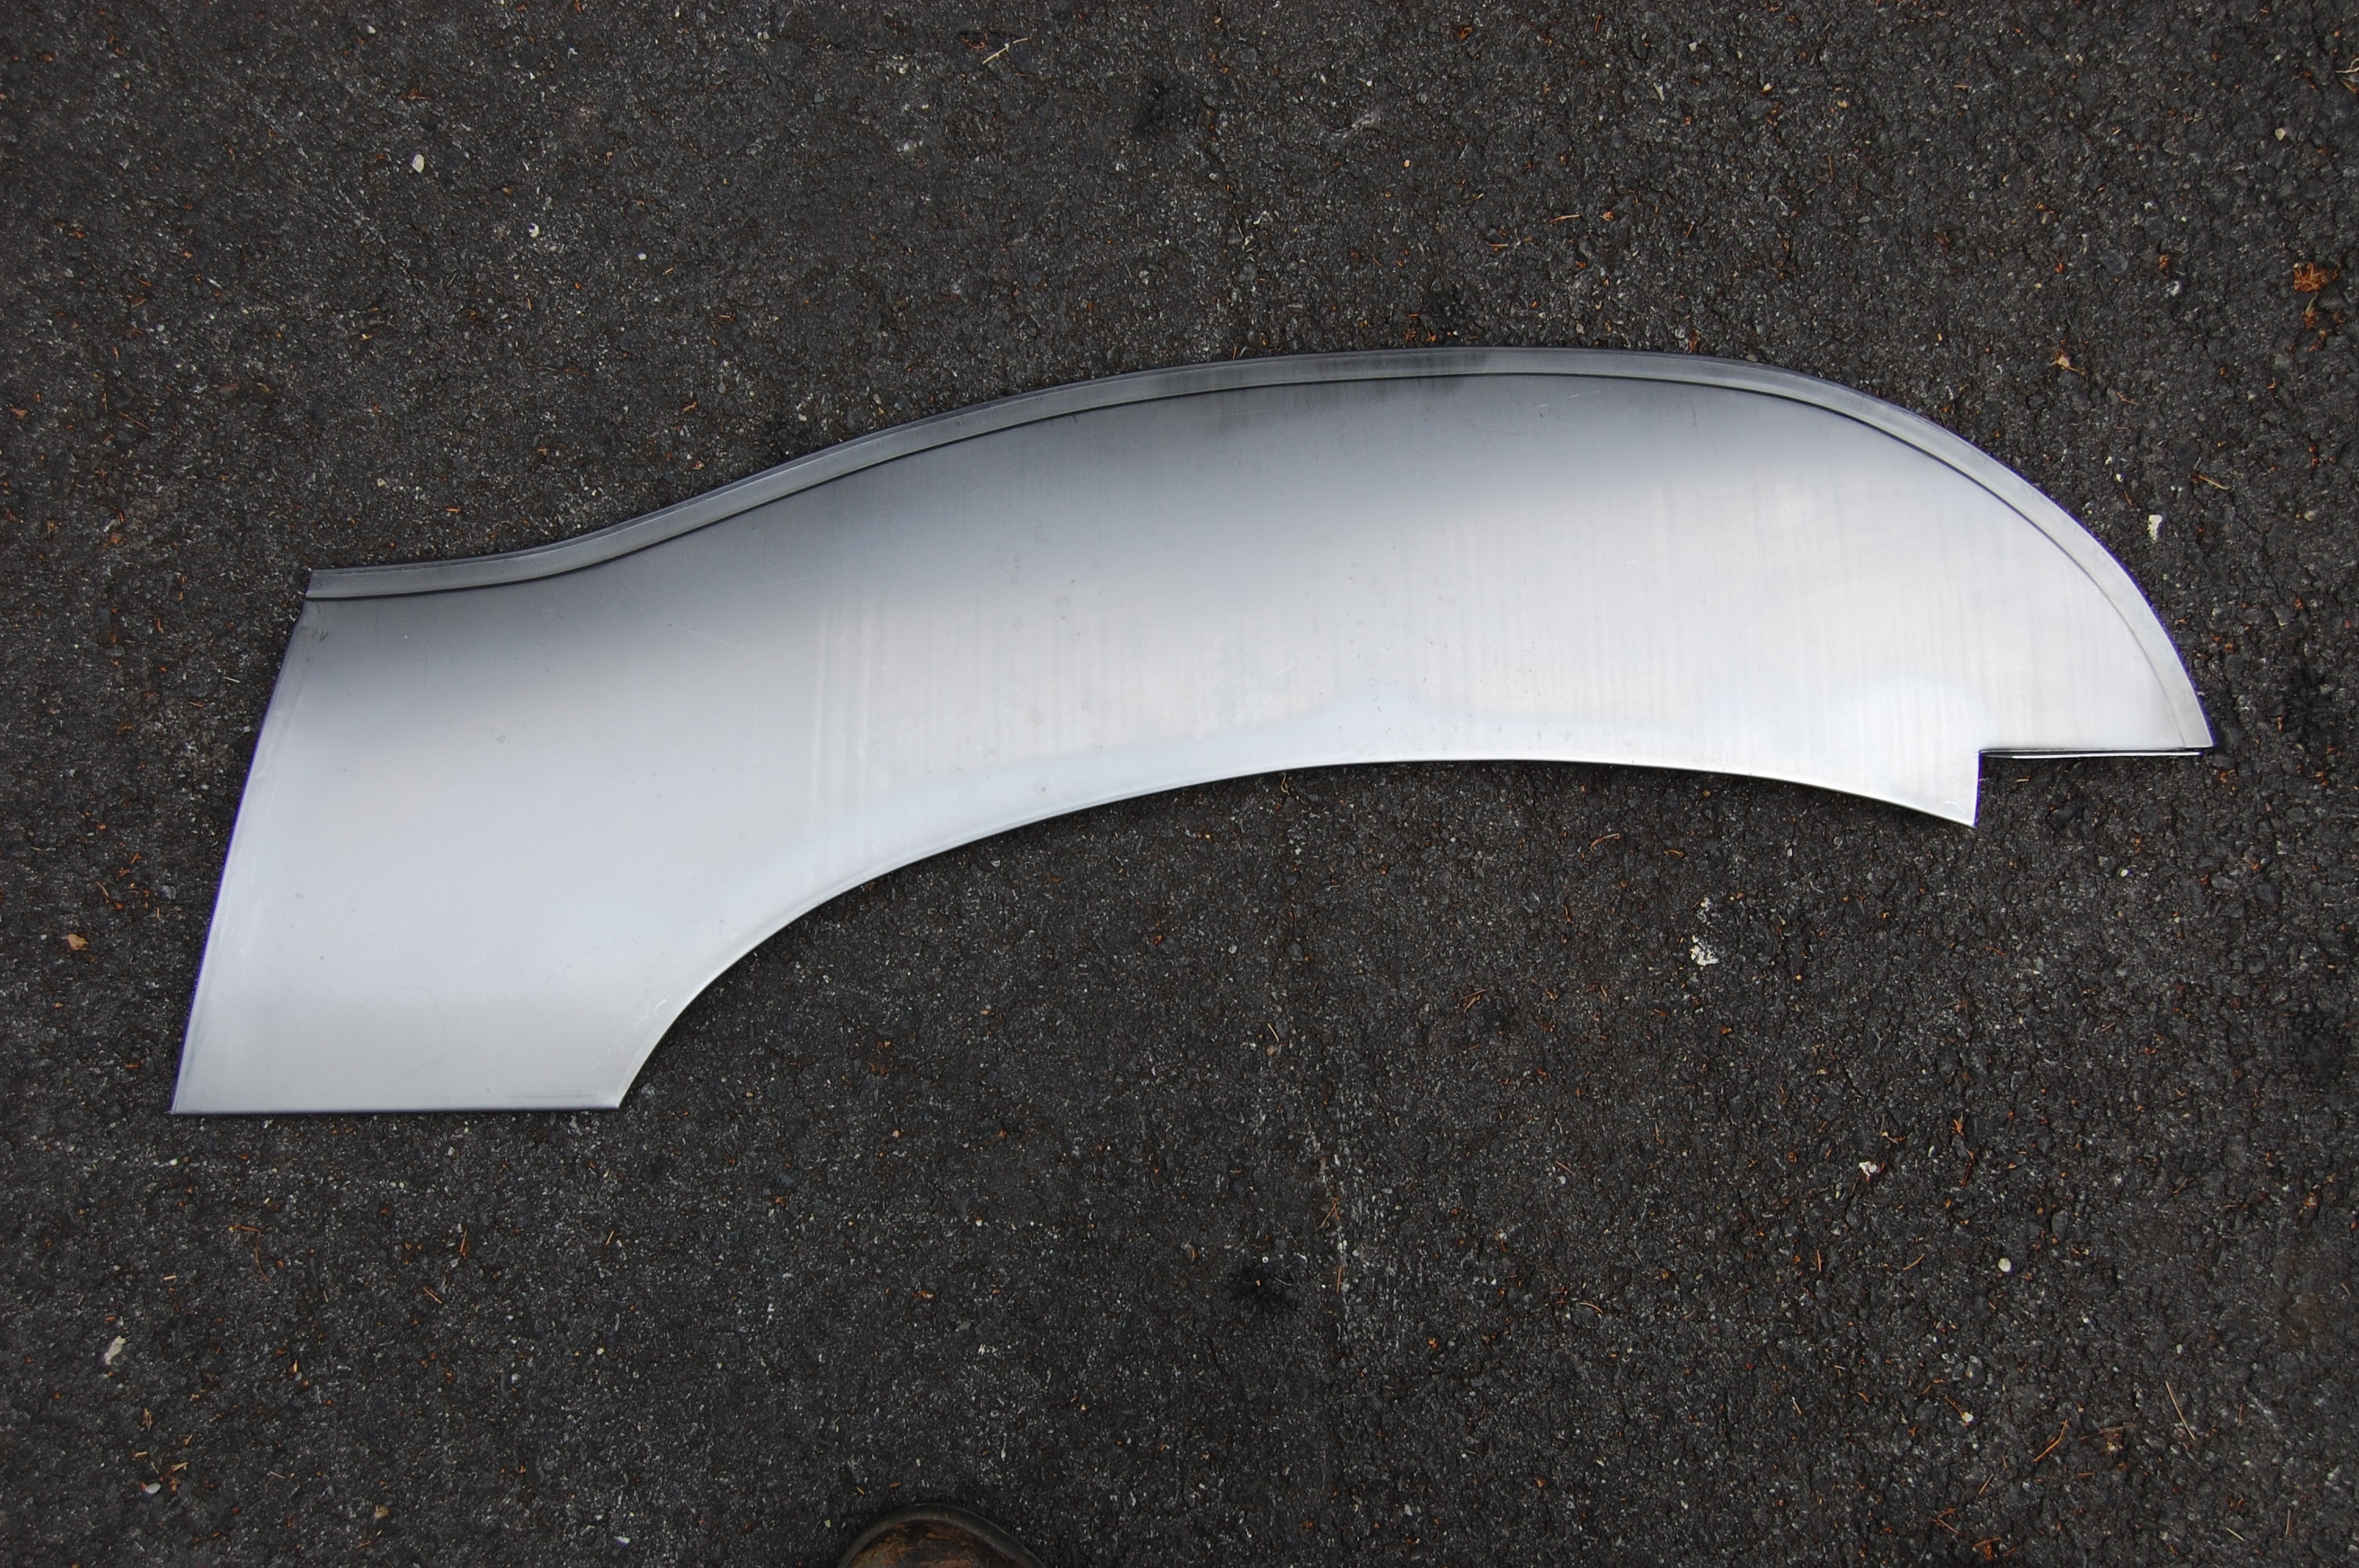
Stage 1 – Our standard 3″ patch piece that runs all the way from the rear edge of the door, up and over the rear wheel arch, and back to the forward tip of the rear bumper. 3 inches is MORE than enough to repair even the worst rust in this area. What we recommend is to cut down the repair panel to the absolute minimum that you need – sometimes about 1.5 inches will do the trick. This places the weld very close to the turned edge of the panel, which will greatly reduce distortion. We also recommend rolling or hammering a stepped flange into the upper edge of the repair panel to tuck the repair under the original wing, and then using a series of plug welds and tacks along the panel edge to further reduce the chances of distortion from excessive welding heat. Our repair panel is DEAD ON – we actually just tweaked it a little further last week. And the crisp wheel edge on our piece is correct – and second to none. The “other guys” panel’s wheel edge flange looks like my 5-year-old son did it with the edge of a bench and a rock – it’s horrible…
Stage 2 – Sadly, after 50 years, many E-Type coupes have already been “fixed” in this area, and this is where the REAL nightmare starts! We often see GIANT patch panels – 6 inches high or more, overlapped, brazed in, or welded in with so much heat that it has pretzled the wing! Then, after the repair has been butchered, and the wing is distorted AND sunken in, they lay in MOUNTAINS of filler – up to 1 inch thick! Unfortunately, once this has happened, the standard 3 inch repair piece that WOULD have worked out very well, is too small for this mess. In this case, we now offer an “intermediate” repair piece that we call “Stage 2”. This piece is 6 inches high, and also goes from the rear edge of the door, all the way around the wheel arch, and back about 5 inches PAST the forward tip of the rear bumper. Now, the weld of this piece is way up in the wing on no-=mans land – no way you can weld it there and retain the wing’s proper bulge outward. This is where our piece shines…
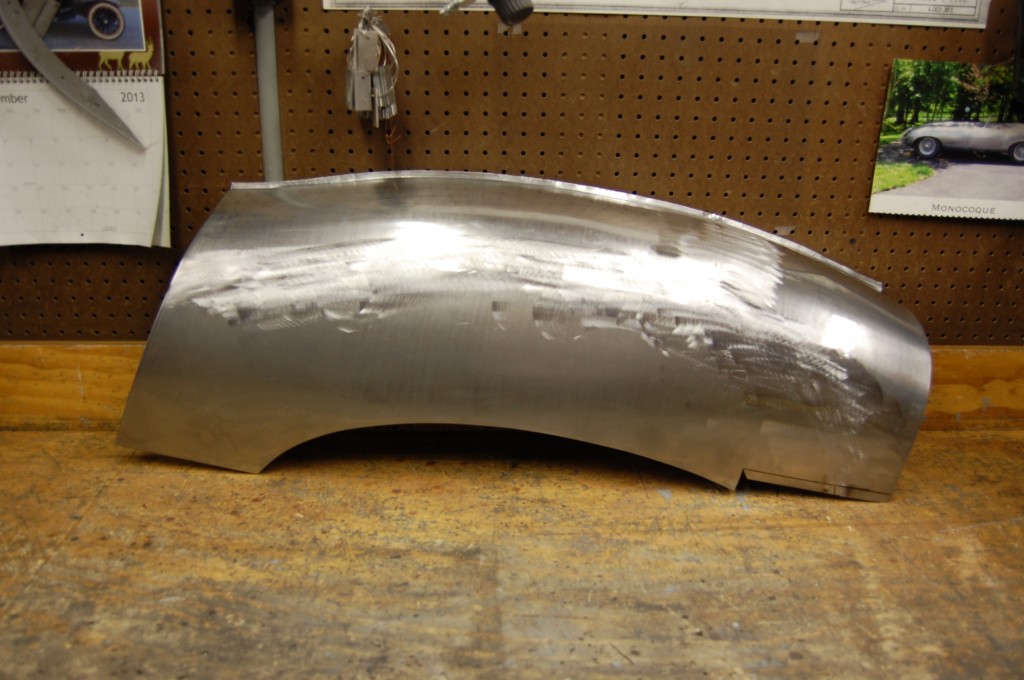
I came up with this laying in bed one night last Summer. On this Stage 2 piece, we go ahead and roll in the stepped flange for you at the top edge, AND we turn the top edge at a 90-degree angle inward and use it as a re-inforcing rib that we can shaped just right. Now, the patch panel acts as a patch AND a support rib all in one! These pieces are made with a large roller and the English wheel, so they are more costly, but they will save your rear wings and make a great, solid repair.
Stage 3 – When all else fails, and you just have a TOTAL TRAIN WRECK on your hands, we will go ahead and make you a custom rear wing repair panel that covers your entire damaged area based on photos that you send in. This is custom work that is not cheap, but it is usually still less than half the price of a new replacement wing, and man, if you can avoid that, you should!
Stage 4 – Total Wing Failure… Sometimes, there’s just no other option other than replacing the ENTIRE rear wing… If this looks like it is the case on your E-Type – call us first – we will do everything we can to get you through it with some type of Stage 3 custom option if we can.
Inner wing Repair panel – It’s INSANE that after all of these years, and all of the E-Type repaired, we are the ONLY source for these! Coupes and 2+2’s rust over the rear wheel arch, where the roadsters do not, because the closed cars have an inner wheel well. This inner piece comes down and joins with the outer, and is spot-welded all along the wheel arch flange. Moisture being trapped between the inner and outer wing is what causes the rust in the first place, and if your outer wing is rusted out, you can be damn sure your inner wing needs work too! Our standard piece here is a PERFECT fit with the outer wing – it’s not just the same shape, but we finally have it down just right.. This piece is 3.5 inches high, and plenty to make the repair, as by this height above the wheel arch, the inner and outer wings are about an inch apart, and don’t rust that high up.
I’m going to throw a few photos of the various stages into this blog, and then write a separate blog showing the details of EACH of these stages. This should help you solve this problem on ANY E-Type!
-
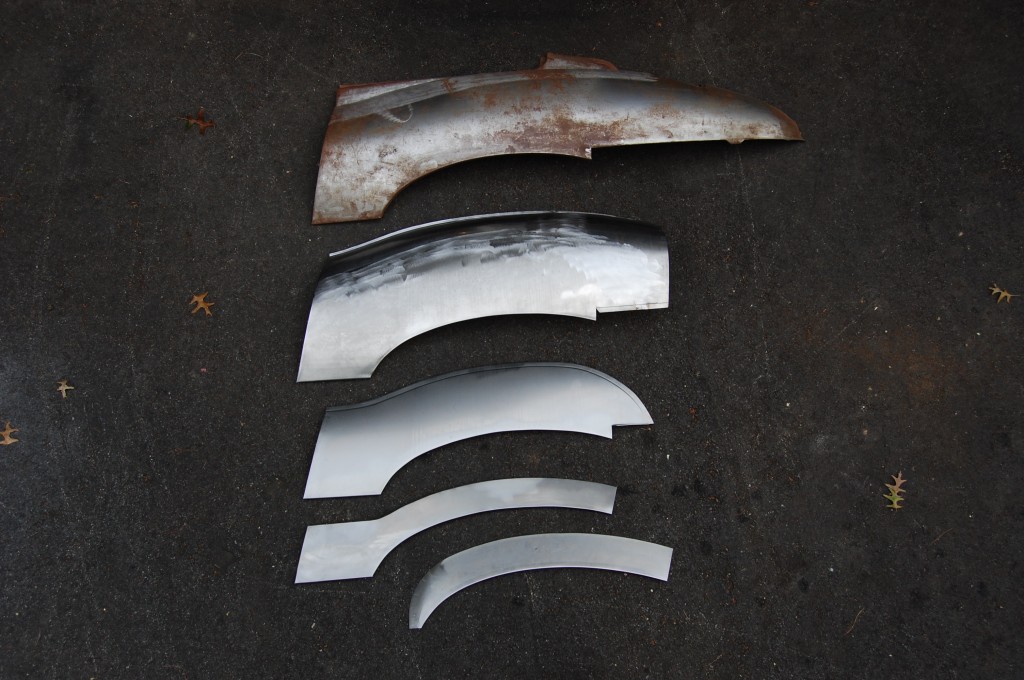
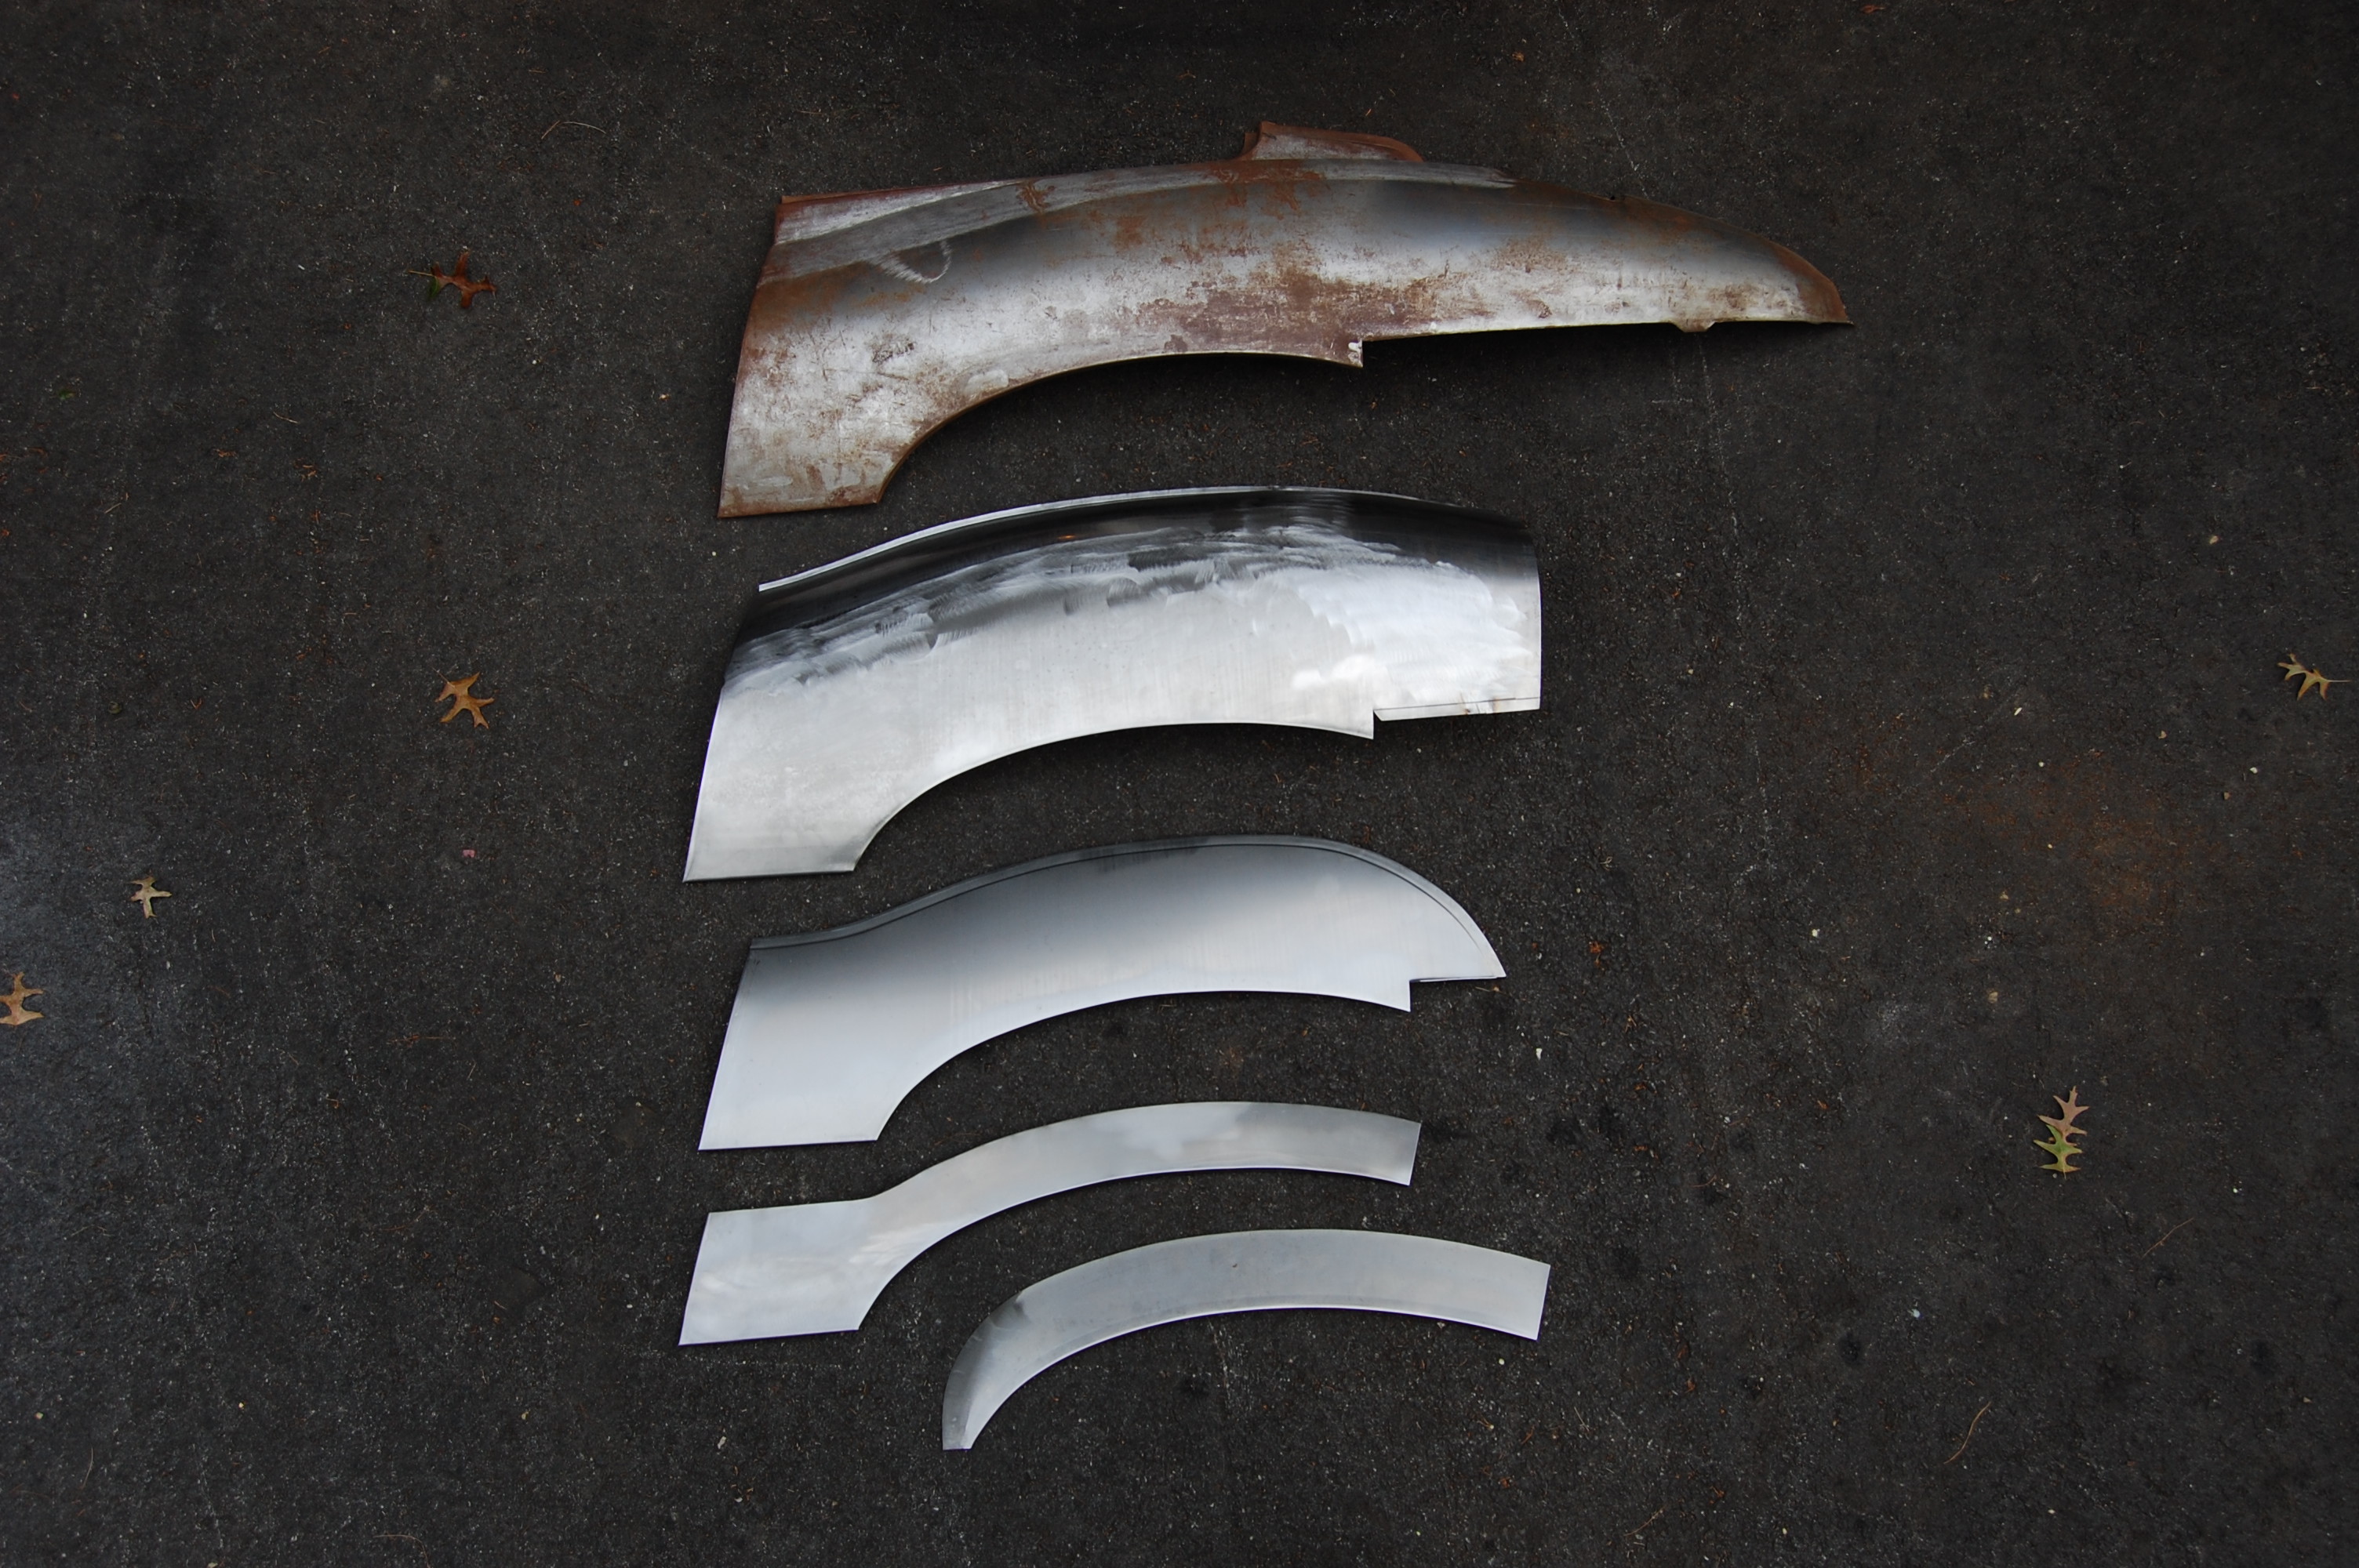
- Here is everything in one shot! From the bottom going up – Inner rear wing repair panel – Stage 1, 3-inch standard patch – Stage 2, 6-inch curved and reinforced patch with stepped flange – Stage 3, larger rear wing patch custom fabricated to repair the damage on YOUR E-Type – Stage 4, NOS Jaguar rear wing (don’t let the surface rust foll you – this panel is an original Jaguar rear wing – worth its weight in gold!)
-
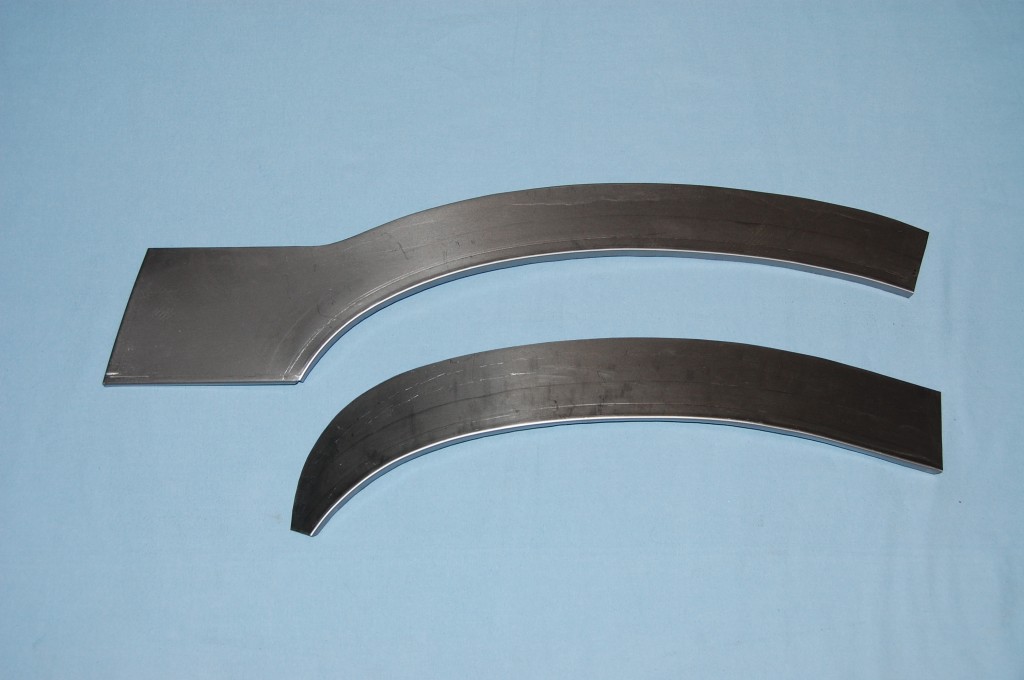
- Stage 1 – these panels will work well together to repair even the worst rear wing rust on VIRGIN E-Types that have not already been butchered by someone else… Inner rear wheel arch repair – $68.00. Outer rear wheel arch repair – $85.00. Both panels are EXTREMELY accurate, and fit all 6-cylinder E-Types and 2+2’s.

-

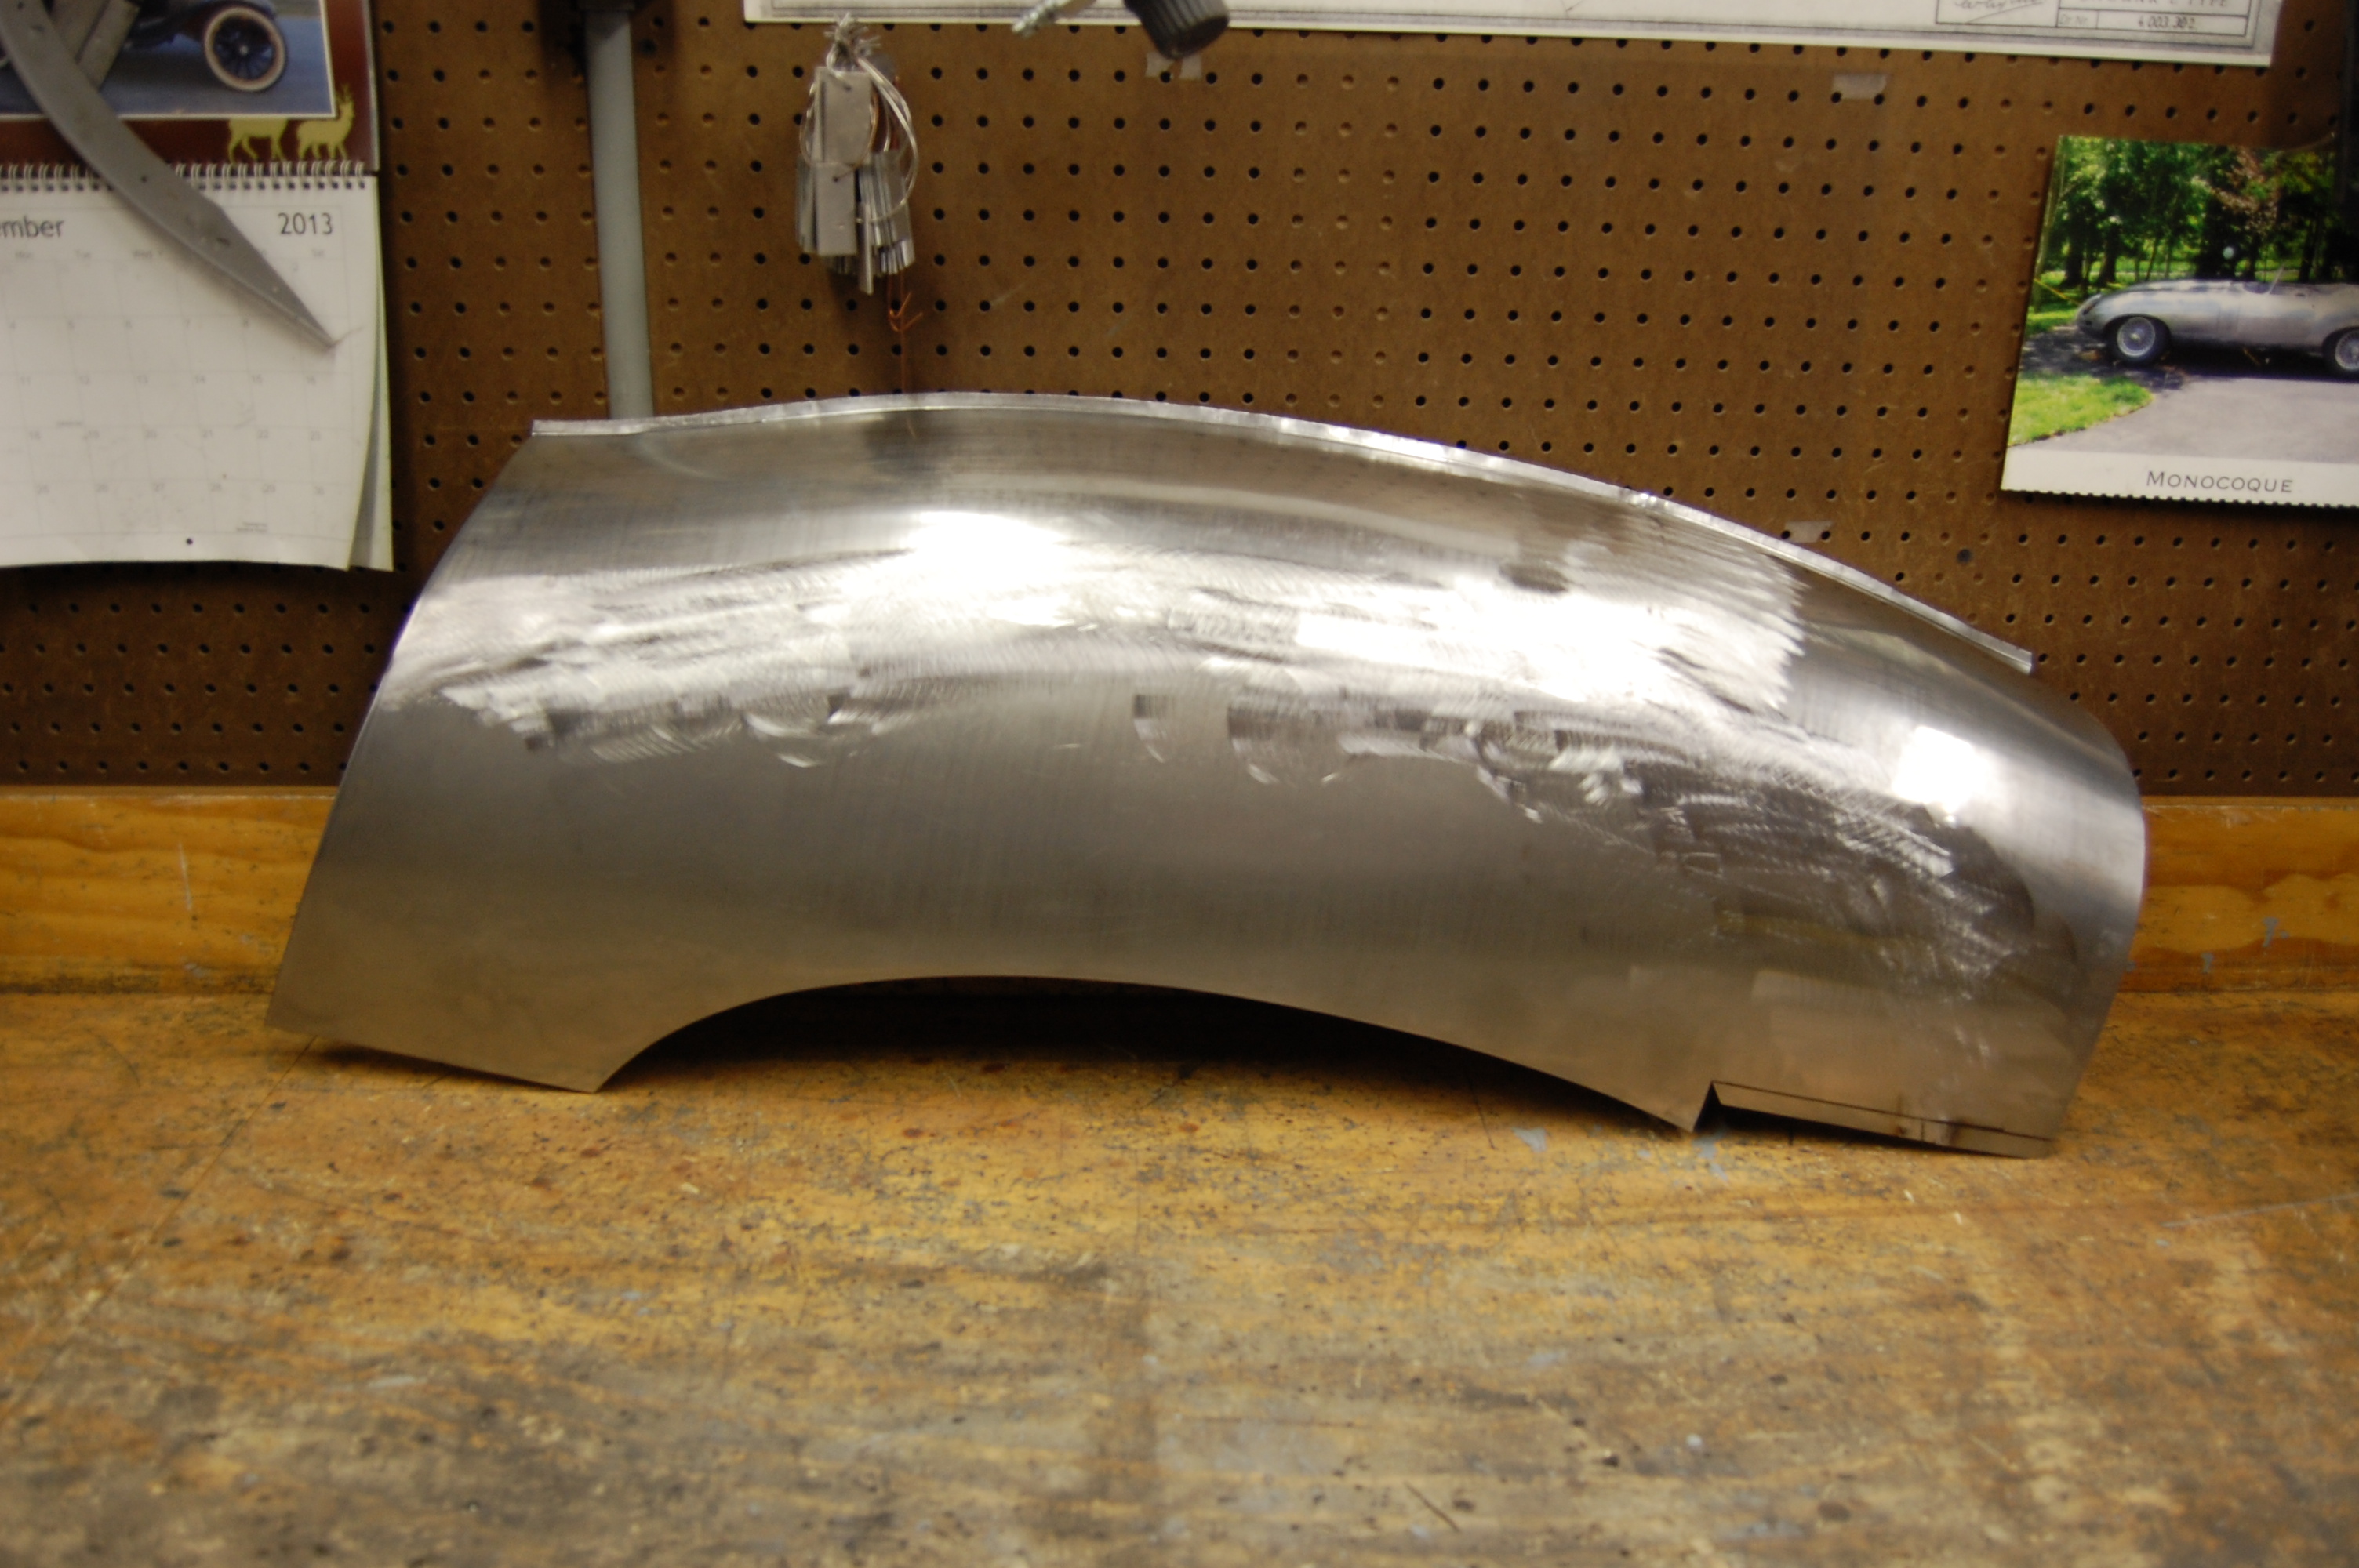
- Stage 2 – This piece is a compound curved repair piece that is designed to repair rear wings that have already been poorly repaired in the past. It has a stepped flange at the top edge to be tucked under and plug-welded to the existing wing, WITH a reinforcing rib to maintain the wings proper shape and bulge – and eliminate warpage from welding. This panel is $325 per side, and is shaped by me personally – it’s right!
-
- Stage 3 – You send photos, we make the piece! Using our flexible shape patterns from an original wing, and the English wheel, we fabricate a large section of the rear wing – ANY portion of it – utilizing the same techniques we use to fabricate aluminum E-Type race bonnets. This piece was $625 – a HUGE improvement over the current $1,400 price tag of a new replacement wing – whose shape and egdes are very suspect! Plus, with a custome piece like this designed for your car, we give you technical support, roll in stepped flanges, etc., and work with you to make the repair as correct, and simple, as it can be!