The customer had been contemplating the purchase of an “original 1961 bonnet” before we agreed to build one up in that configuration. So when we discovered that the gold bonnet’s center section was badly warped, he did purchase that bonnet as “Plan B” – of course, nothing’s ever quite that easy with an E-Type… The new, blue bonnet arrived at the shop with welded-louvers, but it wasn’t quite the “original” bonnet it was supposed to be.
Instead, the bonnet was a combination of many early pieces, some later pieces, and just a real hodge-podge of stuff!
The center section did have the original welded-in louvers, but NOT welded flanges! Instead, it had very crudely formed and much too-wide home-made flanges, that were bonded to the center section. I can tell that it NEVER had flanges welded to it, so it is either a cross-over piece from late-1961, or possibly a very early replacement panel – we’ll never know for sure…
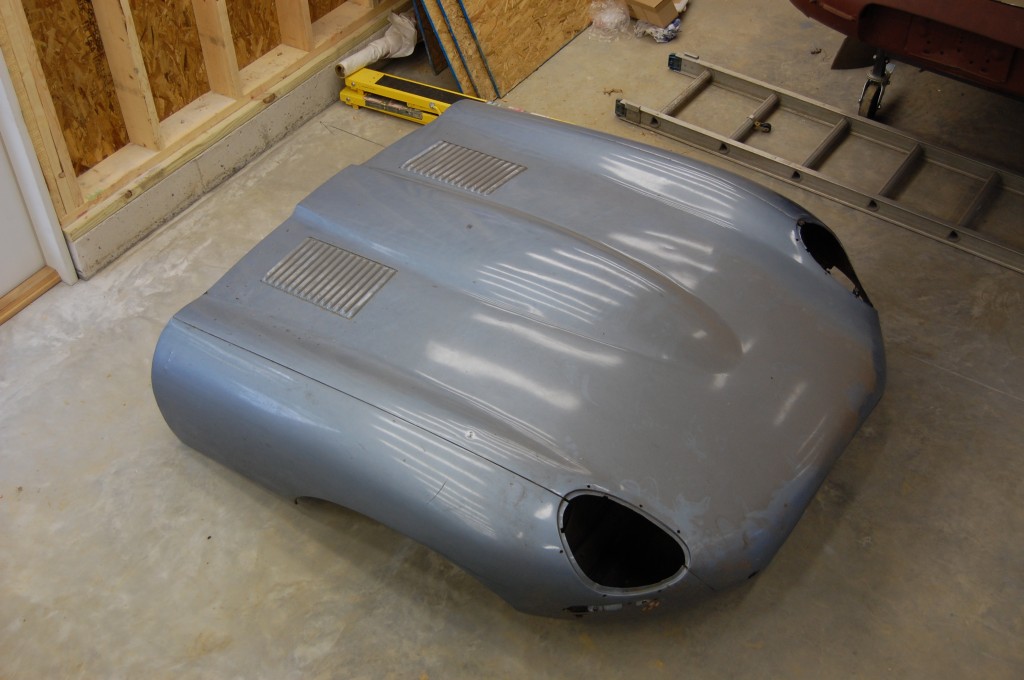
Here's bonnet #2 - supposedly an original 1961 bonnet, but actually a poorly restored conglomeration of parts...
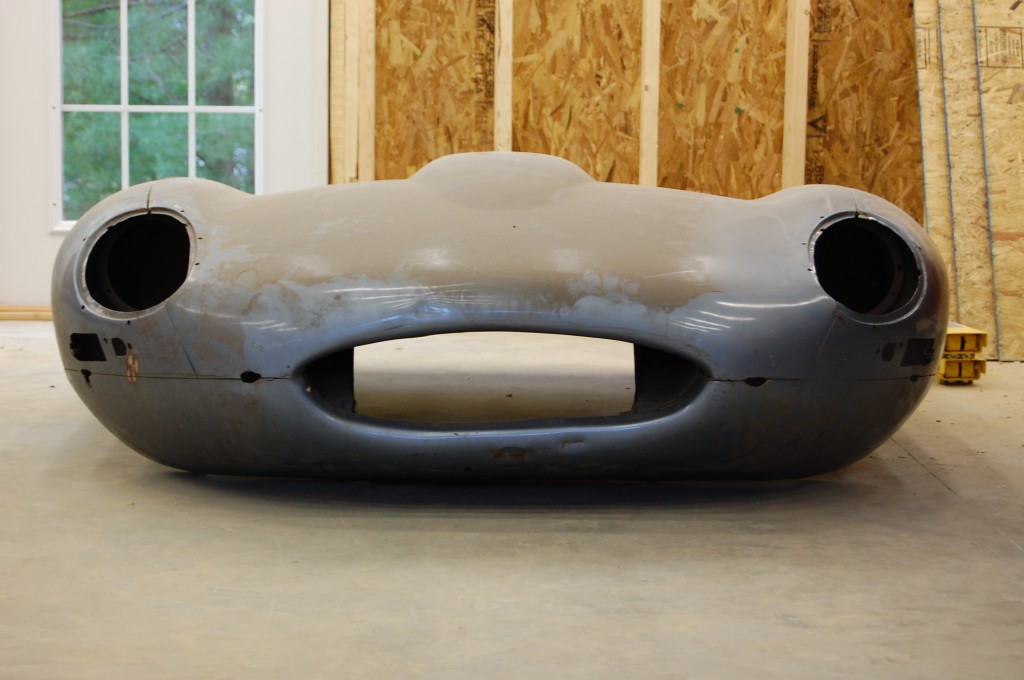
Sorry about all the dust - I didn't have the time to clean it off when the photo was taken. This bonnet was pulled from a partially restored car, and the bodywork and paint is complete - this mouth is "done" - yes, a few small dents have gotten into it in storage, but they are not responsible for the mis-shapen lower valance. What a nightmare... We will make the mouth contour perfect.
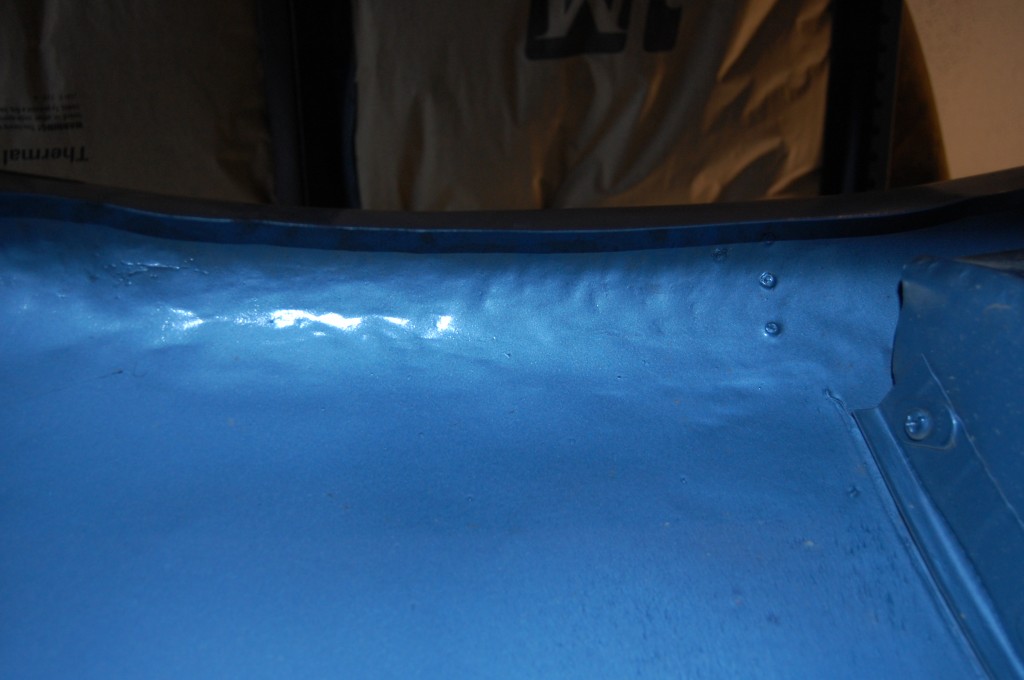
Here are the tell-tale signs of thick filler in the nose - lumps from a primitive hammering job - and dent puller holes. Someday I hope to get an E-Type into the shop that has never seen a dent puller in its past...
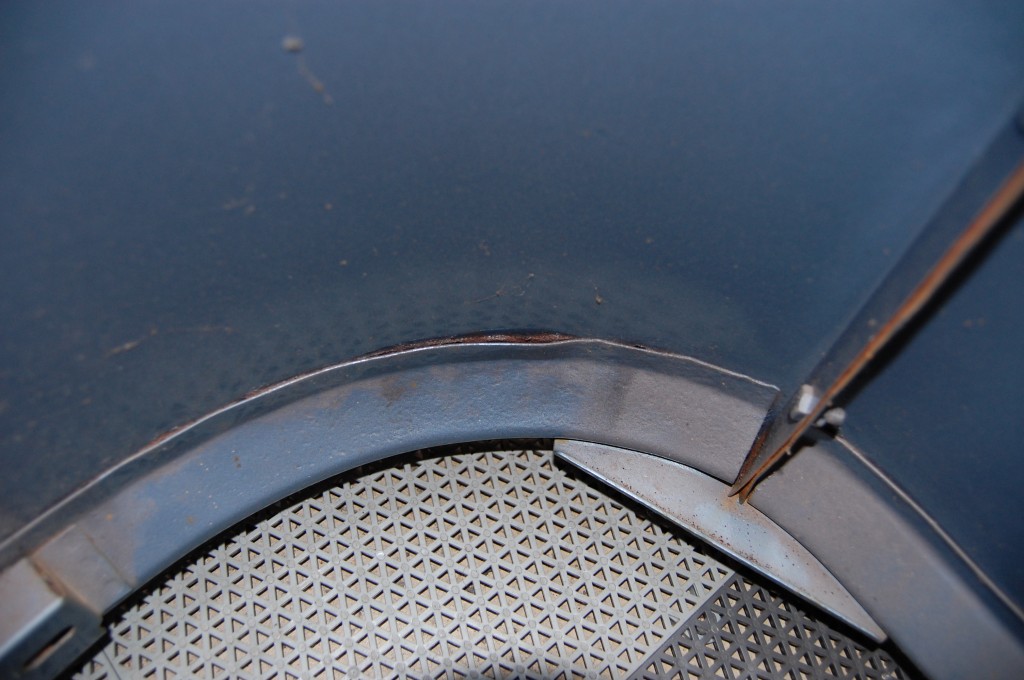
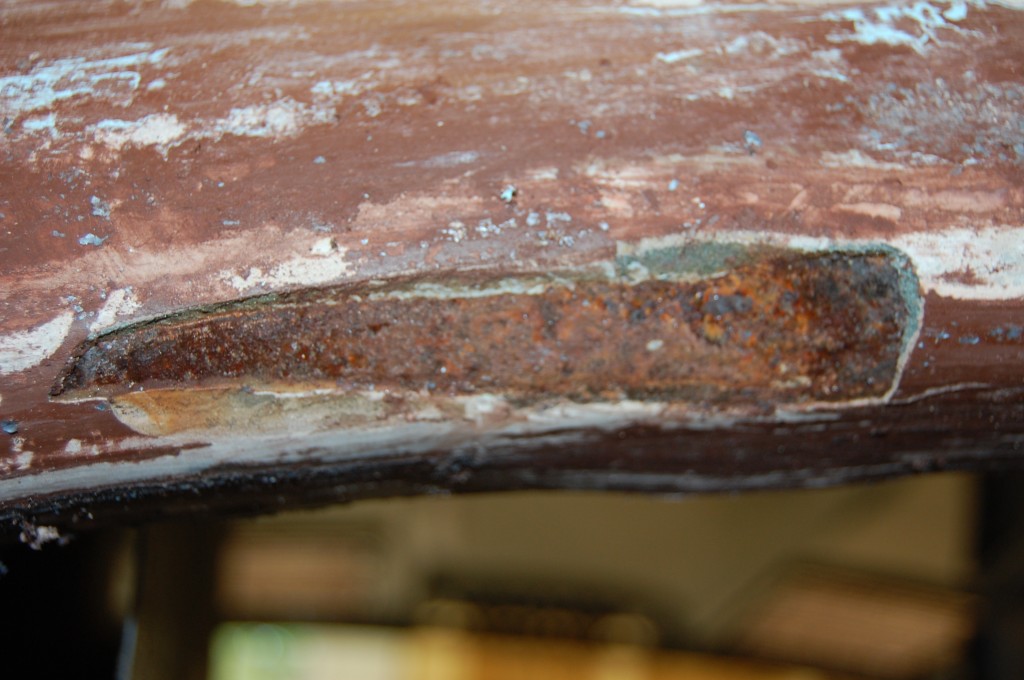
The RH wing IS the early, 1961 welded-flange style, but rust has begun to form between it and the outer skin...
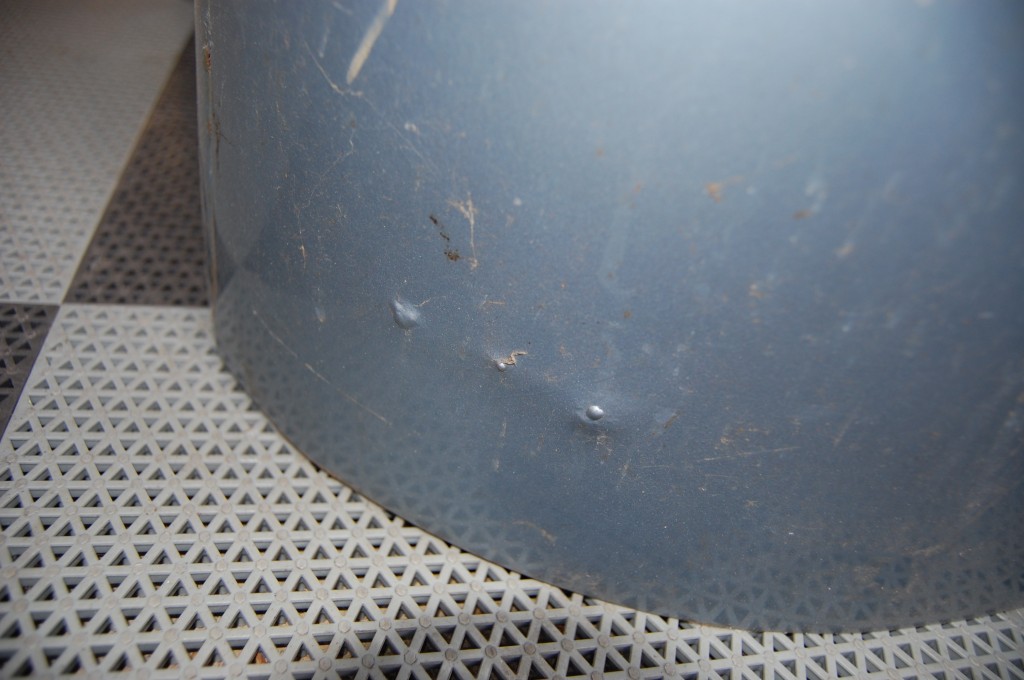
...and here you can see where that has come all the way through. This is what happens to early welded flange bonnets when they are not properly treated during assembly - which they weren't during their original production. Unfortunately, this shows up all over the place on '61 bonnets as they age...
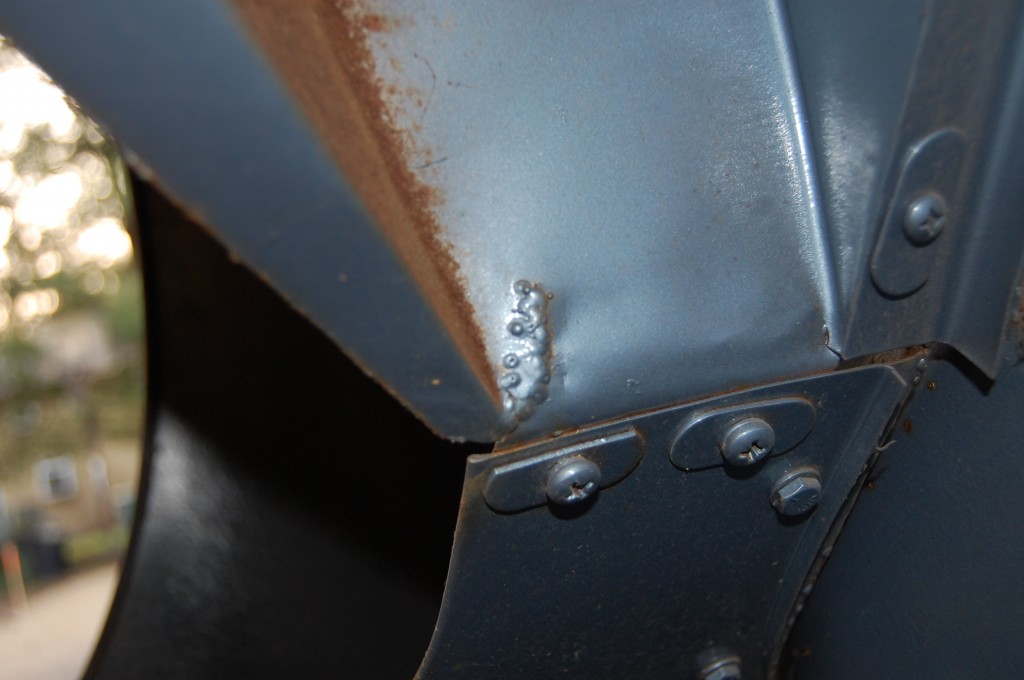
The inner valances were original 1961 pieces - there are some very slight differences that set them apart - so it was nice to get those. This one has the usual tear on the rear of the RH side - I have NEVER seen one of these that was not torn here - they ALL do it. Of course, I'd rather be dealing with a virgin tear instead of this crude repair. We use a TIG welder, sanding discs, and even a Dremel tool to make an invisible repair here.
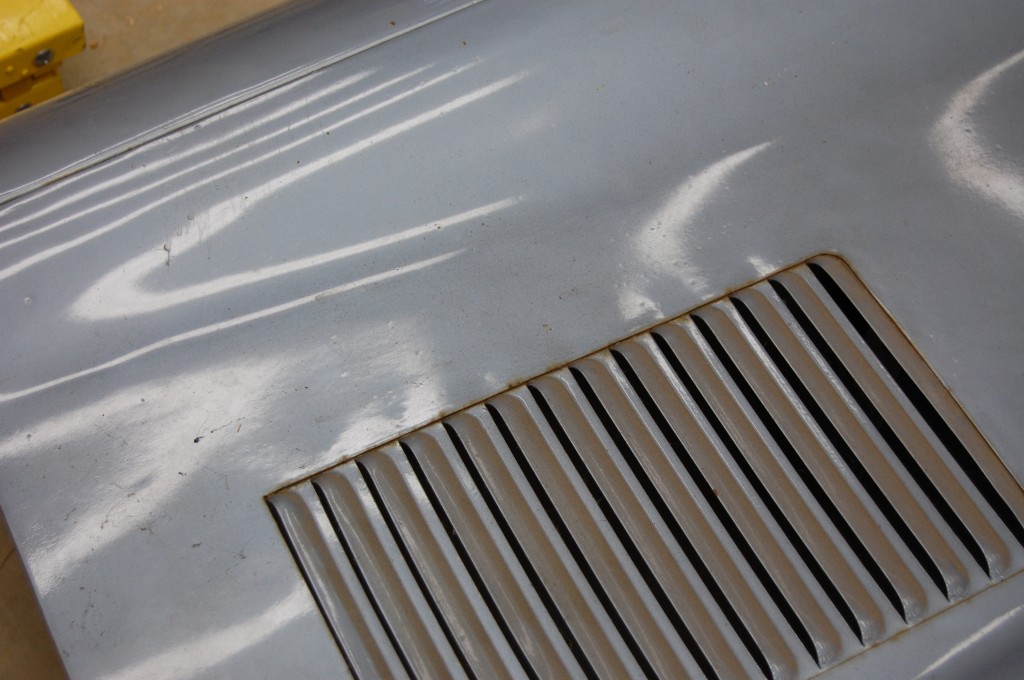
Here's a shot of the welded louvers. The poor bodywork performed on this bonnet did not properly block-sand out the spot-welds. Contrary to what some believe - they should NOT show through the apint - they only do that as the bonnet aged over time and rust formed betweent the two surfaces...
The RH wing was an original 1961 style with welded flanges, that had already rusted completely through the outer skin in places on the rearward flange.
The LH wing was a bonded-flange, 4.2 style.
The lower valance looks like a solid original, but it is LOADED with filler – off the bonnet it weighs a TON!
The headlamp diaphragms were new reproductions panels, still in their black shipping primer and stickers, but without ANY flange connecting them to the center section.
The LH wheel-well mudshield was badly rusted in the lower beaded edge.
The RH mudshield was an incorrectly made reproduction, with a hemmed lower edge instead of a beaded one.
The one piece of really GOOD news is that both inner valances are original 1961 pieces – there are slight differences that we will discuss in a later post, so this was REALLY good news – although in keeping with the nightmarish theme, the longer, LH side had been cut and re-welded shorter in the rear as part of a very lazy and sloppy assembly.
Overall, this was a REAL MESS – and the worst part is that it was filled and painted, and declared in a FINISHED state by another shop – with a HORRIBLY shaped mouth! So while I’m at it, I might as well tell you the story of how this bonnet get into this state… Several years ago, the owner of an E-Type restoration shop in New England went to jail for fraud. This bonnet came from that shop – here’s the story:
Customers would drop their cars off at the shop for full restoration, and cars were coming out of the shop completely restored, looking great, with happy customers. But inside the “sausage factory”, something was amiss… What was REALLY going on in there was a type of “ponzi scheme”. This is a good cautionary tale for choosing your restoration help VERY carefully!
Once cars came in, they were completely disassembled, and the parts just mixed in with the parts from all of the other cars coming in. These parts were all used to feed an “E-Type assembly line” – and the first few cars that came off that line were very nice restorations I suppose… The problem was that these first cars were a mixture of parts from several cars that were disassembled. So if a door was rusted out, they just used another solid door from another car. If a bonnet was dented up, they used another one, and so forth, for every part of the car. Doing it this way makes it easy to get the first few cars out for very little investment besides labor, but further on, you owe customers properly restored cars, and all you have left are the worst parts… The owners were apparently spending the money they did make as fast as they could get their hands on it, and in the end, they went under with several cars still on their assembly line. This bonnet came from one of those cars…
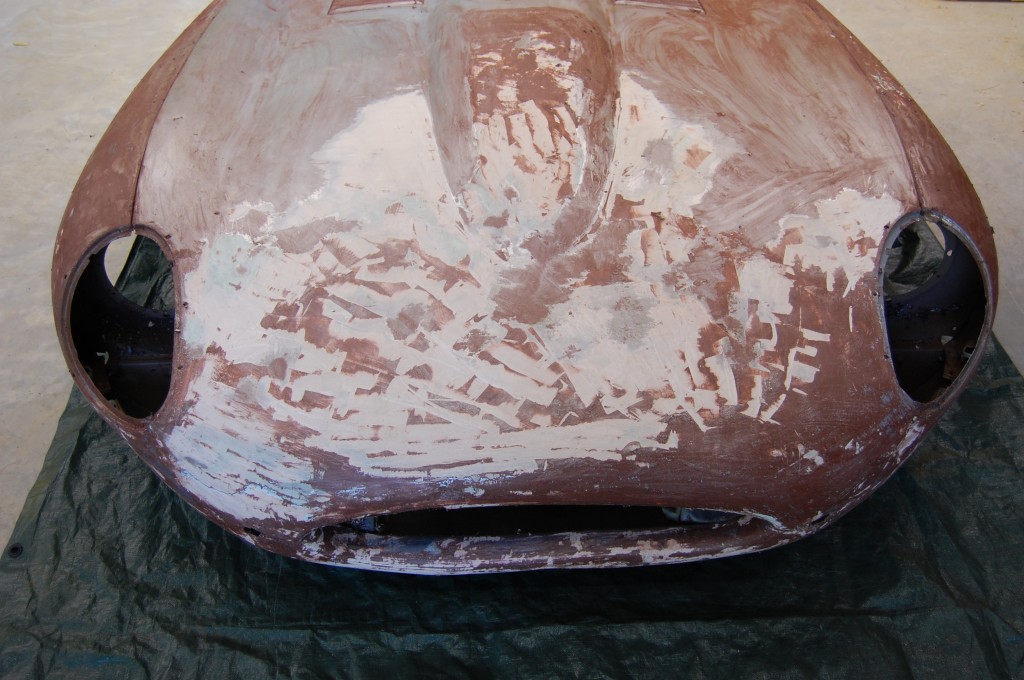
Because of the existing sandblast warpage from the first (gold) bonnet, and the rarity of these 1961 pieces, the customer requested that we strip the blue bonnet by hand with chemicals. Here, you can see the extensive use of filler in the nose. You might end up with a light skim of filler covering this much of the bonnet in a properly retored E-Type, but that's not what this is - this ranged from 1/4" to 3/8"...
If there was ever a case for proper hammer and dolly work, and NOT caking the nose of an E-Type with filler, this is it! I got a fingernail under this and popped it out with my hands... Filler is for surface imperfections - NOT shaping!!!
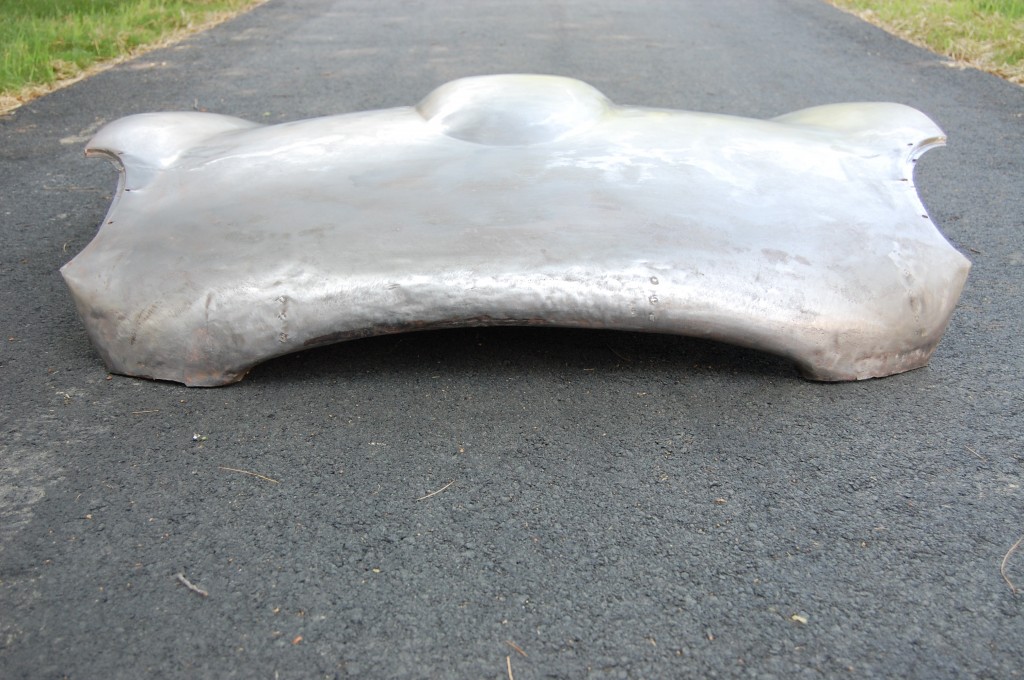
The center section is now stripped bare. It needs work, but it's actually pretty good - a little time spent reshaping this will make it perfect again - and it won't be an 8-hour battle like the last center section we did...
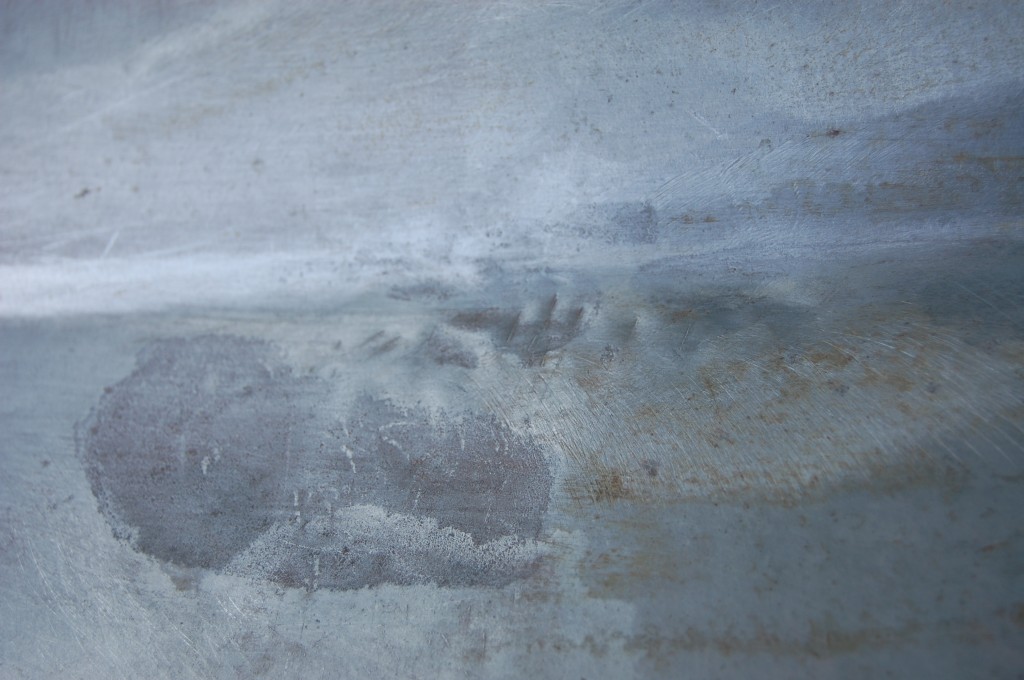
This is the side crease of the power bulge, about 18 inches back from the tip. Whatever impact caused the damage in the leading edge put two crease in the bonnet here, on each side. This is a tough area to work with, but with patience, you can take this damage out - and we will. Note the ancient surface rust - at some point in the past, this bonnet sat out with large sections of paint flaked off - it has had a tough life and deserves some TLC from here on out...
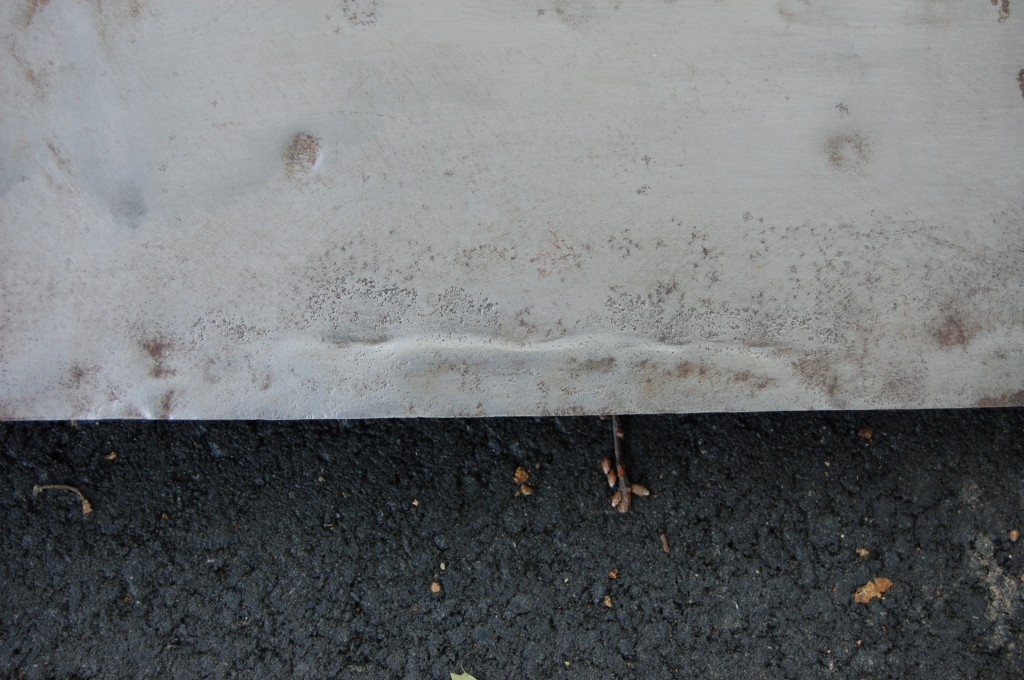
This is the trailing edge where the bonnet meets the cowl. This was also covered up with filler - we will use a combinations of machines in the shop to completely erase this wrinkle.
What REALLY blows my mind, though, is the finish paint (which is horrible) – over this “finished” mouth! AAAAAGGGGGHHHHHH!!!! Who does this and thinks it is even remotely acceptable? So the moral to the story is – choose your restoration partners carefully, and check their references – and their work if possible.
So now the blue bonnet is here and will be disassembled and the original 1961 pieces restored properly – and between the gold and blue bonnets, we have everything we need to make an absolutely PERFECT 1961 bonnet!


