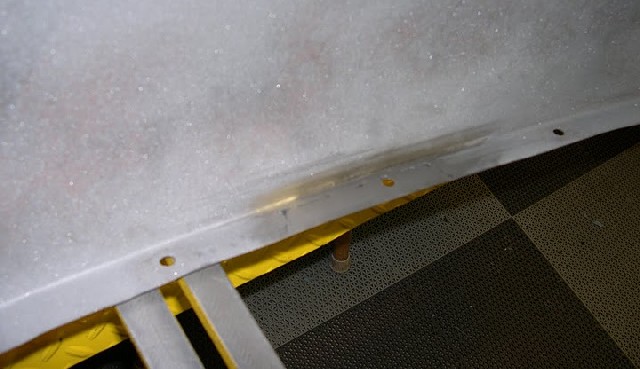
The LH wing on this bonnet was in excellent condition – only a few small dents and dings to smooth. But rust had started to take hold in one of the side flanges above the wheel well (very common…), and we needed to handle that.
E-Types were assembled in bare or lightly primed steel, and then painted. This means that anything you can’t see was very poorly coated from the factory, and one area that is especially vulnerable is the inner surface of the wing-to-center mating flanges. These flanges are spaced with a thick washer to allow the chrome beading clips to be pushed through from the top side, but unfortunately, that also allows road grime, water, and salt to be thrown up into there by the front wheels. Many bonnets suffer cancerous rust in these flanges, and it can quickly spread beyond the flange to the skin itself.
Luckily, this bonnet is in great shape and things have not gotten that far – there is only a small area that has not spread beyond the flange that will be simple to fix. If your bonnet’s flanges are much worse, we fabricate a complete set of new flanges for the wings and center section, and they can be purchased in our online store.
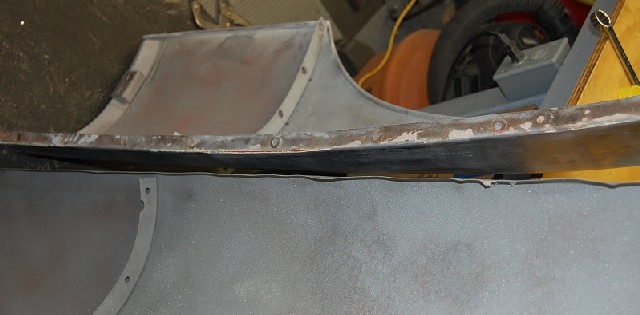
The first order of business is to get the wing completely stripped. Just like the opriginal painting of the assembled bonnet gets very little paint onto the inner surface of these flanges, 48 years later, the sandblaster can't get to it either... So we finish up the blasting of the wings here - in this photo, the LH is already done, and the RH still needs a little clean-up.
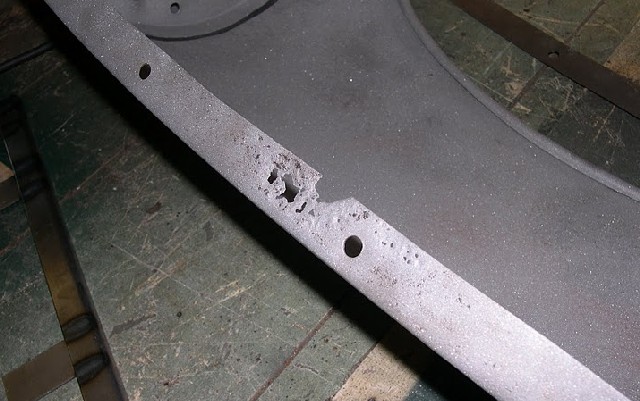
Here is a shot of the cancerous section - not pretty, but luckily, it has not advanced all the way to the bend yet - or worse, beyond...
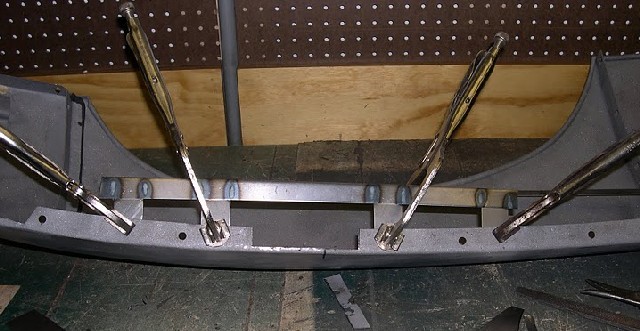
We cut out the bad section and prepare to weld in a patch, but ONLY after we have quickly fabbed up and tightly clamped on a brace which will ensure that the welding heat does not alter the curvature of the fender! Too many do-it-yourselfers learn this lesson the hard way, and like always, a poor repair like that is much more difficult to repair that just doing it carefully from the beginning. Note that we have also marked the location of the hole in this section to be drilled after the patch is complete.
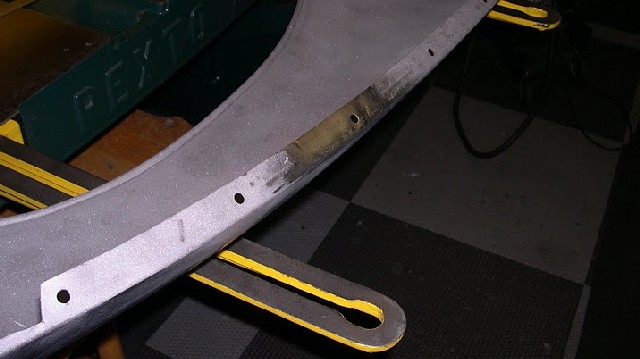
The patch is welded in now and ground smooth. It doesn't look absolutely perfect from this side, but that's OK, because THIS is the side you DON'T see when it's assembled - it's easy to forget that on this repair!

Fast forward and here's the finished repair after the bonnet is loosely assembled (I can do that because I'm so behind in my posts!) There are a few light areas that could be smeared with a little light cream filler later if you really wanted to get that fancy - although this repair is in the wheelwell and facing ouwards, and once painted no-one is going to see these little micro imperfections. You don't want to lay a thick bead into this area to prevent this - that would just introduce unnecessary heat into the repair and increase the risk of altering the curvature of the wing - it's just not worth the risk for a couple tiny little pits that can be filled. The joint is fastened with original hardware, either cad-plated or etch-primed - based on lead times and what we have on the shelf.
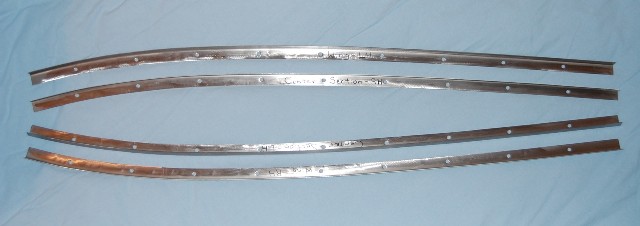
This is a complete set of new side flanges for an E-Type bonnet manufactured by Monocoque Metalworks. We form these flanges in matched sets of 4 - also matched to our master template and checked on original fenders. Welding these in requires skill and patience (and is not for the faint of heart!), but they can save a bonnet that would have been discarded in the past. You can purchase these in our online store, or give us a ring for questions or more info!

